本来只是想把 《1Q84》的读后感写下,现在觉得还是把这篇当成我今年的读书总结吧,不过先从《1Q84》说起。
严格来讲,这不是很书面化的读后感,可能我想写的也只是像聊天一样的说下我读过的书,包括的技术博客其实也是类似的,以后或许会转变,但是目前水平如此吧,写多了可能会变好,也可能不会。
开始正文吧,这书有点类似于海边的卡夫卡,一开始是通过两条故事线,穿插着叙述,一条是青豆的,不算是个职业杀手的女杀手,要去解决一个经常家暴的斯文败类,穿着描述得比较性感吧,杀人方式是通过比较长的细针,从脖子后面一个精巧的位置插入,可以造成是未知原因死亡的假象,可能会推断成心梗之类的,这里有个前置的细节,就是青豆是乘坐一辆很高级的出租车,内饰什么的都非常有质感,有点不像一辆出租车,然后车里放了一首比较小众的歌,雅纳切克的《小交响曲》,但是青豆知道它,这跟后面的情节也有些许关系,这是女主人公青豆的出场;相应的男主的出场印象不是太深刻,男主叫天吾,是个不知名的作家,跟一个叫小松的编辑有比较好的关系,虽然天吾还没有拿到比较有分量的奖项,但是小松很看好他,也让他帮忙审校一个新作家奖的投稿文章,虽然天吾自身还没获得过这个奖,天吾还有个正式工作,是当数学老师,天吾在学生时代是个数学天才,但后面有对文学产生了兴趣,文学还不足以养活自己,靠着教课还是能保持温饱;
接下来是正式故事的起点了,就是小松收到了一部小说投稿,名叫《空气蛹》,是个叫深绘里的女孩子投的稿,小松对他赋予了很高的评价,这里好像记岔了,好像是天吾对这部小说很有好感,但是小松比较怀疑,然后小松看了之后也有了浓厚的兴趣,这里就是开端了,小松想让天吾来重写润色这部《空气蛹》,因为故事本身很有分量,但是描写手法叙事方式等都很拙劣,而天吾正好擅长这个,小松对天吾的评价是,描写技巧无可挑剔,就是故事主体的火花还没际遇迸发,需要一个导火索,这个就可以类比我们程序员,很多比较初中级的程序员主要擅长在原来的代码上修修改改或者给他分配个小功能,比较高级的程序员就需要能做一些项目的架构设计,核心的技术方案设计,以前我也觉得写文档这个比较无聊,但是当一个项目真的比较庞大,复杂的时候,整体和核心部分的架构设计和方案还是需要有文档沉淀的,不然别人不知道没法接受,自己过段时间也会忘记。
对于小松的这个建议,他的初衷是想搅一搅这个死气沉沉套路颇深的文坛,因为本身《空气蛹》这部小说的内容很吸引人,小松想通过天吾的润色补充让这部小说冲击新人奖,有种恶作剧的意图,天吾对此表示很多担心和顾虑,小松的这个建议其实也是一种文学作假,有两方面的担心,一方面是原作者深绘里是否同意如此操作,一方面是外界如果发现了这个事实会有什么样的后果,但是小松表示不用担心,前一步由小松牵线,让天吾跟原作者深绘里当面沟通这个代写是否被允许,结果当然是被允许了,这里有了对深绘里的初步描写,按我的理解是比较仙的感觉,然后语言沟通有些吃力,或者说有她自己的特色,当面沟通时貌似是让深绘里回去再考虑下,然后后面再由天吾去深绘里寄宿的戎野老师家沟通具体的细节。
2019年12月18日23:37:19 更新
去到戎野老师家之后,天吾知道了关于深绘里的一些事情,深绘里的父亲与戎野老师应该是老友,深绘里的父亲在当初成立了一个叫”先驱”的公社,一个独立运行的社会组织,以运营农场作为物资来源,追求更为松散的共同体,即不过分激进地公有制,进行松散的共同生活,承认私有财产,简而言之就是这样一个能稳定存活下来的独立社会组织,但是随着稳定运行,内部的激进派和稳健派开始出现分歧,不可磨合,后来两派就分裂了,深绘里的父亲,深田保留在了稳健派,但是此时其实深田保内心是矛盾的,以为一开始其实是他倡导的独立革命才组织起了这群人,然而现在他又认清了现实社会已经不太相信能通过革命来独立的可能性,后来激进派便开始越加封闭,而且进行军事训练和思想教育,而后这个先驱的激进派别便有了新的名字”黎明”,深绘里也是在此时从先驱逃离来投靠戎野老师
暂时先写到这,未完待续~
这篇年终总结本来应该在农历过完年就出来的,结果是对没有受疫情影响的春节放假时间空闲情况预估太良好,虽然公司调了几天假,但是因为春节期间疫情状况比较好,本来酒店都不让接待聚餐什么的,后来统统放开,结果就是从初一到初六每天要不就是去亲戚家,要不就是去酒店饭店吃饭,计划很丰满,现实很骨感,时间感觉一下就没了,然后年后感觉有点犯懒了,所以才拖到现在。
去年(19 年)的时候跑步突破了 300 公里,然后20 年给自己定了个 400 公里的目标,结果意料之中的没成功,原因可能疫情算一点吧,后面买了跑步机之后,基本周末回家都能跑一下,但是最后还是只跑了300 多公里,总的keep 记录跑量也没超过 1000 公里,所以跑步这个目标还是没成功的,不过还算是比去年多跑一点,这样也算后面好突破点,后面的目标就不定的太高了,每年能比前一年多一点就好,其实跑步已经从一种减肥方式变成一种习惯了,一周一次的跑步已经比较难有效减重了,但是对于保持精力和身体状态还是很有效和重要的,只是对于目前的体重还是要多减下去一些跑步才好,太重了对膝盖负担太大了,可惜还是时间呐,游泳骑车什么的都需要更苛刻的条件和时间,饮食呢控制起来比较难(贪吃
终于在 3 月底之前跑到了 1000 公里,迟了三个月,不过也总算达到了,只是体重控制还是不行,有试着走走楼梯,但是感觉对膝盖负担比较大,得再想想用什么方式

一直提不起笔来写这篇年终总结还有个比较大的原因是觉得20 年的成长不如预期,大小目标都没怎么完成,比如深入了解 jvm,是想能有些深入的见解,而不再是某些点的比较片面的理解,系统性的归纳总结也比较少,每个方向或多或少有些看法和理解,但是不全面,一些东西看过了也会忘记,需要温故而知新,比如 AQS 的内容,第一次读其实理解比较浅,后面就强迫自己去读,去写,才有了一些比之前更深入的理解,因为很多文章都是带有作者思路的引导,适不适合自己都要看是否能从他的思路把它看懂,有些就差别很大,这个跟看书也一样,有些书大众一致推荐,一般情况下大多是经典的好的,但是也有可能是不太适合自己的,可能有时候机缘巧合看到的反而让人茅塞顿开,在 todo 里已经积攒了好多的点和面需要去学习实践,一方面是自己懒,一方面是时间也相对偏少,看看 21 年能不能有所提升,加强“时间管理”,哈哈
技术上主要是看了 mysql 的 mvcc 相关内容,rocketmq 的,redis 的代码,还有 mybatis 等,其实每一个都能写很多,也有很多值得学习的,需要全面系统学习,之前想好好画一个思维导图,将整个技术体系都梳理下,还只做了一点点,方式也有点问题,应该从大到小,而不是深度优先,细节有很多,每一个方面都有自己比较熟悉擅长的,也有不太了解的,可以做一个评分,这个也是亟待改善的,希望今年能完成。
博客方面 20 年一年整是写了 53 篇,差不多是一周一篇的节奏,这个还是不错的,虽然博客质量参差不齐,但是这个更新频率还是比较好的,并且也定了个潜规则,可以一周技术一周生活,这样能缓解水文的频率,提高些技术文章的质量,虽然结果并没有好多少,不过感觉还是可以这么坚持的,能提高一些技术文章的质量那就更好了
]]>另外一件是就是蜗壳,从前不知道黝黑蜗壳是啥意思,只是经常会在他的视频里看到,大学的时候在缘网下了一个集锦,炒鸡帅气,各种空接扣篮,越来越能明白那句“你永远不知道意外和明天不知道哪个会先来,且行且珍惜”的含义,只是听了很多道理,依然活不好这一生,知易行难,王阳明真的是这方面的大师,有空可以看看这方面的书,一直想写写我跟篮球跟蜗壳的这十几年,争取能早日写好吧,不过得找个静得下来的时候写。
正事方面上半年还是挺让人失望的,没有达成一些目标,应该还是能力不足吧,技术方面分析一下还是停留在看的表面层,有些实操的,或者结合业务场景的能力不太行,算是在坚持写写 blog,主要是被这个每周一篇的目标推着走,有时会比较焦虑,内容产出也还比较差,希望能在后面有些改善,可能会降低频率,只是觉得降低了也不一定能有比较好的提升,无法战胜自己的惰性,所以暂时还是坚持下这个目标吧,还有就是 coding 能力,有时候也应该刷刷题,提升思维敏捷度,大脑用太少可能生锈了,况且本来就不是很有优势,虽然失望也只能继续努力吧,日拱一卒,来日方长,加油吧~😔
还有就是跑步减肥了,截止今天,上半年跑了 136 公里了,因为疫情影响,农历年后是从 4 月 17 号开始跑的,去年跑到了 300 公里,奖励自己了一个手表(真的挺后悔的,还不如 200 块买个手表),今年希望可以能在这个基础上再进一步,一直跟领导说,跑步算是我坚持下来的唯一一个好习惯了,618 买了个跑步机,周末回家了可以不受天气影响的多跑跑,不过如果天气好可能还是会出去跑跑,跑步机跑道多少还是有点拘束,只是感觉可能是我还是吃得太多了🤦♂️,效果不是很明显,还在 80 这个坎徘徊,等于浪费了大半年,可能是年初的项目太费心力,压力比较大,吃得更多,是不是可以算工伤😄,这方面也需要好好调整,可以放得开一点,虽然不太可能一下子到位,但是总要去努力下,随着年龄成长总要承担更多,也要看得开一点,没法事事如愿,尽力就好了,减肥这个事情还在结合一些俯卧撑啥的,希望也能坚持下去,加油吧,不知道原话怎么说的,意思是人类最大的勇敢就是看透了人世间的苦难,仍然热爱生活。我当然没可能让内心变得这么强大,试着去努力吧,奥力给!
]]>这一年做的最让自己满意的应该就是看了一些书,由折腾群洋总发起的读书打卡活动,到目前为止已经读完了这几本书,《cUrl 必知必会》,《古董局中局 1》,《古董局中局 2》,《算法图解》,《每天 5 分钟玩转 Kubernetes》《幸福了吗?》《高可用可伸缩微服务架构:基于 Dubbo、Spring Cloud和 Service Mesh》《Rust 权威指南》后面可以写个专题说说看的这些书,虽然每天打卡如果时间安排不好,并且看的书像 rust 这样比较难的话还是会有点小焦虑,不过也是个调整过程,一方面可以在白天就抽空看一会,然后也不必要每次都看很大一章,注重吸收。
技术上的成长的话,有一些比较小的长进吧,对于一些之前忽视的 synchronized,ThreadLocal 和 AQS 等知识点做了下查漏补缺了,然后多了解了一些 Java 垃圾回收的内容,但是在实操上还是比较欠缺,成型的技术方案,架构上所谓的优化也比较少,一些想法也还有考虑不周全的地方,还需要多花时间和心思去学习加强,特别是在目前已经有的基础上如何做系统深层次的优化,既不要是鸡毛蒜皮的,也不能出现一些不可接受的问题和故障,这是个很重要的课题,需要好好学习,后面考虑定一些周期性目标,两个月左右能有一些成果和总结。
另外一部分是自己的服务,因为 ucloud 的机器太贵就没续费了,所以都迁移到腾讯云的小机器上了,顺便折腾了一点点 traefik,但是还很不熟练,不太习惯这一套,一方面是 docker 还不习惯,这也加重了对这套环境的不适应,还是习惯裸机部署,另一方面就是 k8s 了,家里的机器还没虚拟化,没有很好的条件可以做实验,这也是读书打卡的一个没做好的点,整体的学习效果受限于深度和实操,后面是看都是用 traefik,也找到了一篇文章可以 traefik 转发到裸机应用,因为主仓库用的是裸机的 gogs。
还有就是运动减肥上,唉,这又是很大的一个痛点,基本没效果,只是还算稳定,昨天看到一个视频说还需要力量训练来增肌,以此可以提升基础代谢,打算往这个方向尝试下,因为今天没有疫情限制了,在 6 月底完成了 200 公里的跑步小目标,只是有些膝盖跟大腿根外侧不适,抽空得去看下医生,后面打算每天也能做点卷腹跟俯卧撑。
下半年还希望能继续多看看书,比很多网上各种乱七八糟的文章会好很多,结合豆瓣评分,找一些评价高一些的文章,但也不是说分稍低点的就不行,有些也看人是不是适合,一般 6 分以上评价比较多的就可以试试。
]]>工作没什么大变化,有了些微的提升,可能因为是来了之后做了些项目对比公司与来还算是比较重要的,但是技术难度上没有特别突出的点,可能最开始用 openresty+lua 做了个 ab 测的工具,还是让我比较满意的,后面一般都是业务型的需求,今年可能在业务相关的技术逻辑上有了一些深度的了解,而原来一直想做的业务架构升级和通用型技术中间件这样的优化还是停留在想象中,前面说的 ab 测应该算是个半成品,还是没能多走出这一步,得需要多做一些实在的事情,比如轻量级的业务框架,能够对原先不熟悉的业务逻辑,代码逻辑有比较深入的理解,而不是一直都是让特定的同学负责特定的逻辑,很多时候还是在偷懒,习惯以一些简单安全的方案去做事情,在技术上还是要有所追求,还有就是能够在新语言,主要是 rust,swift 这类的能有些小玩具可以做,rust 的话是因为今年看了一本相关的书,后面三分之一其实消化得不好,这本书整体来说是很不错的,只是 rust 本身在所有权这块,还有引用包装等方面是设计得比较难懂,也可能是我基础差,所以还是想在复习下,可以做一个简单的命令行工具这种,然后 swift 是想说可以做点 mac 的小软件,原生的毕竟性能好点,又小。基于 web 做的客户端大部分都是又丑又大,极少数能好看点,但也是很重,起码 7~80M 的大小,原生的估计能除以 10。
整体的职业规划貌似陷入了比较大的困惑期,在目前公司发展前景不是很大,但是出去貌似也没有比较适合我的机会,总的来说还是杭州比较卷,个人觉得有自己的时间是非常重要的,而且这个不光是用来自我提升的,还是让自己有足够的时间做缓冲,有足够的时间锻炼减肥,时间少的情况下,不光会在仅有的时间里暴饮暴食,还没空锻炼,身体是革命的本钱,现在其实能特别明显地感觉到身体状态下滑,容易疲劳,焦虑。所以是否也许有可能以后要往外企这类的方向去发展。
工作上其实还是有个不大不小的缺点,就是容易激动,容易焦虑,前一点可能有稍稍地改观,因为工作中的很多现状其实是我个人难以改变的,即使觉得不合理,但是结构在那里,还不如自己放宽心,尽量做好事情就行。第二点的话还是做得比较差,一直以来抗压能力都比较差,跟成长环境,家庭环境都有比较大的关系,而且说实在的特别是父母,基本也没有在这方面给我正向的帮助,比较擅长给我施压,从小就是通过压力让我好好读书,当个乖学生,考个好学校,并没有能真正地理解我的压力,教我或者帮助我解压,只会在那说着不着边际的空话,甚至经常反过来对我施压。还是希望能慢慢解开,这点可能对我身体也有影响,也许需要看一些心理疏导相关的书籍。工作篇暂时到这,后续还有其他篇,未完待续哈哈😀
Given a sorted array of integers, find the starting and ending position of a given target value.
Your algorithm’s runtime complexity must be in the order of O(log n).
If the target is not found in the array, return [-1, -1].
For example,
Given [5, 7, 7, 8, 8, 10] and target value 8,
return [3, 4].
一开始就想到了二分查找,但是原来做二分查找的时候一般都是找到确定的那个数就完成了,
这里的情况比较特殊,需要找到整个区间,所以需要两遍查找,并且一个是找到小于target
的最大索引,一个是找到大于target的最大索引,代码参考leetcode discuss,这位仁
兄也做了详细的分析解释。
class Solution {
public:
vector<int> searchRange(vector<int>& nums, int target) {
vector<int> ret(2, -1);
int i = 0, j = nums.size() - 1;
int mid;
while(i < j){
mid = (i + j) / 2;
if(nums[mid] < target) i = mid + 1;
else j = mid;
}
if(nums[i] != target) return ret;
else {
ret[0] = i;
if((i+1) < (nums.size() - 1) && nums[i+1] > target){
ret[1] = i;
return ret;
}
} //一点小优化
j = nums.size() - 1;
while(i < j){
mid = (i + j) / 2 + 1;
if(nums[mid] > target) j = mid - 1;
else i = mid;
}
ret[1] = j;
return ret;
}
};]]>synchronized 实现的,后面我也贴下代码
import java.util.concurrent.locks.Condition;
import java.util.concurrent.locks.Lock;
import java.util.concurrent.locks.ReentrantLock;
class BoundedBuffer {
final Lock lock = new ReentrantLock();
// condition 依赖于 lock 来产生
final Condition notFull = lock.newCondition();
final Condition notEmpty = lock.newCondition();
// 对象池子,put 跟 take 的就是这里的
final Object[] items = new Object[100];
int putptr, takeptr, count;
// 生产
public void put(Object x) throws InterruptedException {
// 这里也说明了,需要先拥有锁
lock.lock();
try {
while (count == items.length)
notFull.await(); // 队列已满,等待,直到 not full 才能继续生产
items[putptr] = x;
if (++putptr == items.length) putptr = 0;
++count;
notEmpty.signal(); // 生产成功,队列已经 not empty 了,发个通知出去
} finally {
lock.unlock();
}
}
// 消费
public Object take() throws InterruptedException {
lock.lock();
try {
while (count == 0)
notEmpty.await(); // 队列为空,等待,直到队列 not empty,才能继续消费
Object x = items[takeptr];
if (++takeptr == items.length) takeptr = 0;
--count;
notFull.signal(); // 被我消费掉一个,队列 not full 了,发个通知出去
return x;
} finally {
lock.unlock();
}
}
}
介绍下 Condition 的结构
public class ConditionObject implements Condition, java.io.Serializable {
private static final long serialVersionUID = 1173984872572414699L;
/** First node of condition queue. */
private transient Node firstWaiter;
/** Last node of condition queue. */
private transient Node lastWaiter;
主要的就这么点,而且也复用了 AQS 阻塞队列或者大大叫 lock queue中同样的 Node 节点,只不过它没有使用其中的双向队列,也就是prev 和 next,而是在 Node 中的 nextWaiter,所以只是个单向的队列,没使用 next 其实还有个用处,后面会提到,看下结构的示意图
然后主要是看两个方法,await 和 signal,
先来看下 await
/**
* Implements interruptible condition wait.
* <ol>
* <li> If current thread is interrupted, throw InterruptedException.
* <li> Save lock state returned by {@link #getState}.
* <li> Invoke {@link #release} with saved state as argument,
* throwing IllegalMonitorStateException if it fails.
* <li> Block until signalled or interrupted.
* <li> Reacquire by invoking specialized version of
* {@link #acquire} with saved state as argument.
* <li> If interrupted while blocked in step 4, throw InterruptedException.
* </ol>
*/
public final void await() throws InterruptedException {
if (Thread.interrupted())
throw new InterruptedException();
// 将当前节点包装成一个 condition waiter node 节点
Node node = addConditionWaiter();
// 完全释放占有的锁,这里需要是占有锁的线程
int savedState = fullyRelease(node);
int interruptMode = 0;
// 判断下是否在阻塞队列中,因为有可能被其他节点从等待队列移动到阻塞队列
while (!isOnSyncQueue(node)) {
// park等待,等待被唤醒
LockSupport.park(this);
if ((interruptMode = checkInterruptWhileWaiting(node)) != 0)
break;
}
// 被唤醒后进入阻塞队列,等待获取锁,这里继续用了fullyRelease返回的 state
if (acquireQueued(node, savedState) && interruptMode != THROW_IE)
interruptMode = REINTERRUPT;
if (node.nextWaiter != null) // clean up if cancelled
unlinkCancelledWaiters();
if (interruptMode != 0)
reportInterruptAfterWait(interruptMode);
}
添加条件队列节点
/**
* Adds a new waiter to wait queue.
* @return its new wait node
*/
private Node addConditionWaiter() {
Node t = lastWaiter;
// If lastWaiter is cancelled, clean out.
// 如果节点已经不是 CONDITION 状态了,表示已经取消了
if (t != null && t.waitStatus != Node.CONDITION) {
// 把等待队列中取消的节点清理出去
unlinkCancelledWaiters();
t = lastWaiter;
}
// 把当前线程包装成waitStatus=CONDITION 的节点
Node node = new Node(Thread.currentThread(), Node.CONDITION);
// 没有 lastWaiter 节点,直接是 firstWaiter
if (t == null)
firstWaiter = node;
else
// 不然就接在 lastWaiter 后面
t.nextWaiter = node;
// 当前节点就会变成新的 lastWaiter
lastWaiter = node;
return node;
}
清理取消的节点
/**
* Unlinks cancelled waiter nodes from condition queue.
* Called only while holding lock. This is called when
* cancellation occurred during condition wait, and upon
* insertion of a new waiter when lastWaiter is seen to have
* been cancelled. This method is needed to avoid garbage
* retention in the absence of signals. So even though it may
* require a full traversal, it comes into play only when
* timeouts or cancellations occur in the absence of
* signals. It traverses all nodes rather than stopping at a
* particular target to unlink all pointers to garbage nodes
* without requiring many re-traversals during cancellation
* storms.
*/
private void unlinkCancelledWaiters() {
Node t = firstWaiter;
Node trail = null;
// 循环遍历单向链表的节点,如果状态不是 CONDITION 就清出去
while (t != null) {
Node next = t.nextWaiter;
// 循环链表操作,清掉取消的节点
if (t.waitStatus != Node.CONDITION) {
t.nextWaiter = null;
if (trail == null)
firstWaiter = next;
else
trail.nextWaiter = next;
if (next == null)
lastWaiter = trail;
}
else
trail = t;
t = next;
}
}
完全释放锁
/**
* Invokes release with current state value; returns saved state.
* Cancels node and throws exception on failure.
* @param node the condition node for this wait
* @return previous sync state
*/
final int fullyRelease(Node node) {
boolean failed = true;
try {
// 获取下当前的 state 值,因为是可重入的,所以这个值要保存下来
int savedState = getState();
// 这里还包含比较多操作,不过跟前面分析 AQS 的释放比较类似,不深入了
if (release(savedState)) {
failed = false;
// 返回这个值
return savedState;
} else {
throw new IllegalMonitorStateException();
}
} finally {
if (failed)
node.waitStatus = Node.CANCELLED;
}
}
判断是否在阻塞队列中
/**
* Returns true if a node, always one that was initially placed on
* a condition queue, is now waiting to reacquire on sync queue.
* @param node the node
* @return true if is reacquiring
*/
final boolean isOnSyncQueue(Node node) {
// 如果waitStatus 是 CONDITION 或者没有 prev 前置节点肯定就不在
if (node.waitStatus == Node.CONDITION || node.prev == null)
return false;
// 这里就是我前面提到的 next 的作用
if (node.next != null) // If has successor, it must be on queue
return true;
// 从 tail 开始找,是否在阻塞队列中
/*
* node.prev can be non-null, but not yet on queue because
* the CAS to place it on queue can fail. So we have to
* traverse from tail to make sure it actually made it. It
* will always be near the tail in calls to this method, and
* unless the CAS failed (which is unlikely), it will be
* there, so we hardly ever traverse much.
*/
return findNodeFromTail(node);
}
/**
* Returns true if node is on sync queue by searching backwards from tail.
* Called only when needed by isOnSyncQueue.
* @return true if present
*/
private boolean findNodeFromTail(Node node) {
Node t = tail;
// 从 tail 开始,从后往前找
for (;;) {
if (t == node)
return true;
if (t == null)
return false;
t = t.prev;
}
}
await 的逻辑差不多就是这样子,主要的就是把自己包成一个 Node 节点,waitStatus 的状态是 CONDITION,挂在等待队列的最后,然后完全释放锁,park 等待
/**
* Moves the longest-waiting thread, if one exists, from the
* wait queue for this condition to the wait queue for the
* owning lock.
*
* @throws IllegalMonitorStateException if {@link #isHeldExclusively}
* returns {@code false}
*/
public final void signal() {
if (!isHeldExclusively())
throw new IllegalMonitorStateException();
// firstWaiter 肯定是最早开始等待的
Node first = firstWaiter;
// 如果不为空就唤醒
if (first != null)
doSignal(first);
}
/**
* Removes and transfers nodes until hit non-cancelled one or
* null. Split out from signal in part to encourage compilers
* to inline the case of no waiters.
* @param first (non-null) the first node on condition queue
*/
private void doSignal(Node first) {
do {
// 因为要去唤醒 first 节点了,firstWaiter 需要再从后面找一个
// 并且判断是否为空,如果是空的话就直接可以把 lastWaiter 设置成空了
if ( (firstWaiter = first.nextWaiter) == null)
lastWaiter = null;
// first 不需要继续保存后面的 waiter 了,因为 firstWaiter 已经是 first 的后置节点了
first.nextWaiter = null;
// 如果 first 节点转移不成功,并且 firstWaiter 节点不为空,则继续进入循环
} while (!transferForSignal(first) &&
(first = firstWaiter) != null);
}
/**
* Transfers a node from a condition queue onto sync queue.
* Returns true if successful.
* @param node the node
* @return true if successfully transferred (else the node was
* cancelled before signal)
*/
final boolean transferForSignal(Node node) {
/*
* If cannot change waitStatus, the node has been cancelled.
*/
// 如果状态已经不是 CONDITION 就不会设置成功,返回 false
if (!compareAndSetWaitStatus(node, Node.CONDITION, 0))
return false;
/*
* Splice onto queue and try to set waitStatus of predecessor to
* indicate that thread is (probably) waiting. If cancelled or
* attempt to set waitStatus fails, wake up to resync (in which
* case the waitStatus can be transiently and harmlessly wrong).
*/
// 调用跟aqs 第一篇中一样的 enq 方法进入阻塞队列,返回入队后的前一节点
Node p = enq(node);
int ws = p.waitStatus;
// 将前置节点状态设置成SIGNAL,表示后面有节点在等了
if (ws > 0 || !compareAndSetWaitStatus(p, ws, Node.SIGNAL))
LockSupport.unpark(node.thread);
// 返回 true,上一个方法的循环就退出了
return true;
}
这里其实就是把 condition 等待队列的第一个未取消的节点入队到阻塞队列去争锁
synchronized 版的 BoundedBuffer
/*
File: BoundedBuffer.java
Originally written by Doug Lea and released into the public domain.
This may be used for any purposes whatsoever without acknowledgment.
Thanks for the assistance and support of Sun Microsystems Labs,
and everyone contributing, testing, and using this code.
History:
Date Who What
11Jun1998 dl Create public version
17Jul1998 dl Simplified by eliminating wait counts
25aug1998 dl added peek
5May1999 dl replace % with conditional (slightly faster)
*/
package EDU.oswego.cs.dl.util.concurrent;
/**
* Efficient array-based bounded buffer class.
* Adapted from CPJ, chapter 8, which describes design.
* <p>[<a href="http://gee.cs.oswego.edu/dl/classes/EDU/oswego/cs/dl/util/concurrent/intro.html"> Introduction to this package. </a>] <p>
**/
public class BoundedBuffer implements BoundedChannel {
protected final Object[] array_; // the elements
protected int takePtr_ = 0; // circular indices
protected int putPtr_ = 0;
protected int usedSlots_ = 0; // length
protected int emptySlots_; // capacity - length
/**
* Helper monitor to handle puts.
**/
protected final Object putMonitor_ = new Object();
/**
* Create a BoundedBuffer with the given capacity.
* @exception IllegalArgumentException if capacity less or equal to zero
**/
public BoundedBuffer(int capacity) throws IllegalArgumentException {
if (capacity <= 0) throw new IllegalArgumentException();
array_ = new Object[capacity];
emptySlots_ = capacity;
}
/**
* Create a buffer with the current default capacity
**/
public BoundedBuffer() {
this(DefaultChannelCapacity.get());
}
/**
* Return the number of elements in the buffer.
* This is only a snapshot value, that may change
* immediately after returning.
**/
public synchronized int size() { return usedSlots_; }
public int capacity() { return array_.length; }
protected void incEmptySlots() {
synchronized(putMonitor_) {
++emptySlots_;
putMonitor_.notify();
}
}
protected synchronized void incUsedSlots() {
++usedSlots_;
notify();
}
protected final void insert(Object x) { // mechanics of put
--emptySlots_;
array_[putPtr_] = x;
if (++putPtr_ >= array_.length) putPtr_ = 0;
}
protected final Object extract() { // mechanics of take
--usedSlots_;
Object old = array_[takePtr_];
array_[takePtr_] = null;
if (++takePtr_ >= array_.length) takePtr_ = 0;
return old;
}
public Object peek() {
synchronized(this) {
if (usedSlots_ > 0)
return array_[takePtr_];
else
return null;
}
}
public void put(Object x) throws InterruptedException {
if (x == null) throw new IllegalArgumentException();
if (Thread.interrupted()) throw new InterruptedException();
synchronized(putMonitor_) {
while (emptySlots_ <= 0) {
try { putMonitor_.wait(); }
catch (InterruptedException ex) {
putMonitor_.notify();
throw ex;
}
}
insert(x);
}
incUsedSlots();
}
public boolean offer(Object x, long msecs) throws InterruptedException {
if (x == null) throw new IllegalArgumentException();
if (Thread.interrupted()) throw new InterruptedException();
synchronized(putMonitor_) {
long start = (msecs <= 0)? 0 : System.currentTimeMillis();
long waitTime = msecs;
while (emptySlots_ <= 0) {
if (waitTime <= 0) return false;
try { putMonitor_.wait(waitTime); }
catch (InterruptedException ex) {
putMonitor_.notify();
throw ex;
}
waitTime = msecs - (System.currentTimeMillis() - start);
}
insert(x);
}
incUsedSlots();
return true;
}
public Object take() throws InterruptedException {
if (Thread.interrupted()) throw new InterruptedException();
Object old = null;
synchronized(this) {
while (usedSlots_ <= 0) {
try { wait(); }
catch (InterruptedException ex) {
notify();
throw ex;
}
}
old = extract();
}
incEmptySlots();
return old;
}
public Object poll(long msecs) throws InterruptedException {
if (Thread.interrupted()) throw new InterruptedException();
Object old = null;
synchronized(this) {
long start = (msecs <= 0)? 0 : System.currentTimeMillis();
long waitTime = msecs;
while (usedSlots_ <= 0) {
if (waitTime <= 0) return null;
try { wait(waitTime); }
catch (InterruptedException ex) {
notify();
throw ex;
}
waitTime = msecs - (System.currentTimeMillis() - start);
}
old = extract();
}
incEmptySlots();
return old;
}
}
]]>第一个线程抢到锁了,此时state跟阻塞队列是怎么样的,其实这里是之前没理解对的地方
/**
* Fair version of tryAcquire. Don't grant access unless
* recursive call or no waiters or is first.
*/
protected final boolean tryAcquire(int acquires) {
final Thread current = Thread.currentThread();
int c = getState();
// 这里如果state还是0说明锁还空着
if (c == 0) {
// 因为是公平锁版本的,先去看下是否阻塞队列里有排着队的
if (!hasQueuedPredecessors() &&
compareAndSetState(0, acquires)) {
// 没有排队的,并且state使用cas设置成功的就标记当前占有锁的线程是我
setExclusiveOwnerThread(current);
// 然后其实就返回了,包括阻塞队列的head和tail节点和waitStatus都没有设置
return true;
}
}
else if (current == getExclusiveOwnerThread()) {
int nextc = c + acquires;
if (nextc < 0)
throw new Error("Maximum lock count exceeded");
setState(nextc);
return true;
}
// 这里就是第二个线程会返回false
return false;
}
}
当第二个线程进来的时候应该是怎么样,结合代码来看
/**
* Acquires in exclusive mode, ignoring interrupts. Implemented
* by invoking at least once {@link #tryAcquire},
* returning on success. Otherwise the thread is queued, possibly
* repeatedly blocking and unblocking, invoking {@link
* #tryAcquire} until success. This method can be used
* to implement method {@link Lock#lock}.
*
* @param arg the acquire argument. This value is conveyed to
* {@link #tryAcquire} but is otherwise uninterpreted and
* can represent anything you like.
*/
public final void acquire(int arg) {
// 前面第一种情况是tryAcquire直接成功了,这个if判断第一个条件就是false,就不往下执行了
// 如果是第二个线程,第一个条件获取锁不成功,条件判断!tryAcquire(arg) == true,就会走
// acquireQueued(addWaiter(Node.EXCLUSIVE), arg)
if (!tryAcquire(arg) &&
acquireQueued(addWaiter(Node.EXCLUSIVE), arg))
selfInterrupt();
}
然后来看下addWaiter的逻辑
/**
* Creates and enqueues node for current thread and given mode.
*
* @param mode Node.EXCLUSIVE for exclusive, Node.SHARED for shared
* @return the new node
*/
private Node addWaiter(Node mode) {
// 这里是包装成一个node
Node node = new Node(Thread.currentThread(), mode);
// Try the fast path of enq; backup to full enq on failure
// 最快的方式就是把当前线程的节点放在阻塞队列的最后
Node pred = tail;
// 只有当tail,也就是pred不为空的时候可以直接接上
if (pred != null) {
node.prev = pred;
// 如果这里cas成功了,就直接接上返回了
if (compareAndSetTail(pred, node)) {
pred.next = node;
return node;
}
}
// 不然就会继续走到这里
enq(node);
return node;
}
然后就是enq的逻辑了
/**
* Inserts node into queue, initializing if necessary. See picture above.
* @param node the node to insert
* @return node's predecessor
*/
private Node enq(final Node node) {
for (;;) {
// 如果状态没变化的话,tail这时还是null的
Node t = tail;
if (t == null) { // Must initialize
// 这里就会初始化头结点,就是个空节点
if (compareAndSetHead(new Node()))
// tail也赋值成head
tail = head;
} else {
// 这里就设置tail了
node.prev = t;
if (compareAndSetTail(t, node)) {
t.next = node;
return t;
}
}
}
}
所以从这里可以看出来,其实head头结点不是个真实的带有线程的节点,并且不是在第一个线程进来的时候设置的
通过代码来看下
/**
* Attempts to release this lock.
*
* <p>If the current thread is the holder of this lock then the hold
* count is decremented. If the hold count is now zero then the lock
* is released. If the current thread is not the holder of this
* lock then {@link IllegalMonitorStateException} is thrown.
*
* @throws IllegalMonitorStateException if the current thread does not
* hold this lock
*/
public void unlock() {
// 释放锁
sync.release(1);
}
/**
* Releases in exclusive mode. Implemented by unblocking one or
* more threads if {@link #tryRelease} returns true.
* This method can be used to implement method {@link Lock#unlock}.
*
* @param arg the release argument. This value is conveyed to
* {@link #tryRelease} but is otherwise uninterpreted and
* can represent anything you like.
* @return the value returned from {@link #tryRelease}
*/
public final boolean release(int arg) {
// 尝试去释放
if (tryRelease(arg)) {
Node h = head;
if (h != null && h.waitStatus != 0)
unparkSuccessor(h);
return true;
}
return false;
}
protected final boolean tryRelease(int releases) {
int c = getState() - releases;
if (Thread.currentThread() != getExclusiveOwnerThread())
throw new IllegalMonitorStateException();
boolean free = false;
// 判断是否完全释放锁,因为可重入
if (c == 0) {
free = true;
setExclusiveOwnerThread(null);
}
setState(c);
return free;
}
// 这段代码和上面的一致,只是为了顺序性,又拷下来看下
public final boolean release(int arg) {
// 尝试去释放,如果是完全释放,返回的就是true,否则是false
if (tryRelease(arg)) {
Node h = head;
// 这里判断头结点是否为空以及waitStatus的状态,前面说了head节点其实是
// 在第二个线程进来的时候初始化的,如果是空的话说明没后续节点,并且waitStatus
// 也表示了后续的等待状态
if (h != null && h.waitStatus != 0)
unparkSuccessor(h);
return true;
}
return false;
}
/**
* Wakes up node's successor, if one exists.
*
* @param node the node
*/
// 唤醒后继节点
private void unparkSuccessor(Node node) {
/*
* If status is negative (i.e., possibly needing signal) try
* to clear in anticipation of signalling. It is OK if this
* fails or if status is changed by waiting thread.
*/
int ws = node.waitStatus;
if (ws < 0)
compareAndSetWaitStatus(node, ws, 0);
/*
* Thread to unpark is held in successor, which is normally
* just the next node. But if cancelled or apparently null,
* traverse backwards from tail to find the actual
* non-cancelled successor.
*/
Node s = node.next;
// 如果后继节点是空或者当前节点取消等待了
if (s == null || s.waitStatus > 0) {
s = null;
// 从后往前找,找到非取消的节点,注意这里不是找到就退出,而是一直找到头
// 所以不必担心中间有取消的
for (Node t = tail; t != null && t != node; t = t.prev)
if (t.waitStatus <= 0)
s = t;
}
if (s != null)
// 将其唤醒
LockSupport.unpark(s.thread);
}
]]>// 头结点,你直接把它当做 当前持有锁的线程 可能是最好理解的
private transient volatile Node head;
// 阻塞的尾节点,每个新的节点进来,都插入到最后,也就形成了一个链表
private transient volatile Node tail;
// 这个是最重要的,代表当前锁的状态,0代表没有被占用,大于 0 代表有线程持有当前锁
// 这个值可以大于 1,是因为锁可以重入,每次重入都加上 1
private volatile int state;
// 代表当前持有独占锁的线程,举个最重要的使用例子,因为锁可以重入
// reentrantLock.lock()可以嵌套调用多次,所以每次用这个来判断当前线程是否已经拥有了锁
// if (currentThread == getExclusiveOwnerThread()) {state++}
private transient Thread exclusiveOwnerThread; //继承自AbstractOwnableSynchronizer
大概了解了 aqs 底层的双向等待队列,
结构是这样的
每个 node 里面主要是的代码结构也比较简单
static final class Node {
// 标识节点当前在共享模式下
static final Node SHARED = new Node();
// 标识节点当前在独占模式下
static final Node EXCLUSIVE = null;
// ======== 下面的几个int常量是给waitStatus用的 ===========
/** waitStatus value to indicate thread has cancelled */
// 代码此线程取消了争抢这个锁
static final int CANCELLED = 1;
/** waitStatus value to indicate successor's thread needs unparking */
// 官方的描述是,其表示当前node的后继节点对应的线程需要被唤醒
static final int SIGNAL = -1;
/** waitStatus value to indicate thread is waiting on condition */
// 本文不分析condition,所以略过吧,下一篇文章会介绍这个
static final int CONDITION = -2;
/**
* waitStatus value to indicate the next acquireShared should
* unconditionally propagate
*/
// 同样的不分析,略过吧
static final int PROPAGATE = -3;
// =====================================================
// 取值为上面的1、-1、-2、-3,或者0(以后会讲到)
// 这么理解,暂时只需要知道如果这个值 大于0 代表此线程取消了等待,
// ps: 半天抢不到锁,不抢了,ReentrantLock是可以指定timeouot的。。。
volatile int waitStatus;
// 前驱节点的引用
volatile Node prev;
// 后继节点的引用
volatile Node next;
// 这个就是线程本尊
volatile Thread thread;
}
其实可以主要关注这个 waitStatus 因为这个是后面的节点给前面的节点设置的,等于-1 的时候代表后面有节点等待,需要去唤醒,
这里使用了一个变种的 CLH 队列实现,CLH 队列相关内容可以查看这篇 自旋锁、排队自旋锁、MCS锁、CLH锁
You are given two linked lists representing two non-negative numbers. The digits are stored in reverse order and each of their nodes contain a single digit. Add the two numbers and return it as a linked list.
Input:(2 -> 4 -> 3) + (5 -> 6 -> 4)
Output: 7 -> 0 -> 8
分析(不用英文装逼了)
这个代码是抄来的,链接原作是这位大大。
一开始没看懂题,后来发现是要进位的,自己写的时候想把长短不同时长的串接到结果
串的后面,试了下因为进位会有些问题比较难搞定,这样的话就是在其中一个为空的
时候还是会循环操作,在链表太大的时候可能会有问题,就这样(逃
原来是有个小错误没发现,改进后的代码也AC了,棒棒哒!
/**
* Definition for singly-linked list.
* struct ListNode {
* int val;
* ListNode *next;
* ListNode(int x) : val(x), next(NULL) {}
* };
*/
class Solution {
public:
ListNode *addTwoNumbers(ListNode *l1, ListNode *l2) {
ListNode dummy(0);
ListNode* p = &dummy;
int cn = 0;
while(l1 || l2){
int val = cn + (l1 ? l1->val : 0) + (l2 ? l2->val : 0);
cn = val / 10;
val = val % 10;
p->next = new ListNode(val);
p = p->next;
if(l1){
l1 = l1->next;
}
if(l2){
l2 = l2->next;
}
}
if(cn != 0){
p->next = new ListNode(cn);
p = p->next;
}
return dummy.next;
}
};
/**
* Definition for singly-linked list.
* struct ListNode {
* int val;
* ListNode *next;
* ListNode(int x) : val(x), next(NULL) {}
* };
*/
class Solution {
public:
ListNode *addTwoNumbers(ListNode *l1, ListNode *l2) {
ListNode dummy(0);
ListNode* p = &dummy;
int cn = 0;
int flag = 0;
while(l1 || l2){
int val = cn + (l1 ? l1->val : 0) + (l2 ? l2->val : 0);
cn = val / 10;
val = val % 10;
p->next = new ListNode(val);
p = p->next;
if(!l1 && cn == 0){
flag = 1;
break;
}
if(!l2 && cn == 0){
flag = 1;
break;
}
if(l1){
l1 = l1->next;
}
if(l2){
l2 = l2->next;
}
}
if(!l1 && cn == 0 && flag == 1){
p->next = l2->next;
}
if(!l2 && cn == 0 && flag == 1){
p->next = l1->next;
}
if(cn != 0){
p->next = new ListNode(cn);
p = p->next;
}
return dummy.next;
}
};
]]>com.ctrip.framework.apollo.spring.annotation.SpringValueProcessor#processField
@Override
protected void processField(Object bean, String beanName, Field field) {
// register @Value on field
Value value = field.getAnnotation(Value.class);
if (value == null) {
return;
}
Set<String> keys = placeholderHelper.extractPlaceholderKeys(value.value());
if (keys.isEmpty()) {
return;
}
for (String key : keys) {
SpringValue springValue = new SpringValue(key, value.value(), bean, beanName, field, false);
springValueRegistry.register(beanFactory, key, springValue);
logger.debug("Monitoring {}", springValue);
}
}
然后我们看下这个springValueRegistry是啥玩意
public class SpringValueRegistry {
private static final long CLEAN_INTERVAL_IN_SECONDS = 5;
private final Map<BeanFactory, Multimap<String, SpringValue>> registry = Maps.newConcurrentMap();
private final AtomicBoolean initialized = new AtomicBoolean(false);
private final Object LOCK = new Object();
public void register(BeanFactory beanFactory, String key, SpringValue springValue) {
if (!registry.containsKey(beanFactory)) {
synchronized (LOCK) {
if (!registry.containsKey(beanFactory)) {
registry.put(beanFactory, LinkedListMultimap.<String, SpringValue>create());
}
}
}
registry.get(beanFactory).put(key, springValue);
// lazy initialize
if (initialized.compareAndSet(false, true)) {
initialize();
}
}
这类其实就是个 map 来存放 springvalue,然后有com.ctrip.framework.apollo.spring.property.AutoUpdateConfigChangeListener来监听更新操作,当有变更时
@Override
public void onChange(ConfigChangeEvent changeEvent) {
Set<String> keys = changeEvent.changedKeys();
if (CollectionUtils.isEmpty(keys)) {
return;
}
for (String key : keys) {
// 1. check whether the changed key is relevant
Collection<SpringValue> targetValues = springValueRegistry.get(beanFactory, key);
if (targetValues == null || targetValues.isEmpty()) {
continue;
}
// 2. check whether the value is really changed or not (since spring property sources have hierarchies)
// 这里其实有一点比较绕,是因为 Apollo 里的 namespace 划分,会出现 key 相同,但是 namespace 不同的情况,所以会有个优先级存在,所以需要去校验 environment 里面的是否已经更新,如果未更新则表示不需要更新
if (!shouldTriggerAutoUpdate(changeEvent, key)) {
continue;
}
// 3. update the value
for (SpringValue val : targetValues) {
updateSpringValue(val);
}
}
}
其实原理很简单,就是得了解知道下
]]>Clone a graph. Input is a Node pointer. Return the Node pointer of the cloned graph.
A graph is defined below:
struct Node {
vector neighbors;
}
typedef unordered_map<Node *, Node *> Map;
Node *clone(Node *graph) {
if (!graph) return NULL;
Map map;
queue<Node *> q;
q.push(graph);
Node *graphCopy = new Node();
map[graph] = graphCopy;
while (!q.empty()) {
Node *node = q.front();
q.pop();
int n = node->neighbors.size();
for (int i = 0; i < n; i++) {
Node *neighbor = node->neighbors[i];
// no copy exists
if (map.find(neighbor) == map.end()) {
Node *p = new Node();
map[node]->neighbors.push_back(p);
map[neighbor] = p;
q.push(neighbor);
} else { // a copy already exists
map[node]->neighbors.push_back(map[neighbor]);
}
}
}
return graphCopy;
}
using the Breadth-first traversal
and use a map to save the neighbors not to be duplicated.
比如这样子
我的对象是Entity
public class Entity {
private Long id;
private Long sortValue;
public Long getId() {
return id;
}
public void setId(Long id) {
this.id = id;
}
public Long getSortValue() {
return sortValue;
}
public void setSortValue(Long sortValue) {
this.sortValue = sortValue;
}
}
Comparator
public class MyComparator implements Comparator {
@Override
public int compare(Object o1, Object o2) {
Entity e1 = (Entity) o1;
Entity e2 = (Entity) o2;
if (e1.getSortValue() < e2.getSortValue()) {
return -1;
} else if (e1.getSortValue().equals(e2.getSortValue())) {
return 0;
} else {
return 1;
}
}
}
比较代码
private static MyComparator myComparator = new MyComparator();
public static void main(String[] args) {
List<Entity> list = new ArrayList<Entity>();
Entity e1 = new Entity();
e1.setId(1L);
e1.setSortValue(1L);
list.add(e1);
Entity e2 = new Entity();
e2.setId(2L);
e2.setSortValue(null);
list.add(e2);
Collections.sort(list, myComparator);
看到这里的e2的排序值是null,在Comparator中如果要正常运行的话,就得判空之类的,这里有两点需要,一个是不想写这个MyComparator,然后也没那么好排除掉list里排序值,那么有什么办法能解决这种问题呢,应该说java的这方面真的是很强大

看一下nullsFirst的实现
final static class NullComparator<T> implements Comparator<T>, Serializable {
private static final long serialVersionUID = -7569533591570686392L;
private final boolean nullFirst;
// if null, non-null Ts are considered equal
private final Comparator<T> real;
@SuppressWarnings("unchecked")
NullComparator(boolean nullFirst, Comparator<? super T> real) {
this.nullFirst = nullFirst;
this.real = (Comparator<T>) real;
}
@Override
public int compare(T a, T b) {
if (a == null) {
return (b == null) ? 0 : (nullFirst ? -1 : 1);
} else if (b == null) {
return nullFirst ? 1: -1;
} else {
return (real == null) ? 0 : real.compare(a, b);
}
}
核心代码就是下面这段,其实就是帮我们把前面要做的事情做掉了,是不是挺方便的,小记一下哈
]]>ArrayBlockingQueue,因为这个阻塞队列是使用了锁来控制阻塞,关于并发其实有一些通用的最佳实践,就是用锁,即使是 JDK 提供的锁,也是比较耗资源的,当然这是跟不加锁的对比,同样是锁,JDK 的实现还是性能比较优秀的。常见的阻塞队列中例如 ArrayBlockingQueue 和 LinkedBlockingQueue 都有锁的身影的存在,区别在于 ArrayBlockingQueue 是一把锁,后者是两把锁,不过重点不在几把锁,这里其实是两个问题,一个是所谓的 lock free, 对于一个单生产者的 disruptor 来说,因为写入是只有一个线程的,是可以不用加锁,多生产者的时候使用的是 cas 来获取对应的写入坑位,另一个是解决“伪共享”问题,后面可以详细点分析,先介绍下使用public class LongEvent {
private long value;
public void set(long value) {
this.value = value;
}
public long getValue() {
return value;
}
public void setValue(long value) {
this.value = value;
}
}
事件生产
public class LongEventFactory implements EventFactory<LongEvent>
{
public LongEvent newInstance()
{
return new LongEvent();
}
}
事件处理器
public class LongEventHandler implements EventHandler<LongEvent> {
// event 事件,
// sequence 当前的序列
// 是否当前批次最后一个数据
public void onEvent(LongEvent event, long sequence, boolean endOfBatch)
{
String str = String.format("long event : %s l:%s b:%s", event.getValue(), sequence, endOfBatch);
System.out.println(str);
}
}
主方法代码
package disruptor;
import com.lmax.disruptor.RingBuffer;
import com.lmax.disruptor.dsl.Disruptor;
import com.lmax.disruptor.util.DaemonThreadFactory;
import java.nio.ByteBuffer;
public class LongEventMain
{
public static void main(String[] args) throws Exception
{
// 这个需要是 2 的幂次,这样在定位的时候只需要位移操作,也能减少各种计算操作
int bufferSize = 1024;
Disruptor<LongEvent> disruptor =
new Disruptor<>(LongEvent::new, bufferSize, DaemonThreadFactory.INSTANCE);
// 类似于注册处理器
disruptor.handleEventsWith(new LongEventHandler());
// 或者直接用 lambda
disruptor.handleEventsWith((event, sequence, endOfBatch) ->
System.out.println("Event: " + event));
// 启动我们的 disruptor
disruptor.start();
RingBuffer<LongEvent> ringBuffer = disruptor.getRingBuffer();
ByteBuffer bb = ByteBuffer.allocate(8);
for (long l = 0; true; l++)
{
bb.putLong(0, l);
// 生产事件
ringBuffer.publishEvent((event, sequence, buffer) -> event.set(buffer.getLong(0)), bb);
Thread.sleep(1000);
}
}
}
运行下可以看到运行结果
这里其实就只是最简单的使用,生产者只有一个,然后也不是批量的。
lock free , 相比于前面介绍的两个阻塞队列,false sharing 的情况,也就是常说的 伪共享 问题,那么什么叫 伪共享 呢,Cache Miss 就再往下一级 Cache 读取,Cache Line 读取,并且也遵循了“就近原则”,false sharing,ArrayBlockingQueue,需要有 takeIndex , putIndex , count , 因为在同一个类中,Cache Line 中,但是这几个值会被不同的线程修改,false sharing这种情况disruptor 中则使用了填充的方式,让我的头指针能够不产生false sharing
class LhsPadding
{
protected long p1, p2, p3, p4, p5, p6, p7;
}
class Value extends LhsPadding
{
protected volatile long value;
}
class RhsPadding extends Value
{
protected long p9, p10, p11, p12, p13, p14, p15;
}
/**
* <p>Concurrent sequence class used for tracking the progress of
* the ring buffer and event processors. Support a number
* of concurrent operations including CAS and order writes.
*
* <p>Also attempts to be more efficient with regards to false
* sharing by adding padding around the volatile field.
*/
public class Sequence extends RhsPadding
{
通过代码可以看到,sequence 中其实真正有意义的是 value 字段,因为需要在多线程环境下可见也
使用了volatile 关键字,而 LhsPadding 和 RhsPadding 分别在value 前后填充了各
7 个 long 型的变量,long 型的变量在 Java 中是占用 8 bytes,这样就相当于不管怎么样,
value 都会单独使用一个缓存行,使得其不会产生 false sharing 的问题。
package javax.servlet;
import java.io.IOException;
/**
* Defines methods that all servlets must implement.
*
* <p>
* A servlet is a small Java program that runs within a Web server. Servlets
* receive and respond to requests from Web clients, usually across HTTP, the
* HyperText Transfer Protocol.
*
* <p>
* To implement this interface, you can write a generic servlet that extends
* <code>javax.servlet.GenericServlet</code> or an HTTP servlet that extends
* <code>javax.servlet.http.HttpServlet</code>.
*
* <p>
* This interface defines methods to initialize a servlet, to service requests,
* and to remove a servlet from the server. These are known as life-cycle
* methods and are called in the following sequence:
* <ol>
* <li>The servlet is constructed, then initialized with the <code>init</code>
* method.
* <li>Any calls from clients to the <code>service</code> method are handled.
* <li>The servlet is taken out of service, then destroyed with the
* <code>destroy</code> method, then garbage collected and finalized.
* </ol>
*
* <p>
* In addition to the life-cycle methods, this interface provides the
* <code>getServletConfig</code> method, which the servlet can use to get any
* startup information, and the <code>getServletInfo</code> method, which allows
* the servlet to return basic information about itself, such as author,
* version, and copyright.
*
* @see GenericServlet
* @see javax.servlet.http.HttpServlet
*/
public interface Servlet {
/**
* Called by the servlet container to indicate to a servlet that the servlet
* is being placed into service.
*
* <p>
* The servlet container calls the <code>init</code> method exactly once
* after instantiating the servlet. The <code>init</code> method must
* complete successfully before the servlet can receive any requests.
*
* <p>
* The servlet container cannot place the servlet into service if the
* <code>init</code> method
* <ol>
* <li>Throws a <code>ServletException</code>
* <li>Does not return within a time period defined by the Web server
* </ol>
*
*
* @param config
* a <code>ServletConfig</code> object containing the servlet's
* configuration and initialization parameters
*
* @exception ServletException
* if an exception has occurred that interferes with the
* servlet's normal operation
*
* @see UnavailableException
* @see #getServletConfig
*/
public void init(ServletConfig config) throws ServletException;
/**
*
* Returns a {@link ServletConfig} object, which contains initialization and
* startup parameters for this servlet. The <code>ServletConfig</code>
* object returned is the one passed to the <code>init</code> method.
*
* <p>
* Implementations of this interface are responsible for storing the
* <code>ServletConfig</code> object so that this method can return it. The
* {@link GenericServlet} class, which implements this interface, already
* does this.
*
* @return the <code>ServletConfig</code> object that initializes this
* servlet
*
* @see #init
*/
public ServletConfig getServletConfig();
/**
* Called by the servlet container to allow the servlet to respond to a
* request.
*
* <p>
* This method is only called after the servlet's <code>init()</code> method
* has completed successfully.
*
* <p>
* The status code of the response always should be set for a servlet that
* throws or sends an error.
*
*
* <p>
* Servlets typically run inside multithreaded servlet containers that can
* handle multiple requests concurrently. Developers must be aware to
* synchronize access to any shared resources such as files, network
* connections, and as well as the servlet's class and instance variables.
* More information on multithreaded programming in Java is available in <a
* href
* ="http://java.sun.com/Series/Tutorial/java/threads/multithreaded.html">
* the Java tutorial on multi-threaded programming</a>.
*
*
* @param req
* the <code>ServletRequest</code> object that contains the
* client's request
*
* @param res
* the <code>ServletResponse</code> object that contains the
* servlet's response
*
* @exception ServletException
* if an exception occurs that interferes with the servlet's
* normal operation
*
* @exception IOException
* if an input or output exception occurs
*/
public void service(ServletRequest req, ServletResponse res)
throws ServletException, IOException;
/**
* Returns information about the servlet, such as author, version, and
* copyright.
*
* <p>
* The string that this method returns should be plain text and not markup
* of any kind (such as HTML, XML, etc.).
*
* @return a <code>String</code> containing servlet information
*/
public String getServletInfo();
/**
* Called by the servlet container to indicate to a servlet that the servlet
* is being taken out of service. This method is only called once all
* threads within the servlet's <code>service</code> method have exited or
* after a timeout period has passed. After the servlet container calls this
* method, it will not call the <code>service</code> method again on this
* servlet.
*
* <p>
* This method gives the servlet an opportunity to clean up any resources
* that are being held (for example, memory, file handles, threads) and make
* sure that any persistent state is synchronized with the servlet's current
* state in memory.
*/
public void destroy();
}
重点看 servlet 的 service方法,就是接受请求,处理完了给响应,不说细节,不然光 Tomcat 的能说半年,所以呢再进一步去理解,其实就能知道,就是一个先后的问题,盗个图
filter 跟后两者最大的不一样其实是一个基于 servlet,在非常外层做的处理,然后是 interceptor 的 prehandle 跟 posthandle,接着才是我们常规的 aop,就这么点事情,做个小试验吧(还是先补段代码吧)
// ---------------------------------------------------- FilterChain Methods
/**
* Invoke the next filter in this chain, passing the specified request
* and response. If there are no more filters in this chain, invoke
* the <code>service()</code> method of the servlet itself.
*
* @param request The servlet request we are processing
* @param response The servlet response we are creating
*
* @exception IOException if an input/output error occurs
* @exception ServletException if a servlet exception occurs
*/
@Override
public void doFilter(ServletRequest request, ServletResponse response)
throws IOException, ServletException {
if( Globals.IS_SECURITY_ENABLED ) {
final ServletRequest req = request;
final ServletResponse res = response;
try {
java.security.AccessController.doPrivileged(
new java.security.PrivilegedExceptionAction<Void>() {
@Override
public Void run()
throws ServletException, IOException {
internalDoFilter(req,res);
return null;
}
}
);
} catch( PrivilegedActionException pe) {
Exception e = pe.getException();
if (e instanceof ServletException)
throw (ServletException) e;
else if (e instanceof IOException)
throw (IOException) e;
else if (e instanceof RuntimeException)
throw (RuntimeException) e;
else
throw new ServletException(e.getMessage(), e);
}
} else {
internalDoFilter(request,response);
}
}
private void internalDoFilter(ServletRequest request,
ServletResponse response)
throws IOException, ServletException {
// Call the next filter if there is one
if (pos < n) {
ApplicationFilterConfig filterConfig = filters[pos++];
try {
Filter filter = filterConfig.getFilter();
if (request.isAsyncSupported() && "false".equalsIgnoreCase(
filterConfig.getFilterDef().getAsyncSupported())) {
request.setAttribute(Globals.ASYNC_SUPPORTED_ATTR, Boolean.FALSE);
}
if( Globals.IS_SECURITY_ENABLED ) {
final ServletRequest req = request;
final ServletResponse res = response;
Principal principal =
((HttpServletRequest) req).getUserPrincipal();
Object[] args = new Object[]{req, res, this};
SecurityUtil.doAsPrivilege ("doFilter", filter, classType, args, principal);
} else {
filter.doFilter(request, response, this);
}
} catch (IOException | ServletException | RuntimeException e) {
throw e;
} catch (Throwable e) {
e = ExceptionUtils.unwrapInvocationTargetException(e);
ExceptionUtils.handleThrowable(e);
throw new ServletException(sm.getString("filterChain.filter"), e);
}
return;
}
// We fell off the end of the chain -- call the servlet instance
try {
if (ApplicationDispatcher.WRAP_SAME_OBJECT) {
lastServicedRequest.set(request);
lastServicedResponse.set(response);
}
if (request.isAsyncSupported() && !servletSupportsAsync) {
request.setAttribute(Globals.ASYNC_SUPPORTED_ATTR,
Boolean.FALSE);
}
// Use potentially wrapped request from this point
if ((request instanceof HttpServletRequest) &&
(response instanceof HttpServletResponse) &&
Globals.IS_SECURITY_ENABLED ) {
final ServletRequest req = request;
final ServletResponse res = response;
Principal principal =
((HttpServletRequest) req).getUserPrincipal();
Object[] args = new Object[]{req, res};
SecurityUtil.doAsPrivilege("service",
servlet,
classTypeUsedInService,
args,
principal);
} else {
servlet.service(request, response);
}
} catch (IOException | ServletException | RuntimeException e) {
throw e;
} catch (Throwable e) {
e = ExceptionUtils.unwrapInvocationTargetException(e);
ExceptionUtils.handleThrowable(e);
throw new ServletException(sm.getString("filterChain.servlet"), e);
} finally {
if (ApplicationDispatcher.WRAP_SAME_OBJECT) {
lastServicedRequest.set(null);
lastServicedResponse.set(null);
}
}
}
注意看这一行filter.doFilter(request, response, this);
是不是看懂了,就是个 filter 链,但是这个代码在哪呢,org.apache.catalina.core.ApplicationFilterChain#doFilter
然后是interceptor,
protected void doDispatch(HttpServletRequest request, HttpServletResponse response) throws Exception {
HttpServletRequest processedRequest = request;
HandlerExecutionChain mappedHandler = null;
boolean multipartRequestParsed = false;
WebAsyncManager asyncManager = WebAsyncUtils.getAsyncManager(request);
try {
try {
ModelAndView mv = null;
Object dispatchException = null;
try {
processedRequest = this.checkMultipart(request);
multipartRequestParsed = processedRequest != request;
mappedHandler = this.getHandler(processedRequest);
if (mappedHandler == null) {
this.noHandlerFound(processedRequest, response);
return;
}
HandlerAdapter ha = this.getHandlerAdapter(mappedHandler.getHandler());
String method = request.getMethod();
boolean isGet = "GET".equals(method);
if (isGet || "HEAD".equals(method)) {
long lastModified = ha.getLastModified(request, mappedHandler.getHandler());
if ((new ServletWebRequest(request, response)).checkNotModified(lastModified) && isGet) {
return;
}
}
/**
* 看这里看这里‼️
*/
if (!mappedHandler.applyPreHandle(processedRequest, response)) {
return;
}
mv = ha.handle(processedRequest, response, mappedHandler.getHandler());
if (asyncManager.isConcurrentHandlingStarted()) {
return;
}
this.applyDefaultViewName(processedRequest, mv);
/**
* 再看这里看这里‼️
*/
mappedHandler.applyPostHandle(processedRequest, response, mv);
} catch (Exception var20) {
dispatchException = var20;
} catch (Throwable var21) {
dispatchException = new NestedServletException("Handler dispatch failed", var21);
}
this.processDispatchResult(processedRequest, response, mappedHandler, mv, (Exception)dispatchException);
} catch (Exception var22) {
this.triggerAfterCompletion(processedRequest, response, mappedHandler, var22);
} catch (Throwable var23) {
this.triggerAfterCompletion(processedRequest, response, mappedHandler, new NestedServletException("Handler processing failed", var23));
}
} finally {
if (asyncManager.isConcurrentHandlingStarted()) {
if (mappedHandler != null) {
mappedHandler.applyAfterConcurrentHandlingStarted(processedRequest, response);
}
} else if (multipartRequestParsed) {
this.cleanupMultipart(processedRequest);
}
}
}
代码在哪呢,org.springframework.web.servlet.DispatcherServlet#doDispatch,然后才是我们自己写的 aop,是不是差不多明白了,嗯,接下来是例子
写个 filter
public class DemoFilter extends HttpServlet implements Filter {
@Override
public void init(FilterConfig filterConfig) throws ServletException {
System.out.println("==>DemoFilter启动");
}
@Override
public void doFilter(ServletRequest servletRequest, ServletResponse servletResponse, FilterChain filterChain) throws IOException, ServletException {
// 将请求转换成HttpServletRequest 请求
HttpServletRequest req = (HttpServletRequest) servletRequest;
HttpServletResponse resp = (HttpServletResponse) servletResponse;
System.out.println("before filter");
filterChain.doFilter(req, resp);
System.out.println("after filter");
}
@Override
public void destroy() {
}
}
因为用的springboot,所以就不写 web.xml 了,写个配置类
@Configuration
public class FilterConfiguration {
@Bean
public FilterRegistrationBean filterDemo4Registration() {
FilterRegistrationBean registration = new FilterRegistrationBean();
//注入过滤器
registration.setFilter(new DemoFilter());
//拦截规则
registration.addUrlPatterns("/*");
//过滤器名称
registration.setName("DemoFilter");
//是否自动注册 false 取消Filter的自动注册
registration.setEnabled(true);
//过滤器顺序
registration.setOrder(1);
return registration;
}
}
然后再来个 interceptor 和 aop,以及一个简单的请求处理
public class DemoInterceptor extends HandlerInterceptorAdapter {
@Override
public boolean preHandle(HttpServletRequest request, HttpServletResponse response, Object handler) throws Exception {
System.out.println("preHandle test");
return true;
}
@Override
public void postHandle(HttpServletRequest request, HttpServletResponse response, Object handler, ModelAndView modelAndView) throws Exception {
System.out.println("postHandle test");
}
}
@Aspect
@Component
public class DemoAspect {
@Pointcut("execution( public * com.nicksxs.springbootdemo.demo.DemoController.*())")
public void point() {
}
@Before("point()")
public void doBefore(){
System.out.println("==doBefore==");
}
@After("point()")
public void doAfter(){
System.out.println("==doAfter==");
}
}
@RestController
public class DemoController {
@RequestMapping("/hello")
@ResponseBody
public String hello() {
return "hello world";
}
}
好了,请求一下,看看 stdout,
搞定完事儿~
这里主要介绍这个比较新的垃圾回收器,在 G1 之前的垃圾回收器都是基于如下图的内存结构分布,有新生代,老年代和永久代(jdk8 之前),然后G1 往前的那些垃圾回收器都有个分代,比如 serial,parallel 等,一般有个应用的组合,最初的 serial 和 serial old,因为新生代和老年代的收集方式不太一样,新生代主要是标记复制,所以有 eden 跟两个 survival区,老年代一般用标记整理方式,而 G1 对这个不太一样。
看一下 G1 的内存分布
可以看到这有很大的不同,G1 通过将内存分成大小相等的 region,每个region是存在于一个连续的虚拟内存范围,对于某个 region 来说其角色是类似于原来的收集器的Eden、Survivor、Old Generation,这个具体在代码层面
// We encode the value of the heap region type so the generation can be
// determined quickly. The tag is split into two parts:
//
// major type (young, old, humongous, archive) : top N-1 bits
// minor type (eden / survivor, starts / cont hum, etc.) : bottom 1 bit
//
// If there's need to increase the number of minor types in the
// future, we'll have to increase the size of the latter and hence
// decrease the size of the former.
//
// 00000 0 [ 0] Free
//
// 00001 0 [ 2] Young Mask
// 00001 0 [ 2] Eden
// 00001 1 [ 3] Survivor
//
// 00010 0 [ 4] Humongous Mask
// 00100 0 [ 8] Pinned Mask
// 00110 0 [12] Starts Humongous
// 00110 1 [13] Continues Humongous
//
// 01000 0 [16] Old Mask
//
// 10000 0 [32] Archive Mask
// 11100 0 [56] Open Archive
// 11100 1 [57] Closed Archive
//
typedef enum {
FreeTag = 0,
YoungMask = 2,
EdenTag = YoungMask,
SurvTag = YoungMask + 1,
HumongousMask = 4,
PinnedMask = 8,
StartsHumongousTag = HumongousMask | PinnedMask,
ContinuesHumongousTag = HumongousMask | PinnedMask + 1,
OldMask = 16,
OldTag = OldMask,
// Archive regions are regions with immutable content (i.e. not reclaimed, and
// not allocated into during regular operation). They differ in the kind of references
// allowed for the contained objects:
// - Closed archive regions form a separate self-contained (closed) object graph
// within the set of all of these regions. No references outside of closed
// archive regions are allowed.
// - Open archive regions have no restrictions on the references of their objects.
// Objects within these regions are allowed to have references to objects
// contained in any other kind of regions.
ArchiveMask = 32,
OpenArchiveTag = ArchiveMask | PinnedMask | OldMask,
ClosedArchiveTag = ArchiveMask | PinnedMask | OldMask + 1
} Tag;
hotspot/share/gc/g1/heapRegionType.hpp
当执行垃圾收集时,G1以类似于CMS收集器的方式运行。 G1执行并发全局标记阶段,以确定整个堆中对象的存活性。标记阶段完成后,G1知道哪些region是基本空的。它首先收集这些region,通常会产生大量的可用空间。这就是为什么这种垃圾收集方法称为“垃圾优先”的原因。顾名思义,G1将其收集和压缩活动集中在可能充满可回收对象(即垃圾)的堆区域。 G1使用暂停预测模型来满足用户定义的暂停时间目标,并根据指定的暂停时间目标选择要收集的区域数。
由G1标识为可回收的区域是使用撤离的方式(Evacuation)。 G1将对象从堆的一个或多个区域复制到堆上的单个区域,并在此过程中压缩并释放内存。撤离是在多处理器上并行执行的,以减少暂停时间并增加吞吐量。因此,对于每次垃圾收集,G1都在用户定义的暂停时间内连续工作以减少碎片。这是优于前面两种方法的。 CMS(并发标记扫描)垃圾收集器不进行压缩。 ParallelOld垃圾回收仅执行整个堆压缩,这导致相当长的暂停时间。
需要重点注意的是,G1不是实时收集器。它很有可能达到设定的暂停时间目标,但并非绝对确定。 G1根据先前收集的数据,估算在用户指定的目标时间内可以收集多少个区域。因此,收集器具有收集区域成本的合理准确的模型,并且收集器使用此模型来确定要收集哪些和多少个区域,同时保持在暂停时间目标之内。
注意:G1同时具有并发(与应用程序线程一起运行,例如优化,标记,清理)和并行(多线程,例如stw)阶段。Full GC仍然是单线程的,但是如果正确调优,您的应用程序应该可以避免Full GC。
在前面那篇中在代码层面简单的了解了这个可预测时间的过程,这也是 G1 的一大特点。
]]>HeapWord* G1CollectedHeap::do_collection_pause(size_t word_size,
uint gc_count_before,
bool* succeeded,
GCCause::Cause gc_cause) {
assert_heap_not_locked_and_not_at_safepoint();
VM_G1CollectForAllocation op(word_size,
gc_count_before,
gc_cause,
false, /* should_initiate_conc_mark */
g1_policy()->max_pause_time_ms());
VMThread::execute(&op);
HeapWord* result = op.result();
bool ret_succeeded = op.prologue_succeeded() && op.pause_succeeded();
assert(result == NULL || ret_succeeded,
"the result should be NULL if the VM did not succeed");
*succeeded = ret_succeeded;
assert_heap_not_locked();
return result;
}
这里就是收集时需要停顿的,其中VMThread::execute(&op);是具体执行的,真正执行的是VM_G1CollectForAllocation::doit方法
void VM_G1CollectForAllocation::doit() {
G1CollectedHeap* g1h = G1CollectedHeap::heap();
assert(!_should_initiate_conc_mark || g1h->should_do_concurrent_full_gc(_gc_cause),
"only a GC locker, a System.gc(), stats update, whitebox, or a hum allocation induced GC should start a cycle");
if (_word_size > 0) {
// An allocation has been requested. So, try to do that first.
_result = g1h->attempt_allocation_at_safepoint(_word_size,
false /* expect_null_cur_alloc_region */);
if (_result != NULL) {
// If we can successfully allocate before we actually do the
// pause then we will consider this pause successful.
_pause_succeeded = true;
return;
}
}
GCCauseSetter x(g1h, _gc_cause);
if (_should_initiate_conc_mark) {
// It's safer to read old_marking_cycles_completed() here, given
// that noone else will be updating it concurrently. Since we'll
// only need it if we're initiating a marking cycle, no point in
// setting it earlier.
_old_marking_cycles_completed_before = g1h->old_marking_cycles_completed();
// At this point we are supposed to start a concurrent cycle. We
// will do so if one is not already in progress.
bool res = g1h->g1_policy()->force_initial_mark_if_outside_cycle(_gc_cause);
// The above routine returns true if we were able to force the
// next GC pause to be an initial mark; it returns false if a
// marking cycle is already in progress.
//
// If a marking cycle is already in progress just return and skip the
// pause below - if the reason for requesting this initial mark pause
// was due to a System.gc() then the requesting thread should block in
// doit_epilogue() until the marking cycle is complete.
//
// If this initial mark pause was requested as part of a humongous
// allocation then we know that the marking cycle must just have
// been started by another thread (possibly also allocating a humongous
// object) as there was no active marking cycle when the requesting
// thread checked before calling collect() in
// attempt_allocation_humongous(). Retrying the GC, in this case,
// will cause the requesting thread to spin inside collect() until the
// just started marking cycle is complete - which may be a while. So
// we do NOT retry the GC.
if (!res) {
assert(_word_size == 0, "Concurrent Full GC/Humongous Object IM shouldn't be allocating");
if (_gc_cause != GCCause::_g1_humongous_allocation) {
_should_retry_gc = true;
}
return;
}
}
// Try a partial collection of some kind.
_pause_succeeded = g1h->do_collection_pause_at_safepoint(_target_pause_time_ms);
if (_pause_succeeded) {
if (_word_size > 0) {
// An allocation had been requested. Do it, eventually trying a stronger
// kind of GC.
_result = g1h->satisfy_failed_allocation(_word_size, &_pause_succeeded);
} else {
bool should_upgrade_to_full = !g1h->should_do_concurrent_full_gc(_gc_cause) &&
!g1h->has_regions_left_for_allocation();
if (should_upgrade_to_full) {
// There has been a request to perform a GC to free some space. We have no
// information on how much memory has been asked for. In case there are
// absolutely no regions left to allocate into, do a maximally compacting full GC.
log_info(gc, ergo)("Attempting maximally compacting collection");
_pause_succeeded = g1h->do_full_collection(false, /* explicit gc */
true /* clear_all_soft_refs */);
}
}
guarantee(_pause_succeeded, "Elevated collections during the safepoint must always succeed.");
} else {
assert(_result == NULL, "invariant");
// The only reason for the pause to not be successful is that, the GC locker is
// active (or has become active since the prologue was executed). In this case
// we should retry the pause after waiting for the GC locker to become inactive.
_should_retry_gc = true;
}
}
这里可以看到核心的是G1CollectedHeap::do_collection_pause_at_safepoint这个方法,它带上了目标暂停时间的值
G1CollectedHeap::do_collection_pause_at_safepoint(double target_pause_time_ms) {
assert_at_safepoint_on_vm_thread();
guarantee(!is_gc_active(), "collection is not reentrant");
if (GCLocker::check_active_before_gc()) {
return false;
}
_gc_timer_stw->register_gc_start();
GCIdMark gc_id_mark;
_gc_tracer_stw->report_gc_start(gc_cause(), _gc_timer_stw->gc_start());
SvcGCMarker sgcm(SvcGCMarker::MINOR);
ResourceMark rm;
g1_policy()->note_gc_start();
wait_for_root_region_scanning();
print_heap_before_gc();
print_heap_regions();
trace_heap_before_gc(_gc_tracer_stw);
_verifier->verify_region_sets_optional();
_verifier->verify_dirty_young_regions();
// We should not be doing initial mark unless the conc mark thread is running
if (!_cm_thread->should_terminate()) {
// This call will decide whether this pause is an initial-mark
// pause. If it is, in_initial_mark_gc() will return true
// for the duration of this pause.
g1_policy()->decide_on_conc_mark_initiation();
}
// We do not allow initial-mark to be piggy-backed on a mixed GC.
assert(!collector_state()->in_initial_mark_gc() ||
collector_state()->in_young_only_phase(), "sanity");
// We also do not allow mixed GCs during marking.
assert(!collector_state()->mark_or_rebuild_in_progress() || collector_state()->in_young_only_phase(), "sanity");
// Record whether this pause is an initial mark. When the current
// thread has completed its logging output and it's safe to signal
// the CM thread, the flag's value in the policy has been reset.
bool should_start_conc_mark = collector_state()->in_initial_mark_gc();
// Inner scope for scope based logging, timers, and stats collection
{
EvacuationInfo evacuation_info;
if (collector_state()->in_initial_mark_gc()) {
// We are about to start a marking cycle, so we increment the
// full collection counter.
increment_old_marking_cycles_started();
_cm->gc_tracer_cm()->set_gc_cause(gc_cause());
}
_gc_tracer_stw->report_yc_type(collector_state()->yc_type());
GCTraceCPUTime tcpu;
G1HeapVerifier::G1VerifyType verify_type;
FormatBuffer<> gc_string("Pause Young ");
if (collector_state()->in_initial_mark_gc()) {
gc_string.append("(Concurrent Start)");
verify_type = G1HeapVerifier::G1VerifyConcurrentStart;
} else if (collector_state()->in_young_only_phase()) {
if (collector_state()->in_young_gc_before_mixed()) {
gc_string.append("(Prepare Mixed)");
} else {
gc_string.append("(Normal)");
}
verify_type = G1HeapVerifier::G1VerifyYoungNormal;
} else {
gc_string.append("(Mixed)");
verify_type = G1HeapVerifier::G1VerifyMixed;
}
GCTraceTime(Info, gc) tm(gc_string, NULL, gc_cause(), true);
uint active_workers = AdaptiveSizePolicy::calc_active_workers(workers()->total_workers(),
workers()->active_workers(),
Threads::number_of_non_daemon_threads());
active_workers = workers()->update_active_workers(active_workers);
log_info(gc,task)("Using %u workers of %u for evacuation", active_workers, workers()->total_workers());
TraceCollectorStats tcs(g1mm()->incremental_collection_counters());
TraceMemoryManagerStats tms(&_memory_manager, gc_cause(),
collector_state()->yc_type() == Mixed /* allMemoryPoolsAffected */);
G1HeapTransition heap_transition(this);
size_t heap_used_bytes_before_gc = used();
// Don't dynamically change the number of GC threads this early. A value of
// 0 is used to indicate serial work. When parallel work is done,
// it will be set.
{ // Call to jvmpi::post_class_unload_events must occur outside of active GC
IsGCActiveMark x;
gc_prologue(false);
if (VerifyRememberedSets) {
log_info(gc, verify)("[Verifying RemSets before GC]");
VerifyRegionRemSetClosure v_cl;
heap_region_iterate(&v_cl);
}
_verifier->verify_before_gc(verify_type);
_verifier->check_bitmaps("GC Start");
#if COMPILER2_OR_JVMCI
DerivedPointerTable::clear();
#endif
// Please see comment in g1CollectedHeap.hpp and
// G1CollectedHeap::ref_processing_init() to see how
// reference processing currently works in G1.
// Enable discovery in the STW reference processor
_ref_processor_stw->enable_discovery();
{
// We want to temporarily turn off discovery by the
// CM ref processor, if necessary, and turn it back on
// on again later if we do. Using a scoped
// NoRefDiscovery object will do this.
NoRefDiscovery no_cm_discovery(_ref_processor_cm);
// Forget the current alloc region (we might even choose it to be part
// of the collection set!).
_allocator->release_mutator_alloc_region();
// This timing is only used by the ergonomics to handle our pause target.
// It is unclear why this should not include the full pause. We will
// investigate this in CR 7178365.
//
// Preserving the old comment here if that helps the investigation:
//
// The elapsed time induced by the start time below deliberately elides
// the possible verification above.
double sample_start_time_sec = os::elapsedTime();
g1_policy()->record_collection_pause_start(sample_start_time_sec);
if (collector_state()->in_initial_mark_gc()) {
concurrent_mark()->pre_initial_mark();
}
g1_policy()->finalize_collection_set(target_pause_time_ms, &_survivor);
evacuation_info.set_collectionset_regions(collection_set()->region_length());
// Make sure the remembered sets are up to date. This needs to be
// done before register_humongous_regions_with_cset(), because the
// remembered sets are used there to choose eager reclaim candidates.
// If the remembered sets are not up to date we might miss some
// entries that need to be handled.
g1_rem_set()->cleanupHRRS();
register_humongous_regions_with_cset();
assert(_verifier->check_cset_fast_test(), "Inconsistency in the InCSetState table.");
// We call this after finalize_cset() to
// ensure that the CSet has been finalized.
_cm->verify_no_cset_oops();
if (_hr_printer.is_active()) {
G1PrintCollectionSetClosure cl(&_hr_printer);
_collection_set.iterate(&cl);
}
// Initialize the GC alloc regions.
_allocator->init_gc_alloc_regions(evacuation_info);
G1ParScanThreadStateSet per_thread_states(this, workers()->active_workers(), collection_set()->young_region_length());
pre_evacuate_collection_set();
// Actually do the work...
evacuate_collection_set(&per_thread_states);
post_evacuate_collection_set(evacuation_info, &per_thread_states);
const size_t* surviving_young_words = per_thread_states.surviving_young_words();
free_collection_set(&_collection_set, evacuation_info, surviving_young_words);
eagerly_reclaim_humongous_regions();
record_obj_copy_mem_stats();
_survivor_evac_stats.adjust_desired_plab_sz();
_old_evac_stats.adjust_desired_plab_sz();
double start = os::elapsedTime();
start_new_collection_set();
g1_policy()->phase_times()->record_start_new_cset_time_ms((os::elapsedTime() - start) * 1000.0);
if (evacuation_failed()) {
set_used(recalculate_used());
if (_archive_allocator != NULL) {
_archive_allocator->clear_used();
}
for (uint i = 0; i < ParallelGCThreads; i++) {
if (_evacuation_failed_info_array[i].has_failed()) {
_gc_tracer_stw->report_evacuation_failed(_evacuation_failed_info_array[i]);
}
}
} else {
// The "used" of the the collection set have already been subtracted
// when they were freed. Add in the bytes evacuated.
increase_used(g1_policy()->bytes_copied_during_gc());
}
if (collector_state()->in_initial_mark_gc()) {
// We have to do this before we notify the CM threads that
// they can start working to make sure that all the
// appropriate initialization is done on the CM object.
concurrent_mark()->post_initial_mark();
// Note that we don't actually trigger the CM thread at
// this point. We do that later when we're sure that
// the current thread has completed its logging output.
}
allocate_dummy_regions();
_allocator->init_mutator_alloc_region();
{
size_t expand_bytes = _heap_sizing_policy->expansion_amount();
if (expand_bytes > 0) {
size_t bytes_before = capacity();
// No need for an ergo logging here,
// expansion_amount() does this when it returns a value > 0.
double expand_ms;
if (!expand(expand_bytes, _workers, &expand_ms)) {
// We failed to expand the heap. Cannot do anything about it.
}
g1_policy()->phase_times()->record_expand_heap_time(expand_ms);
}
}
// We redo the verification but now wrt to the new CSet which
// has just got initialized after the previous CSet was freed.
_cm->verify_no_cset_oops();
// This timing is only used by the ergonomics to handle our pause target.
// It is unclear why this should not include the full pause. We will
// investigate this in CR 7178365.
double sample_end_time_sec = os::elapsedTime();
double pause_time_ms = (sample_end_time_sec - sample_start_time_sec) * MILLIUNITS;
size_t total_cards_scanned = g1_policy()->phase_times()->sum_thread_work_items(G1GCPhaseTimes::ScanRS, G1GCPhaseTimes::ScanRSScannedCards);
g1_policy()->record_collection_pause_end(pause_time_ms, total_cards_scanned, heap_used_bytes_before_gc);
evacuation_info.set_collectionset_used_before(collection_set()->bytes_used_before());
evacuation_info.set_bytes_copied(g1_policy()->bytes_copied_during_gc());
if (VerifyRememberedSets) {
log_info(gc, verify)("[Verifying RemSets after GC]");
VerifyRegionRemSetClosure v_cl;
heap_region_iterate(&v_cl);
}
_verifier->verify_after_gc(verify_type);
_verifier->check_bitmaps("GC End");
assert(!_ref_processor_stw->discovery_enabled(), "Postcondition");
_ref_processor_stw->verify_no_references_recorded();
// CM reference discovery will be re-enabled if necessary.
}
#ifdef TRACESPINNING
ParallelTaskTerminator::print_termination_counts();
#endif
gc_epilogue(false);
}
// Print the remainder of the GC log output.
if (evacuation_failed()) {
log_info(gc)("To-space exhausted");
}
g1_policy()->print_phases();
heap_transition.print();
// It is not yet to safe to tell the concurrent mark to
// start as we have some optional output below. We don't want the
// output from the concurrent mark thread interfering with this
// logging output either.
_hrm.verify_optional();
_verifier->verify_region_sets_optional();
TASKQUEUE_STATS_ONLY(print_taskqueue_stats());
TASKQUEUE_STATS_ONLY(reset_taskqueue_stats());
print_heap_after_gc();
print_heap_regions();
trace_heap_after_gc(_gc_tracer_stw);
// We must call G1MonitoringSupport::update_sizes() in the same scoping level
// as an active TraceMemoryManagerStats object (i.e. before the destructor for the
// TraceMemoryManagerStats is called) so that the G1 memory pools are updated
// before any GC notifications are raised.
g1mm()->update_sizes();
_gc_tracer_stw->report_evacuation_info(&evacuation_info);
_gc_tracer_stw->report_tenuring_threshold(_g1_policy->tenuring_threshold());
_gc_timer_stw->register_gc_end();
_gc_tracer_stw->report_gc_end(_gc_timer_stw->gc_end(), _gc_timer_stw->time_partitions());
}
// It should now be safe to tell the concurrent mark thread to start
// without its logging output interfering with the logging output
// that came from the pause.
if (should_start_conc_mark) {
// CAUTION: after the doConcurrentMark() call below,
// the concurrent marking thread(s) could be running
// concurrently with us. Make sure that anything after
// this point does not assume that we are the only GC thread
// running. Note: of course, the actual marking work will
// not start until the safepoint itself is released in
// SuspendibleThreadSet::desynchronize().
do_concurrent_mark();
}
return true;
}
往下走就是这一步G1Policy::finalize_collection_set,去处理新生代和老年代
void G1Policy::finalize_collection_set(double target_pause_time_ms, G1SurvivorRegions* survivor) {
double time_remaining_ms = _collection_set->finalize_young_part(target_pause_time_ms, survivor);
_collection_set->finalize_old_part(time_remaining_ms);
}
这里分别调用了两个方法,可以看到剩余时间是往下传的,来看一下具体的方法
double G1CollectionSet::finalize_young_part(double target_pause_time_ms, G1SurvivorRegions* survivors) {
double young_start_time_sec = os::elapsedTime();
finalize_incremental_building();
guarantee(target_pause_time_ms > 0.0,
"target_pause_time_ms = %1.6lf should be positive", target_pause_time_ms);
size_t pending_cards = _policy->pending_cards();
double base_time_ms = _policy->predict_base_elapsed_time_ms(pending_cards);
double time_remaining_ms = MAX2(target_pause_time_ms - base_time_ms, 0.0);
log_trace(gc, ergo, cset)("Start choosing CSet. pending cards: " SIZE_FORMAT " predicted base time: %1.2fms remaining time: %1.2fms target pause time: %1.2fms",
pending_cards, base_time_ms, time_remaining_ms, target_pause_time_ms);
// The young list is laid with the survivor regions from the previous
// pause are appended to the RHS of the young list, i.e.
// [Newly Young Regions ++ Survivors from last pause].
uint survivor_region_length = survivors->length();
uint eden_region_length = _g1h->eden_regions_count();
init_region_lengths(eden_region_length, survivor_region_length);
verify_young_cset_indices();
// Clear the fields that point to the survivor list - they are all young now.
survivors->convert_to_eden();
_bytes_used_before = _inc_bytes_used_before;
time_remaining_ms = MAX2(time_remaining_ms - _inc_predicted_elapsed_time_ms, 0.0);
log_trace(gc, ergo, cset)("Add young regions to CSet. eden: %u regions, survivors: %u regions, predicted young region time: %1.2fms, target pause time: %1.2fms",
eden_region_length, survivor_region_length, _inc_predicted_elapsed_time_ms, target_pause_time_ms);
// The number of recorded young regions is the incremental
// collection set's current size
set_recorded_rs_lengths(_inc_recorded_rs_lengths);
double young_end_time_sec = os::elapsedTime();
phase_times()->record_young_cset_choice_time_ms((young_end_time_sec - young_start_time_sec) * 1000.0);
return time_remaining_ms;
}
下面是老年代的部分
void G1CollectionSet::finalize_old_part(double time_remaining_ms) {
double non_young_start_time_sec = os::elapsedTime();
double predicted_old_time_ms = 0.0;
if (collector_state()->in_mixed_phase()) {
cset_chooser()->verify();
const uint min_old_cset_length = _policy->calc_min_old_cset_length();
const uint max_old_cset_length = _policy->calc_max_old_cset_length();
uint expensive_region_num = 0;
bool check_time_remaining = _policy->adaptive_young_list_length();
HeapRegion* hr = cset_chooser()->peek();
while (hr != NULL) {
if (old_region_length() >= max_old_cset_length) {
// Added maximum number of old regions to the CSet.
log_debug(gc, ergo, cset)("Finish adding old regions to CSet (old CSet region num reached max). old %u regions, max %u regions",
old_region_length(), max_old_cset_length);
break;
}
// Stop adding regions if the remaining reclaimable space is
// not above G1HeapWastePercent.
size_t reclaimable_bytes = cset_chooser()->remaining_reclaimable_bytes();
double reclaimable_percent = _policy->reclaimable_bytes_percent(reclaimable_bytes);
double threshold = (double) G1HeapWastePercent;
if (reclaimable_percent <= threshold) {
// We've added enough old regions that the amount of uncollected
// reclaimable space is at or below the waste threshold. Stop
// adding old regions to the CSet.
log_debug(gc, ergo, cset)("Finish adding old regions to CSet (reclaimable percentage not over threshold). "
"old %u regions, max %u regions, reclaimable: " SIZE_FORMAT "B (%1.2f%%) threshold: " UINTX_FORMAT "%%",
old_region_length(), max_old_cset_length, reclaimable_bytes, reclaimable_percent, G1HeapWastePercent);
break;
}
double predicted_time_ms = predict_region_elapsed_time_ms(hr);
if (check_time_remaining) {
if (predicted_time_ms > time_remaining_ms) {
// Too expensive for the current CSet.
if (old_region_length() >= min_old_cset_length) {
// We have added the minimum number of old regions to the CSet,
// we are done with this CSet.
log_debug(gc, ergo, cset)("Finish adding old regions to CSet (predicted time is too high). "
"predicted time: %1.2fms, remaining time: %1.2fms old %u regions, min %u regions",
predicted_time_ms, time_remaining_ms, old_region_length(), min_old_cset_length);
break;
}
// We'll add it anyway given that we haven't reached the
// minimum number of old regions.
expensive_region_num += 1;
}
} else {
if (old_region_length() >= min_old_cset_length) {
// In the non-auto-tuning case, we'll finish adding regions
// to the CSet if we reach the minimum.
log_debug(gc, ergo, cset)("Finish adding old regions to CSet (old CSet region num reached min). old %u regions, min %u regions",
old_region_length(), min_old_cset_length);
break;
}
}
// We will add this region to the CSet.
time_remaining_ms = MAX2(time_remaining_ms - predicted_time_ms, 0.0);
predicted_old_time_ms += predicted_time_ms;
cset_chooser()->pop(); // already have region via peek()
_g1h->old_set_remove(hr);
add_old_region(hr);
hr = cset_chooser()->peek();
}
if (hr == NULL) {
log_debug(gc, ergo, cset)("Finish adding old regions to CSet (candidate old regions not available)");
}
if (expensive_region_num > 0) {
// We print the information once here at the end, predicated on
// whether we added any apparently expensive regions or not, to
// avoid generating output per region.
log_debug(gc, ergo, cset)("Added expensive regions to CSet (old CSet region num not reached min)."
"old: %u regions, expensive: %u regions, min: %u regions, remaining time: %1.2fms",
old_region_length(), expensive_region_num, min_old_cset_length, time_remaining_ms);
}
cset_chooser()->verify();
}
stop_incremental_building();
log_debug(gc, ergo, cset)("Finish choosing CSet. old: %u regions, predicted old region time: %1.2fms, time remaining: %1.2f",
old_region_length(), predicted_old_time_ms, time_remaining_ms);
double non_young_end_time_sec = os::elapsedTime();
phase_times()->record_non_young_cset_choice_time_ms((non_young_end_time_sec - non_young_start_time_sec) * 1000.0);
QuickSort::sort(_collection_set_regions, _collection_set_cur_length, compare_region_idx, true);
}
上面第三行是个判断,当前是否是 mixed 回收阶段,如果不是的话其实是没有老年代什么事的,所以可以看到代码基本是从这个 if 判断if (collector_state()->in_mixed_phase()) {开始往下走的
先写到这,偏向于做笔记用,有错轻拍
Merge two sorted linked lists and return it as a sorted list. The list should be made by splicing together the nodes of the first two lists.
将两个升序链表合并为一个新的 升序 链表并返回。新链表是通过拼接给定的两个链表的所有节点组成的。

输入:l1 = [1,2,4], l2 = [1,3,4]
输出:[1,1,2,3,4,4]
输入: l1 = [], l2 = []
输出: []
输入: l1 = [], l2 = [0]
输出: [0]
这题是 Easy 的,看着也挺简单,两个链表进行合并,就是比较下大小,可能将就点的话最好就在两个链表中原地合并
public ListNode mergeTwoLists(ListNode l1, ListNode l2) {
// 下面两个if判断了入参的边界,如果其一为null,直接返回另一个就可以了
if (l1 == null) {
return l2;
}
if (l2 == null) {
return l1;
}
// new 一个合并后的头结点
ListNode merged = new ListNode();
// 这个是当前节点
ListNode current = merged;
// 一开始给这个while加了l1和l2不全为null的条件,后面想了下不需要
// 因为内部前两个if就是跳出条件
while (true) {
if (l1 == null) {
// 这里其实跟开头类似,只不过这里需要将l2剩余部分接到merged链表后面
// 所以不能是直接current = l2,这样就是把后面的直接丢了
current.val = l2.val;
current.next = l2.next;
break;
}
if (l2 == null) {
current.val = l1.val;
current.next = l1.next;
break;
}
// 这里是两个链表都不为空的时候,就比较下大小
if (l1.val < l2.val) {
current.val = l1.val;
l1 = l1.next;
} else {
current.val = l2.val;
l2 = l2.next;
}
// 这里是new个新的,其实也可以放在循环头上
current.next = new ListNode();
current = current.next;
}
current = null;
// 返回这个头结点
return merged;
}

Implement strStr().
Return the index of the first occurrence of needle in haystack, or -1 if needle is not part of haystack.
What should we return when needle is an empty string? This is a great question to ask during an interview.
For the purpose of this problem, we will return 0 when needle is an empty string. This is consistent to C’s strstr() and Java’s indexOf().
Example 1:
Input: haystack = "hello", needle = "ll"
Output: 2
Example 2:
Input: haystack = "aaaaa", needle = "bba"
Output: -1
Example 3:
Input: haystack = "", needle = ""
Output: 0
字符串比较其实是写代码里永恒的主题,底层的编译器等处理肯定需要字符串对比,像 kmp 算法也是很厉害
public int strStr(String haystack, String needle) {
// 如果两个字符串都为空,返回 -1
if (haystack == null || needle == null) {
return -1;
}
// 如果 haystack 长度小于 needle 长度,返回 -1
if (haystack.length() < needle.length()) {
return -1;
}
// 如果 needle 为空字符串,返回 0
if (needle.equals("")) {
return 0;
}
// 如果两者相等,返回 0
if (haystack.equals(needle)) {
return 0;
}
int needleLength = needle.length();
int haystackLength = haystack.length();
for (int i = needleLength - 1; i <= haystackLength - 1; i++) {
// 比较 needle 最后一个字符,倒着比较稍微节省点时间
if (needle.charAt(needleLength - 1) == haystack.charAt(i)) {
// 如果needle 是 1 的话直接可以返回 i 作为位置了
if (needle.length() == 1) {
return i;
}
boolean flag = true;
// 原来比的是 needle 的最后一个位置,然后这边从倒数第二个位置开始
int j = needle.length() - 2;
for (; j >= 0; j--) {
// 这里的 i- (needleLength - j) + 1 ) 比较绕,其实是外循环的 i 表示当前 i 位置的字符跟 needle 最后一个字符
// 相同,j 在上面的循环中--,对应的 haystack 也要在 i 这个位置 -- ,对应的位置就是 i - (needleLength - j) + 1
if (needle.charAt(j) != haystack.charAt(i - (needleLength - j) + 1)) {
flag = false;
break;
}
}
// 循环完了之后,如果 flag 为 true 说明 从 i 开始倒着对比都相同,但是这里需要起始位置,就需要
// i - needleLength + 1
if (flag) {
return i - needleLength + 1;
}
}
}
// 这里表示未找到
return -1;
}]]>Given an integer array nums, find the contiguous subarray (containing at least one number) which has the largest sum and return its sum.
A subarray is a contiguous part of an array.
Example 1:
Input: nums = [-2,1,-3,4,-1,2,1,-5,4]
Output: 6
Explanation: [4,-1,2,1] has the largest sum = 6.
Example 2:
Input: nums = [1]
Output: 1
Example 3:
Input: nums = [5,4,-1,7,8]
Output: 23
说起来这个题其实非常有渊源,大学数据结构的第一个题就是这个,而最佳的算法就是传说中的 online 算法,就是遍历一次就完了,最基本的做法就是记下来所有的连续子数组,然后求出最大的那个。
public int maxSubArray(int[] nums) {
int max = nums[0];
int sum = nums[0];
for (int i = 1; i < nums.length; i++) {
// 这里最重要的就是这一行了,其实就是如果前面的 sum 是小于 0 的,那么就不需要前面的 sum,反正加上了还不如不加大
sum = Math.max(nums[i], sum + nums[i]);
// max 是用来承载最大值的
max = Math.max(max, sum);
}
return max;
}]]>给定一个二叉树,找出其最大深度。
二叉树的深度为根节点到最远叶子节点的最长路径上的节点数。
说明: 叶子节点是指没有子节点的节点。
示例:
给定二叉树 [3,9,20,null,null,15,7],
3
/ \
9 20
/ \
15 7
返回它的最大深度 3 。
// 主体是个递归的应用
public int maxDepth(TreeNode root) {
// 节点的退出条件之一
if (root == null) {
return 0;
}
int left = 0;
int right = 0;
// 存在左子树,就递归左子树
if (root.left != null) {
left = maxDepth(root.left);
}
// 存在右子树,就递归右子树
if (root.right != null) {
right = maxDepth(root.right);
}
// 前面返回后,左右取大者
return Math.max(left + 1, right + 1);
}
其实对于树这类题,一般是以递归形式比较方便,只是要注意退出条件
]]>Given preorder and inorder traversal of a tree, construct the binary tree.
给定一棵树的前序和中序遍历,构造出一棵二叉树
You may assume that duplicates do not exist in the tree.
你可以假设树中没有重复的元素。(PS: 不然就没法做了呀)
preorder = [3,9,20,15,7]
inorder = [9,3,15,20,7]
返回的二叉树
3
/ \
9 20
/ \
15 7
看到这个题可以想到一个比较常规的解法就是递归拆树,前序就是根左右,中序就是左根右,然后就是通过前序已经确定的根在中序中找到,然后去划分左右子树,这个例子里是 3,找到中序中的位置,那么就可以确定,9 是左子树,15,20,7是右子树,然后对应的可以根据左右子树的元素数量在前序中划分左右子树,再继续递归就行
class Solution {
public TreeNode buildTree(int[] preorder, int[] inorder) {
// 获取下数组长度
int n = preorder.length;
// 排除一下异常和边界
if (n != inorder.length) {
return null;
}
if (n == 0) {
return null;
}
if (n == 1) {
return new TreeNode(preorder[0]);
}
// 获得根节点
TreeNode node = new TreeNode(preorder[0]);
int pos = 0;
// 找到中序中的位置
for (int i = 0; i < inorder.length; i++) {
if (node.val == inorder[i]) {
pos = i;
break;
}
}
// 划分左右再进行递归,注意下`Arrays.copyOfRange`的用法
node.left = buildTree(Arrays.copyOfRange(preorder, 1, pos + 1), Arrays.copyOfRange(inorder, 0, pos));
node.right = buildTree(Arrays.copyOfRange(preorder, pos + 1, n), Arrays.copyOfRange(inorder, pos + 1, n));
return node;
}
}]]>class FooBar {
public void foo() {
for (int i = 0; i < n; i++) {
print("foo");
}
}
public void bar() {
for (int i = 0; i < n; i++) {
print("bar");
}
}
}
The same instance of FooBar will be passed to two different threads:
A will call foo(), whileB will call bar()."foobar" n times.Input: n = 1
Output: “foobar”
Explanation: There are two threads being fired asynchronously. One of them calls foo(), while the other calls bar().
“foobar” is being output 1 time.
Input: n = 2
Output: “foobarfoobar”
Explanation: “foobar” is being output 2 times.
其实用信号量是很直观的,就是让打印 foo 的线程先拥有信号量,打印后就等待,给 bar 信号量 + 1,然后 bar 线程运行打印消耗 bar 信号量,再给 foo 信号量 + 1
class FooBar {
private final Semaphore foo = new Semaphore(1);
private final Semaphore bar = new Semaphore(0);
private int n;
public FooBar(int n) {
this.n = n;
}
public void foo(Runnable printFoo) throws InterruptedException {
for (int i = 0; i < n; i++) {
foo.acquire();
// printFoo.run() outputs "foo". Do not change or remove this line.
printFoo.run();
bar.release();
}
}
public void bar(Runnable printBar) throws InterruptedException {
for (int i = 0; i < n; i++) {
bar.acquire();
// printBar.run() outputs "bar". Do not change or remove this line.
printBar.run();
foo.release();
}
}
}
]]>You are given an array prices where prices[i] is the price of a given stock on the ith day.
You want to maximize your profit by choosing a single day to buy one stock and choosing a different day in the future to sell that stock.
Return the maximum profit you can achieve from this transaction. If you cannot achieve any profit, return 0.
给定一个数组 prices ,它的第 i 个元素 prices[i] 表示一支给定股票第 i 天的价格。
你只能选择 某一天 买入这只股票,并选择在 未来的某一个不同的日子 卖出该股票。设计一个算法来计算你所能获取的最大利润。
返回你可以从这笔交易中获取的最大利润。如果你不能获取任何利润,返回 0 。
其实这个跟二叉树的最长路径和有点类似,需要找到整体的最大收益,但是在迭代过程中需要一个当前的值
int maxSofar = 0;
public int maxProfit(int[] prices) {
if (prices.length <= 1) {
return 0;
}
int maxIn = prices[0];
int maxOut = prices[0];
for (int i = 1; i < prices.length; i++) {
if (maxIn > prices[i]) {
// 当循环当前值小于之前的买入值时就当成买入值,同时卖出也要更新
maxIn = prices[i];
maxOut = prices[i];
}
if (prices[i] > maxOut) {
// 表示一个可卖出点,即比买入值高时
maxOut = prices[i];
// 需要设置一个历史值
maxSofar = Math.max(maxSofar, maxOut - maxIn);
}
}
return maxSofar;
}
一开始看到 easy 就觉得是很简单,就没有 maxSofar ,但是一提交就出现问题了
对于[2, 4, 1]这种就会变成 0,所以还是需要一个历史值来存放历史最大值,这题有点动态规划的意思
A path in a binary tree is a sequence of nodes where each pair of adjacent nodes in the sequence has an edge connecting them. A node can only appear in the sequence at most once. Note that the path does not need to pass through the root.
The path sum of a path is the sum of the node’s values in the path.
Given the root of a binary tree, return the maximum path sum of any path.
路径 被定义为一条从树中任意节点出发,沿父节点-子节点连接,达到任意节点的序列。该路径 至少包含一个 节点,且不一定经过根节点。
路径和 是路径中各节点值的总和。
给你一个二叉树的根节点 root ,返回其 最大路径和
其实这个题目会被误解成比较简单,左子树最大的,或者右子树最大的,或者两边加一下,仔细想想都不对,其实有可能是产生于左子树中,或者右子树中,这两个都是指跟左子树根还有右子树根没关系的,这么说感觉不太容易理解,画个图
可以看到图里,其实最长路径和是左边这个子树组成的,跟根节点还有右子树完全没关系,然后再想一种情况,如果是整棵树就是图中的左子树,那么这个最长路径和就是左子树加右子树加根节点了,所以不是我一开始想得那么简单,在代码实现中也需要一些技巧
int ansNew = Integer.MIN_VALUE;
public int maxPathSum(TreeNode root) {
maxSumNew(root);
return ansNew;
}
public int maxSumNew(TreeNode root) {
if (root == null) {
return 0;
}
// 这里是个简单的递归,就是去递归左右子树,但是这里其实有个概念,当这样处理时,其实相当于把子树的内部的最大路径和已经算出来了
int left = maxSumNew(root.left);
int right = maxSumNew(root.right);
// 这里前面我有点没想明白,但是看到 ansNew 的比较,其实相当于,返回的是三种情况里的最大值,一个是左子树+根,一个是右子树+根,一个是单独根节点,
// 这样这个递归的返回才会有意义,不然像原来的方法,它可能是跳着的,但是这种情况其实是借助于 ansNew 这个全局的最大值,因为原来我觉得要比较的是
// left, right, left + root , right + root, root, left + right + root 这些的最大值,这里是分成了两个阶段,left 跟 right 的最大值已经在上面的
// 调用过程中赋值给 ansNew 了
int currentSum = Math.max(Math.max(root.val + left , root.val + right), root.val);
// 这边返回的是 currentSum,然后再用它跟 left + right + root 进行对比,然后再去更新 ans
// PS: 有个小点也是这边的破局点,就是这个 ansNew
int res = Math.max(left + right + root.val, currentSum);
ans = Math.max(res, ans);
return currentSum;
}
这里非常重要的就是 ansNew 是最后的一个结果,而对于 maxSumNew 这个函数的返回值其实是需要包含了一个连续结果,因为要返回继续去算路径和,所以返回的是 currentSum,最终结果是 ansNew
难得有个 100%,贴个图哈哈
Design a stack that supports push, pop, top, and retrieving the minimum element in constant time.
设计一个栈,支持压栈,出站,获取栈顶元素,通过常数级复杂度获取栈中的最小元素
Example 1:
Input
["MinStack","push","push","push","getMin","pop","top","getMin"]
[[],[-2],[0],[-3],[],[],[],[]]
Output
[null,null,null,null,-3,null,0,-2]
Explanation
MinStack minStack = new MinStack();
minStack.push(-2);
minStack.push(0);
minStack.push(-3);
minStack.getMin(); // return -3
minStack.pop();
minStack.top(); // return 0
minStack.getMin(); // return -2
其实现在大部分语言都自带类栈的数据结构,Java 也自带 stack 这个数据结构,所以这个题的主要难点的就是常数级的获取最小元素,最开始的想法是就一个栈外加一个记录最小值的变量就行了,但是仔细一想是不行的,因为随着元素被 pop 出去,这个最小值也可能需要梗着变化,就不太好判断了,所以后面是用了一个辅助栈。
class MinStack {
// 这个作为主栈
Stack<Integer> s1 = new Stack<>();
// 这个作为辅助栈,放最小值的栈
Stack<Integer> s2 = new Stack<>();
/** initialize your data structure here. */
public MinStack() {
}
public void push(int x) {
// 放入主栈
s1.push(x);
// 当 s2 是空或者当前值是小于"等于" s2 栈顶时,压入辅助最小值的栈
// 注意这里的"等于"非常必要,因为当最小值有多个的情况下,也需要压入栈,否则在 pop 的时候就会不对等
if (s2.isEmpty() || x <= s2.peek()) {
s2.push(x);
}
}
public void pop() {
// 首先就是主栈要 pop,然后就是第二个了,跟上面的"等于"很有关系,
// 因为如果有两个最小值,如果前面等于的情况没有压栈,那这边相等的时候 pop 就会少一个了,可能就导致最小值不对了
int x = s1.pop();
if (x == s2.peek()) {
s2.pop();
}
}
public int top() {
// 栈顶的元素
return s1.peek();
}
public int getMin() {
// 辅助最小栈的栈顶
return s2.peek();
}
}
]]>Given an integer array nums of length n and an integer target, find three integers in nums such that the sum is closest to target.
Return the sum of the three integers.
You may assume that each input would have exactly one solution.
简单解释下就是之前是要三数之和等于目标值,现在是找到最接近的三数之和。
Input: nums = [-1,2,1,-4], target = 1
Output: 2
Explanation: The sum that is closest to the target is 2. (-1 + 2 + 1 = 2).
Input: nums = [0,0,0], target = 1
Output: 0
3 <= nums.length <= 1000-1000 <= nums[i] <= 1000-10^4 <= target <= 10^4这个题思路上来讲不难,也是用原来三数之和的方式去做,利用”双指针法”或者其它描述法,但是需要简化逻辑
public int threeSumClosest(int[] nums, int target) {
Arrays.sort(nums);
// 当前最近的和
int closestSum = nums[0] + nums[1] + nums[nums.length - 1];
for (int i = 0; i < nums.length - 2; i++) {
if (i == 0 || nums[i] != nums[i - 1]) {
// 左指针
int left = i + 1;
// 右指针
int right = nums.length - 1;
// 判断是否遍历完了
while (left < right) {
// 当前的和
int sum = nums[i] + nums[left] + nums[right];
// 小优化,相等就略过了
while (left < right && nums[left] == nums[left + 1]) {
left++;
}
while (left < right && nums[right] == nums[right - 1]) {
right--;
}
// 这里判断,其实也还是希望趋近目标值
if (sum < target) {
left++;
} else {
right--;
}
// 判断是否需要替换
if (Math.abs(sum - target) < Math.abs(closestSum - target)) {
closestSum = sum;
}
}
}
}
return closestSum;
}

写一个程序找出两个单向链表的交叉起始点,可能是我英语不好,图里画的其实还有一点是交叉以后所有节点都是相同的
Write a program to find the node at which the intersection of two singly linked lists begins.
For example, the following two linked lists:
begin to intersect at node c1.

Input: intersectVal = 8, listA = [4,1,8,4,5], listB = [5,6,1,8,4,5], skipA = 2, skipB = 3
Output: Reference of the node with value = 8
Input Explanation: The intersected node's value is 8 (note that this must not be 0 if the two lists intersect). From the head of A, it reads as [4,1,8,4,5]. From the head of B, it reads as [5,6,1,8,4,5]. There are 2 nodes before the intersected node in A; There are 3 nodes before the intersected node in B.
一开始没什么头绪,感觉只能最原始的遍历,后来看了一些文章,发现比较简单的方式就是先找两个链表的长度差,因为从相交点开始肯定是长度一致的,这是个很好的解题突破口,找到长度差以后就是先跳过长链表的较长部分,然后开始同步遍历比较 A,B 链表;
public ListNode getIntersectionNode(ListNode headA, ListNode headB) {
if (headA == null || headB == null) {
return null;
}
// 算 A 的长度
int countA = 0;
ListNode tailA = headA;
while (tailA != null) {
tailA = tailA.next;
countA++;
}
// 算 B 的长度
int countB = 0;
ListNode tailB = headB;
while (tailB != null) {
tailB = tailB.next;
countB++;
}
tailA = headA;
tailB = headB;
// 依据长度差,先让长的链表 tail 指针往后移
if (countA > countB) {
while (countA > countB) {
tailA = tailA.next;
countA--;
}
} else if (countA < countB) {
while (countA < countB) {
tailB = tailB.next;
countB--;
}
}
// 然后以相同速度遍历两个链表比较
while (tailA != null) {
if (tailA == tailB) {
return tailA;
} else {
tailA = tailA.next;
tailB = tailB.next;
}
}
return null;
}
可能缺少这种思维,做的还是比较少,所以没法一下子反应过来,需要锻炼,我的第一反应是两重遍历,不过那样复杂度就高了,这里应该是只有 O(N) 的复杂度。
]]>You are given two non-empty linked lists representing two non-negative integers. The digits are stored in reverse order, and each of their nodes contains a single digit. Add the two numbers and return the sum as a linked list.
You may assume the two numbers do not contain any leading zero, except the number 0 itself.
就是给了两个链表,用来表示两个非负的整数,在链表中倒序放着,每个节点包含一位的数字,把他们加起来以后也按照原来的链表结构输出
Input: l1 = [2,4,3], l2 = [5,6,4]
Output: [7,0,8]
Explanation: 342 + 465 = 807.
Input: l1 = [0], l2 = [0]
Output: [0]
Input: l1 = [9,9,9,9,9,9,9], l2 = [9,9,9,9]
Output: [8,9,9,9,0,0,0,1]
public ListNode addTwoNumbers(ListNode l1, ListNode l2) {
ListNode root = new ListNode();
if (l1 == null && l2 == null) {
return root;
}
ListNode tail = root;
int entered = 0;
// 这个条件加了 entered,就是还有进位的数
while (l1 != null || l2 != null || entered != 0) {
int temp = entered;
if (l1 != null) {
temp += l1.val;
l1 = l1.next;
}
if (l2 != null) {
temp += l2.val;
l2 = l2.next;
}
entered = (temp - temp % 10) / 10;
tail.val = temp % 10;
// 循环内部的控制是为了排除最后的空节点
if (l1 != null || l2 != null || entered != 0) {
tail.next = new ListNode();
tail = tail.next;
}
}
// tail = null;
return root;
}
这里唯二需要注意的就是两个点,一个是循环条件需要包含进位值还存在的情况,还有一个是最后一个节点,如果是空的了,就不要在 new 一个出来了,写的比较挫
]]>年初换了个公司,也算换了个环境,跟前公司不太一样,做的事情方向也不同,可能是侧重点不同,一开始有些不适应,主要是压力上,会觉得压力比较大,但是总体来说与人相处的部分还是不错的,做的技术方向还是Java,这里也感谢前东家让我有机会转了Java,个人感觉杭州整个市场还是Java比较有优势,不过在开始的时候总觉得对Java有点不适应,应该值得深究的东西还是很多的,而且对于面试来说,也是有很多可以问的,后面慢慢发现除开某里等一线超一线互联网公司之外,大部分的面试还是有大概的套路跟大纲的,不过更细致的则因人而异了,面试有时候也还看缘分,面试官关注的点跟应试者比较契合的话就很容易通过面试,不然的话总会有能刁难或者理性化地说比较难回答的问题。这个后面可以单独说一下,先按下不表。
刚进公司没多久就负责比较重要的项目,工期也比较紧张,整体来说那段时间的压力的确是比较大的,不过总算最后结果不坏,这里应该说对一些原来在前东家都是掌握的不太好的部分,比如maven,其实maven对于java程序员来说还是很重要的,但是我碰到过的面试基本没问过这个,我自己也在后面的面试中没问过相关的,不知道咋问,比如dependence分析、冲突解决,比如对bean的理解,这个算是我一直以来的疑问点,因为以前刚开始学Java学spring,上来就是bean,但是bean到底是啥,IOC是啥,可能网上的文章跟大多数书籍跟我的理解思路不太match,导致一直不能很好的理解这玩意,到后面才理解,要理解这个bean,需要有两个基本概念,一个是面向对象,一个是对象容器跟依赖反转,还是只说到这,后面可以有专题说一下,总之自认为技术上有了不小的长进了,方向上应该是偏实用的。这个重要的项目完成后慢慢能喘口气了,后面也有一些比较紧急且工作量大的,不过在我TL的帮助下还是能尽量协调好资源。
后面因为项目比较多,缺少开发,所以也参与帮忙做一些面试,这里总体感觉是面的候选人还是比较多样的,有些工作了蛮多年但是一些基础问题回答的不好,有些还是在校学生,但是面试技巧不错,针对常见的面试题都有不错的准备,不过还是觉得光靠这些面试题不能完全说明问题,真正工作了需要的是解决问题的人,而不是会背题的,退一步来说能好好准备面试还是比较重要的,也是双向选择中的基本尊重,印象比较深刻的是参加了去杭州某高校的校招面试,感觉参加校招的同学还是很多的,大部分是20年将毕业的研究生,挺多都是基础很扎实,对比起我刚要毕业时还是很汗颜,挺多来面试的同学都非常不错,那天强度也很大,从下午到那开始一直面到六七点,在这祝福那些来面试的同学,也都不容易的,能找到心仪的工作。
这一年前大半部分还是比较焦虑不能恢复那种主动找时间学习的状态,可能换了公司是主要的原因,初期有个适应的过程也比较正常,总体来说可能是到九十月份开始慢慢有所改善,对这些方面有学习了下,
住的地方没变化,主要是周边设施比较方便,暂时没找到更好的就没打算换,主要的问题是没电梯,一开始没觉得有啥,真正住起来还是觉得比较累的,希望后面租的可以有电梯,或者楼层低一点,还有就是要通下水道,第一次让师傅上门,花了两百大洋,后来自学成才了,让师傅通了一次才撑了一个月就不行了,后面自己通的差不多可以撑半年,还是比较有成就感的😀,然后就是跑步了,年初的时候去了紫金港跑步,后面因为工作的原因没去了,但是公司的跑步机倒是让我重拾起这个唯一的运动健身项目,后面因为肠胃问题,体重也需要控制,所以就周末回来也在家这边坚持跑步,下半年的话基本保持每周一次以上,比较那些跑马拉松的大牛还是差距很大,不过也是突破自我了,有一次跑了12公里,最远的距离,而且后面感觉跑十公里也不是特别吃不消了,这一年达成了300公里的目标,体重也稍有下降,比较满意的结果。
希望工作方面技术方面能有所长进,生活上能多点时间陪家人,继续跑步减肥,家人健健康康的,嗯
]]>Given a singly linked list, determine if it is a palindrome.
给定一个单向链表,判断是否是回文链表
Input: 1->2
Output: false
Input: 1->2->2->1
Output: true
Follow up:
Could you do it in O(n) time and O(1) space?
首先这是个单向链表,如果是双向的就可以一个从头到尾,一个从尾到头,显然那样就没啥意思了,然后想过要不找到中点,然后用一个栈,把前一半塞进栈里,但是这种其实也比较麻烦,比如长度是奇偶数,然后如何找到中点,这倒是可以借助于双指针,还是比较麻烦,再想一想,回文链表,就跟最开始的一样,链表只有单向的,我用个栈不就可以逆向了么,先把链表整个塞进栈里,然后在一个个 pop 出来跟链表从头开始比较,全对上了就是回文了
/**
* Definition for singly-linked list.
* public class ListNode {
* int val;
* ListNode next;
* ListNode() {}
* ListNode(int val) { this.val = val; }
* ListNode(int val, ListNode next) { this.val = val; this.next = next; }
* }
*/
class Solution {
public boolean isPalindrome(ListNode head) {
if (head == null) {
return true;
}
ListNode tail = head;
LinkedList<Integer> stack = new LinkedList<>();
// 这里就是一个循环,将所有元素依次压入栈
while (tail != null) {
stack.push(tail.val);
tail = tail.next;
}
// 在逐个 pop 出来,其实这个出来的顺序就等于链表从尾到头遍历,同时跟链表从头到尾遍历进行逐对对比
while (!stack.isEmpty()) {
if (stack.peekFirst() == head.val) {
stack.pollFirst();
head = head.next;
} else {
return false;
}
}
return true;
}
}]]>Given a binary tree, find the lowest common ancestor (LCA) of two given nodes in the tree.
According to the definition of LCA on Wikipedia: “The lowest common ancestor is defined between two nodes p and q as the lowest node in T that has both p and q as descendants (where we allow a node to be a descendant of itself).”
给定一个二叉树, 找到该树中两个指定节点的最近公共祖先。
百度百科中最近公共祖先的定义为:“对于有根树 T 的两个节点 p、q,最近公共祖先表示为一个节点 x,满足 x 是 p、q 的祖先且 x 的深度尽可能大(一个节点也可以是它自己的祖先)。”
public TreeNode lowestCommonAncestor(TreeNode root, TreeNode p, TreeNode q) {
// 如果当前节点就是 p 或者是 q 的时候,就直接返回了
// 当没找到,即 root == null 的时候也会返回 null,这是个重要的点
if (root == null || root == p || root == q) return root;
// 在左子树中找 p 和 q
TreeNode left = lowestCommonAncestor(root.left, p, q);
// 在右子树中找 p 和 q
TreeNode right = lowestCommonAncestor(root.right, p, q);
// 当左边是 null 就直接返回右子树,但是这里不表示右边不是 null,所以这个顺序是不影响的
// 考虑一种情况,如果一个节点的左右子树都是 null,那么其实对于这个节点来说首先两个子树分别调用
// lowestCommonAncestor会在开头就返回 null,那么就是上面 left 跟 right 都是 null,然后走下面的判断的时候
// 其实第一个 if 就返回了 null,如此递归返回就能达到当子树中没有找到 p 或者 q 的时候只返回 null
if (left == null) {
return right;
} else if (right == null) {
return left;
} else {
return root;
}
// if (right == null) {
// return left;
// } else if (left == null) {
// return right;
// } else {
// return root;
// }
// return left == null ? right : right == null ? left : root;
}
]]>You are a product manager and currently leading a team to develop a new product. Unfortunately, the latest version of your product fails the quality check. Since each version is developed based on the previous version, all the versions after a bad version are also bad.
Suppose you have n versions [1, 2, ..., n] and you want to find out the first bad one, which causes all the following ones to be bad.
You are given an API bool isBadVersion(version) which returns whether version is bad. Implement a function to find the first bad version. You should minimize the number of calls to the API.
Input: n = 5, bad = 4
Output: 4
Explanation:
call isBadVersion(3) -> false
call isBadVersion(5) -> true
call isBadVersion(4) -> true
Then 4 is the first bad version.
Input: n = 1, bad = 1
Output: 1
简单来说就是一个二分查找,但是这个问题其实处理起来还是需要搞清楚一些边界问题
public int firstBadVersion(int n) {
// 类似于双指针法
int left = 1, right = n, mid;
while (left < right) {
// 取中点
mid = left + (right - left) / 2;
// 如果不是错误版本,就往右找
if (!isBadVersion(mid)) {
left = mid + 1;
} else {
// 如果是的话就往左查找
right = mid;
}
}
// 这里考虑交界情况是,在上面循环中如果 left 是好的,right 是坏的,那进入循环的时候 mid == left
// 然后 left = mid + 1 就会等于 right,循环条件就跳出了,此时 left 就是那个起始的错误点了
// 其实这两个是同一个值
return left;
}
往右移动示例
往左移动示例

Given a string s, find the length of the longest substring without repeating characters.
Input: s = "abcabcbb"
Output: 3
Explanation: The answer is "abc", with the length of 3.
Input: s = "bbbbb"
Output: 1
Explanation: The answer is "b", with the length of 1.
Input: s = "pwwkew"
Output: 3
Explanation: The answer is "wke", with the length of 3.
Notice that the answer must be a substring, "pwke" is a subsequence and not a substring.
Input: s = ""
Output: 0
就是一个最长不重复的字符串长度,因为也是中等难度的题,不太需要特别复杂的思考,最基本的就是O(N*N)两重循环,不过显然不太好,万一超时间,还有一种就是线性复杂度的了,这个就是需要搞定一个思路,比如字符串时 abcdefgaqwrty,比如遍历到第二个a的时候其实不用再从头去遍历了,只要把前面那个a给排除掉,继续往下算就好了
class Solution {
Map<String, Integer> counter = new HashMap<>();
public int lengthOfLongestSubstring(String s) {
int length = s.length();
// 当前的长度
int subStringLength = 0;
// 最长的长度
int maxSubStringLength = 0;
// 考虑到重复的位置已经被跳过的情况,即已经在当前长度的字符串范围之前的重复字符不需要回溯
int lastDuplicatePos = -1;
for (int i = 0; i < length; i++) {
// 使用 map 存储字符和上一次出现的位置,如果存在并且大于上一次重复位置
if (counter.get(String.valueOf(s.charAt(i))) != null && counter.get(String.valueOf(s.charAt(i))) > lastDuplicatePos) {
// 记录重复位置
lastDuplicatePos = counter.get(String.valueOf(s.charAt(i)));
// 重置不重复子串的长度,减去重复起点
subStringLength = i - counter.get(String.valueOf(s.charAt(i))) - 1;
// 替换当前位置
counter.replace(String.valueOf(s.charAt(i)), i);
} else {
// 如果不存在就直接 put
counter.put(String.valueOf(s.charAt(i)), i);
}
// 长度累加
subStringLength++;
if (subStringLength > maxSubStringLength) {
// 简单替换
maxSubStringLength = subStringLength;
}
}
return maxSubStringLength;
}
}
注释应该写的比较清楚了。
]]>Given a 2D grid of size m x n and an integer k. You need to shift the grid k times.
In one shift operation:
Element at grid[i][j] moves to grid[i][j + 1].
Element at grid[i][n - 1] moves to grid[i + 1][0].
Element at grid[m - 1][n - 1] moves to grid[0][0].
Return the 2D grid after applying shift operation k times.
Input: grid = [[1,2,3],[4,5,6],[7,8,9]], k = 1
Output: [[9,1,2],[3,4,5],[6,7,8]]
Input: grid = [[3,8,1,9],[19,7,2,5],[4,6,11,10],[12,0,21,13]], k = 4
Output: [[12,0,21,13],[3,8,1,9],[19,7,2,5],[4,6,11,10]]
Input: grid = [[1,2,3],[4,5,6],[7,8,9]], k = 9
Output: [[1,2,3],[4,5,6],[7,8,9]]
m == grid.lengthn == grid[i].length1 <= m <= 501 <= n <= 50-1000 <= grid[i][j] <= 10000 <= k <= 100这个题主要是矩阵或者说数组的操作,并且题目要返回的是个 List,所以也不用原地操作,只需要找对位置就可以了,k 是多少就相当于让这个二维数组头尾衔接移动 k 个元素
public List<List<Integer>> shiftGrid(int[][] grid, int k) {
// 行数
int m = grid.length;
// 列数
int n = grid[0].length;
// 偏移值,取下模
k = k % (m * n);
// 反向取下数量,因为我打算直接从头填充新的矩阵
/*
* 比如
* 1 2 3
* 4 5 6
* 7 8 9
* 需要变成
* 9 1 2
* 3 4 5
* 6 7 8
* 就要从 9 开始填充
*/
int reverseK = m * n - k;
List<List<Integer>> matrix = new ArrayList<>();
// 这类就是两层循环
for (int i = 0; i < m; i++) {
List<Integer> line = new ArrayList<>();
for (int j = 0; j < n; j++) {
// 数量会随着循环迭代增长, 确认是第几个
int currentNum = reverseK + i * n + (j + 1);
// 这里处理下到达矩阵末尾后减掉 m * n
if (currentNum > m * n) {
currentNum -= m * n;
}
// 根据矩阵列数 n 算出在原来矩阵的位置
int last = (currentNum - 1) % n;
int passLine = (currentNum - 1) / n;
line.add(grid[passLine][last]);
}
matrix.add(line);
}
return matrix;
}

比较慢
Given a string s containing just the characters '(', ')', '{', '}', '[' and ']', determine if the input string is valid.
An input string is valid if:
Input: s = “()”
Output: true
Input: s = “()[]{}”
Output: true
Input: s = “(]”
Output: false
1 <= s.length <= 10^4s consists of parentheses only '()[]{}'.easy题,并且看起来也是比较简单的,三种括号按对匹配,直接用栈来做,栈里面存的是括号的类型,如果是左括号,就放入栈中,如果是右括号,就把栈顶的元素弹出,如果弹出的元素不是左括号,就返回false,如果弹出的元素是左括号,就继续往下走,如果遍历完了,如果栈里面还有元素,就返回false,如果遍历完了,如果栈里面没有元素,就返回true
class Solution {
public boolean isValid(String s) {
if (s.length() % 2 != 0) {
return false;
}
Stack<String> stk = new Stack<>();
for (int i = 0; i < s.length(); i++) {
if (s.charAt(i) == '{' || s.charAt(i) == '(' || s.charAt(i) == '[') {
stk.push(String.valueOf(s.charAt(i)));
continue;
}
if (s.charAt(i) == '}') {
if (stk.isEmpty()) {
return false;
}
String cur = stk.peek();
if (cur.charAt(0) != '{') {
return false;
} else {
stk.pop();
}
continue;
}
if (s.charAt(i) == ']') {
if (stk.isEmpty()) {
return false;
}
String cur = stk.peek();
if (cur.charAt(0) != '[') {
return false;
} else {
stk.pop();
}
continue;
}
if (s.charAt(i) == ')') {
if (stk.isEmpty()) {
return false;
}
String cur = stk.peek();
if (cur.charAt(0) != '(') {
return false;
} else {
stk.pop();
}
continue;
}
}
return stk.size() == 0;
}
}
]]>给定两个数组 nums1 和 nums2 ,返回 它们的交集 。输出结果中的每个元素一定是 唯一 的。我们可以 不考虑输出结果的顺序 。
示例 1:
输入:nums1 = [1,2,2,1], nums2 = [2,2]
输出:[2]
示例 2:
输入:nums1 = [4,9,5], nums2 = [9,4,9,8,4]
输出:[9,4]
解释:[4,9] 也是可通过的
1 <= nums1.length, nums2.length <= 10000 <= nums1[i], nums2[i] <= 1000两个数组的交集,最简单就是两层循环了把两个都存在的找出来,不过还有个要去重的问题,稍微思考下可以使用集合 set 来处理,先把一个数组全丢进去,再对比另外一个,如果出现在第一个集合里就丢进一个新的集合,最后转换成数组,这次我稍微取了个巧,因为看到了提示里的条件,两个数组中的元素都是不大于 1000 的,所以就搞了个 1000 长度的数组,如果在第一个数组出现,就在对应的下标设置成 1,如果在第二个数组也出现了就加 1,
public int[] intersection(int[] nums1, int[] nums2) {
// 大小是 1000 的数组,如果没有提示的条件就没法这么做
// define a array which size is 1000, and can not be done like this without the condition in notice
int[] inter = new int[1000];
int[] outer;
int m = 0;
for (int j : nums1) {
// 这里得是设置成 1,因为有可能 nums1 就出现了重复元素,如果直接++会造成结果重复
// need to be set 1, cause element in nums1 can be duplicated
inter[j] = 1;
}
for (int j : nums2) {
if (inter[j] > 0) {
// 这里可以直接+1,因为后面判断只需要判断大于 1
// just plus 1, cause we can judge with condition that larger than 1
inter[j] += 1;
}
}
for (int i = 0; i < inter.length; i++) {
// 统计下元素数量
// count distinct elements
if (inter[i] > 1) {
m++;
}
}
// initial a array of size m
outer = new int[m];
m = 0;
for (int i = 0; i < inter.length; i++) {
if (inter[i] > 1) {
// add to outer
outer[m++] = i;
}
}
return outer;
}]]>You are given an n x n 2D matrix representing an image, rotate the image by 90 degrees (clockwise).
You have to rotate the image in-place, which means you have to modify the input 2D matrix directly. DO NOT allocate another 2D matrix and do the rotation.
如图,这道题以前做过,其实一看有点蒙,好像规则很容易描述,但是代码很难写,因为要类似于贪吃蛇那样,后来想着应该会有一些特殊的技巧,比如翻转等
直接上码
public void rotate(int[][] matrix) {
// 这里真的傻了,长宽应该是一致的,所以取一次就够了
int lengthX = matrix[0].length;
int lengthY = matrix.length;
int temp;
System.out.println(lengthY - (lengthY % 2) / 2);
// 这里除错了,应该是减掉余数再除 2
// for (int i = 0; i < lengthY - (lengthY % 2) / 2; i++) {
/**
* 1 2 3 7 8 9
* 4 5 6 => 4 5 6 先沿着 4 5 6 上下交换
* 7 8 9 1 2 3
*/
for (int i = 0; i < (lengthY - (lengthY % 2)) / 2; i++) {
for (int j = 0; j < lengthX; j++) {
temp = matrix[i][j];
matrix[i][j] = matrix[lengthY-i-1][j];
matrix[lengthY-i-1][j] = temp;
}
}
/**
* 7 8 9 7 4 1
* 4 5 6 => 8 5 2 这里再沿着 7 5 3 这条对角线交换
* 1 2 3 9 6 3
*/
for (int i = 0; i < lengthX; i++) {
for (int j = 0; j <= i; j++) {
if (i == j) {
continue;
}
temp = matrix[i][j];
matrix[i][j] = matrix[j][i];
matrix[j][i] = temp;
}
}
}
还没到可以直接归纳题目类型的水平,主要是几年前做过,可能有那么点模糊的记忆,当然应该也有直接转的方法
]]>给定两个大小分别为 m 和 n 的正序(从小到大)数组 nums1 和 nums2。请你找出并返回这两个正序数组的 中位数 。
算法的时间复杂度应该为 O(log (m+n)) 。
输入:nums1 = [1,3], nums2 = [2]
输出:2.00000
解释:合并数组 = [1,2,3] ,中位数 2
输入:nums1 = [1,2], nums2 = [3,4]
输出:2.50000
解释:合并数组 = [1,2,3,4] ,中位数 (2 + 3) / 2 = 2.5
这个题也是我随机出来的,之前都是随机到 easy 的,而且是序号这么靠前的,然后翻一下,之前应该是用 C++做过的,具体的方法其实可以从他的算法时间复杂度要求看出来,大概率是要二分法这种,后面就结合代码来讲了
public double findMedianSortedArrays(int[] nums1, int[] nums2) {
int n1 = nums1.length;
int n2 = nums2.length;
if (n1 > n2) {
return findMedianSortedArrays(nums2, nums1);
}
// 找到两个数组的中点下标
int k = (n1 + n2 + 1 ) / 2;
// 使用一个类似于二分法的查找方法
// 起始值就是 num1 的头跟尾
int left = 0;
int right = n1;
while (left < right) {
// m1 表示我取的是 nums1 的中点,即二分法的方式
int m1 = left + (right - left) / 2;
// *** 这里是重点,因为这个问题也可以转换成找成 n1 + n2 那么多个数中的前 (n1 + n2 + 1) / 2 个
// *** 因为两个数组都是排好序的,那么我从 num1 中取了 m1 个,从 num2 中就是去 k - m1 个
// *** 但是不知道取出来大小是否正好是整体排序的第 (n1 + n2 + 1) / 2 个,所以需要二分法上下对比
int m2 = k - m1;
// 如果 nums1[m1] 小,那我在第一个数组 nums1 的二分查找就要把左端点改成前一次的中点 + 1 (不然就进死循环了
if (nums1[m1] < nums2[m2 - 1]) {
left = m1 + 1;
} else {
right = m1;
}
}
// 因为对比后其实我们只是拿到了一个位置,具体哪个是第 k 个就需要继续判断
int m1 = left;
int m2 = k - left;
// 如果 m1 或者 m2 有小于等于 0 的,那这个值可以先抛弃
// m1 如果等于 0,就是 num1[0] 都比 nums2 中所有值都要大
// m2 等于 0 的话 刚好相反
// 可以这么推断,当其中一个是 0 的时候那么另一个 mx 值肯定是> 0 的,那么就是取的对应的这个下标的值
int c1 = Math.max( m1 <= 0 ? Integer.MIN_VALUE : nums1[m1 - 1] , m2 <= 0 ? Integer.MIN_VALUE : nums2[m2 - 1]);
// 如果两个数组的元素数量和是奇数,那就直接可以返回了,因为 m1 + m2 就是 k, 如果是一个数组,那这个元素其实就是 nums[k - 1]
// 如果 m1 或者 m2 是 0,那另一个就是 k,取 mx - 1的下标就等于是 k - 1
// 如果都不是 0,那就是取的了 nums1[m1 - 1] 与 nums2[m2 - 1]中的较大者,如果取得是后者,那么也就是 m1 + m2 - 1 的下标就是 k - 1
if ((n1 + n2) % 2 == 1) {
return c1;
}
// 如果是偶数个,那还要取两个数组后面的较小者,然后求平均值
int c2 = Math.min(m1 >= n1 ? Integer.MAX_VALUE : nums1[m1], m2 >= n2 ? Integer.MAX_VALUE : nums2[m2]);
return (c1 + c2) / 2.0;
}
前面考虑的方法还是比较繁琐,考虑了两个数组的各种交叉情况,后面这个参考了一些网上的解法,代码比较简洁,但是可能不容易一下子就搞明白,所以配合了比较多的注释。
]]>给定一个已排序的链表的头 head , 删除所有重复的元素,使每个元素只出现一次 。返回 已排序的链表 。
PS:注意已排序,还有返回也要已排序

输入:head = [1,1,2]
输出:[1,2]

输入:head = [1,1,2,3,3]
输出:[1,2,3]
[0, 300] 内-100 <= Node.val <= 100这题其实是比较正常的 easy 级别的题目,链表已经排好序了,如果还带一个排序就更复杂一点,
只需要前后项做个对比,如果一致则移除后项,因为可能存在多个重复项,所以只有在前后项不同
时才会更新被比较项
public ListNode deleteDuplicates(ListNode head) {
// 链表头是空的或者只有一个头结点,就不用处理了
if (head == null || head.next == null) {
return head;
}
ListNode tail = head;
// 以处理节点还有后续节点作为循环边界条件
while (tail.next != null) {
ListNode temp = tail.next;
// 如果前后相同,那么可以跳过这个节点,将 Tail ----> temp ---> temp.next
// 更新成 Tail ----> temp.next
if (temp.val == tail.val) {
tail.next = temp.next;
} else {
// 不相同,则更新 tail
tail = tail.next;
}
}
// 最后返回头结点
return head;
}
链表应该是个需要反复的训练的数据结构,因为涉及到前后指针,然后更新操作,判空等,
我在这块也是掌握的不太好,需要多练习。
Given a string, find the length of the longest substring without repeating characters.
For example, the longest substring without repeating letters for “abcabcbb” is “abc”,
which the length is 3. For “bbbbb” the longest substring is “b”, with the length of 1.
源码这次是参考了这个代码,
tail 表示的当前子串的起始点位置,tail从-1开始就包括的串的长度是1的边界。其实我
也是猜的(逃
int ct[256];
memset(ct, -1, sizeof(ct));
int tail = -1;
int max = 0;
for (int i = 0; i < s.size(); i++){
if (ct[s[i]] > tail)
tail = ct[s[i]];
if (i - tail > max)
max = i - tail;
ct[s[i]] = i;
}
return max;
]]>譬如
grep 'xxx' xxxx.log
然后有挺多情况比如想要找日志里带一些符号什么的,就需要用到一些特殊的
比如这样\"userId\":\"123456\",因为比如用户 ID 有时候会跟其他的 id 一样,只用具体的值 123456 来查的话干扰信息太多了,如果直接这样
grep '\"userId\":\"123456\"' xxxx.log
好像不行,盲猜就是符号的问题,特别是\和"这两个,
之前一直是想试一下,但是没成功,昨天在排查一个问题的时候发现了,只要把这些都转义了就行了
grep '\\\"userId\\\":\\\"123456\\\"' xxxx.log

void CTestDialog::OnBnClickedOk()
{
CString m_SrcTest;
int nIndex = m_CbTest.GetCurSel();
m_CbTest.GetLBText(nIndex, m_SrcTest);
OnOK();
}
模态对话框弹出确定后,在弹出对话框时新建的类及其变量会存在,但是对于其中的控件
对象无法调用函数,即如果要在主对话框中获得弹出对话框的Combo box选中值的话,需
要在弹出 对话框的确定函数内将其值取出,赋值给弹出对话框的公有变量,这样就可以
在主对话框类得到值。
Maven 是一个项目管理工具,可以对 Java 项目进行构建、依赖管理。
Maven 也可被用于构建和管理各种项目,例如 C#,Ruby,Scala 和其他语言编写的项目。Maven 曾是 Jakarta 项目的子项目,现为由 Apache 软件基金会主持的独立 Apache 项目。
maven也是我们日常项目中实用的包管理工具,相比以前需要用把包下载下来,放进 lib 中,在平时工作中使用的话,其实像 idea 这样的 ide 工具都会自带 maven 工具和插件
mvn -vmvn compilemvn testmvn packagemvn cleanmvn installmvn deploy因为我也是个 PHP 程序员,所以对比一下两种语言,很容易想到在 PHP 的 composer 跟 Java 的 maven 是比较类似的作用,有一点两者是非常相似的,就是原仓库都是因为某些原因连接拉取都会很慢,所以像 composer 会有一些国内源,前阵子阿里也出了一个,类似的 maven 一般也会使用阿里的镜像仓库,通过在 setting.xml 文件中的设置
<mirrors>
<mirror>
<id>aliyun</id>
<name>aliyun maven</name>
<url>http://maven.aliyun.com/nexus/content/groups/public/</url>
<mirrorOf>central</mirrorOf>
</mirror>
</mirrors>
这算是个尴尬的共同点,然后因为 PHP 是解释型脚本语言,所以 php 打出来的 composer 包其实就是个 php 代码包,使用SPL Autoload等方式加载代码包,maven 包则是经过编译的 class 包,还有一点是 composer 也可以直接使用 github 地址作为包代码的拉取源,这点也是比较大的区别,maven使用 pom 文件管理依赖
mvn compile加个-U参数,如果还不行就需要将本地仓库的 snapshot 删掉,mvn dependency:tree分析下依赖关系,如果要找具体某个包的依赖引用关系可以使用mvn dependency:tree -Dverbose -Dincludes=org.springframework:spring-webmvc命令进行分析,如果发现有冲突的依赖关系,本身 maven 中依赖引用有相对的顺序,大致来说是引用路径短的优先,pom 文件中定义的顺序优先,如果要把冲突的包排除掉可以在 pom 中用<exclusions>
<exclusion>
<groupId>ch.qos.logback</groupId>
<artifactId>logback-classic</artifactId>
</exclusion>
</exclusions>
将冲突的包排除掉mvn -v可以查看 maven 的安装信息Apache Maven 3.6.3 (cecedd343002696d0abb50b32b541b8a6ba2883f)
Maven home: /usr/local/Cellar/maven/3.6.3_1/libexec
Java version: 1.8.0_201, vendor: Oracle Corporation, runtime: /Library/Java/JavaVirtualMachines/jdk1.8.0_201.jdk/Contents/Home/jre
Default locale: zh_CN, platform encoding: UTF-8
OS name: "mac os x", version: "10.14.6", arch: "x86_64", family: "mac"
这里可以看到用了 mac 自带的 jdk1.8,结合我之前碰到的一个问题,因为使用 homebrew 升级了 gradle,而 gradle 又依赖了 jdk13,因为这个 mvn 的 Java version 也变成 jdk13 了,然后 mvn 编译的时候出现了 java.lang.ExceptionInInitializerError: com.sun.tools.javac.code.TypeTags这个问题,所以需要把这个版本给改回来,但是咋改呢,网上搜来的一大堆都是在 pom 文件里的<build>
<plugins>
<plugin>
<groupId>org.apache.maven.plugins</groupId>
<artifactId>maven-compiler-plugin</artifactId>
<configuration>
<source>1.8</source>
<target>1.8</target>
<encoding>UTF-8</encoding>
</configuration>
</plugin>
</plugins>
<build>
或者修改 maven 的 setting.xml中的<profiles>
<profile>
<id>ngmm-nexus</id>
<activation>
<jdk>1.8</jdk>
</activation>
<properties>
<maven.compiler.source>1.8</maven.compiler.source>
<maven.compiler.target>1.8</maven.compiler.target>
<maven.compiler.compilerVersion>1.8</maven.compiler.compilerVersion>
</properties>
</profile>
</profiles>
但是这些都没啥用啊,真正有办法的是建个 .mavenrc,这个顾名思义就是 maven 的资源文件,类似于 .bashrc和.zshrc,在里面添加 MAVEN_HOME 和 JAVA_HOME,然后执行 source .mavenrc就 OK 啦00000000000000000000000000001011, so the function should return 3.从1位到2位到4位逐步的交换
int hammingWeight(uint32_t n) {
const uint32_t m1 = 0x55555555; //binary: 0101...
const uint32_t m2 = 0x33333333; //binary: 00110011..
const uint32_t m4 = 0x0f0f0f0f; //binary: 4 zeros, 4 ones ...
const uint32_t m8 = 0x00ff00ff; //binary: 8 zeros, 8 ones ...
const uint32_t m16 = 0x0000ffff; //binary: 16 zeros, 16 ones ...
n = (n & m1 ) + ((n >> 1) & m1 ); //put count of each 2 bits into those 2 bits
n = (n & m2 ) + ((n >> 2) & m2 ); //put count of each 4 bits into those 4 bits
n = (n & m4 ) + ((n >> 4) & m4 ); //put count of each 8 bits into those 8 bits
n = (n & m8 ) + ((n >> 8) & m8 ); //put count of each 16 bits into those 16 bits
n = (n & m16) + ((n >> 16) & m16); //put count of each 32 bits into those 32 bits
return n;
}]]>Given a binary tree and a sum, determine if the tree has a root-to-leaf path such that adding up all the values along the path equals the given sum.
For example:
Given the below binary tree and sum = 22,
5
/ \
4 8
/ / \
11 13 4
/ \ \
7 2 1
return true, as there exist a root-to-leaf path 5->4->11->2 which sum is 22.
using simple deep first search
/*
Definition for binary tree
struct TreeNode {
int val;
TreeNode *left;
TreeNode *right;
TreeNode(int x) : val(x), left(NULL), right(NULL)}
};
*/
class Solution {
public:
bool deep_first_search(TreeNode *node, int sum, int curSum)
{
if (node == NULL)
return false;
if (node->left == NULL && node->right == NULL)
return curSum + node->val == sum;
return deep_first_search(node->left, sum, curSum + node->val) || deep_first_search(node->right, sum, curSum + node->val);
}
bool hasPathSum(TreeNode *root, int sum) {
// Start typing your C/C++ solution below
// DO NOT write int main() function
return deep_first_search(root, sum, 0);
}
};
]]>redis 分布式锁 redlock 的实现,简单记录下,
原先我对 redis 锁的概念就是加锁使用 setnx,解锁使用 lua 脚本,但是 setnx 具体是啥,lua 脚本是啥不是很清楚
首先简单思考下这个问题,首先为啥不是先 get 一下 key 存不存在,然后再 set 一个 key value,因为加锁这个操作我们是要保证两点,一个是不能中途被打断,也就是说要原子性,如果是先 get 一下 key,如果不存在再 set 值的话,那就不是原子操作了;第二个是可不可以直接 set 值呢,显然不行,锁要保证唯一性,有且只能有一个线程或者其他应用单位获得该锁,正好 setnx 给了我们这种原子命令
然后是 setnx 的键和值分别是啥,键比较容易想到是要锁住的资源,比如 user_id, 这里有个我自己之前比较容易陷进去的误区,但是这个误区后
面再说,这里其实是把user_id 作为要锁住的资源,在我获得锁的时候别的线程不允许操作,以此保证业务的正确性,不会被多个线程同时修改,确定了键,再来看看值是啥,其实原先我认为值是啥都没关系,我只要锁住了,光键就够我用了,但是考虑下多个线程的问题,如果我这个线程加了锁,然后我因为 gc 停顿等原因卡死了,这个时候redis 的锁或者说就是 redis 的缓存已经过期了,这时候另一个线程获得锁成功,然后我这个线程又活过来了,然后我就仍然认为我拿着锁,我去对数据进行修改或者释放锁,是不是就出现问题了,所以是不是我们还需要一个东西来区分这个锁是哪个线程加的,所以我们可以将值设置成为一个线程独有识别的值,至少在相对长的一段时间内不会重复。
上面其实还有两个问题,一个是当 gc 超时时,我这个线程如何知道我手里的锁已经过期了,一种方法是我在加好锁之后就维护一个超时时间,这里其实还有个问题,不过跟第二个问题相关,就一起说了,就是设置超时时间,有些对于不是锁的 redis 缓存操作可以是先设置好值,然后在设置过期时间,那么这就又有上面说到的不是原子性的问题,那么就需要在同一条指令里把超时时间也设置了,幸好 redis 提供了这种支持
SET resource_name my_random_value NX PX 30000
这里借鉴一下解释下,resource_name就是 key,代表要锁住的东西,my_random_value就是识别我这个线程的,NX代表只有在不存在的时候才设置,然后PX 30000表示超时时间是 30秒自动过期
PS:记录下我原先有的一个误区,是不是要用 key 来区分加锁的线程,这样只有一个用处,就是自身线程可以识别是否是自己加的锁,但是最大的问题是别的线程不知道,其实这个用户的出发点是我在担心前面提过的一个问题,就是当 gc 停顿后,我要去判断当前的这个锁是否是我加的,还有就是当释放锁的时候,如果保证不会错误释放了其他线程加的锁,但是这样附带很多其他问题,最大的就是其他线程怎么知道能不能加这个锁。
当线程在锁过期之前就处理完了业务逻辑,那就可以提前释放这个锁,那么提前释放要怎么操作,直接del key显然是不行的,因为这样就是我前面想用线程随机值加资源名作为锁的初衷,我不能去释放别的线程加的锁,那么我要怎么办呢,先 get 一下看是不是我的?那又变成非原子的操作了,幸好redis 也考虑到了这个问题,给了lua 脚本来操作这种
if redis.call("get",KEYS[1]) == ARGV[1] then
return redis.call("del",KEYS[1])
else
return 0
end
这里的KEYS[1]就是前面加锁的resource_name,ARGV[1]就是线程的随机值my_random_value
前面说的其实是单节点 redis 作为分布式锁的情况,那么当我们的 redis 有多节点的情况呢,如果多节点下处于加锁或者解锁或者锁有效情况下redis 的某个节点宕掉了怎么办,这里就有一些需要思考的地方,是否单独搞一个单节点的 redis作为分布式锁专用的,但是如果这个单节点的挂了呢,还有就是成本问题,所以我们需要一个多节点的分布式锁方案
这里就引出了开头说到的redlock,这个可是 redis的作者写的, 他的加锁过程是分以下几步去做这个事情
For example, given input 43261596 (represented in binary as 00000010100101000001111010011100), return 964176192 (represented in binary as 00111001011110000010100101000000).
Follow up:
If this function is called many times, how would you optimize it?
class Solution {
public:
uint32_t reverseBits(uint32_t n) {
n = ((n >> 1) & 0x55555555) | ((n & 0x55555555) << 1);
n = ((n >> 2) & 0x33333333) | ((n & 0x33333333) << 2);
n = ((n >> 4) & 0x0f0f0f0f) | ((n & 0x0f0f0f0f) << 4);
n = ((n >> 8) & 0x00ff00ff) | ((n & 0x00ff00ff) << 8);
n = ((n >> 16) & 0x0000ffff) | ((n & 0x0000ffff) << 16);
return n;
}
};
]]>Example1: x = 123, return 321
Example2: x = -123, return -321
Have you thought about this?
Here are some good questions to ask before coding. Bonus points for you if you have already thought through this!
If the integer’s last digit is 0, what should the output be? ie, cases such as 10, 100.
Did you notice that the reversed integer might overflow? Assume the input is a 32-bit integer, then the reverse of 1000000003 overflows. How should you handle such cases?
For the purpose of this problem, assume that your function returns 0 when the reversed integer overflows.
class Solution {
public:
int reverse(int x) {
int max = 1 << 31 - 1;
int ret = 0;
max = (max - 1) * 2 + 1;
int min = 1 << 31;
if(x < 0)
while(x != 0){
if(ret < (min - x % 10) / 10)
return 0;
ret = ret * 10 + x % 10;
x = x / 10;
}
else
while(x != 0){
if(ret > (max -x % 10) / 10)
return 0;
ret = ret * 10 + x % 10;
x = x / 10;
}
return ret;
}
};
]]>Given an array of integers, find two numbers such that they add up to a specific target number.
The function twoSum should return indices of the two numbers such that they add up to the target, where index1 must be less than index2. Please note that your returned answers (both index1 and index2) are not zero-based.
You may assume that each input would have exactly one solution.
Input: numbers={2, 7, 11, 15}, target=9
Output: index1=1, index2=2
struct Node
{
int num, pos;
};
bool cmp(Node a, Node b)
{
return a.num < b.num;
}
class Solution {
public:
vector<int> twoSum(vector<int> &numbers, int target) {
// Start typing your C/C++ solution below
// DO NOT write int main() function
vector<int> result;
vector<Node> array;
for (int i = 0; i < numbers.size(); i++)
{
Node temp;
temp.num = numbers[i];
temp.pos = i;
array.push_back(temp);
}
sort(array.begin(), array.end(), cmp);
for (int i = 0, j = array.size() - 1; i != j;)
{
int sum = array[i].num + array[j].num;
if (sum == target)
{
if (array[i].pos < array[j].pos)
{
result.push_back(array[i].pos + 1);
result.push_back(array[j].pos + 1);
} else
{
result.push_back(array[j].pos + 1);
result.push_back(array[i].pos + 1);
}
break;
} else if (sum < target)
{
i++;
} else if (sum > target)
{
j--;
}
}
return result;
}
};
sort the array, then test from head and end, until catch the right answer
]]>ambari是一个大数据平台的管理工具,包含了hadoop, yarn, hive, hbase, spark等大数据的基础架构和工具,简化了数据平台的搭建,之前只是在同事搭建好平台后的一些使用,这次有机会从头开始用ambari来搭建一个测试的数据平台,过程中也踩到不少坑,简单记录下。
/etc/yum.repos.d/路径下,然后yum update && yum install ambari-server安装即可,如果有条件就用proxychains走下代理。ambari-server setup做一些初始化设置,其中包含了JDK路径的设置,数据库设置,设置好就OK了,然后执行ambari-server start启动服务,这里有个小插曲,因为ambari-server涉及到这么多服务,所以管理控制监控之类的模块是必不可少的,这部分可以在ambari-server的web ui界面安装,也可以命令行提前安装,这部分被称为HDF Management Pack,运行ambari-server install-mpack \ --mpack=http://public-repo-1.hortonworks.com/HDF/centos7/2.x/updates/2.1.4.0/tars/hdf_ambari_mp/hdf-ambari-mpack-2.1.4.0-5.tar.gz \ --purge \ --verboseambari-serverA binary watch has 4 LEDs on the top which represent the hours (0-11), and the 6 LEDs on the bottom represent the minutes (0-59).
Each LED represents a zero or one, with the least significant bit on the right.

For example, the above binary watch reads “3:25”.
Given a non-negative integer n which represents the number of LEDs that are currently on, return all possible times the watch could represent.
Input: n = 1
Return: ["1:00", "2:00", "4:00", "8:00", "0:01", "0:02", "0:04", "0:08", "0:16", "0:32"]
又是参(chao)考(xi)别人的代码,嗯,就是这么不要脸,链接
class Solution {
public:
vector<string> readBinaryWatch(int num) {
vector<string> res;
for (int h = 0; h < 12; ++h) {
for (int m = 0; m < 60; ++m) {
if (bitset<10>((h << 6) + m).count() == num) {
res.push_back(to_string(h) + (m < 10 ? ":0" : ":") + to_string(m));
}
}
}
return res;
}
};]]>基于docker搭了个mysql集群,稍微记一下,
首先是新建mysql主库容
docker run -d -e MYSQL_ROOT_PASSWORD=admin --name mysql-master -p 3307:3306 mysql:latest-d表示容器运行在后台,-e表示设置环境变量,即MYSQL_ROOT_PASSWORD=admin,设置了mysql的root密码,--name表示容器名,-p表示端口映射,将内部mysql:3306映射为外部的3307,最后的mysql:latest表示镜像名
此外还可以用-v /local_path/my-master.cnf:/etc/mysql/my.cnf来映射配置文件
然后同理启动从库docker run -d -e MYSQL_ROOT_PASSWORD=admin --name mysql-slave -p 3308:3306 mysql:latest
然后进入主库改下配置文件docker-enter mysql-master如果无法进入就用docker ps -a看下容器是否在正常运行,如果status显示
未正常运行,则用docker logs mysql-master看下日志哪里出错了。
进入容器后,我这边使用的镜像的mysqld配置文件是在/etc/mysql下面,这个最新版本的mysql的配置文件包含
三部分,/etc/mysql/my.cnf和/etc/mysql/conf.d/mysql.cnf,还有/etc/mysql/mysql.conf.d/mysqld.cnf
这里需要改的是最后一个,加上
log-bin = mysql-bin
server_id = 1
保存后退出容器重启主库容器,然后进入从库更改相同文件,
log-bin = mysql-bin
server_id = 2
同样退出重启容器,然后是配置主从,首先进入主库,用命令mysql -u root -pxxxx进入mysql,然后赋予一个同步
权限GRANT REPLICATION SLAVE ON *.* to 'backup'@'%' identified by '123456';还是同样说明下,ON *.*表示了数
据库全部的权限,如果要指定数据库/表的话可以使用类似testDb/testTable,然后是'backup'@'%'表示给予同步
权限的用户名及其主机ip,%表示不限制ip,当然如果有防火墙的话还是会有限制的,最后的identified by '123456'
表示同步用户的密码,然后就查看下主库的状态信息show master status,如下图:![9G5FE[9%@7%G(B`Q7]E)5@R.png](https://ooo.0o0.ooo/2016/08/10/57aac43029559.png)
把file跟position记下来,然后再开一个terminal,进入从库容器,登陆mysql,然后设置主库
change master to
master_host='xxx.xxx.xxx.xxx', //如果主从库的容器都在同一个宿主机上,这里的ip是docker容器的ip
master_user='backup', //就是上面的赋予权限的用户
master_password='123456',
master_log_file='mysql-bin.000004', //主库中查看到的file
master_log_pos=312, //主库中查看到的position
master_port=3306; //如果是同一宿主机,这里使用真实的3306端口,3308及主库的3307是给外部连接使用的
通过docker-ip mysql-master可以查看容器的ip
这里有一点是要注意的,也是我踩的坑,就是如果是同一宿主机下两个mysql容器互联,我这里只能通过docker-ip和真实
的3306端口能够连接成功。
本文参考了这位同学的文章
docker最开始是之前在某位大佬的博客看到的,看上去有点神奇,感觉是一种轻量级的虚拟机,但是能做的事情好像差不多,那时候是在Ubuntu系统的vps里起一个Ubuntu的docker,然后在里面装个nginx,配置端口映射就可以访问了,后来也草草写过一篇使用docker搭建mysql集群,但是最近看了下好像是因为装docker的大佬做了一些别名还是什么操作,导致里面用的操作都不具有普遍性,而且主要是把搭的过程写了下,属于囫囵吞枣,没理解docker是干啥的,为啥用docker,就是操作了下,这几天借着搭phabricator的过程,把一些原来不理解,或者原来理解错误的地方重新理一下。
之前写的 mysql 集群,一主二备,这种架构在很多小型应用里都是这么配置的,而且一般是直接在三台 vps 里启动三个 mysql 实例,但是如果换成 docker 会有什么好处呢,其实就是方便部署,比如其中一台备库挂了,我要加一台,或者说备库的 qps 太高了,需要再加一个,如果要在 vps 上搭建的话,首先要买一台机器,等初始化,然后在上面修改源,更新,装 mysql ,然后配置主从,可能还要处理防火墙等等,如果把这些打包成一个 docker 镜像,并且放在自己的 docker registry,那就直接run 一下就可以了;还有比如在公司要给一个新同学整一套开发测试环境,以 Java 开发为例,要装 git,maven,jdk,配置 maven settings 和各种 rc,整合在一个镜像里的话,就会很方便了;再比如微服务的水平扩展。
但是为啥 docker 会有这种优势,听起来好像虚拟机也可以干这个事,但是虚拟机动辄上 G,而且需要 VMware,virtual box 等支持,不适合在Linux服务器环境使用,而且占用资源也会非常大。说得这么好,那么 docker 是啥呢
docker 主要使用 Linux 中已经存在的两种技术的一个整合升级,一个是 namespace,一个是cgroups,相比于虚拟机需要完整虚拟出一个操作系统运行基础,docker 基于宿主机内核,通过 namespace 和 cgroups 分隔进程,理念就是提供一个隔离的最小化运行依赖,这样子相对于虚拟机就有了巨大的便利性,具体的 namespace 和 cgroups 就先不展开讲,可以参考耗子叔的文章
那么我们先安装下 docker,参考官方的教程,安装,我的系统是 ubuntu 的,就贴了 ubuntu 的链接,用其他系统的可以找到对应的系统文档安装,安装完了的话看看 docker 的信息
sudo docker info
输出以下信息
然后再来运行个 hello world 呗,
sudo docker run hello-world
输出了这些
看看这个运行命令是怎么用的,一般都会看到这样子的,sudo docker run -it ubuntu bash, 前面的 docker run 反正就是运行一个容器的意思,-it是啥呢,还有这个什么 ubuntu bash,来看看docker run`的命令帮助信息
-i, --interactive Keep STDIN open even if not attached
就是要有输入,我们运行的时候能输入
-t, --tty Allocate a pseudo-TTY
要有个虚拟终端,
Usage: docker run [OPTIONS] IMAGE [COMMAND] [ARG...]
Run a command in a new container
上面说的-it 就是这里的 options,后面那个 ubuntu 就是 image 辣,image 是啥呢
Docker 把应用程序及其依赖,打包在 image 文件里面,可以把它理解成为类似于虚拟机的镜像或者运行一个进程的代码,跑起来了的叫docker 容器或者进程,比如我们将要运行的docker run -it ubuntu bash的ubuntu 就是个 ubuntu 容器的镜像,将这个镜像运行起来后,我们可以进入容器像使用 ubuntu 一样使用它,来看下我们的镜像,使用sudo docker image ls就能列出我们宿主机上的 docker 镜像了

一个 ubuntu 镜像才 64MB,非常小巧,然后是后面的bash,我通过交互式启动了一个 ubuntu 容器,然后在这个启动的容器里运行了 bash 命令,这样就可以在容器里玩一下了

只有刚才运行容器的 bash 进程和我刚执行的 ps,这里有个可以注意下的,bash 这个进程的 pid 是 1,其实这里就用到了 linux 中的PID Namespace,容器会隔离出一个 pid 的名字空间,这里面的进程跟外部的 pid 命名独立
sudo docker ps -a

这个应该是比较常用的,因为比如是一个微服务容器,有时候就像看下运行状态,日志啥的
sudo docker exec -it [containerID] bash

sudo docker logs [containerID]
我在运行容器的终端里胡乱输入点啥,然后通过上面的命令就可以看到啦


上一篇的 Dockerfile 我们停留在构建阶段,现在来把它跑起来
docker run -d -p 80 --name static_web nicksxs/static_web \
nginx -g "daemon off;"
这里的-d表示以分离模型运行docker (detached),然后-p 是表示将容器的 80 端口开放给宿主机,然后容器名就叫 static_web,使用了我们上次构建的 static_web 镜像,后面的是让 nginx 在前台运行
可以看到返回了个容器 id,但是具体情况没出现,也没连上去,那我们想看看怎么访问在 Dockerfile 里写的静态页面,我们来看下docker 进程
发现为我们随机分配了一个宿主机的端口,32768,去服务器的防火墙把这个外网端口开一下,看看是不是符合我们的预期呢
好像不太对额,应该是 ubuntu 安装的 nginx 的默认工作目录不对,我们来进容器看看,再熟悉下命令docker exec -it 4792455ca2ed /bin/bash
记得容器 id 换成自己的,进入容器后得找找 nginx 的配置文件,通常在/etc/nginx,/usr/local/etc等目录下,然后找到我们的目录是在这
所以把刚才的内容复制过去再试试
目标达成,give me five✌️
然后就想来动态一点的,毕竟写过 PHP,就来试试 PHP
再建一个目录叫 dynamic_web,里面创建 src 目录,放一个 index.php
内容是
<?php
echo "Hello World!";
然后在 dynamic_web 目录下创建 Dockerfile,
FROM trafex/alpine-nginx-php7:latest
COPY src/ /var/www/html
EXPOSE 80
Dockerfile 虽然只有三行,不过要着重说明下,这个底包其实不是docker 官方的,有两点考虑,一点是官方的基本都是 php apache 的镜像,还有就是 alpine这个,截取一段中文介绍
Alpine 操作系统是一个面向安全的轻型 Linux 发行版。它不同于通常 Linux 发行版,Alpine 采用了 musl libc 和 busybox 以减小系统的体积和运行时资源消耗,但功能上比 busybox 又完善的多,因此得到开源社区越来越多的青睐。在保持瘦身的同时,Alpine 还提供了自己的包管理工具 apk,可以通过 https://pkgs.alpinelinux.org/packages 网站上查询包信息,也可以直接通过 apk 命令直接查询和安装各种软件。
Alpine 由非商业组织维护的,支持广泛场景的 Linux发行版,它特别为资深/重度Linux用户而优化,关注安全,性能和资源效能。Alpine 镜像可以适用于更多常用场景,并且是一个优秀的可以适用于生产的基础系统/环境。
Alpine Docker 镜像也继承了 Alpine Linux 发行版的这些优势。相比于其他 Docker 镜像,它的容量非常小,仅仅只有 5 MB 左右(对比 Ubuntu 系列镜像接近 200 MB),且拥有非常友好的包管理机制。官方镜像来自 docker-alpine 项目。
目前 Docker 官方已开始推荐使用 Alpine 替代之前的 Ubuntu 做为基础镜像环境。这样会带来多个好处。包括镜像下载速度加快,镜像安全性提高,主机之间的切换更方便,占用更少磁盘空间等。
一方面在没有镜像的情况下,拉取 docker 镜像还是比较费力的,第二个就是也能节省硬盘空间,所以目前有大部分的 docker 镜像都将 alpine 作为基础镜像了
然后再来构建下
这里还有个点,就是上面的那个镜像我们也是 EXPOSE 80端口,然后外部宿主机会随机映射一个端口,为了偷个懒,我们就直接指定外部端口了docker run -d -p 80:80 dynamic_web打开浏览器发现访问不了,咋回事呢
因为我们没看trafex/alpine-nginx-php7:latest这个镜像说明,它内部的服务是 8080 端口的,所以我们映射的暴露端口应该是 8080,再用 docker run -d -p 80:8080 dynamic_web这个启动,
这里我们开始玩一点有意思的,我们在容器里装下 vim 和 gcc,然后写这样一段 c 代码
#include <stdio.h>
int main(void)
{
int i = 0;
for(;;) i++;
return 0;
}
就是一个最简单的死循环,然后在容器里跑起来
$ gcc 1.c
$ ./a.out
然后我们来看下系统资源占用(CPU)
上图是在容器里的,可以看到 cpu 已经 100%了
然后看看容器外面的
可以看到一个核的 cpu 也被占满了,因为是个双核的机器,并且代码是单线程的
然后呢我们要做点啥
因为已经在这个 ubuntu 容器中装了 vim 和 gcc,考虑到国内的网络,所以我们先把这个容器 commit 一下,
docker commit -a "nick" -m "my ubuntu" f63c5607df06 my_ubuntu:v1
然后再运行起来
docker run -it --cpus=0.1 my_ubuntu:v1 bash

我们的代码跟可执行文件都还在,要的就是这个效果,然后再运行一下
结果是这个样子的,有点神奇是不,关键就在于 run 的时候的--cpus=0.1这个参数,它其实就是基于我前一篇说的 cgroup 技术,能将进程之间的cpu,内存等资源进行隔离
上一面为了复用那个我装了 vim 跟 gcc 的容器,我把它提交到了本地,使用了docker commit命令,有点类似于 git 的 commit,但是这个不是个很好的操作方式,需要手动介入,这里更推荐使用 Dockerfile 来构建镜像
From ubuntu:latest
MAINTAINER Nicksxs "nicksxs@hotmail.com"
RUN sed -i s@/archive.ubuntu.com/@/mirrors.aliyun.com/@g /etc/apt/sources.list
RUN apt-get clean
RUN apt-get update && apt install -y nginx
RUN echo 'Hi, i am in container' \
> /usr/share/nginx/html/index.html
EXPOSE 80
先解释下这是在干嘛,首先是这个From ubuntu:latest基于的 ubuntu 的最新版本的镜像,然后第二行是维护人的信息,第三四行么作为墙内人你懂的,把 ubuntu 的源换成阿里云的,不然就有的等了,然后就是装下 nginx,往默认的 nginx 的入口 html 文件里输入一行欢迎语,然后暴露 80 端口
然后我们使用sudo docker build -t="nicksxs/static_web" .命令来基于这个 Dockerfile 构建我们自己的镜像,过程中是这样的

可以看到图中,我的 Dockerfile 是 7 行,里面就执行了 7 步,并且每一步都有一个类似于容器 id 的层 id 出来,这里就是一个比较重要的东西,docker 在构建的时候其实是有这个层的概念,Dockerfile 里的每一行都会往上加一层,这里有还注意下命令后面的.,代表当前目录下会自行去寻找 Dockerfile 进行构建,构建完了之后我们再看下我们的本地镜像
我们自己的镜像出现啦
然后有个问题,如果这个构建中途报了错咋办呢,来试试看,我们把 nginx 改成随便的一个错误名,nginxx(不知道会不会运气好真的有这玩意),再来 build 一把
找不到 nginxx 包,是不是这个镜像就完全不能用呢,当然也不是,因为前面说到了,docker 是基于层去构建的,可以看到前面的 4 个 step 都没报错,那我们基于最后的成功步骤创建下容器看看
也就是sudo docker run -t -i bd26f991b6c8 /bin/bash
答案是可以的,只是没装成功 nginx
还有一点注意到没,前面的几个 step 都有一句 Using cache,说明 docker 在构建镜像的时候是有缓存的,这也更能说明 docker 是基于层去构建镜像,同样的底包,同样的步骤,这些层是可以被复用的,这就是 docker 的构建缓存,当然我们也可以在 build 的时候加上--no-cache去把构建缓存禁用掉。
最近做 docker 系列,会经常需要进到 docker 内部,如上一篇介绍的,这些镜像一般都有用 ubuntu 或者alpine 这样的 Linux 系统作为底包,如果构建镜像的时候没有替换源的话,因为特殊的网络原因,在内部想编辑下东西要安装个类似于 vim 这样的编辑器就会很慢很慢,像视频里 two thousand years later~ 而且如果在容器内部想改源配置的话也要编辑器,就陷入了一个鸡生蛋,跟蛋生鸡的死锁问题中,对于 linux 大神来说应该有一万种方法解决这个问题,对于我这个渣渣来说可能只想到了这个土方法,先 cp backup 一下 sources.list, 再 echo “xxx” > sources.list, 这里就碰到了一个问题,这个 sources.list 一般不止一行,直接 echo 的话就解析不了了,不过 echo 可以支持”\n”转义,就是加-e看一下解释和示例,我这里使用了 tldr ,可以用 npm install -g tldr 安装,也可以直接用man, 或者–help 来查看使用方式
还有一点也是在这个时候要安装 vim 之类的,得知道是什么镜像底包,如果是用 uname 指令,其实看到的是宿主机的系统,得用cat /etc/issue

这里稍稍记一下
目前国内系统源用得比较多的是阿里云源,不过这里也推荐清华源, 中科大源, 浙大源 这里不要脸的推荐下母校的源,不过还不是很完善,尽情期待下。
]]><dependency>
<groupId>org.apache.curator</groupId>
<artifactId>curator-client</artifactId>
<version>${curator.version}</version>
</dependency>
<dependency>
<groupId>org.apache.curator</groupId>
<artifactId>curator-recipes</artifactId>
<version>${curator.version}</version>
</dependency>
有个别应用用的是这个
<dependency>
<groupId>com.101tec</groupId>
<artifactId>zkclient</artifactId>
<version>0.11</version>
</dependency>
还有的应用是找不到相关的依赖,并且这些的使用没有个比较好的说明,为啥用前者,为啥用后者,有啥注意点,
首先在使用 2.6.5 的 alibaba 的 dubbo 的时候,只使用后者是会报错的,至于为啥会报错,其实就是这篇文章想说明的点
报错的内容其实很简单, 就是缺少这个 org.apache.curator.framework.CuratorFrameworkFactory 类
这个类看着像是依赖上面的配置,但是应该不需要两个配置一块用的,所以还是需要去看代码
通过找上面类被依赖的和 dubbo 连接注册中心相关的代码,看到了这段指点迷津的代码
@SPI("curator")
public interface ZookeeperTransporter {
@Adaptive({Constants.CLIENT_KEY, Constants.TRANSPORTER_KEY})
ZookeeperClient connect(URL url);
}
众所周知,dubbo 创造了叫自适应扩展点加载的神奇技术,这里的 adaptive 注解中的Constants.CLIENT_KEY 和 Constants.TRANSPORTER_KEY 可以在配置 dubbo 的注册信息的时候进行配置,如果是通过 xml 配置的话,可以在 <dubbo:registry/> 这个 tag 中的以上两个 key 进行配置,
具体在 dubbo.xsd 中有描述
<xsd:element name="registry" type="registryType">
<xsd:annotation>
<xsd:documentation><![CDATA[ The registry config ]]></xsd:documentation>
</xsd:annotation>
</xsd:element>

并且在 spi 的配置com.alibaba.dubbo.remoting.zookeeper.ZookeeperTransporter 中可以看到
zkclient=com.alibaba.dubbo.remoting.zookeeper.zkclient.ZkclientZookeeperTransporter
curator=com.alibaba.dubbo.remoting.zookeeper.curator.CuratorZookeeperTransporter
zkclient=com.alibaba.dubbo.remoting.zookeeper.zkclient.ZkclientZookeeperTransporter
curator=com.alibaba.dubbo.remoting.zookeeper.curator.CuratorZookeeperTransporter
zkclient=com.alibaba.dubbo.remoting.zookeeper.zkclient.ZkclientZookeeperTransporter
curator=com.alibaba.dubbo.remoting.zookeeper.curator.CuratorZookeeperTransporter
而在上面的代码里默认的SPI 值是 curator,所以如果不配置,那就会报上面找不到类的问题,所以如果需要使用 zkclient 的,就需要在<dubbo:registry/> 配置中添加 client="zkclient"这个配置,所以有些地方还是需要懂一些更深层次的原理,但也不至于每个东西都要抠到每一行代码原理,除非就是专门做这一块的。
还有一点是发现有些应用是碰运气,刚好有个三方包把这个类带进来了,但是这个应用就没有单独配置这块,如果不了解或者后续忘了再来查问题就会很奇怪
webhook 的配置,需要的两个文件,一个是 hooks.json,这个是 webhook 服务的配置文件,像这样
[
{
"id": "redeploy-app",
"execute-command": "/opt/scripts/redeploy.sh",
"command-working-directory": "/opt/scripts",
"pass-arguments-to-command":
[
{
"source": "payload",
"name": "head_commit.message"
},
{
"source": "payload",
"name": "pusher.name"
},
{
"source": "payload",
"name": "head_commit.id"
}
],
"trigger-rule":
{
"and":
[
{
"match":
{
"type": "payload-hash-sha1",
"secret": "your-github-secret",
"parameter":
{
"source": "header",
"name": "X-Hub-Signature"
}
}
},
{
"match":
{
"type": "value",
"value": "refs/heads/master",
"parameter":
{
"source": "payload",
"name": "ref"
}
}
}
]
}
}
]
这是个跟 github搭配的示例,首先 id 表示的是这个对应 hook 的识别 id,也可以看到这个 hooks.json 的结构是这样的一个数组,然后就是要执行的命令和命令执行的参数,值得注意的是这个trigger-rule,就是请求进来了回去匹配里面的,比如前一个是一个加密的,放在请求头里,第二个 match 表示请求里的 ref 是个 master 分支,就可以区分分支进行不同操作,但是前面的加密配合 gogs 使用的时候有个问题(PS: webhook 的文档是真的烂),gogs 设置 webhook 的加密是用的
密钥文本将被用于计算推送内容的 SHA256 HMAC 哈希值,并设置为
X-Gogs-Signature请求头的值。
这种加密方式,所以 webhook 的这个示例的加密方式不行,但这货的文档里居然没有说明支持哪些加密,神TM,后来还是翻 issue 翻到了, 需要使用这个payload-hash-sha256
脚本类似于这样
#!/bin/bash -e
function cleanup {
echo "Error occoured"
}
trap cleanup ERR
commit_message=$1 # head_commit.message
pusher_name=$2 # pusher.name
commit_id=$3 # head_commit.id
cd ~/do-react-example-app/
git pull origin master
yarn && yarn build
就是简单的拉代码,然后构建下,真实使用时可能不是这样,因为页面会部署在 nginx 的作用目录,还需要 rsync 过去,这部分可能还涉及到两个问题第一个是使用 rsync 还是其他的 cp,不过这个无所谓;第二个是目录权限的问题,以我的系统ubuntu 为例,默认用户是 ubuntu,nginx 部署的目录是 www,所以需要切换用户等操作,一开始是想用在shell 文件中直接写了密码,但是不知道咋传,查了下是类似于这样 echo "passwd" | sudo -S cmd,通过管道命令往后传,然后就是这个-S, 参数的解释是-S, --stdin read password from standard input,但是这样么也不是太安全的赶脚,又看了下还有两种方法,
就是给root 设置一个不需要密码的命令类似于这样,
myusername ALL = (ALL) ALL
myusername ALL = (root) NOPASSWD: /path/to/my/program
另一种就是把默认用户跟 root 设置成同一个 group 的
真正实操的时候其实还有不少问题,首先运行 webhook 就碰到了我前面说的,使用 snap 运行的时候会找不到前面的 hooks.json配置文件,执行snap run webhook -hooks /opt/hooks/hooks.json -verbose就碰到下面的couldn't load hooks from file! open /opt/hooks/hooks.json: no such file or directory,后来直接下了个官方最新的 release,就直接执行 webhook -hooks /opt/hooks/hooks.json -verbose 就可以了,然后是前面的示例配置文件里的几个参数,比如head_commit.message 其实 gogs 推过来的根本没这玩意,而且都是数组,不知道咋取,烂文档,不过总比搭个 drone 好一点就忍了。补充一点就是在 debug 的时候需要看下问题出在哪,看看脚本有没有执行,所以需要在前面的 json 里加这个参数"include-command-output-in-response": true, 就能输出来脚本执行结果
4
/ \
2 7
/ \ / \
1 3 6 9
to
4
/ \
7 2
/ \ / \
9 6 3 1
Trivia:
This problem was inspired by this original tweet by Max Howell:
Google: 90% of our engineers use the software you wrote (Homebrew),
but you can’t invert a binary tree on a whiteboard so fuck off.
/**
* Definition for a binary tree node.
* struct TreeNode {
* int val;
* TreeNode *left;
* TreeNode *right;
* TreeNode(int x) : val(x), left(NULL), right(NULL) {}
* };
*/
class Solution {
public:
TreeNode* invertTree(TreeNode* root) {
if(root == NULL) return root;
TreeNode* temp;
temp = invertTree(root->left);
root->left = invertTree(root->right);
root->right = temp;
return root;
}
};]]><dubbo:registry address="zookeeper://127.0.0.1:2181" register="false" />
就是只要 register="false" 就可以了,这样比如我们在开发环境想运行服务,但又不想让开发环境正常的请求调用到本地来,当然这不是唯一的方式,通过 dubbo 2.7 以上的 tag 路由也可以实现或者自行改造拉取和注册服务的逻辑,因为注册到注册中心的其实是一串带参数的 url,还是比较方便改造的。相反的就是只注册,不拉取
<dubbo:registry address="zookeeper://127.0.0.1:2181" subscribe="false" />
这个使用场景就是如果我这个服务只作为 provider,没有任何调用其他的服务,其实就可以这么设置
<dubbo:provider loadbalance="random" weight="50"/>
首先这是在使用了随机的负载均衡策略的时候可以进行配置,并且是对于多个 provider 的情况下,这样其实也可以部分解决上面的只拉取不注册的问题,我把自己的权重调成 0 或者很低
]]>Given an array of n positive integers and a positive integer s, find the minimal length of a subarray of which the sum ≥ s. If there isn’t one, return 0 instead.
For example, given the array [2,3,1,2,4,3] and s = 7,
the subarray [4,3] has the minimal length under the problem constraint.
参考,滑动窗口,跟之前Data Structure课上的online算法有点像,链接
class Solution {
public:
int minSubArrayLen(int s, vector<int>& nums) {
int len = nums.size();
if(len == 0) return 0;
int minlen = INT_MAX;
int sum = 0;
int left = 0;
int right = -1;
while(right < len)
{
while(sum < s && right < len)
sum += nums[++right];
if(sum >= s)
{
minlen = minlen < right - left + 1 ? minlen : right - left + 1;
sum -= nums[left++];
}
}
return minlen > len ? 0 : minlen;
}
};
]]>在C++中,应该是从C语言就开始了,除了void型指针之外都是需要有分配对应的内存才可以使用,同时malloc与free成对使用,new与delete成对使用,否则造成内存泄漏。
]]>闲扯这么多来说说 mybatis 的缓存,mybatis 一般作为一个轻量级的 orm 使用,相对应的就是比较重量级的 hibernate,不过不在这次讨论范围,上一次是主要讲了 mybatis 在解析 sql 过程中,对于两种占位符的不同替换实现策略,这次主要聊下 mybatis 的缓存,前面其实得了解下前置的东西,比如 sqlsession,先当做我们知道 sqlsession 是个什么玩意,可能或多或少的知道 mybatis 是有两级缓存,
第一级的缓存是在 BaseExecutor 中的 PerpetualCache,它是个最基本的缓存实现类,使用了 HashMap 实现缓存功能,代码其实没几十行
public class PerpetualCache implements Cache {
private final String id;
private final Map<Object, Object> cache = new HashMap<>();
public PerpetualCache(String id) {
this.id = id;
}
@Override
public String getId() {
return id;
}
@Override
public int getSize() {
return cache.size();
}
@Override
public void putObject(Object key, Object value) {
cache.put(key, value);
}
@Override
public Object getObject(Object key) {
return cache.get(key);
}
@Override
public Object removeObject(Object key) {
return cache.remove(key);
}
@Override
public void clear() {
cache.clear();
}
@Override
public boolean equals(Object o) {
if (getId() == null) {
throw new CacheException("Cache instances require an ID.");
}
if (this == o) {
return true;
}
if (!(o instanceof Cache)) {
return false;
}
Cache otherCache = (Cache) o;
return getId().equals(otherCache.getId());
}
@Override
public int hashCode() {
if (getId() == null) {
throw new CacheException("Cache instances require an ID.");
}
return getId().hashCode();
}
}
可以看一下BaseExecutor 的构造函数
protected BaseExecutor(Configuration configuration, Transaction transaction) {
this.transaction = transaction;
this.deferredLoads = new ConcurrentLinkedQueue<>();
this.localCache = new PerpetualCache("LocalCache");
this.localOutputParameterCache = new PerpetualCache("LocalOutputParameterCache");
this.closed = false;
this.configuration = configuration;
this.wrapper = this;
}
就是把 PerpetualCache 作为 localCache,然后怎么使用我看简单看一下,BaseExecutor 的查询首先是调用这个函数
@Override
public <E> List<E> query(MappedStatement ms, Object parameter, RowBounds rowBounds, ResultHandler resultHandler) throws SQLException {
BoundSql boundSql = ms.getBoundSql(parameter);
CacheKey key = createCacheKey(ms, parameter, rowBounds, boundSql);
return query(ms, parameter, rowBounds, resultHandler, key, boundSql);
}
可以看到首先是调用了 createCacheKey 方法,这个方法呢,先不看怎么写的,如果我们自己要实现这么个缓存,首先这个缓存 key 的设计也是个问题,如果是以表名加主键作为 key,那么分页查询,或者没有主键的时候就不行,来看看 mybatis 是怎么设计的
@Override
public CacheKey createCacheKey(MappedStatement ms, Object parameterObject, RowBounds rowBounds, BoundSql boundSql) {
if (closed) {
throw new ExecutorException("Executor was closed.");
}
CacheKey cacheKey = new CacheKey();
cacheKey.update(ms.getId());
cacheKey.update(rowBounds.getOffset());
cacheKey.update(rowBounds.getLimit());
cacheKey.update(boundSql.getSql());
List<ParameterMapping> parameterMappings = boundSql.getParameterMappings();
TypeHandlerRegistry typeHandlerRegistry = ms.getConfiguration().getTypeHandlerRegistry();
// mimic DefaultParameterHandler logic
for (ParameterMapping parameterMapping : parameterMappings) {
if (parameterMapping.getMode() != ParameterMode.OUT) {
Object value;
String propertyName = parameterMapping.getProperty();
if (boundSql.hasAdditionalParameter(propertyName)) {
value = boundSql.getAdditionalParameter(propertyName);
} else if (parameterObject == null) {
value = null;
} else if (typeHandlerRegistry.hasTypeHandler(parameterObject.getClass())) {
value = parameterObject;
} else {
MetaObject metaObject = configuration.newMetaObject(parameterObject);
value = metaObject.getValue(propertyName);
}
cacheKey.update(value);
}
}
if (configuration.getEnvironment() != null) {
// issue #176
cacheKey.update(configuration.getEnvironment().getId());
}
return cacheKey;
}
首先需要 id,这个 id 是 mapper 里方法的 id, 然后是偏移量跟返回行数,再就是 sql,然后是参数,基本上是会有影响的都加进去了,在这个 update 里面
public void update(Object object) {
int baseHashCode = object == null ? 1 : ArrayUtil.hashCode(object);
count++;
checksum += baseHashCode;
baseHashCode *= count;
hashcode = multiplier * hashcode + baseHashCode;
updateList.add(object);
}
其实是一个 hash 转换,具体不纠结,就是提高特异性,然后回来就是继续调用 query
@Override
public <E> List<E> query(MappedStatement ms, Object parameter, RowBounds rowBounds, ResultHandler resultHandler, CacheKey key, BoundSql boundSql) throws SQLException {
ErrorContext.instance().resource(ms.getResource()).activity("executing a query").object(ms.getId());
if (closed) {
throw new ExecutorException("Executor was closed.");
}
if (queryStack == 0 && ms.isFlushCacheRequired()) {
clearLocalCache();
}
List<E> list;
try {
queryStack++;
list = resultHandler == null ? (List<E>) localCache.getObject(key) : null;
if (list != null) {
handleLocallyCachedOutputParameters(ms, key, parameter, boundSql);
} else {
list = queryFromDatabase(ms, parameter, rowBounds, resultHandler, key, boundSql);
}
} finally {
queryStack--;
}
if (queryStack == 0) {
for (DeferredLoad deferredLoad : deferredLoads) {
deferredLoad.load();
}
// issue #601
deferredLoads.clear();
if (configuration.getLocalCacheScope() == LocalCacheScope.STATEMENT) {
// issue #482
clearLocalCache();
}
}
return list;
}
可以看到是先从 localCache 里取,取不到再 queryFromDatabase,其实比较简单,这是一级缓存,考虑到 sqlsession 跟 BaseExecutor 的关系,其实是随着 sqlsession 来保证这个缓存不会出现脏数据幻读的情况,当然事务相关的后面可能再单独聊。
其实这个一级二级顺序有点反过来,其实查询的是先走的二级缓存,当然二级的需要配置开启,默认不开,
需要通过
<setting name="cacheEnabled" value="true"/>
来开启,然后我们的查询就会走到
public class CachingExecutor implements Executor {
private final Executor delegate;
private final TransactionalCacheManager tcm = new TransactionalCacheManager();
这个 Executor 中,这里我放了类里面的元素,发现没有一个 Cache 类,这就是一个特点了,往下看查询过程
@Override
public <E> List<E> query(MappedStatement ms, Object parameterObject, RowBounds rowBounds, ResultHandler resultHandler) throws SQLException {
BoundSql boundSql = ms.getBoundSql(parameterObject);
CacheKey key = createCacheKey(ms, parameterObject, rowBounds, boundSql);
return query(ms, parameterObject, rowBounds, resultHandler, key, boundSql);
}
@Override
public <E> List<E> query(MappedStatement ms, Object parameterObject, RowBounds rowBounds, ResultHandler resultHandler, CacheKey key, BoundSql boundSql)
throws SQLException {
Cache cache = ms.getCache();
if (cache != null) {
flushCacheIfRequired(ms);
if (ms.isUseCache() && resultHandler == null) {
ensureNoOutParams(ms, boundSql);
@SuppressWarnings("unchecked")
List<E> list = (List<E>) tcm.getObject(cache, key);
if (list == null) {
list = delegate.query(ms, parameterObject, rowBounds, resultHandler, key, boundSql);
tcm.putObject(cache, key, list); // issue #578 and #116
}
return list;
}
}
return delegate.query(ms, parameterObject, rowBounds, resultHandler, key, boundSql);
}
看到没,其实缓存是从 tcm 这个成员变量里取,而这个是什么呢,事务性缓存(直译下),因为这个其实是用 MappedStatement 里的 Cache 作为key 从 tcm 的 map 取出来的
public class TransactionalCacheManager {
private final Map<Cache, TransactionalCache> transactionalCaches = new HashMap<>();
MappedStatement是被全局使用的,所以其实二级缓存是跟着 mapper 的 namespace 走的,可以被多个 CachingExecutor 获取到,就会出现线程安全问题,线程安全问题可以用SynchronizedCache来解决,就是加锁,但是对于事务中的脏读,使用了TransactionalCache来解决这个问题,
public class TransactionalCache implements Cache {
private static final Log log = LogFactory.getLog(TransactionalCache.class);
private final Cache delegate;
private boolean clearOnCommit;
private final Map<Object, Object> entriesToAddOnCommit;
private final Set<Object> entriesMissedInCache;
在事务还没提交的时候,会把中间状态的数据放在 entriesToAddOnCommit 中,只有在提交后会放进共享缓存中,
public void commit() {
if (clearOnCommit) {
delegate.clear();
}
flushPendingEntries();
reset();
}]]>select * from t1 where id = #{id}这样的 sql,在初始化扫描 mapper 的xml文件的时候会根据是否是 dynamic 来判断生成 DynamicSqlSource 还是 RawSqlSource,这里它是一条 RawSqlSource,#{}替换成了?// org.apache.ibatis.scripting.xmltags.XMLScriptBuilder#parseScriptNode
public SqlSource parseScriptNode() {
MixedSqlNode rootSqlNode = parseDynamicTags(context);
SqlSource sqlSource;
if (isDynamic) {
sqlSource = new DynamicSqlSource(configuration, rootSqlNode);
} else {
sqlSource = new RawSqlSource(configuration, rootSqlNode, parameterType);
}
return sqlSource;
}
// org.apache.ibatis.scripting.xmltags.XMLScriptBuilder#parseDynamicTags
protected MixedSqlNode parseDynamicTags(XNode node) {
List<SqlNode> contents = new ArrayList<>();
NodeList children = node.getNode().getChildNodes();
for (int i = 0; i < children.getLength(); i++) {
XNode child = node.newXNode(children.item(i));
if (child.getNode().getNodeType() == Node.CDATA_SECTION_NODE || child.getNode().getNodeType() == Node.TEXT_NODE) {
String data = child.getStringBody("");
TextSqlNode textSqlNode = new TextSqlNode(data);
if (textSqlNode.isDynamic()) {
contents.add(textSqlNode);
isDynamic = true;
} else {
contents.add(new StaticTextSqlNode(data));
}
} else if (child.getNode().getNodeType() == Node.ELEMENT_NODE) { // issue #628
String nodeName = child.getNode().getNodeName();
NodeHandler handler = nodeHandlerMap.get(nodeName);
if (handler == null) {
throw new BuilderException("Unknown element <" + nodeName + "> in SQL statement.");
}
handler.handleNode(child, contents);
isDynamic = true;
}
}
return new MixedSqlNode(contents);
}
// org.apache.ibatis.scripting.xmltags.TextSqlNode#isDynamic
public boolean isDynamic() {
DynamicCheckerTokenParser checker = new DynamicCheckerTokenParser();
GenericTokenParser parser = createParser(checker);
parser.parse(text);
return checker.isDynamic();
}
private GenericTokenParser createParser(TokenHandler handler) {
return new GenericTokenParser("${", "}", handler);
}
可以看到其中一个条件就是是否有${}这种占位符,假如说上面的 sql 换成 ${},那么可以看到它会在这里创建一个 dynamicSqlSource,
// org.apache.ibatis.scripting.xmltags.DynamicSqlSource
public class DynamicSqlSource implements SqlSource {
private final Configuration configuration;
private final SqlNode rootSqlNode;
public DynamicSqlSource(Configuration configuration, SqlNode rootSqlNode) {
this.configuration = configuration;
this.rootSqlNode = rootSqlNode;
}
@Override
public BoundSql getBoundSql(Object parameterObject) {
DynamicContext context = new DynamicContext(configuration, parameterObject);
rootSqlNode.apply(context);
SqlSourceBuilder sqlSourceParser = new SqlSourceBuilder(configuration);
Class<?> parameterType = parameterObject == null ? Object.class : parameterObject.getClass();
SqlSource sqlSource = sqlSourceParser.parse(context.getSql(), parameterType, context.getBindings());
BoundSql boundSql = sqlSource.getBoundSql(parameterObject);
context.getBindings().forEach(boundSql::setAdditionalParameter);
return boundSql;
}
}
这里眼尖的同学可能就可以看出来了,RawSqlSource 在初始化的时候已经经过了 parse,把#{}替换成了?占位符,但是 DynamicSqlSource 并没有
再看这个图,我们发现在这的时候还没有进行替换
然后往里跟
好像是这里了
这里 rootSqlNode.apply 其实是一个对原来 sql 的解析结果的一个循环调用,不同类型的标签会构成不同的 node,像这里就是一个 textSqlNode
可以发现到这我们的 sql 已经被替换了,而且是直接作为 string 类型替换的,所以可以明白了这个问题所在,就是注入,不过细心的同学发现其实这里是有个
理论上还是可以做过滤的,不过好像现在没用起来。
我们前面可以发现对于#{}是在启动扫描 mapper的 xml 文件就替换成了 ?,然后是在什么时候变成实际的值的呢
发现到这的时候还是没有替换,其实说白了也就是 prepareStatement 那一套,
在这里进行替换,会拿到 org.apache.ibatis.mapping.ParameterMapping,然后进行替换,因为会带着类型信息,所以不用担心注入咯
默认的格式是预定义的 combined
log_format combined '$remote_addr - $remote_user [$time_local] '
'"$request" $status $body_bytes_sent '
'"$http_referer" "$http_user_agent"';
配置的日志可以使用这个默认的,如果满足需求的话
Syntax: access_log path [format [buffer=size] [gzip[=level]] [flush=time] [if=condition]];
access_log off;
Default: access_log logs/access.log combined;
Context: http, server, location, if in location, limit_except
而如果需要额外的一些配置的话可以自己定义 log_format ,比如我想要给日志里加上请求时间,那就可以自己定义一个 log_format 比如添加下
$request_time
request processing time in seconds with a milliseconds resolution;
time elapsed between the first bytes were read from the client and the log write after the last bytes were sent to the client
log_format combined_extend '$remote_addr - $remote_user [$time_local] '
'"$request" $status $body_bytes_sent '
'"$http_referer" "$http_user_agent" "$request_time"';
然后其他的比如还有 gzip 压缩,可以设置压缩级别,flush 刷盘时间还有根据条件控制
这里的条件控制简单看了下还比较厉害
比如我想对2xx 跟 3xx 的访问不记录日志
map $status $loggable {
~^[23] 0;
default 1;
}
access_log /path/to/access.log combined if=$loggable;
当 $loggable 是 0 或者空时表示 if 条件为否,上面的默认就是 1,只有当请求状态 status 是 2xx 或 3xx 时才是 0,代表不用记录,有了这个特性就可以更灵活地配置日志
文章主要参考了 nginx 的 log 模块的文档
]]>首先是日志error_log logs/error.log debug;
需要nginx开启日志的debug才能看到日志
使用 lua_code_cache off即可, 另外注意只有使用 content_by_lua_file 才会生效
http {
lua_code_cache off;
}
location ~* /(\d+-.*)/api/orgunits/load_all(.*) {
default_type 'application/json;charset=utf-8';
content_by_lua_file /data/projects/xxx/current/lua/controller/load_data.lua;
}
使用lua给nginx请求response头添加内容可以用这个
ngx.header['response'] = 'header'
后续:
一开始在本地环境的时候使用content_by_lua_file只关注了头,后来发到测试环境发现请求内容都没代理转发到后端服务上
网上查了下发现content_by_lua_file是将请求的所有内容包括response都用这里面的lua脚本生成了,content这个词就表示是请求内容
后来改成了access_by_lua_file就正常了,只是要去获取请求内容和修改响应头,并不是要完整的接管请求
后来又碰到了一个坑是nginx有个client_body_buffer_size的配置参数,nginx在32位和64位系统里有8K和16K两个默认值,当请求内容大于这两个值的时候,会把请求内容放到临时文件里,这个时候openresty里的ngx.req.get_post_args()就会报“failed to get post args: requesty body in temp file not supported”这个错误,将client_body_buffer_size这个参数配置调大一点就好了
还有就是lua的异常捕获,网上看一般是用pcall和xpcall来进行保护调用,因为问题主要出在cjson的decode,这里有两个解决方案,一个就是将cjson.decode使用pcall封装,
local decode = require("cjson").decode
function json_decode( str )
local ok, t = pcall(decode, str)
if not ok then
return nil
end
return t
end
这个是使用了pcall,称为保护调用,会在内部错误后返回两个参数,第一个是false,第二个是错误信息
还有一种是使用cjson.safe包
local json = require("cjson.safe")
local str = [[ {"key:"value"} ]]
local t = json.decode(str)
if t then
ngx.say(" --> ", type(t))
end
cjson.safe包会在解析失败的时候返回nil
还有一个是redis链接时如果host使用的是域名的话会提示“failed to connect: no resolver defined to resolve “redis.xxxxxx.com””,这里需要使用nginx的resolver指令,
resolver 8.8.8.8 valid=3600s;
还有一点补充下
就是业务在使用redis的时候使用了db的特性,所以在lua访问redis的时候也需要执行db,这里lua的redis库也支持了这个特性,可以使用instance:select(config:get(‘db’))来切换db
发现一个不错的openresty站点
地址
Perl Compatible Regular Expressions (PCRE) is a regular
expression C library inspired by the regular expression
capabilities in the Perl programming language, written
by Philip Hazel, starting in summer 1997.
因为最近工作内容的一部分需要做字符串的识别处理,所以就顺便用上了之前在PHP中用过的正则,在C/C++中本身不包含正则库,这里使用的pcre,对MFC开发,在这里提供了静态链接库,在引入lib跟.h文件后即可使用。
然后是一些正则语法,官方的语法文档比较科学严谨,特别是对类似于贪婪匹配等细节的说明,当然一般的使用可以在网上找到很多匹配语法,例如这个。
pcre_compile
原型:
#include <pcre.h>
pcre *pcre_compile(const char *pattern, int options, const char **errptr, int *erroffset, const unsigned char *tableptr);
功能:将一个正则表达式编译成一个内部表示,在匹配多个字符串时,可以加速匹配。其同pcre_compile2功能一样只是缺少一个参数errorcodeptr。
参数:pattern 正则表达式options 为0,或者其他参数选项errptr 出错消息erroffset 出错位置tableptr 指向一个字符数组的指针,可以设置为空NULL
pcre_exec
原型:
#include <pcre.h>
int pcre_exec(const pcre *code, const pcre_extra *extra, const char *subject, int length, int startoffset, int options, int *ovector, int ovecsize)
功能:使用编译好的模式进行匹配,采用与Perl相似的算法,返回匹配串的偏移位置。
参数:code 编译好的模式extra 指向一个pcre_extra结构体,可以为NULLsubject 需要匹配的字符串length 匹配的字符串长度(Byte)startoffset 匹配的开始位置options 选项位ovector 指向一个结果的整型数组ovecsize 数组大小。
这里是两个最常用的函数的简单说明,pcre的静态库提供了一系列的函数以供使用,可以参考这个博客说明,另外对于以上函数的具体参数详细说明可以参考官网此处
void COcxDemoDlg::pcre_exec_all(const pcre * re, PCRE_SPTR src, vector<pair<int, int>> &vc)
{
int rc;
int ovector[30];
int i = 0;
pair<int, int> pr;
rc = pcre_exec(re, NULL, src, strlen(src), i, 0, ovector, 30);
for (; rc > 0;)
{
i = ovector[1];
pr.first = ovector[2];
pr.second = ovector[3];
vc.push_back(pr);
rc = pcre_exec(re, NULL, src, strlen(src), i, 0, ovector, 30);
}
}
vector中是全文匹配后的索引对,只是简单地用下。
]]><?php
interface int1{
const INTER1 = 111;
function inter1();
}
interface int2{
const INTER1 = 222;
function inter2();
}
abstract class abst1{
public function abstr1(){
echo 1111;
}
abstract function abstra1(){
echo 'ahahahha';
}
}
abstract class abst2{
public function abstr2(){
echo 1111;
}
abstract function abstra2();
}
class normal1 extends abst1{
protected function abstr2(){
echo 222;
}
}
PHP Fatal error: Abstract function abst1::abstra1() cannot contain body in new.php on line 17
Fatal error: Abstract function abst1::abstra1() cannot contain body in php on line 17
]]>接触了一下rabbitmq,原来在选型的时候是在rabbitmq跟kafka之间做选择,网上搜了一下之后发现kafka的优势在于吞吐量,而rabbitmq相对注重可靠性,因为应用在im上,需要保证消息不能丢失所以就暂时选定rabbitmq,
Message Queue的需求由来已久,80年代最早在金融交易中,高盛等公司采用Teknekron公司的产品,当时的Message queuing软件叫做:the information bus(TIB)。 TIB被电信和通讯公司采用,路透社收购了Teknekron公司。之后,IBM开发了MQSeries,微软开发了Microsoft Message Queue(MSMQ)。这些商业MQ供应商的问题是厂商锁定,价格高昂。2001年,Java Message queuing试图解决锁定和交互性的问题,但对应用来说反而更加麻烦了。
RabbitMQ采用Erlang语言开发。Erlang语言由Ericson设计,专门为开发concurrent和distribution系统的一种语言,在电信领域使用广泛。OTP(Open Telecom Platform)作为Erlang语言的一部分,包含了很多基于Erlang开发的中间件/库/工具,如mnesia/SASL,极大方便了Erlang应用的开发。OTP就类似于Python语言中众多的module,用户借助这些module可以很方便的开发应用。
于是2004年,摩根大通和iMatrix开始着手Advanced Message Queuing Protocol (AMQP)开放标准的开发。2006年,AMQP规范发布。2007年,Rabbit技术公司基于AMQP标准开发的RabbitMQ 1.0 发布。所有主要的编程语言均有与代理接口通讯的客户端库。
这里介绍下其中的一些概念,connection表示和队列服务器的连接,一般情况下是tcp连接, channel表示通道,可以在一个连接上建立多个通道,这里主要是节省了tcp连接握手的成本,exchange可以理解成一个路由器,将消息推送给对应的队列queue,其实是像一个订阅的模式。
rabbitmqctl stop这个是关闭rabbitmq,在搭建集群时候先关闭服务,然后使用rabbitmq-server -detached静默启动,这时候使用rabbitmqctl cluster_status查看集群状态,因为还没将节点加入集群,所以只能看到类似
Cluster status of node rabbit@rabbit1 ...
[{nodes,[{disc,[rabbit@rabbit1,rabbit@rabbit2,rabbit@rabbit3]}]},
{running_nodes,[rabbit@rabbit2,rabbit@rabbit1]}]
...done.
然后就可以把当前节点加入集群,
rabbit2$ rabbitmqctl stop_app #这个stop_app与stop的区别是前者停的是rabbitmq应用,保留erlang节点,
#后者是停止了rabbitmq和erlang节点
Stopping node rabbit@rabbit2 ...done.
rabbit2$ rabbitmqctl join_cluster rabbit@rabbit1 #这里可以用--ram指定将当前节点作为内存节点加入集群
Clustering node rabbit@rabbit2 with [rabbit@rabbit1] ...done.
rabbit2$ rabbitmqctl start_app
Starting node rabbit@rabbit2 ...done.
其他可以参考官方文档
这里碰到过一个坑,对于使用exchange来做消息路由的,会有一个情况,就是在routing_key没被订阅的时候,会将该条找不到路由对应的queue的消息丢掉What happens if we break our contract and send a message with one or four words, like "orange" or "quick.orange.male.rabbit"? Well, these messages won't match any bindings and will be lost.对应链接,而当使用空的exchange时,会保留消息,当出现消费者的时候就可以将收到之前生产者所推送的消息对应链接,这里就是用了空的exchange。
集群搭建的时候有个erlang vm生成的random cookie,这个是用来做集群之间认证的,相同的cookie才能连接,但是如果通过vim打开复制后在其他几点新建文件写入会多一个换行,导致集群建立是报错,所以这里最好使用scp等传输命令直接传输cookie文件,同时要注意下cookie的文件权限。
另外在集群搭建的时候如果更改过hostname,那么要把rabbitmq的数据库删除,否则启动后会马上挂掉
fork()之后,kernel把父进程中所有的内存页的权限都设为read-only,然后子进程的地址空间指向父进程。当父子进程都只读内存时,相安无事。当其中某个进程写内存时,CPU硬件检测到内存页是read-only的,于是触发页异常中断(page-fault),陷入kernel的一个中断例程。中断例程中,kernel就会把触发的异常的页复制一份,于是父子进程各自持有独立的一份。这个操作其实可以类比为写屏障,正常的读取是没问题的,当有写入时就会分裂。
1、减少分配和复制资源时带来的瞬时延迟;
2、减少不必要的资源分配;
CopyOnWrite的缺点:
1、如果父子进程都需要进行大量的写操作,会产生大量的分页错误(页异常中断page-fault);
Redis在持久化时,如果是采用BGSAVE命令或者BGREWRITEAOF的方式,那Redis会fork出一个子进程来读取数据,从而写到磁盘中。
总体来看,Redis还是读操作比较多。如果子进程存在期间,发生了大量的写操作,那可能就会出现很多的分页错误(页异常中断page-fault),这样就得耗费不少性能在复制上。
而在rehash阶段上,写操作是无法避免的。所以Redis在fork出子进程之后,将负载因子阈值提高,尽量减少写操作,避免不必要的内存写入操作,最大限度地节约内存。这里其实更巧妙了,在细节上去优化会产生大量页异常中断的情况。
memcache之类的竞品,但是现在貌似 redis 快一统江湖,这里当然不是在吹,只是个人角度的一个感觉,不权威只是主观感觉。Strings,Lists,Sets,Hashes,Sorted Sets,这五种数据结构先简单介绍下,Strings类型的其实就是我们最常用的 key-value,实际开发中也会用的最多;Lists是列表,这个有些会用来做队列,因为 redis 目前常用的版本支持丰富的列表操作;还有是Sets集合,这个主要的特点就是集合中元素不重复,可以用在有这类需求的场景里;Hashes是叫散列,类似于 Python 中的字典结构;还有就是Sorted Sets这个是个有序集合;一眼看这些其实没啥特别的,除了最后这个有序集合,不过去了解背后的实现方式还是比较有意思的。
先从Strings开始说,了解过 C 语言的应该知道,C 语言中的字符串其实是个 char[] 字符数组,redis 也不例外,只是最开始的版本就对这个做了一丢丢的优化,而正是这一丢丢的优化,让这个 redis 的使用效率提升了数倍
struct sdshdr {
// 字符串长度
int len;
// 字符串空余字符数
int free;
// 字符串内容
char buf[];
};
这里引用了 redis 在 github 上最早的 2.2 版本的代码,代码路径是https://github.com/antirez/redis/blob/2.2/src/sds.h,可以看到这个结构体里只有仨元素,两个 int 型和一个 char 型数组,两个 int 型其实就是我说的优化,因为 C 语言本身的字符串数组,有两个问题,一个是要知道它实际已被占用的长度,需要去遍历这个数组,第二个就是比较容易踩坑的是遍历的时候要注意它有个以\0作为结尾的特点;通过上面的两个 int 型参数,一个是知道字符串目前的长度,一个是知道字符串还剩余多少位空间,这样子坐着两个操作从 O(N)简化到了O(1)了,还有第二个 free 还有个比较重要的作用就是能防止 C 字符串的溢出问题,在存储之前可以先判断 free 长度,如果长度不够就先扩容了,先介绍到这,这个系列可以写蛮多的,慢慢介绍吧
链表是比较常见的数据结构了,但是因为 redis 是用 C 写的,所以在不依赖第三方库的情况下只能自己写一个了,redis 的链表是个有头的链表,而且是无环的,具体的结构我也找了 github 上最早版本的代码
typedef struct listNode {
// 前置节点
struct listNode *prev;
// 后置节点
struct listNode *next;
// 值
void *value;
} listNode;
typedef struct list {
// 链表表头
listNode *head;
// 当前节点,也可以说是最后节点
listNode *tail;
// 节点复制函数
void *(*dup)(void *ptr);
// 节点值释放函数
void (*free)(void *ptr);
// 节点值比较函数
int (*match)(void *ptr, void *key);
// 链表包含的节点数量
unsigned int len;
} list;
代码地址是这个https://github.com/antirez/redis/blob/2.2/src/adlist.h
可以看下节点是由listNode承载的,包括值和一个指向前节点跟一个指向后一节点的两个指针,然后值是 void 指针类型,所以可以承载不同类型的值
然后是 list结构用来承载一个链表,包含了表头,和表尾,复制函数,释放函数和比较函数,还有链表长度,因为包含了前两个节点,找到表尾节点跟表头都是 O(1)的时间复杂度,还有节点数量,其实这个跟 SDS 是同一个做法,就是空间换时间,这也是写代码里比较常见的做法,以此让一些高频的操作提速。
字典也是个常用的数据结构,其实只是叫法不同,数据结构中叫 hash 散列,Java 中叫 Map,PHP 中是数组 array,Python 中也叫字典 dict,因为纯 C 语言本身不带这些数据结构,所以这也是个痛并快乐着的过程,享受 C 语言的高性能的同时也要接受它只提供了语言的基本功能的现实,各种轮子都需要自己造,redis 同样实现了自己的字典
下面来看看代码
typedef struct dictEntry {
void *key;
void *val;
struct dictEntry *next;
} dictEntry;
typedef struct dictType {
unsigned int (*hashFunction)(const void *key);
void *(*keyDup)(void *privdata, const void *key);
void *(*valDup)(void *privdata, const void *obj);
int (*keyCompare)(void *privdata, const void *key1, const void *key2);
void (*keyDestructor)(void *privdata, void *key);
void (*valDestructor)(void *privdata, void *obj);
} dictType;
/* This is our hash table structure. Every dictionary has two of this as we
* implement incremental rehashing, for the old to the new table. */
typedef struct dictht {
dictEntry **table;
unsigned long size;
unsigned long sizemask;
unsigned long used;
} dictht;
typedef struct dict {
dictType *type;
void *privdata;
dictht ht[2];
int rehashidx; /* rehashing not in progress if rehashidx == -1 */
int iterators; /* number of iterators currently running */
} dict;
看了下这个 2.2 版本的代码跟最新版的其实也差的不是很多,所以还是照旧用老代码,可以看到上面四个结构体中,其实只有三个是存储数据用的,dictType 是用来放操作函数的,那么三个存放数据的结构体分别是干嘛的,这时候感觉需要一个图来说明比较好,稍等,我去画个图~
这个图看着应该比较清楚这些都是用来干嘛的了,dict 是我们的主体结构,它有一个指向 dictType 的指针,这里面包含了字典的操作函数,然后是一个私有数据指针,接下来是一个 dictht 的数组,包含两个dictht,这个就是用来存数据的了,然后是 rehashidx 表示重哈希的状态,当是-1 的时候表示当前没有重哈希,iterators 表示正在遍历的迭代器的数量。
首先说说为啥需要有两个 dictht,这是因为字典 dict 这个数据结构随着数据量的增减,会需要在中途做扩容或者缩容操作,如果只有一个的话,对它进行扩容缩容时会影响正常的访问和修改操作,或者说保证正常查询,修改的正确性会比较复杂,并且因为需要高效利用空间,不能一下子申请一个非常大的空间来存很少的数据。当 dict 中 dictht 中的数据量超过 size 的时候负载就超过了 1,就需要进行扩容,这里的其实跟 Java 中的 HashMap 比较类似,超过一定的负载之后进行扩容。这里为啥 size 会超过 1 呢,可能有部分不了解这类结构的同学会比较奇怪,其实就是上图中画的,在数据结构中对于散列的冲突有几类解决方法,比如转换成链表,二次散列,找下个空槽等,这里就使用了链表法,或者说拉链法。当一个新元素通过 hashFunction 得出的 key 跟 sizemask 取模之后的值相同了,那就将其放在原来的节点之前,变成链表挂在数组 dictht.table下面,放在原有节点前是考虑到可能会优先访问。
忘了说明下 dictht 跟 dictEntry 的关系了,dictht 就是个哈希表,它里面是个dictEntry 的二维数组,而 dictEntry 是个包含了 key-value 结构之外还有一个 next 指针,因此可以将哈希冲突的以链表的形式保存下来。
在重点说下重哈希,可能同样写 Java 的同学对这个比较有感觉,跟 HashMap 一样,会以 2 的 N 次方进行扩容,那么扩容的方法就会比较简单,每个键重哈希要不就在原来这个槽,要不就在原来的槽加原 dictht.size 的位置;然后是重头戏,具体是怎么做扩容呢,其实这里就把第二个 ht 用上了,其实这两个hashtable 的具体作用有点类似于 jvm 中的两个 survival 区,但是又不全一样,因为 redis 在扩容的时候是采用的渐进式地重哈希,什么叫渐进式的呢,就是它不是像 jvm 那种标记复制的模式直接将一个 eden 区和原来的 survival 区存活的对象复制到另一个 survival 区,而是在每一次添加,删除,查找或者更新操作时,都会额外的帮忙搬运一部分的原 dictht 中的数据,这里会根据 rehashidx 的值来判断,如果是-1 表示并没有在重哈希中,如果是 0 表示开始重哈希了,然后rehashidx 还会随着每次的帮忙搬运往上加,但全部被搬运完成后 rehashidx 又变回了-1,又可以扯到Java 中的 Concurrent HashMap, 他在扩容的时候也使用了类似的操作。
typedef struct intset {
// 编码方式
uint32_t encoding;
// 集合包含的元素数量
uint32_t length;
// 保存元素的数组
int8_t contents[];
} intset;
/* Note that these encodings are ordered, so:
* INTSET_ENC_INT16 < INTSET_ENC_INT32 < INTSET_ENC_INT64. */
#define INTSET_ENC_INT16 (sizeof(int16_t))
#define INTSET_ENC_INT32 (sizeof(int32_t))
#define INTSET_ENC_INT64 (sizeof(int64_t))
一眼看,为啥整型还需要编码,然后 int8_t 怎么能存下大整形呢,带着这些疑问,我们一步步分析下去,这里的编码其实指的是这个整型集合里存的究竟是多大的整型,16 位,还是 32 位,还是 64 位,结构体下面的宏定义就是表示了 encoding 的可能取值,INTSET_ENC_INT16 表示每个元素用2个字节存储,INTSET_ENC_INT32 表示每个元素用4个字节存储,INTSET_ENC_INT64 表示每个元素用8个字节存储。因此,intset中存储的整数最多只能占用64bit。length 就是正常的表示集合中元素的数量。最奇怪的应该就是这个 contents 了,是个 int8_t 的数组,那放毛线数据啊,最小的都有 16 位,这里我在看代码和《redis 设计与实现》的时候也有点懵逼,后来查了下发现这是个比较取巧的用法,这里我用自己的理解表述一下,先看看 8,16,32,64 的关系,一眼看就知道都是 2 的 N 次,并且呈两倍关系,而且 8 位刚好一个字节,所以呢其实这里的contents 不是个常规意义上的 int8_t 类型的数组,而是个柔性数组。看下 wiki 的定义
Flexible array members1 were introduced in the C99 standard of the C programming language (in particular, in section §6.7.2.1, item 16, page 103).2 It is a member of a struct, which is an array without a given dimension. It must be the last member of such a struct and it must be accompanied by at least one other member, as in the following example:
struct vectord {
size_t len;
double arr[]; // the flexible array member must be last
};
在初始化这个 intset 的时候,这个contents数组是不占用空间的,后面的反正用到了申请,那么这里就有一个问题,给出了三种可能的 encoding 值,他们能随便换吗,显然不行,首先在 intset 中数据的存放是有序的,这个有部分原因是方便二分查找,然后存放数据其实随着数据的大小不同会有一个升级的过程,看下图
新创建的intset只有一个header,总共8个字节。其中encoding = 2, length = 0, 类型都是uint32_t,各占 4 字节,添加15, 5两个元素之后,因为它们是比较小的整数,都能使用2个字节表示,所以encoding不变,值还是2,也就是默认的 INTSET_ENC_INT16,当添加32768的时候,它不再能用2个字节来表示了(2个字节能表达的数据范围是-215~215-1,而32768等于215,超出范围了),因此encoding必须升级到INTSET_ENC_INT32(值为4),即用4个字节表示一个元素。在添加每个元素的过程中,intset始终保持从小到大有序。与ziplist类似,intset也是按小端(little endian)模式存储的(参见维基百科词条Endianness)。比如,在上图中intset添加完所有数据之后,表示encoding字段的4个字节应该解释成0x00000004,而第4个数据应该解释成0x00008000 = 32768
跳表是个在我们日常的代码中不太常用到的数据结构,相对来讲就没有像数组,链表,字典,散列,树等结构那么熟悉,所以就从头开始分析下,首先是链表,跳表跟链表都有个表字(太硬扯了我🤦♀️),注意这是个有序链表
如上图,在这个链表里如果我要找到 23,是不是我需要从3,5,9开始一直往后找直到找到 23,也就是说时间复杂度是 O(N),N 的一次幂复杂度,那么我们来看看第二个
这个结构跟原先有点不一样,它给链表中偶数位的节点又加了一个指针把它们链接起来,这样子当我们要寻找 23 的时候就可以从原来的一个个往下找变成跳着找,先找到 5,然后是 10,接着是 19,然后是 28,这时候发现 28 比 23 大了,那我在退回到 19,然后从下一层原来的链表往前找,
这里毛估估是不是前面的节点我就少找了一半,有那么点二分法的意思。
前面的其实是跳表的引子,真正的跳表其实不是这样,因为上面的其实有个比较大的问题,就是插入一个元素后需要调整每个元素的指针,在 redis 中的跳表其实是做了个随机层数的优化,因为沿着前面的例子,其实当数据量很大的时候,是不是层数越多,其查询效率越高,但是随着层数变多,要保持这种严格的层数规则其实也会增大处理复杂度,所以 redis 插入每个元素的时候都是使用随机的方式,看一眼代码
/* ZSETs use a specialized version of Skiplists */
typedef struct zskiplistNode {
sds ele;
double score;
struct zskiplistNode *backward;
struct zskiplistLevel {
struct zskiplistNode *forward;
unsigned long span;
} level[];
} zskiplistNode;
typedef struct zskiplist {
struct zskiplistNode *header, *tail;
unsigned long length;
int level;
} zskiplist;
typedef struct zset {
dict *dict;
zskiplist *zsl;
} zset;
忘了说了,redis 是把 skiplist 跳表用在 zset 里,zset 是个有序的集合,可以看到 zskiplist 就是个跳表的结构,里面用 header 保存跳表的表头,tail 保存表尾,还有长度和最大层级,具体的跳表节点元素使用 zskiplistNode 表示,里面包含了 sds 类型的元素值,double 类型的分值,用来排序,一个 backward 后向指针和一个 zskiplistLevel 数组,每个 level 包含了一个前向指针,和一个 span,span 表示的是跳表前向指针的跨度,这里再补充一点,前面说了为了灵活这个跳表的新增修改,redis 使用了随机层高的方式插入新节点,但是如果所有节点都随机到很高的层级或者所有都很低的话,跳表的效率优势就会减小,所以 redis 使用了个小技巧,贴下代码
#define ZSKIPLIST_P 0.25 /* Skiplist P = 1/4 */
int zslRandomLevel(void) {
int level = 1;
while ((random()&0xFFFF) < (ZSKIPLIST_P * 0xFFFF))
level += 1;
return (level<ZSKIPLIST_MAXLEVEL) ? level : ZSKIPLIST_MAXLEVEL;
}
当随机值跟0xFFFF进行与操作小于ZSKIPLIST_P * 0xFFFF时才会增大 level 的值,因此保持了一个相对递减的概率
可以简单分析下,当 random() 的值小于 0xFFFF 的 1/4,才会 level + 1,就意味着当有 1 - 1/4也就是3/4的概率是直接跳出,所以一层的概率是3/4,也就是 1-P,二层的概率是 P*(1-P),三层的概率是 P² * (1-P) 依次递推。
/* The actual Redis Object */
#define OBJ_STRING 0 /* String object. */
#define OBJ_LIST 1 /* List object. */
#define OBJ_SET 2 /* Set object. */
#define OBJ_ZSET 3 /* Sorted set object. */
#define OBJ_HASH 4 /* Hash object. */
/*
* Objects encoding. Some kind of objects like Strings and Hashes can be
* internally represented in multiple ways. The 'encoding' field of the object
* is set to one of this fields for this object. */
#define OBJ_ENCODING_RAW 0 /* Raw representation */
#define OBJ_ENCODING_INT 1 /* Encoded as integer */
#define OBJ_ENCODING_HT 2 /* Encoded as hash table */
#define OBJ_ENCODING_ZIPMAP 3 /* Encoded as zipmap */
#define OBJ_ENCODING_LINKEDLIST 4 /* No longer used: old list encoding. */
#define OBJ_ENCODING_ZIPLIST 5 /* Encoded as ziplist */
#define OBJ_ENCODING_INTSET 6 /* Encoded as intset */
#define OBJ_ENCODING_SKIPLIST 7 /* Encoded as skiplist */
#define OBJ_ENCODING_EMBSTR 8 /* Embedded sds string encoding */
#define OBJ_ENCODING_QUICKLIST 9 /* Encoded as linked list of ziplists */
#define OBJ_ENCODING_STREAM 10 /* Encoded as a radix tree of listpacks */
#define LRU_BITS 24
#define LRU_CLOCK_MAX ((1<<LRU_BITS)-1) /* Max value of obj->lru */
#define LRU_CLOCK_RESOLUTION 1000 /* LRU clock resolution in ms */
#define OBJ_SHARED_REFCOUNT INT_MAX
typedef struct redisObject {
unsigned type:4;
unsigned encoding:4;
unsigned lru:LRU_BITS; /* LRU time (relative to global lru_clock) or
* LFU data (least significant 8 bits frequency
* and most significant 16 bits access time). */
int refcount;
void *ptr;
} robj;
主体结构就是这个 redisObject,
The ziplist is a specially encoded dually linked list that is designed to be very memory efficient.
这是摘自 redis 源码中ziplist.c 文件的注释,也说明了原因,它的大概结构是这样子
<zlbytes> <zltail> <zllen> <entry> <entry> ... <entry> <zlend>
其中<zlbytes>表示 ziplist 占用的字节总数,类型是uint32_t,32 位的无符号整型,当然表示的字节数也包含自己本身占用的 4 个<zltail> 类型也是是uint32_t,表示ziplist表中最后一项(entry)在ziplist中的偏移字节数。<zltail>的存在,使得我们可以很方便地找到最后一项(不用遍历整个ziplist),从而可以在ziplist尾端快速地执行push或pop操作。<uint16_t zllen> 表示ziplist 中的数据项个数,因为是 16 位,所以当数量超过所能表示的最大的数量,它的 16 位全会置为 1,但是真实的数量需要遍历整个 ziplist 才能知道<entry>是具体的数据项,后面解释<zlend> ziplist 的最后一个字节,固定是255。
再看一下<entry>中的具体结构,
<prevlen> <encoding> <entry-data>
首先这个<prevlen>有两种情况,一种是前面的元素的长度,如果是小于等于 253的时候就用一个uint8_t 来表示前一元素的长度,如果大于的话他将占用五个字节,第一个字节是 254,即表示这个字节已经表示不下了,需要后面的四个字节帮忙表示<encoding>这个就比较复杂,把源码的注释放下面先看下
* |00pppppp| - 1 byte
* String value with length less than or equal to 63 bytes (6 bits).
* "pppppp" represents the unsigned 6 bit length.
* |01pppppp|qqqqqqqq| - 2 bytes
* String value with length less than or equal to 16383 bytes (14 bits).
* IMPORTANT: The 14 bit number is stored in big endian.
* |10000000|qqqqqqqq|rrrrrrrr|ssssssss|tttttttt| - 5 bytes
* String value with length greater than or equal to 16384 bytes.
* Only the 4 bytes following the first byte represents the length
* up to 32^2-1. The 6 lower bits of the first byte are not used and
* are set to zero.
* IMPORTANT: The 32 bit number is stored in big endian.
* |11000000| - 3 bytes
* Integer encoded as int16_t (2 bytes).
* |11010000| - 5 bytes
* Integer encoded as int32_t (4 bytes).
* |11100000| - 9 bytes
* Integer encoded as int64_t (8 bytes).
* |11110000| - 4 bytes
* Integer encoded as 24 bit signed (3 bytes).
* |11111110| - 2 bytes
* Integer encoded as 8 bit signed (1 byte).
* |1111xxxx| - (with xxxx between 0000 and 1101) immediate 4 bit integer.
* Unsigned integer from 0 to 12. The encoded value is actually from
* 1 to 13 because 0000 and 1111 can not be used, so 1 should be
* subtracted from the encoded 4 bit value to obtain the right value.
* |11111111| - End of ziplist special entry.
首先如果 encoding 的前两位是 00 的话代表这个元素是个 6 位的字符串,即直接将数据保存在 encoding 中,不消耗额外的<entry-data>,如果前两位是 01 的话表示是个 14 位的字符串,如果是 10 的话表示encoding 块之后的四个字节是存放字符串类型的数据,encoding 的剩余 6 位置 0。
如果 encoding 的前两位是 11 的话表示这是个整型,具体的如果后两位是00的话,表示后面是个2字节的 int16_t 类型,如果是01的话,后面是个4字节的int32_t,如果是10的话后面是8字节的int64_t,如果是 11 的话后面是 3 字节的有符号整型,这些都要最后 4 位都是 0 的情况噢
剩下当是11111110时,则表示是一个1 字节的有符号数,如果是 1111xxxx,其中xxxx在0000 到 1101 表示实际的 1 到 13,为啥呢,因为 0000 前面已经用过了,而 1110 跟 1111 也都有用了。
看个具体的例子(上下有点对不齐,将就看)
[0f 00 00 00] [0c 00 00 00] [02 00] [00 f3] [02 f6] [ff]
|**zlbytes***| |***zltail***| |*zllen*| |entry1 entry2| |zlend|
第一部分代表整个 ziplist 有 15 个字节,zlbytes 自己占了 4 个 zltail 表示最后一个元素的偏移量,第 13 个字节起,zllen 表示有 2 个元素,第一个元素是00f3,00表示前一个元素长度是 0,本来前面就没元素(不过不知道这个能不能优化这一字节),然后是 f3,换成二进制就是11110011,对照上面的注释,是落在|1111xxxx|这个类型里,注意这个其实是用 0001 到 1101 也就是 1到 13 来表示 0到 12,所以 f3 应该就是 2,第一个元素是 2,第二个元素呢,02 代表前一个元素也就是刚才说的这个,占用 2 字节,f6 展开也是刚才的类型,实际是 5,ff 表示 ziplist 的结尾,所以这个 ziplist 里面是两个元素,2 跟 5
<!ELEMENT foreach (#PCDATA | include | trim | where | set | foreach | choose | if | bind)*>
<!ATTLIST foreach
collection CDATA #REQUIRED
item CDATA #IMPLIED
index CDATA #IMPLIED
open CDATA #IMPLIED
close CDATA #IMPLIED
separator CDATA #IMPLIED
>
collection 表示需要使用 foreach 的集合,item 表示进行迭代的变量名,index 就是索引值,而 open 跟 close
代表拼接的起始和结束符号,一般就是左右括号,separator 则是每个 item 直接的分隔符
例如写了一个简单的 sql 查询
<select id="search" parameterType="list" resultMap="StudentMap">
select * from student
<where>
id in
<foreach collection="list" item="item" open="(" close=")" separator=",">
#{item}
</foreach>
</where>
</select>
这里就发现了一个问题,collection 对应的这个值,如果传入的参数是个 HashMap,collection 的这个值就是以此作为
key 从这个 HashMap 获取对应的集合,但是这里有几个特殊的小技巧,
在上面的这个方法对应的接口方法定义中
public List<Student> search(List<Long> userIds);
我是这么定义的,而 collection 的值是list,这里就有一点不能理解了,但其实是 mybatis 考虑到使用的方便性,
帮我们做了一点点小转换,我们翻一下 mybatis 的DefaultSqlSession 中的代码可以看到
@Override
public <E> List<E> selectList(String statement, Object parameter, RowBounds rowBounds) {
try {
MappedStatement ms = configuration.getMappedStatement(statement);
return executor.query(ms, wrapCollection(parameter), rowBounds, Executor.NO_RESULT_HANDLER);
} catch (Exception e) {
throw ExceptionFactory.wrapException("Error querying database. Cause: " + e, e);
} finally {
ErrorContext.instance().reset();
}
}
// 就是在这帮我们做了转换
private Object wrapCollection(final Object object) {
if (object instanceof Collection) {
StrictMap<Object> map = new StrictMap<Object>();
map.put("collection", object);
if (object instanceof List) {
// 如果类型是list 就会转成以 list 为 key 的 map
map.put("list", object);
}
return map;
} else if (object != null && object.getClass().isArray()) {
StrictMap<Object> map = new StrictMap<Object>();
map.put("array", object);
return map;
}
return object;
}]]>| Policy | Description |
|---|---|
| noeviction 不逐出 | Returns an error if the memory limit has been reached when trying to insert more data,插入更多数据时,如果内存达到上限了,返回错误 |
| allkeys-lru 所有的 key 使用 lru 逐出 | Evicts the least recently used keys out of all keys 在所有 key 中逐出最近最少使用的 |
| allkeys-lfu 所有的 key 使用 lfu 逐出 | Evicts the least frequently used keys out of all keys 在所有 key 中逐出最近最不频繁使用的 |
| allkeys-random 所有的 key 中随机逐出 | Randomly evicts keys out of all keys 在所有 key 中随机逐出 |
| volatile-lru | Evicts the least recently used keys out of all keys with an “expire” field set 在设置了过期时间的 key 空间 expire 中使用 lru 策略逐出 |
| volatile-lfu | Evicts the least frequently used keys out of all keys with an “expire” field set 在设置了过期时间的 key 空间 expire 中使用 lfu 策略逐出 |
| volatile-random | Randomly evicts keys with an “expire” field set 在设置了过期时间的 key 空间 expire 中随机逐出 |
| volatile-ttl | Evicts the shortest time-to-live keys out of all keys with an “expire” field set.在设置了过期时间的 key 空间 expire 中逐出更早过期的 |
而在这其中默认使用的策略是 volatile-lru,对 lru 跟 lfu 想有更多的了解可以看下我之前的文章redis系列介绍八-淘汰策略
]]>redis 是如何过期缓存的,可以猜测下,最无脑的就是每个设置了过期时间的 key 都设个定时器,过期了就删除,这种显然消耗太大,清理地最及时,还有的就是 redis 正在采用的懒汉清理策略和定期清理
懒汉策略就是在使用的时候去检查缓存是否过期,比如 get 操作时,先判断下这个 key 是否已经过期了,如果过期了就删掉,并且返回空,如果没过期则正常返回
主要代码是
/* This function is called when we are going to perform some operation
* in a given key, but such key may be already logically expired even if
* it still exists in the database. The main way this function is called
* is via lookupKey*() family of functions.
*
* The behavior of the function depends on the replication role of the
* instance, because slave instances do not expire keys, they wait
* for DELs from the master for consistency matters. However even
* slaves will try to have a coherent return value for the function,
* so that read commands executed in the slave side will be able to
* behave like if the key is expired even if still present (because the
* master has yet to propagate the DEL).
*
* In masters as a side effect of finding a key which is expired, such
* key will be evicted from the database. Also this may trigger the
* propagation of a DEL/UNLINK command in AOF / replication stream.
*
* The return value of the function is 0 if the key is still valid,
* otherwise the function returns 1 if the key is expired. */
int expireIfNeeded(redisDb *db, robj *key) {
if (!keyIsExpired(db,key)) return 0;
/* If we are running in the context of a slave, instead of
* evicting the expired key from the database, we return ASAP:
* the slave key expiration is controlled by the master that will
* send us synthesized DEL operations for expired keys.
*
* Still we try to return the right information to the caller,
* that is, 0 if we think the key should be still valid, 1 if
* we think the key is expired at this time. */
if (server.masterhost != NULL) return 1;
/* Delete the key */
server.stat_expiredkeys++;
propagateExpire(db,key,server.lazyfree_lazy_expire);
notifyKeyspaceEvent(NOTIFY_EXPIRED,
"expired",key,db->id);
return server.lazyfree_lazy_expire ? dbAsyncDelete(db,key) :
dbSyncDelete(db,key);
}
/* Check if the key is expired. */
int keyIsExpired(redisDb *db, robj *key) {
mstime_t when = getExpire(db,key);
mstime_t now;
if (when < 0) return 0; /* No expire for this key */
/* Don't expire anything while loading. It will be done later. */
if (server.loading) return 0;
/* If we are in the context of a Lua script, we pretend that time is
* blocked to when the Lua script started. This way a key can expire
* only the first time it is accessed and not in the middle of the
* script execution, making propagation to slaves / AOF consistent.
* See issue #1525 on Github for more information. */
if (server.lua_caller) {
now = server.lua_time_start;
}
/* If we are in the middle of a command execution, we still want to use
* a reference time that does not change: in that case we just use the
* cached time, that we update before each call in the call() function.
* This way we avoid that commands such as RPOPLPUSH or similar, that
* may re-open the same key multiple times, can invalidate an already
* open object in a next call, if the next call will see the key expired,
* while the first did not. */
else if (server.fixed_time_expire > 0) {
now = server.mstime;
}
/* For the other cases, we want to use the most fresh time we have. */
else {
now = mstime();
}
/* The key expired if the current (virtual or real) time is greater
* than the expire time of the key. */
return now > when;
}
/* Return the expire time of the specified key, or -1 if no expire
* is associated with this key (i.e. the key is non volatile) */
long long getExpire(redisDb *db, robj *key) {
dictEntry *de;
/* No expire? return ASAP */
if (dictSize(db->expires) == 0 ||
(de = dictFind(db->expires,key->ptr)) == NULL) return -1;
/* The entry was found in the expire dict, this means it should also
* be present in the main dict (safety check). */
serverAssertWithInfo(NULL,key,dictFind(db->dict,key->ptr) != NULL);
return dictGetSignedIntegerVal(de);
}
这里有几点要注意的,第一是当惰性删除时会根据lazyfree_lazy_expire这个参数去判断是执行同步删除还是异步删除,另外一点是对于 slave,是不需要执行的,因为会在 master 过期时向 slave 发送 del 指令。
光采用这个策略会有什么问题呢,假如一些key 一直未被访问,那这些 key 就不会过期了,导致一直被占用着内存,所以 redis 采取了懒汉式过期加定期过期策略,定期策略是怎么执行的呢
/* This function handles 'background' operations we are required to do
* incrementally in Redis databases, such as active key expiring, resizing,
* rehashing. */
void databasesCron(void) {
/* Expire keys by random sampling. Not required for slaves
* as master will synthesize DELs for us. */
if (server.active_expire_enabled) {
if (server.masterhost == NULL) {
activeExpireCycle(ACTIVE_EXPIRE_CYCLE_SLOW);
} else {
expireSlaveKeys();
}
}
/* Defrag keys gradually. */
activeDefragCycle();
/* Perform hash tables rehashing if needed, but only if there are no
* other processes saving the DB on disk. Otherwise rehashing is bad
* as will cause a lot of copy-on-write of memory pages. */
if (!hasActiveChildProcess()) {
/* We use global counters so if we stop the computation at a given
* DB we'll be able to start from the successive in the next
* cron loop iteration. */
static unsigned int resize_db = 0;
static unsigned int rehash_db = 0;
int dbs_per_call = CRON_DBS_PER_CALL;
int j;
/* Don't test more DBs than we have. */
if (dbs_per_call > server.dbnum) dbs_per_call = server.dbnum;
/* Resize */
for (j = 0; j < dbs_per_call; j++) {
tryResizeHashTables(resize_db % server.dbnum);
resize_db++;
}
/* Rehash */
if (server.activerehashing) {
for (j = 0; j < dbs_per_call; j++) {
int work_done = incrementallyRehash(rehash_db);
if (work_done) {
/* If the function did some work, stop here, we'll do
* more at the next cron loop. */
break;
} else {
/* If this db didn't need rehash, we'll try the next one. */
rehash_db++;
rehash_db %= server.dbnum;
}
}
}
}
}
/* Try to expire a few timed out keys. The algorithm used is adaptive and
* will use few CPU cycles if there are few expiring keys, otherwise
* it will get more aggressive to avoid that too much memory is used by
* keys that can be removed from the keyspace.
*
* Every expire cycle tests multiple databases: the next call will start
* again from the next db, with the exception of exists for time limit: in that
* case we restart again from the last database we were processing. Anyway
* no more than CRON_DBS_PER_CALL databases are tested at every iteration.
*
* The function can perform more or less work, depending on the "type"
* argument. It can execute a "fast cycle" or a "slow cycle". The slow
* cycle is the main way we collect expired cycles: this happens with
* the "server.hz" frequency (usually 10 hertz).
*
* However the slow cycle can exit for timeout, since it used too much time.
* For this reason the function is also invoked to perform a fast cycle
* at every event loop cycle, in the beforeSleep() function. The fast cycle
* will try to perform less work, but will do it much more often.
*
* The following are the details of the two expire cycles and their stop
* conditions:
*
* If type is ACTIVE_EXPIRE_CYCLE_FAST the function will try to run a
* "fast" expire cycle that takes no longer than EXPIRE_FAST_CYCLE_DURATION
* microseconds, and is not repeated again before the same amount of time.
* The cycle will also refuse to run at all if the latest slow cycle did not
* terminate because of a time limit condition.
*
* If type is ACTIVE_EXPIRE_CYCLE_SLOW, that normal expire cycle is
* executed, where the time limit is a percentage of the REDIS_HZ period
* as specified by the ACTIVE_EXPIRE_CYCLE_SLOW_TIME_PERC define. In the
* fast cycle, the check of every database is interrupted once the number
* of already expired keys in the database is estimated to be lower than
* a given percentage, in order to avoid doing too much work to gain too
* little memory.
*
* The configured expire "effort" will modify the baseline parameters in
* order to do more work in both the fast and slow expire cycles.
*/
#define ACTIVE_EXPIRE_CYCLE_KEYS_PER_LOOP 20 /* Keys for each DB loop. */
#define ACTIVE_EXPIRE_CYCLE_FAST_DURATION 1000 /* Microseconds. */
#define ACTIVE_EXPIRE_CYCLE_SLOW_TIME_PERC 25 /* Max % of CPU to use. */
#define ACTIVE_EXPIRE_CYCLE_ACCEPTABLE_STALE 10 /* % of stale keys after which
we do extra efforts. */
void activeExpireCycle(int type) {
/* Adjust the running parameters according to the configured expire
* effort. The default effort is 1, and the maximum configurable effort
* is 10. */
unsigned long
effort = server.active_expire_effort-1, /* Rescale from 0 to 9. */
config_keys_per_loop = ACTIVE_EXPIRE_CYCLE_KEYS_PER_LOOP +
ACTIVE_EXPIRE_CYCLE_KEYS_PER_LOOP/4*effort,
config_cycle_fast_duration = ACTIVE_EXPIRE_CYCLE_FAST_DURATION +
ACTIVE_EXPIRE_CYCLE_FAST_DURATION/4*effort,
config_cycle_slow_time_perc = ACTIVE_EXPIRE_CYCLE_SLOW_TIME_PERC +
2*effort,
config_cycle_acceptable_stale = ACTIVE_EXPIRE_CYCLE_ACCEPTABLE_STALE-
effort;
/* This function has some global state in order to continue the work
* incrementally across calls. */
static unsigned int current_db = 0; /* Last DB tested. */
static int timelimit_exit = 0; /* Time limit hit in previous call? */
static long long last_fast_cycle = 0; /* When last fast cycle ran. */
int j, iteration = 0;
int dbs_per_call = CRON_DBS_PER_CALL;
long long start = ustime(), timelimit, elapsed;
/* When clients are paused the dataset should be static not just from the
* POV of clients not being able to write, but also from the POV of
* expires and evictions of keys not being performed. */
if (clientsArePaused()) return;
if (type == ACTIVE_EXPIRE_CYCLE_FAST) {
/* Don't start a fast cycle if the previous cycle did not exit
* for time limit, unless the percentage of estimated stale keys is
* too high. Also never repeat a fast cycle for the same period
* as the fast cycle total duration itself. */
if (!timelimit_exit &&
server.stat_expired_stale_perc < config_cycle_acceptable_stale)
return;
if (start < last_fast_cycle + (long long)config_cycle_fast_duration*2)
return;
last_fast_cycle = start;
}
/* We usually should test CRON_DBS_PER_CALL per iteration, with
* two exceptions:
*
* 1) Don't test more DBs than we have.
* 2) If last time we hit the time limit, we want to scan all DBs
* in this iteration, as there is work to do in some DB and we don't want
* expired keys to use memory for too much time. */
if (dbs_per_call > server.dbnum || timelimit_exit)
dbs_per_call = server.dbnum;
/* We can use at max 'config_cycle_slow_time_perc' percentage of CPU
* time per iteration. Since this function gets called with a frequency of
* server.hz times per second, the following is the max amount of
* microseconds we can spend in this function. */
timelimit = config_cycle_slow_time_perc*1000000/server.hz/100;
timelimit_exit = 0;
if (timelimit <= 0) timelimit = 1;
if (type == ACTIVE_EXPIRE_CYCLE_FAST)
timelimit = config_cycle_fast_duration; /* in microseconds. */
/* Accumulate some global stats as we expire keys, to have some idea
* about the number of keys that are already logically expired, but still
* existing inside the database. */
long total_sampled = 0;
long total_expired = 0;
for (j = 0; j < dbs_per_call && timelimit_exit == 0; j++) {
/* Expired and checked in a single loop. */
unsigned long expired, sampled;
redisDb *db = server.db+(current_db % server.dbnum);
/* Increment the DB now so we are sure if we run out of time
* in the current DB we'll restart from the next. This allows to
* distribute the time evenly across DBs. */
current_db++;
/* Continue to expire if at the end of the cycle more than 25%
* of the keys were expired. */
do {
unsigned long num, slots;
long long now, ttl_sum;
int ttl_samples;
iteration++;
/* If there is nothing to expire try next DB ASAP. */
if ((num = dictSize(db->expires)) == 0) {
db->avg_ttl = 0;
break;
}
slots = dictSlots(db->expires);
now = mstime();
/* When there are less than 1% filled slots, sampling the key
* space is expensive, so stop here waiting for better times...
* The dictionary will be resized asap. */
if (num && slots > DICT_HT_INITIAL_SIZE &&
(num*100/slots < 1)) break;
/* The main collection cycle. Sample random keys among keys
* with an expire set, checking for expired ones. */
expired = 0;
sampled = 0;
ttl_sum = 0;
ttl_samples = 0;
if (num > config_keys_per_loop)
num = config_keys_per_loop;
/* Here we access the low level representation of the hash table
* for speed concerns: this makes this code coupled with dict.c,
* but it hardly changed in ten years.
*
* Note that certain places of the hash table may be empty,
* so we want also a stop condition about the number of
* buckets that we scanned. However scanning for free buckets
* is very fast: we are in the cache line scanning a sequential
* array of NULL pointers, so we can scan a lot more buckets
* than keys in the same time. */
long max_buckets = num*20;
long checked_buckets = 0;
while (sampled < num && checked_buckets < max_buckets) {
for (int table = 0; table < 2; table++) {
if (table == 1 && !dictIsRehashing(db->expires)) break;
unsigned long idx = db->expires_cursor;
idx &= db->expires->ht[table].sizemask;
dictEntry *de = db->expires->ht[table].table[idx];
long long ttl;
/* Scan the current bucket of the current table. */
checked_buckets++;
while(de) {
/* Get the next entry now since this entry may get
* deleted. */
dictEntry *e = de;
de = de->next;
ttl = dictGetSignedIntegerVal(e)-now;
if (activeExpireCycleTryExpire(db,e,now)) expired++;
if (ttl > 0) {
/* We want the average TTL of keys yet
* not expired. */
ttl_sum += ttl;
ttl_samples++;
}
sampled++;
}
}
db->expires_cursor++;
}
total_expired += expired;
total_sampled += sampled;
/* Update the average TTL stats for this database. */
if (ttl_samples) {
long long avg_ttl = ttl_sum/ttl_samples;
/* Do a simple running average with a few samples.
* We just use the current estimate with a weight of 2%
* and the previous estimate with a weight of 98%. */
if (db->avg_ttl == 0) db->avg_ttl = avg_ttl;
db->avg_ttl = (db->avg_ttl/50)*49 + (avg_ttl/50);
}
/* We can't block forever here even if there are many keys to
* expire. So after a given amount of milliseconds return to the
* caller waiting for the other active expire cycle. */
if ((iteration & 0xf) == 0) { /* check once every 16 iterations. */
elapsed = ustime()-start;
if (elapsed > timelimit) {
timelimit_exit = 1;
server.stat_expired_time_cap_reached_count++;
break;
}
}
/* We don't repeat the cycle for the current database if there are
* an acceptable amount of stale keys (logically expired but yet
* not reclained). */
} while ((expired*100/sampled) > config_cycle_acceptable_stale);
}
elapsed = ustime()-start;
server.stat_expire_cycle_time_used += elapsed;
latencyAddSampleIfNeeded("expire-cycle",elapsed/1000);
/* Update our estimate of keys existing but yet to be expired.
* Running average with this sample accounting for 5%. */
double current_perc;
if (total_sampled) {
current_perc = (double)total_expired/total_sampled;
} else
current_perc = 0;
server.stat_expired_stale_perc = (current_perc*0.05)+
(server.stat_expired_stale_perc*0.95);
}
执行定期清除分成两种类型,快和慢,分别由beforeSleep和databasesCron调用,快版有两个限制,一个是执行时长由ACTIVE_EXPIRE_CYCLE_FAST_DURATION限制,另一个是执行间隔是 2 倍的ACTIVE_EXPIRE_CYCLE_FAST_DURATION,另外这还可以由配置的server.active_expire_effort参数来控制,默认是 1,最大是 10
onfig_cycle_fast_duration = ACTIVE_EXPIRE_CYCLE_FAST_DURATION +
ACTIVE_EXPIRE_CYCLE_FAST_DURATION/4*effort
然后会从一定数量的 db 中找出一定数量的带过期时间的 key(保存在 expires中),这里的数量是由
config_keys_per_loop = ACTIVE_EXPIRE_CYCLE_KEYS_PER_LOOP +
ACTIVE_EXPIRE_CYCLE_KEYS_PER_LOOP/4*effort
```
控制,慢速的执行时长是
```C
config_cycle_slow_time_perc = ACTIVE_EXPIRE_CYCLE_SLOW_TIME_PERC +
2*effort
timelimit = config_cycle_slow_time_perc*1000000/server.hz/100;
这里还有一个额外的退出条件,如果当前数据库的抽样结果已经达到我们所允许的过期 key 百分比,则下次不再处理当前 db,继续处理下个 db
]]>之前其实写过redis的过期的一些原理,这次主要是记录下,一些使用上的概念,主要是redis使用的过期策略是懒过期和定时清除,懒过期的其实比较简单,即是在key被访问的时候会顺带着判断下这个key是否已过期了,如果已经过期了,就不返回了,但是这种策略有个漏洞是如果有些key之后一直不会被访问了,就等于沉在池底了,所以需要有一个定时的清理机制,去从设置了过期的key池子(expires)里随机地捞key,具体的策略我们看下官网的解释
从池子里随机获取20个key,将其中过期的key删掉,如果这其中有超过25%的key已经过期了,那就再来一次,以此保持过期的key不超过25%(左右),并且这个定时策略可以在redis的配置文件
# Redis calls an internal function to perform many background tasks, like
# closing connections of clients in timeout, purging expired keys that are
# never requested, and so forth.
#
# Not all tasks are performed with the same frequency, but Redis checks for
# tasks to perform according to the specified "hz" value.
#
# By default "hz" is set to 10. Raising the value will use more CPU when
# Redis is idle, but at the same time will make Redis more responsive when
# there are many keys expiring at the same time, and timeouts may be
# handled with more precision.
#
# The range is between 1 and 500, however a value over 100 is usually not
# a good idea. Most users should use the default of 10 and raise this up to
# 100 only in environments where very low latency is required.
hz 10
可以配置这个hz的值,代表的含义是每秒的执行次数,默认是10,其实也用了hz的普遍含义。有兴趣可以看看之前写的一篇文章redis系列介绍七-过期策略
]]>说完了过期策略再说下淘汰策略,redis 使用的策略是近似的 lru 策略,为什么是近似的呢,先来看下什么是 lru,看下 wiki 的介绍
,图中一共有四个槽的存储空间,依次访问顺序是 A B C D E D F,
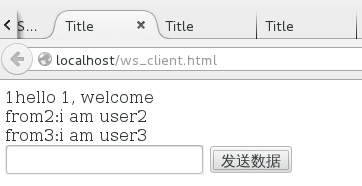
当第一次访问 D 时刚好占满了坑,并且值是 4,这个值越小代表越先被淘汰,当 E 进来时,看了下已经存在的四个里 A 是最小的,代表是最早存在并且最早被访问的,那就先淘汰它了,E 占领了 A 的位置,并设置值为 4,然后又访问 D 了,D 已经存在了,不过又被访问到了,得更新值为 5,然后是 F 进来了,这时 B 是最老的且最近未被访问,所以就淘汰它了。以上是一个 lru 的简要说明,但是 redis 没有严格按照这个去执行,理由跟前面过期策略一致,最严格的过期策略应该是每个 key 都有对应的定时器,当超时时马上就能清除,但是问题是这样的cpu 消耗太大,所换来的内存效率不太值得,淘汰策略也是这样,类似于上图,要维护所有 key 的一个有序 lru 值,并且遍历将最小的淘汰,redis 采用的是抽样的形式,最初的实现方式是随机从 dict 抽取 5 个 key,淘汰一个 lru 最小的,这样子勉强能达到淘汰的目的,但是效果不是特别好,后面在 redis 3.0开始,将随机抽取改成了维护一个 pool,pool 的大小默认是 16,每次放入的都是按lru 值有序排列好,每一次放入的必须是 lru小于 pool 中最小的 lru 才允许放入,直到放满,后面再有新的就会将大的踢出。
redis 针对这个策略的改进做了一个实验,这里借用下图
首先背景是这图中的所有点都对应一个 redis 的 key,灰色部分加入后被顺序访问过一遍,然后又加入了绿色部分,那么按照理论的 lru 算法,应该是图左上中,浅灰色部分全都被淘汰,那么对比来看看图右上,左下和右下,左下表示 2.8 版本就是随机抽样 5 个 key,淘汰其中 lru 最小的一个,发现是灰色和浅灰色的都有被淘汰的,右下的 3.0 版本抽样数量不变的情况下,稍好一些,当 3.0 版本的抽样数量调整成 10 后,已经较为接近理论上的 lru 策略了,通过代码来简要分析下
typedef struct redisObject {
unsigned type:4;
unsigned encoding:4;
unsigned lru:LRU_BITS; /* LRU time (relative to global lru_clock) or
* LFU data (least significant 8 bits frequency
* and most significant 16 bits access time). */
int refcount;
void *ptr;
} robj;
对于 lru 策略来说,lru 字段记录的就是redisObj 的LRU time,
redis 在访问数据时,都会调用lookupKey方法
/* Low level key lookup API, not actually called directly from commands
* implementations that should instead rely on lookupKeyRead(),
* lookupKeyWrite() and lookupKeyReadWithFlags(). */
robj *lookupKey(redisDb *db, robj *key, int flags) {
dictEntry *de = dictFind(db->dict,key->ptr);
if (de) {
robj *val = dictGetVal(de);
/* Update the access time for the ageing algorithm.
* Don't do it if we have a saving child, as this will trigger
* a copy on write madness. */
if (!hasActiveChildProcess() && !(flags & LOOKUP_NOTOUCH)){
if (server.maxmemory_policy & MAXMEMORY_FLAG_LFU) {
// 这个是后面一节的内容
updateLFU(val);
} else {
// 对于这个分支,访问时就会去更新 lru 值
val->lru = LRU_CLOCK();
}
}
return val;
} else {
return NULL;
}
}
/* This function is used to obtain the current LRU clock.
* If the current resolution is lower than the frequency we refresh the
* LRU clock (as it should be in production servers) we return the
* precomputed value, otherwise we need to resort to a system call. */
unsigned int LRU_CLOCK(void) {
unsigned int lruclock;
if (1000/server.hz <= LRU_CLOCK_RESOLUTION) {
// 如果服务器的频率server.hz大于 1 时就是用系统预设的 lruclock
lruclock = server.lruclock;
} else {
lruclock = getLRUClock();
}
return lruclock;
}
/* Return the LRU clock, based on the clock resolution. This is a time
* in a reduced-bits format that can be used to set and check the
* object->lru field of redisObject structures. */
unsigned int getLRUClock(void) {
return (mstime()/LRU_CLOCK_RESOLUTION) & LRU_CLOCK_MAX;
}
redis 处理命令是在这里processCommand
/* If this function gets called we already read a whole
* command, arguments are in the client argv/argc fields.
* processCommand() execute the command or prepare the
* server for a bulk read from the client.
*
* If C_OK is returned the client is still alive and valid and
* other operations can be performed by the caller. Otherwise
* if C_ERR is returned the client was destroyed (i.e. after QUIT). */
int processCommand(client *c) {
moduleCallCommandFilters(c);
/* Handle the maxmemory directive.
*
* Note that we do not want to reclaim memory if we are here re-entering
* the event loop since there is a busy Lua script running in timeout
* condition, to avoid mixing the propagation of scripts with the
* propagation of DELs due to eviction. */
if (server.maxmemory && !server.lua_timedout) {
int out_of_memory = freeMemoryIfNeededAndSafe() == C_ERR;
/* freeMemoryIfNeeded may flush slave output buffers. This may result
* into a slave, that may be the active client, to be freed. */
if (server.current_client == NULL) return C_ERR;
/* It was impossible to free enough memory, and the command the client
* is trying to execute is denied during OOM conditions or the client
* is in MULTI/EXEC context? Error. */
if (out_of_memory &&
(c->cmd->flags & CMD_DENYOOM ||
(c->flags & CLIENT_MULTI &&
c->cmd->proc != execCommand &&
c->cmd->proc != discardCommand)))
{
flagTransaction(c);
addReply(c, shared.oomerr);
return C_OK;
}
}
}
这里只摘了部分,当需要清理内存时就会调用, 然后调用了freeMemoryIfNeededAndSafe
/* This is a wrapper for freeMemoryIfNeeded() that only really calls the
* function if right now there are the conditions to do so safely:
*
* - There must be no script in timeout condition.
* - Nor we are loading data right now.
*
*/
int freeMemoryIfNeededAndSafe(void) {
if (server.lua_timedout || server.loading) return C_OK;
return freeMemoryIfNeeded();
}
/* This function is periodically called to see if there is memory to free
* according to the current "maxmemory" settings. In case we are over the
* memory limit, the function will try to free some memory to return back
* under the limit.
*
* The function returns C_OK if we are under the memory limit or if we
* were over the limit, but the attempt to free memory was successful.
* Otehrwise if we are over the memory limit, but not enough memory
* was freed to return back under the limit, the function returns C_ERR. */
int freeMemoryIfNeeded(void) {
int keys_freed = 0;
/* By default replicas should ignore maxmemory
* and just be masters exact copies. */
if (server.masterhost && server.repl_slave_ignore_maxmemory) return C_OK;
size_t mem_reported, mem_tofree, mem_freed;
mstime_t latency, eviction_latency;
long long delta;
int slaves = listLength(server.slaves);
/* When clients are paused the dataset should be static not just from the
* POV of clients not being able to write, but also from the POV of
* expires and evictions of keys not being performed. */
if (clientsArePaused()) return C_OK;
if (getMaxmemoryState(&mem_reported,NULL,&mem_tofree,NULL) == C_OK)
return C_OK;
mem_freed = 0;
if (server.maxmemory_policy == MAXMEMORY_NO_EVICTION)
goto cant_free; /* We need to free memory, but policy forbids. */
latencyStartMonitor(latency);
while (mem_freed < mem_tofree) {
int j, k, i;
static unsigned int next_db = 0;
sds bestkey = NULL;
int bestdbid;
redisDb *db;
dict *dict;
dictEntry *de;
if (server.maxmemory_policy & (MAXMEMORY_FLAG_LRU|MAXMEMORY_FLAG_LFU) ||
server.maxmemory_policy == MAXMEMORY_VOLATILE_TTL)
{
struct evictionPoolEntry *pool = EvictionPoolLRU;
while(bestkey == NULL) {
unsigned long total_keys = 0, keys;
/* We don't want to make local-db choices when expiring keys,
* so to start populate the eviction pool sampling keys from
* every DB. */
for (i = 0; i < server.dbnum; i++) {
db = server.db+i;
dict = (server.maxmemory_policy & MAXMEMORY_FLAG_ALLKEYS) ?
db->dict : db->expires;
if ((keys = dictSize(dict)) != 0) {
evictionPoolPopulate(i, dict, db->dict, pool);
total_keys += keys;
}
}
if (!total_keys) break; /* No keys to evict. */
/* Go backward from best to worst element to evict. */
for (k = EVPOOL_SIZE-1; k >= 0; k--) {
if (pool[k].key == NULL) continue;
bestdbid = pool[k].dbid;
if (server.maxmemory_policy & MAXMEMORY_FLAG_ALLKEYS) {
de = dictFind(server.db[pool[k].dbid].dict,
pool[k].key);
} else {
de = dictFind(server.db[pool[k].dbid].expires,
pool[k].key);
}
/* Remove the entry from the pool. */
if (pool[k].key != pool[k].cached)
sdsfree(pool[k].key);
pool[k].key = NULL;
pool[k].idle = 0;
/* If the key exists, is our pick. Otherwise it is
* a ghost and we need to try the next element. */
if (de) {
bestkey = dictGetKey(de);
break;
} else {
/* Ghost... Iterate again. */
}
}
}
}
/* volatile-random and allkeys-random policy */
else if (server.maxmemory_policy == MAXMEMORY_ALLKEYS_RANDOM ||
server.maxmemory_policy == MAXMEMORY_VOLATILE_RANDOM)
{
/* When evicting a random key, we try to evict a key for
* each DB, so we use the static 'next_db' variable to
* incrementally visit all DBs. */
for (i = 0; i < server.dbnum; i++) {
j = (++next_db) % server.dbnum;
db = server.db+j;
dict = (server.maxmemory_policy == MAXMEMORY_ALLKEYS_RANDOM) ?
db->dict : db->expires;
if (dictSize(dict) != 0) {
de = dictGetRandomKey(dict);
bestkey = dictGetKey(de);
bestdbid = j;
break;
}
}
}
/* Finally remove the selected key. */
if (bestkey) {
db = server.db+bestdbid;
robj *keyobj = createStringObject(bestkey,sdslen(bestkey));
propagateExpire(db,keyobj,server.lazyfree_lazy_eviction);
/* We compute the amount of memory freed by db*Delete() alone.
* It is possible that actually the memory needed to propagate
* the DEL in AOF and replication link is greater than the one
* we are freeing removing the key, but we can't account for
* that otherwise we would never exit the loop.
*
* AOF and Output buffer memory will be freed eventually so
* we only care about memory used by the key space. */
delta = (long long) zmalloc_used_memory();
latencyStartMonitor(eviction_latency);
if (server.lazyfree_lazy_eviction)
dbAsyncDelete(db,keyobj);
else
dbSyncDelete(db,keyobj);
latencyEndMonitor(eviction_latency);
latencyAddSampleIfNeeded("eviction-del",eviction_latency);
latencyRemoveNestedEvent(latency,eviction_latency);
delta -= (long long) zmalloc_used_memory();
mem_freed += delta;
server.stat_evictedkeys++;
notifyKeyspaceEvent(NOTIFY_EVICTED, "evicted",
keyobj, db->id);
decrRefCount(keyobj);
keys_freed++;
/* When the memory to free starts to be big enough, we may
* start spending so much time here that is impossible to
* deliver data to the slaves fast enough, so we force the
* transmission here inside the loop. */
if (slaves) flushSlavesOutputBuffers();
/* Normally our stop condition is the ability to release
* a fixed, pre-computed amount of memory. However when we
* are deleting objects in another thread, it's better to
* check, from time to time, if we already reached our target
* memory, since the "mem_freed" amount is computed only
* across the dbAsyncDelete() call, while the thread can
* release the memory all the time. */
if (server.lazyfree_lazy_eviction && !(keys_freed % 16)) {
if (getMaxmemoryState(NULL,NULL,NULL,NULL) == C_OK) {
/* Let's satisfy our stop condition. */
mem_freed = mem_tofree;
}
}
} else {
latencyEndMonitor(latency);
latencyAddSampleIfNeeded("eviction-cycle",latency);
goto cant_free; /* nothing to free... */
}
}
latencyEndMonitor(latency);
latencyAddSampleIfNeeded("eviction-cycle",latency);
return C_OK;
cant_free:
/* We are here if we are not able to reclaim memory. There is only one
* last thing we can try: check if the lazyfree thread has jobs in queue
* and wait... */
while(bioPendingJobsOfType(BIO_LAZY_FREE)) {
if (((mem_reported - zmalloc_used_memory()) + mem_freed) >= mem_tofree)
break;
usleep(1000);
}
return C_ERR;
}
这里就是根据具体策略去淘汰 key,首先是要往 pool 更新 key,更新key 的方法是evictionPoolPopulate
void evictionPoolPopulate(int dbid, dict *sampledict, dict *keydict, struct evictionPoolEntry *pool) {
int j, k, count;
dictEntry *samples[server.maxmemory_samples];
count = dictGetSomeKeys(sampledict,samples,server.maxmemory_samples);
for (j = 0; j < count; j++) {
unsigned long long idle;
sds key;
robj *o;
dictEntry *de;
de = samples[j];
key = dictGetKey(de);
/* If the dictionary we are sampling from is not the main
* dictionary (but the expires one) we need to lookup the key
* again in the key dictionary to obtain the value object. */
if (server.maxmemory_policy != MAXMEMORY_VOLATILE_TTL) {
if (sampledict != keydict) de = dictFind(keydict, key);
o = dictGetVal(de);
}
/* Calculate the idle time according to the policy. This is called
* idle just because the code initially handled LRU, but is in fact
* just a score where an higher score means better candidate. */
if (server.maxmemory_policy & MAXMEMORY_FLAG_LRU) {
idle = estimateObjectIdleTime(o);
} else if (server.maxmemory_policy & MAXMEMORY_FLAG_LFU) {
/* When we use an LRU policy, we sort the keys by idle time
* so that we expire keys starting from greater idle time.
* However when the policy is an LFU one, we have a frequency
* estimation, and we want to evict keys with lower frequency
* first. So inside the pool we put objects using the inverted
* frequency subtracting the actual frequency to the maximum
* frequency of 255. */
idle = 255-LFUDecrAndReturn(o);
} else if (server.maxmemory_policy == MAXMEMORY_VOLATILE_TTL) {
/* In this case the sooner the expire the better. */
idle = ULLONG_MAX - (long)dictGetVal(de);
} else {
serverPanic("Unknown eviction policy in evictionPoolPopulate()");
}
/* Insert the element inside the pool.
* First, find the first empty bucket or the first populated
* bucket that has an idle time smaller than our idle time. */
k = 0;
while (k < EVPOOL_SIZE &&
pool[k].key &&
pool[k].idle < idle) k++;
if (k == 0 && pool[EVPOOL_SIZE-1].key != NULL) {
/* Can't insert if the element is < the worst element we have
* and there are no empty buckets. */
continue;
} else if (k < EVPOOL_SIZE && pool[k].key == NULL) {
/* Inserting into empty position. No setup needed before insert. */
} else {
/* Inserting in the middle. Now k points to the first element
* greater than the element to insert. */
if (pool[EVPOOL_SIZE-1].key == NULL) {
/* Free space on the right? Insert at k shifting
* all the elements from k to end to the right. */
/* Save SDS before overwriting. */
sds cached = pool[EVPOOL_SIZE-1].cached;
memmove(pool+k+1,pool+k,
sizeof(pool[0])*(EVPOOL_SIZE-k-1));
pool[k].cached = cached;
} else {
/* No free space on right? Insert at k-1 */
k--;
/* Shift all elements on the left of k (included) to the
* left, so we discard the element with smaller idle time. */
sds cached = pool[0].cached; /* Save SDS before overwriting. */
if (pool[0].key != pool[0].cached) sdsfree(pool[0].key);
memmove(pool,pool+1,sizeof(pool[0])*k);
pool[k].cached = cached;
}
}
/* Try to reuse the cached SDS string allocated in the pool entry,
* because allocating and deallocating this object is costly
* (according to the profiler, not my fantasy. Remember:
* premature optimizbla bla bla bla. */
int klen = sdslen(key);
if (klen > EVPOOL_CACHED_SDS_SIZE) {
pool[k].key = sdsdup(key);
} else {
memcpy(pool[k].cached,key,klen+1);
sdssetlen(pool[k].cached,klen);
pool[k].key = pool[k].cached;
}
pool[k].idle = idle;
pool[k].dbid = dbid;
}
}
Redis随机选择maxmemory_samples数量的key,然后计算这些key的空闲时间idle time,当满足条件时(比pool中的某些键的空闲时间还大)就可以进pool。pool更新之后,就淘汰pool中空闲时间最大的键。
estimateObjectIdleTime用来计算Redis对象的空闲时间:
/* Given an object returns the min number of milliseconds the object was never
* requested, using an approximated LRU algorithm. */
unsigned long long estimateObjectIdleTime(robj *o) {
unsigned long long lruclock = LRU_CLOCK();
if (lruclock >= o->lru) {
return (lruclock - o->lru) * LRU_CLOCK_RESOLUTION;
} else {
return (lruclock + (LRU_CLOCK_MAX - o->lru)) *
LRU_CLOCK_RESOLUTION;
}
}
空闲时间第一种是 lurclock 大于对象的 lru,那么就是减一下乘以精度,因为 lruclock 有可能是已经预生成的,所以会可能走下面这个
上面介绍了LRU 的算法,但是考虑一种场景
~~~~~A~~~~~A~~~~~A~~~~A~~~~~A~~~~~A~~|
~~B~~B~~B~~B~~B~~B~~B~~B~~B~~B~~B~~B~|
~~~~~~~~~~C~~~~~~~~~C~~~~~~~~~C~~~~~~|
~~~~~D~~~~~~~~~~D~~~~~~~~~D~~~~~~~~~D|
可以发现,当采用 lru 的淘汰策略的时候,D 是最新的,会被认为是最值得保留的,但是事实上还不如 A 跟 B,然后 antirez 大神就想到了LFU (Least Frequently Used) 这个算法, 显然对于上面的四个 key 的访问频率,保留优先级应该是 B > A > C = D
那要怎么来实现这个 LFU 算法呢,其实像LRU,理想的情况就是维护个链表,把最新访问的放到头上去,但是这个会影响访问速度,注意到前面代码的应该可以看到,redisObject 的 lru 字段其实是两用的,当策略是 LFU 时,这个字段就另作他用了,它的 24 位长度被分成两部分
16 bits 8 bits
+----------------+--------+
+ Last decr time | LOG_C |
+----------------+--------+
前16位字段是最后一次递减时间,因此Redis知道 上一次计数器递减,后8位是 计数器 counter。
LFU 的主体策略就是当这个 key 被访问的次数越多频率越高他就越容易被保留下来,并且是最近被访问的频率越高。这其实有两个事情要做,一个是在访问的时候增加计数值,在一定长时间不访问时进行衰减,所以这里用了两个值,前 16 位记录上一次衰减的时间,后 8 位记录具体的计数值。
Redis4.0之后为maxmemory_policy淘汰策略添加了两个LFU模式:
volatile-lfu:对有过期时间的key采用LFU淘汰策略allkeys-lfu:对全部key采用LFU淘汰策略
还有2个配置可以调整LFU算法:
lfu-log-factor 10
lfu-decay-time 1
```
`lfu-log-factor` 可以调整计数器counter的增长速度,lfu-log-factor越大,counter增长的越慢。
`lfu-decay-time`是一个以分钟为单位的数值,可以调整counter的减少速度
这里有个问题是 8 位大小够计么,访问一次加 1 的话的确不够,不过大神就是大神,才不会这么简单的加一。往下看代码
```C
/* Low level key lookup API, not actually called directly from commands
* implementations that should instead rely on lookupKeyRead(),
* lookupKeyWrite() and lookupKeyReadWithFlags(). */
robj *lookupKey(redisDb *db, robj *key, int flags) {
dictEntry *de = dictFind(db->dict,key->ptr);
if (de) {
robj *val = dictGetVal(de);
/* Update the access time for the ageing algorithm.
* Don't do it if we have a saving child, as this will trigger
* a copy on write madness. */
if (!hasActiveChildProcess() && !(flags & LOOKUP_NOTOUCH)){
if (server.maxmemory_policy & MAXMEMORY_FLAG_LFU) {
// 当淘汰策略是 LFU 时,就会调用这个updateLFU
updateLFU(val);
} else {
val->lru = LRU_CLOCK();
}
}
return val;
} else {
return NULL;
}
}
updateLFU 这个其实个入口,调用了两个重要的方法
/* Update LFU when an object is accessed.
* Firstly, decrement the counter if the decrement time is reached.
* Then logarithmically increment the counter, and update the access time. */
void updateLFU(robj *val) {
unsigned long counter = LFUDecrAndReturn(val);
counter = LFULogIncr(counter);
val->lru = (LFUGetTimeInMinutes()<<8) | counter;
}
首先来看看LFUDecrAndReturn,这个方法的作用是根据上一次衰减时间和系统配置的 lfu-decay-time 参数来确定需要将 counter 减去多少
/* If the object decrement time is reached decrement the LFU counter but
* do not update LFU fields of the object, we update the access time
* and counter in an explicit way when the object is really accessed.
* And we will times halve the counter according to the times of
* elapsed time than server.lfu_decay_time.
* Return the object frequency counter.
*
* This function is used in order to scan the dataset for the best object
* to fit: as we check for the candidate, we incrementally decrement the
* counter of the scanned objects if needed. */
unsigned long LFUDecrAndReturn(robj *o) {
// 右移 8 位,拿到上次衰减时间
unsigned long ldt = o->lru >> 8;
// 对 255 做与操作,拿到 counter 值
unsigned long counter = o->lru & 255;
// 根据lfu_decay_time来算出过了多少个衰减周期
unsigned long num_periods = server.lfu_decay_time ? LFUTimeElapsed(ldt) / server.lfu_decay_time : 0;
if (num_periods)
counter = (num_periods > counter) ? 0 : counter - num_periods;
return counter;
}
然后是加,调用了LFULogIncr
/* Logarithmically increment a counter. The greater is the current counter value
* the less likely is that it gets really implemented. Saturate it at 255. */
uint8_t LFULogIncr(uint8_t counter) {
// 最大值就是 255,到顶了就不加了
if (counter == 255) return 255;
// 生成个随机小数
double r = (double)rand()/RAND_MAX;
// 减去个基础值,LFU_INIT_VAL = 5,防止刚进来就被逐出
double baseval = counter - LFU_INIT_VAL;
// 如果是小于 0,
if (baseval < 0) baseval = 0;
// 如果 baseval 是 0,那么 p 就是 1了,后面 counter 直接加一,如果不是的话,得看系统参数lfu_log_factor,这个越大,除出来的 p 越小,那么 counter++的可能性也越小,这样子就把前面的疑问给解决了,不是直接+1 的
double p = 1.0/(baseval*server.lfu_log_factor+1);
if (r < p) counter++;
return counter;
}
大概的变化速度可以参考
+--------+------------+------------+------------+------------+------------+
| factor | 100 hits | 1000 hits | 100K hits | 1M hits | 10M hits |
+--------+------------+------------+------------+------------+------------+
| 0 | 104 | 255 | 255 | 255 | 255 |
+--------+------------+------------+------------+------------+------------+
| 1 | 18 | 49 | 255 | 255 | 255 |
+--------+------------+------------+------------+------------+------------+
| 10 | 10 | 18 | 142 | 255 | 255 |
+--------+------------+------------+------------+------------+------------+
| 100 | 8 | 11 | 49 | 143 | 255 |
+--------+------------+------------+------------+------------+------------+
简而言之就是 lfu_log_factor 越大变化的越慢
总结一下,redis 实现了近似的 lru 淘汰策略,通过增加了淘汰 key 的池子(pool),并且增大每次抽样的 key 的数量来将淘汰效果更进一步地接近于 lru,这是 lru 策略,但是对于前面举的一个例子,其实 lru 并不能保证 key 的淘汰就如我们预期,所以在后期又引入了 lfu 的策略,lfu的策略比较巧妙,复用了 redis 对象的 lru 字段,并且使用了factor 参数来控制计数器递增的速度,防止 8 位的计数器太早溢出。
]]>此时我们就可以用引用来解决这个问题
fn main() {
let s1 = String::from("hello");
let len = calculate_length(&s1);
println!("The length of '{}' is {}", s1, len);
}
fn calculate_length(s: &String) -> usize {
s.len()
}
这里的&符号就是引用的语义,它们允许你在不获得所有权的前提下使用值
由于引用不持有值的所有权,所以当引用离开当前作用域时,它指向的值也不会被丢弃
而当我们尝试对引用的字符串进行修改时
fn main() {
let s1 = String::from("hello");
change(&s1);
}
fn change(s: &String) {
s.push_str(", world");
}
就会有以下报错,
其实也很容易发现,毕竟没有 mut 指出这是可变引用,同时需要将 s1 改成 mut 可变的
fn main() {
let mut s1 = String::from("hello");
change(&mut s1);
}
fn change(s: &mut String) {
s.push_str(", world");
}
再看一个例子
fn main() {
let mut s1 = String::from("hello");
let r1 = &mut s1;
let r2 = &mut s1;
}
这个例子在书里是会报错的,因为同时存在一个以上的可变引用,但是在我运行的版本里前面这段没有报错,只有当我真的要去更改的时候
fn main() {
let mut s1 = String::from("hello");
let mut r1 = &mut s1;
let mut r2 = &mut s1;
change(&mut r1);
change(&mut r2);
}
fn change(s: &mut String) {
s.push_str(", world");
}

这里可能就是具体版本在实现上的一个差异,我用的 rustc 是 1.44.0 版本
其实上面的主要是由 rust 想要避免这类多重可变更导致的异常问题,总结下就是三个点
还有一点需要注意的就是悬垂引用
fn main() {
let reference_to_nothing = dangle();
}
fn dangle() -> &String {
let s = String::from("hello");
&s
}
这里可以看到其实在 dangle函数返回后,这里的 s 理论上就离开了作用域,但是由于返回了 s 的引用,在 main 函数中就会拿着这个引用,就会出现如下错误
最后总结下
fn main() {
let mut s = String::from("hello world");
let word = first_word(&s);
s.clear();
// 这时候虽然 word 还是 5,但是 s 已经被清除了,所以就没存在的意义
}
这里其实我们就需要关注 s 的存在性,代码的逻辑合理性就需要额外去维护,此时我们就可以用切片
let s = String::from("hello world")
let hello = &s[0..5];
let world = &s[6..11];
其实跟 Python 的list 之类的语法有点类似,当然里面还有些语法糖,比如可以直接用省略后面的数字表示直接引用到结尾
let hello = &s[0..];
甚至再进一步
let hello = &s[..];
使用了切片之后
fn first_word(s: &String) -> &str {
let bytes = s.as_bytes();
for (i, &item) in bytes.iter().enumerate() {
if item == b' ' {
return &s[0..i];
}
}
&s[..]
}
fn main() {
let mut s = String::from("hello world");
let word = first_word(&s);
s.clear(); // error!
println!("the first word is: {}", word);
}
那再执行 main 函数的时候就会抛错,因为 word 还是个切片,需要保证 s 的有效性,并且其实我们可以将函数申明成
fn first_word(s: &str) -> &str {
这样就既能处理&String 的情况,就是当成完整字符串的切片,也能处理普通的切片。
其他类型的切片
let a = [1, 2, 3, 4, 5];
let slice = &a[1..3];
简单记录下,具体可以去看看这本书
]]>然后看个案例
let x = 5;
let y = x;
这个其实有两种,一般可以认为比较多实现的会使用 copy on write 之类的,先让两个都指向同一个快 5 的存储,在发生变更后开始正式拷贝,但是涉及到内存处理的便利性,对于这类简单类型,可以直接拷贝
但是对于非基础类型
let s1 = String::from("hello");
let s2 = s1;
println!("{}, world!", s1);
有可能认为有两种内存分布可能
先看下 string 的内存结构
第一种可能是
第二种是
我们来尝试编译下
发现有这个错误,其实在 rust 中let y = x这个行为的实质是移动,在赋值给 y 之后 x 就无效了
这样子就不会造成脱离作用域时,对同一块内存区域的二次释放,如果需要复制,可以使用 clone 方法
let s1 = String::from("hello");
let s2 = s1.clone();
println!("s1 = {}, s2 = {}", s1, s2);
这里其实会有点疑惑,为什么前面的x, y 的行为跟 s1, s2 的不一样,其实主要是基本类型和 string 这类的不定大小的类型的内存分配方式不同,x, y这类整型可以直接确定大小,可以直接在栈上分配,而像 string 和其他的变体结构体,其大小都是不能在编译时确定,所以需要在堆上进行分配
工作中学习使用了一下Spark做数据分析,主要是用spark的python接口,首先是pyspark.SparkContext(appName=xxx),这是初始化一个Spark应用实例或者说会话,不能重复,
返回的实例句柄就可以调用textFile(path)读取文本文件,这里的文本文件可以是HDFS上的文本文件,也可以普通文本文件,但是需要在Spark的所有集群上都存在,否则会
读取失败,parallelize则可以将python生成的集合数据读取后转换成rdd(A Resilient Distributed Dataset (RDD),一种spark下的基本抽象数据集),基于这个RDD就可以做
数据的流式计算,例如map reduce,在Spark中可以非常方便地实现
textFile = sc.parallelize([(1,1), (2,1), (3,1), (4,1), (5,1),(1,1), (2,1), (3,1), (4,1), (5,1)])
data = textFile.reduceByKey(lambda x, y: x + y).collect()
for _ in data:
print(_)
(3, 2)
(1, 2)
(4, 2)
(2, 2)
(5, 2)
]]>Given a sorted integer array without duplicates, return the summary of its ranges.
For example, given [0,1,2,4,5,7], return ["0->2","4->5","7"].
每一个区间的起点nums[i]加上j是否等于nums[i+j]
参考
class Solution {
public:
vector<string> summaryRanges(vector<int>& nums) {
int i = 0, j = 1, n;
vector<string> res;
n = nums.size();
while(i < n){
j = 1;
while(j < n && nums[i+j] - nums[i] == j) j++;
res.push_back(j <= 1 ? to_string(nums[i]) : to_string(nums[i]) + "->" + to_string(nums[i + j - 1]));
i += j;
}
return res;
}
};]]>
public class CustomSpringEvent extends ApplicationEvent {
private String message;
public CustomSpringEvent(Object source, String message) {
super(source);
this.message = message;
}
public String getMessage() {
return message;
}
}
这个 ApplicationEvent 其实也比较简单,内部就一个 Object 类型的 source,可以自行扩展,我们在自定义的这个 Event 里加了个 Message ,只是简单介绍下使用
public abstract class ApplicationEvent extends EventObject {
private static final long serialVersionUID = 7099057708183571937L;
private final long timestamp;
public ApplicationEvent(Object source) {
super(source);
this.timestamp = System.currentTimeMillis();
}
public ApplicationEvent(Object source, Clock clock) {
super(source);
this.timestamp = clock.millis();
}
public final long getTimestamp() {
return this.timestamp;
}
}
然后就是事件生产者和监听消费者
@Component
public class CustomSpringEventPublisher {
@Resource
private ApplicationEventPublisher applicationEventPublisher;
public void publishCustomEvent(final String message) {
System.out.println("Publishing custom event. ");
CustomSpringEvent customSpringEvent = new CustomSpringEvent(this, message);
applicationEventPublisher.publishEvent(customSpringEvent);
}
}
这里的 ApplicationEventPublisher 是 Spring 的方法接口
@FunctionalInterface
public interface ApplicationEventPublisher {
default void publishEvent(ApplicationEvent event) {
this.publishEvent((Object)event);
}
void publishEvent(Object var1);
}
具体的是例如 org.springframework.context.support.AbstractApplicationContext#publishEvent(java.lang.Object, org.springframework.core.ResolvableType) 中的实现,后面可以展开讲讲
事件监听者:
@Component
public class CustomSpringEventListener implements ApplicationListener<CustomSpringEvent> {
@Override
public void onApplicationEvent(CustomSpringEvent event) {
System.out.println("Received spring custom event - " + event.getMessage());
}
}
这里的也是 spring 的一个方法接口
@FunctionalInterface
public interface ApplicationListener<E extends ApplicationEvent> extends EventListener {
void onApplicationEvent(E var1);
static <T> ApplicationListener<PayloadApplicationEvent<T>> forPayload(Consumer<T> consumer) {
return (event) -> {
consumer.accept(event.getPayload());
};
}
}
然后简单包个请求
@RequestMapping(value = "/event", method = RequestMethod.GET)
@ResponseBody
public void event() {
customSpringEventPublisher.publishCustomEvent("hello sprint event");
}

就能看到接收到消息了。
WebSocket是HTML5开始提供的一种在单个TCP连接上进行全双工通讯的协议。WebSocket通信协议于2011年被IETF定为标准RFC 6455,WebSocketAPI被W3C定为标准。
,在web私信,im等应用较多。背景和优缺点可以参看wiki。
因为swoole官方还不支持windows,所以需要装下linux,之前都是用ubuntu,
这次就试一下centos7,还是满好看的,虽然虚拟机会默认最小安装,需要在安装
时自己选择带gnome的,当然最小安装也是可以的,只是最后需要改下防火墙。
然后是装下PHP,Nginx什么的,我是用Oneinstack,可以按需安装
给做这个的大大点个赞。
1.install via pecl
pecl install swoole
2.install from source
sudo apt-get install php5-dev
git clone https://github.com/swoole/swoole-src.git
cd swoole-src
phpize
./configure
make && make install
3.add extension
extension = swoole.so
4.test extension
php -m | grep swoole
如果存在就代表安装成功啦
实现代码看了这位仁兄的代码
还是贴一下代码
服务端:
//创建websocket服务器对象,监听0.0.0.0:9502端口
$ws = new swoole_websocket_server("0.0.0.0", 9502);
//监听WebSocket连接打开事件
$ws->on('open', function ($ws, $request) {
$fd[] = $request->fd;
$GLOBALS['fd'][] = $fd;
//区别下当前用户
$ws->push($request->fd, "hello user{$request->fd}, welcome\n");
});
//监听WebSocket消息事件
$ws->on('message', function ($ws, $frame) {
$msg = 'from'.$frame->fd.":{$frame->data}\n";
foreach($GLOBALS['fd'] as $aa){
foreach($aa as $i){
if($i != $frame->fd) {
# code...
$ws->push($i,$msg);
}
}
}
});
//监听WebSocket连接关闭事件
$ws->on('close', function ($ws, $fd) {
echo "client-{$fd} is closed\n";
});
$ws->start();
客户端:
<!DOCTYPE html>
<html lang="en">
<head>
<meta charset="UTF-8">
<title>Title</title>
</head>
<body>
<div id="msg"></div>
<input type="text" id="text">
<input type="submit" value="发送数据" onclick="song()">
</body>
<script>
var msg = document.getElementById("msg");
var wsServer = 'ws://0.0.0.0:9502';
//调用websocket对象建立连接:
//参数:ws/wss(加密)://ip:port (字符串)
var websocket = new WebSocket(wsServer);
//onopen监听连接打开
websocket.onopen = function (evt) {
//websocket.readyState 属性:
/*
CONNECTING 0 The connection is not yet open.
OPEN 1 The connection is open and ready to communicate.
CLOSING 2 The connection is in the process of closing.
CLOSED 3 The connection is closed or couldn't be opened.
*/
msg.innerHTML = websocket.readyState;
};
function song(){
var text = document.getElementById('text').value;
document.getElementById('text').value = '';
//向服务器发送数据
websocket.send(text);
}
//监听连接关闭
// websocket.onclose = function (evt) {
// console.log("Disconnected");
// };
//onmessage 监听服务器数据推送
websocket.onmessage = function (evt) {
msg.innerHTML += evt.data +'<br>';
// console.log('Retrieved data from server: ' + evt.data);
};
//监听连接错误信息
// websocket.onerror = function (evt, e) {
// console.log('Error occured: ' + evt.data);
// };
</script>
</html>
做了个循环,将当前用户的消息发送给同时在线的其他用户,比较简陋,如下图
user1:
user2:

user3:

wp_users 表,用 select 查询看下可以看到有用户的数据,如果是像我这样搭着玩的没有创建其他用户的话应该就只有一个用户,那我们的表里的用户数据就只会有一条,当然多条的话可以通过用户名来找UPDATE wp_users SET user_pass = MD5('123456') WHERE ID = 1;
然后就能用自己的账户跟刚才更新的密码登录了。
]]>/* quicklistNode is a 32 byte struct describing a ziplist for a quicklist.
* We use bit fields keep the quicklistNode at 32 bytes.
* count: 16 bits, max 65536 (max zl bytes is 65k, so max count actually < 32k).
* encoding: 2 bits, RAW=1, LZF=2.
* container: 2 bits, NONE=1, ZIPLIST=2.
* recompress: 1 bit, bool, true if node is temporarry decompressed for usage.
* attempted_compress: 1 bit, boolean, used for verifying during testing.
* extra: 10 bits, free for future use; pads out the remainder of 32 bits */
typedef struct quicklistNode {
struct quicklistNode *prev;
struct quicklistNode *next;
unsigned char *zl;
unsigned int sz; /* ziplist size in bytes */
unsigned int count : 16; /* count of items in ziplist */
unsigned int encoding : 2; /* RAW==1 or LZF==2 */
unsigned int container : 2; /* NONE==1 or ZIPLIST==2 */
unsigned int recompress : 1; /* was this node previous compressed? */
unsigned int attempted_compress : 1; /* node can't compress; too small */
unsigned int extra : 10; /* more bits to steal for future usage */
} quicklistNode;
/* quicklistLZF is a 4+N byte struct holding 'sz' followed by 'compressed'.
* 'sz' is byte length of 'compressed' field.
* 'compressed' is LZF data with total (compressed) length 'sz'
* NOTE: uncompressed length is stored in quicklistNode->sz.
* When quicklistNode->zl is compressed, node->zl points to a quicklistLZF */
typedef struct quicklistLZF {
unsigned int sz; /* LZF size in bytes*/
char compressed[];
} quicklistLZF;
/* quicklist is a 40 byte struct (on 64-bit systems) describing a quicklist.
* 'count' is the number of total entries.
* 'len' is the number of quicklist nodes.
* 'compress' is: -1 if compression disabled, otherwise it's the number
* of quicklistNodes to leave uncompressed at ends of quicklist.
* 'fill' is the user-requested (or default) fill factor. */
typedef struct quicklist {
quicklistNode *head;
quicklistNode *tail;
unsigned long count; /* total count of all entries in all ziplists */
unsigned long len; /* number of quicklistNodes */
int fill : 16; /* fill factor for individual nodes */
unsigned int compress : 16; /* depth of end nodes not to compress;0=off */
} quicklist;
粗略看下,quicklist 里有 head,tail, quicklistNode里有 prev,next 指针,是不是有链表的基本轮廓了,那么为啥这玩意要称为快表呢,快在哪,关键就在这个unsigned char *zl;zl 是不是前面又看到过,就是 ziplist ,这是什么鬼,链表里用压缩表,这不套娃么,先别急,回顾下前面说的 ziplist,ziplist 有哪些特点,内存利用率高,可以从表头快速定位到尾节点,节点可以从后往前找,但是有个缺点,就是从中间插入的效率比较低,需要整体往后移,这个其实是普通数组的优化版,但还是有数组的一些劣势,所以要真的快,是不是可以将链表跟数组真的结合起来。
这里有两个 redis 的配置参数,list-max-ziplist-size 和 list-compress-depth,先来说第一个,既然快表是将链表跟压缩表数组结合起来使用,那么具体怎么用呢,比如我有一个 10 个元素的 list,那具体怎么放,每个 quicklistNode 里放多大的 ziplist,假如每个快表节点的 ziplist 只放一个元素,那么其实这就退化成了一个链表,如果 10 个元素放在一个 quicklistNode 的 ziplist 里,那就退化成了一个 ziplist,所以有了这个 list-max-ziplist-size,而且它还比较牛,能取正负值,当是正值时,对应的就是每个 quicklistNode 的 ziplist 中的元素个数,比如配置了 list-max-ziplist-size = 5,那么我刚才的 10 个元素的 list 就是一个两个 quicklistNode 组成的快表,每个 quicklistNode 中的 ziplist 包含了五个元素,当 list-max-ziplist-size取负值的时候,它限制了 ziplist 的字节数
size_t offset = (-fill) - 1;
if (offset < (sizeof(optimization_level) / sizeof(*optimization_level))) {
if (sz <= optimization_level[offset]) {
return 1;
} else {
return 0;
}
} else {
return 0;
}
/* Optimization levels for size-based filling */
static const size_t optimization_level[] = {4096, 8192, 16384, 32768, 65536};
/* Create a new quicklist.
* Free with quicklistRelease(). */
quicklist *quicklistCreate(void) {
struct quicklist *quicklist;
quicklist = zmalloc(sizeof(*quicklist));
quicklist->head = quicklist->tail = NULL;
quicklist->len = 0;
quicklist->count = 0;
quicklist->compress = 0;
quicklist->fill = -2;
return quicklist;
}
这个 fill 就是传进来的 list-max-ziplist-size, 具体对应的就是
quicklist->fill = -2;list-compress-depth这个参数呢是用来配置压缩的,等等压缩是为啥,不是里面已经是压缩表了么,大牛们就是为了性能殚精竭虑,这里考虑到的是一个场景,一般状况下,list 都是两端的访问频率比较高,那么是不是可以对中间的数据进行压缩,那么这个参数就是用来表示
/* depth of end nodes not to compress;0=off */
简单说下插入元素的过程
/* Wrapper to allow argument-based switching between HEAD/TAIL pop */
void quicklistPush(quicklist *quicklist, void *value, const size_t sz,
int where) {
if (where == QUICKLIST_HEAD) {
quicklistPushHead(quicklist, value, sz);
} else if (where == QUICKLIST_TAIL) {
quicklistPushTail(quicklist, value, sz);
}
}
/* Add new entry to head node of quicklist.
*
* Returns 0 if used existing head.
* Returns 1 if new head created. */
int quicklistPushHead(quicklist *quicklist, void *value, size_t sz) {
quicklistNode *orig_head = quicklist->head;
if (likely(
_quicklistNodeAllowInsert(quicklist->head, quicklist->fill, sz))) {
quicklist->head->zl =
ziplistPush(quicklist->head->zl, value, sz, ZIPLIST_HEAD);
quicklistNodeUpdateSz(quicklist->head);
} else {
quicklistNode *node = quicklistCreateNode();
node->zl = ziplistPush(ziplistNew(), value, sz, ZIPLIST_HEAD);
quicklistNodeUpdateSz(node);
_quicklistInsertNodeBefore(quicklist, quicklist->head, node);
}
quicklist->count++;
quicklist->head->count++;
return (orig_head != quicklist->head);
}
/* Add new entry to tail node of quicklist.
*
* Returns 0 if used existing tail.
* Returns 1 if new tail created. */
int quicklistPushTail(quicklist *quicklist, void *value, size_t sz) {
quicklistNode *orig_tail = quicklist->tail;
if (likely(
_quicklistNodeAllowInsert(quicklist->tail, quicklist->fill, sz))) {
quicklist->tail->zl =
ziplistPush(quicklist->tail->zl, value, sz, ZIPLIST_TAIL);
quicklistNodeUpdateSz(quicklist->tail);
} else {
quicklistNode *node = quicklistCreateNode();
node->zl = ziplistPush(ziplistNew(), value, sz, ZIPLIST_TAIL);
quicklistNodeUpdateSz(node);
_quicklistInsertNodeAfter(quicklist, quicklist->tail, node);
}
quicklist->count++;
quicklist->tail->count++;
return (orig_tail != quicklist->tail);
}
/* Wrappers for node inserting around existing node. */
REDIS_STATIC void _quicklistInsertNodeBefore(quicklist *quicklist,
quicklistNode *old_node,
quicklistNode *new_node) {
__quicklistInsertNode(quicklist, old_node, new_node, 0);
}
REDIS_STATIC void _quicklistInsertNodeAfter(quicklist *quicklist,
quicklistNode *old_node,
quicklistNode *new_node) {
__quicklistInsertNode(quicklist, old_node, new_node, 1);
}
/* Insert 'new_node' after 'old_node' if 'after' is 1.
* Insert 'new_node' before 'old_node' if 'after' is 0.
* Note: 'new_node' is *always* uncompressed, so if we assign it to
* head or tail, we do not need to uncompress it. */
REDIS_STATIC void __quicklistInsertNode(quicklist *quicklist,
quicklistNode *old_node,
quicklistNode *new_node, int after) {
if (after) {
new_node->prev = old_node;
if (old_node) {
new_node->next = old_node->next;
if (old_node->next)
old_node->next->prev = new_node;
old_node->next = new_node;
}
if (quicklist->tail == old_node)
quicklist->tail = new_node;
} else {
new_node->next = old_node;
if (old_node) {
new_node->prev = old_node->prev;
if (old_node->prev)
old_node->prev->next = new_node;
old_node->prev = new_node;
}
if (quicklist->head == old_node)
quicklist->head = new_node;
}
/* If this insert creates the only element so far, initialize head/tail. */
if (quicklist->len == 0) {
quicklist->head = quicklist->tail = new_node;
}
if (old_node)
quicklistCompress(quicklist, old_node);
quicklist->len++;
}
前面第一步先根据插入的是头还是尾选择不同的 push 函数,quicklistPushHead 或者 quicklistPushTail,举例分析下从头插入的 quicklistPushHead,先判断当前的 quicklistNode 节点还能不能允许再往 ziplist 里添加元素,如果可以就添加,如果不允许就新建一个 quicklistNode,然后调用 _quicklistInsertNodeBefore 将节点插进去,具体插入quicklist节点的操作类似链表的插入。
]]>给定 n 个非负整数表示每个宽度为 1 的柱子的高度图,计算按此排列的柱子,下雨之后能接多少雨水。

输入:height = [0,1,0,2,1,0,1,3,2,1,2,1]
输出:6
解释:上面是由数组 [0,1,0,2,1,0,1,3,2,1,2,1] 表示的高度图,在这种情况下,可以接 6 个单位的雨水(蓝色部分表示雨水)。
其实最开始的想法是从左到右扫区间,就是示例中的第一个水槽跟第二个水槽都可以用这个办法解决
前面这种是属于右侧比左侧高的情况,对于左侧高右侧低的就不行了,(写这篇的时候想起来可以再反着扫一遍可能可以)
所以这个方案不好,贴一下这个方案的代码
public int trap(int[] height) {
int lastLeft = -1;
int sum = 0;
int tempSum = 0;
boolean startFlag = true;
for (int j : height) {
if (startFlag && j <= 0) {
startFlag = false;
continue;
}
if (j >= lastLeft) {
sum += tempSum;
tempSum = 0;
lastLeft = j;
} else {
tempSum += lastLeft - j;
}
}
return sum;
}
后面结合网上的解法,其实可以反过来,对于每个格子找左右侧的最大值,取小的那个和当前格子的差值就是这一个的储水量了
理解了这种想法,代码其实就不难了
int n = height.length;
if (n <= 2) {
return 0;
}
// 思路转变下,其实可以对于每一格算储水量,算法就是找到这一格左边的最高点跟这一格右边的最高点,
// 比较两侧的最高点,取小的那个,然后再跟当前格子的高度对比,差值就是当前格的储水量
int maxL[] = new int[n];
int maxR[] = new int[n];
int max = height[0];
maxL[0] = 0;
// 计算左侧的最高点
for (int i = 1; i < n - 1; i++) {
maxL[i] = max;
if (max < height[i]) {
max = height[i];
}
}
max = height[n - 1];
maxR[n - 1] = 0;
int tempSum, sum = 0;
// 计算右侧的最高点,并且同步算出来储水量,节省一个循环
for (int i = n - 2; i > 0; i--) {
maxR[i] = max;
if (height[i] > max) {
max = height[i];
}
tempSum = Math.min(maxL[i], maxR[i]) - height[i];
if (tempSum > 0) {
sum += tempSum;
}
}
return sum;
]]>Given an integer array nums and an integer k, return true if it is possible to divide this array into k non-empty subsets whose sums are all equal.
Example 1:
Input: nums = [4,3,2,3,5,2,1], k = 4
Output: true
Explanation: It is possible to divide it into 4 subsets (5), (1, 4), (2,3), (2,3) with equal sums.
Example 2:
Input: nums = [1,2,3,4], k = 3
Output: false
Constraints:
看到这个题一开始以为挺简单,但是仔细想想问题还是挺多的,首先是分成 k 组,但是数量不限,应该需要用到回溯的方式,同时对于时间和空间复杂度也有要求,一开始这个代码是超时的,我也试了下 leetcode 上 discussion 里 vote 最高的提交也是超时的,不过看 discussion 里的帖子,貌似是后面加了一些条件,可以帮忙提高执行效率,第三条提示不太清楚意图,具体可以看下代码
public boolean canPartitionKSubsets(int[] nums, int k) {
if (k == 1) {
return true;
}
int sum = 0, n;
n = nums.length;
for (int num : nums) {
sum += num;
}
if (sum % k != 0) {
return false;
}
int avg = sum / k;
// 排序
Arrays.sort(nums);
// 做个前置判断,如果最大值超过分组平均值了就可以返回 false 了
if (nums[n - 1] > avg) {
return false;
}
// 这里取了个巧,先将数组中元素就等于分组平均值的直接排除了
int calculated = 0;
for (int i = n - 1; i > 0; i--) {
if (nums[i] == avg) {
k--;
calculated++;
}
}
int[] bucket = new int[k];
// 初始化 bucket
for (int i = 0; i < k; i++) {
bucket[i] = avg;
}
// 提前做下边界判断
if (nums[n - 1] > avg) {
return false;
}
return backTraversal(nums, bucket, k, n - 1 - calculated);
}
private boolean backTraversal(int[] nums, int[] bucket, int k, int cur) {
if (cur < 0) {
return true;
}
for (int i = 0; i < k; i++) {
if (bucket[i] == nums[cur] || bucket[i] >= nums[cur] + nums[0]) {
// 判断如果当前 bucket[i] 剩余的数字等于nums[cur], 即当前bucket已经满了
// 或者如果当前 bucket[i] 剩余的数字大于等于 nums[cur] + nums[0] ,
// 因为nums 在经过排序后 nums[0]是最小值,如果加上 nums[0] 都已经超过bucket[i] 了,
// 那当前bucket[i] 肯定是没法由包含 nums[cur] 的组合组成一个满足和为前面 s/k 的组合了
// 这里判断的是 nums[cur] ,如果第一次 k 次循环都不符合其实就返回 false 了
// 而如果符合,就将 bucket[i] 减去 nums[cur] 再次进入递归,
// 这里进入递归有个收敛参数就是 cur - 1,因为其实判断 cur 递减作为一个结束条件
bucket[i] -= nums[cur];
// 符合条件,这里对应着入口,当 cur 被减到 0 了,就表示都符合了因为是根据所有值的和 s 和 k 组除出来的平均值,当所有数都通过前面的 if 判断符合了,并且每个数字都使用了,
// 即说明已经符合要求了
if (backTraversal(nums, bucket, k, cur - 1)) return true;
// 这边是个回退机制,如果前面 nums[cur]没办法组合成和为平均值的话就减掉进入下一个循环
bucket[i] += nums[cur];
}
}
return false;
}
最后贴个图
还是像我这样的小白专属,消息队列用来干啥,很多都是标准答案,用来削峰填谷的,这个完全对,只是我想结合场景说给像我这样的小白同学听,想想一个电商的下单功能,除了 AT 两家之外应该大部分都是接入的支付,那么下单支付完成后一般都是等支付回调,告诉你支付完成了(也有可能是失败了,或者超时了咱们主动去查),然后这个回调里我们自己的业务代码干点啥,首先比如是把订单状态改掉了,然后会有各类的操作,比如把优惠券核销了,把其他金钱相关的也核销了,把购物车里对应的商品给删了,还有更次要的,比如发个客服消息,让用户确认下地址的,给用户加积分的等等等等,想象下如果这些都是回调里一股脑儿做掉了,那可能你的代码健壮性跟相关服务的稳定性还有性能要达到一个非常高的水平才能让业务不出现异常,并且万一流量打起来了,这些重要的不重要的操作都会阻塞着,所以需要用一个消息队列,在接到回调后只处理极少的几个核心操作,完了就把这个消息丢进消息队列里,让各个业务方去消费这个消息,把客服消息发一下,给用户加个积分等等,这样子主要的业务流程需要处理的事情就少了,速度也加快了,这个例子呢不能严格算是削峰填谷的例子,不过也算是消息队列的比较典型的使用场景了,要说真实的削峰填谷的话其实可以这么理解,假如短时间内有 1w 个请求进来,系统能支持的 QPS 才 1000,那么正常情况下服务就挂了,或者被限流了,为了让服务正常,那么可以把这些请求先放进消息队列里,我服务端以拉的模式按我的处理能力来消费,这样就没啥问题了
扯了这么多来聊聊 RocketMQ 长啥样

总共有四大部分:NameServer,Broker,Producer,Consumer。
NameServer是一个非常简单的Topic路由注册中心,其角色类似Dubbo中的zookeeper,支持Broker的动态注册与发现。主要包括两个功能:Broker管理,NameServer接受Broker集群的注册信息并且保存下来作为路由信息的基本数据。然后提供心跳检测机制,检查Broker是否还存活;路由信息管理,每个NameServer将保存关于Broker集群的整个路由信息和用于客户端查询的队列信息。然后Producer和Conumser通过NameServer就可以知道整个Broker集群的路由信息,从而进行消息的投递和消费。NameServer通常也是集群的方式部署,各实例间相互不进行信息通讯。Broker是向每一台NameServer注册自己的路由信息,所以每一个NameServer实例上面都保存一份完整的路由信息。当某个NameServer因某种原因下线了,Broker仍然可以向其它NameServer同步其路由信息,Producer,Consumer仍然可以动态感知Broker的路由的信息。
NameServer压力不会太大,正常情况主要负责维持心跳和提供Topic-Broker的关系数据。但有一点需要注意,Broker向Namesr发心跳时,会带上当前自己所负责的所有Topic信息,如果Topic个数太多,会导致一次心跳中,光Topic的数据就非常大,网络情况差的话,网络传输失败,心跳失败,导致Namesrv误认为Broker心跳失败。
Broker主要负责消息的存储、投递和查询以及服务高可用保证,为了实现这些功能,Broker包含了以下几个重要子模块。
1.负载均衡:Broker上存Topic信息,Topic由多个队列组成,队列会平均分散在多个Broker上,而Producer的发送机制保证消息尽量平均分布到所有队列中,最终效果就是所有消息都平均落在每个Broker上。
2.动态伸缩能力(非顺序消息):Broker的伸缩性体现在两个维度:Topic, Broker。
Topic维度:假如一个Topic的消息量特别大,但集群水位压力还是很低,就可以扩大该Topic的队列数,Topic的队列数跟发送、消费速度成正比。
Broker维度:如果集群水位很高了,需要扩容,直接加机器部署Broker就可以。Broker起来后想NameServer注册,Producer、Consumer通过NameServer发现新Broker,立即跟该Broker直连,收发消息。
3.高可用&高可靠
高可用:集群部署时一般都为主备,备机实时从主机同步消息,如果其中一个主机宕机,备机提供消费服务,但不提供写服务。
高可靠:所有发往broker的消息,有同步刷盘和异步刷盘机制;同步刷盘时,消息写入物理文件才会返回成功,异步刷盘时,只有机器宕机,才会产生消息丢失,broker挂掉可能会发生,但是机器宕机崩溃是很少发生的,除非突然断电
Producer与NameServer集群中的其中一个节点(随机选择)建立长连接,定期从NameServer获取Topic路由信息,并向提供Topic 服务的Master建立长连接,且定时向Master发送心跳。Producer完全无状态,可集群部署。
RocketMQ提供三种发送方式:
同步:在广泛的场景中使用可靠的同步传输,如重要的通知信息、短信通知、短信营销系统等。
异步:异步发送通常用于响应时间敏感的业务场景,发送出去即刻返回,利用回调做后续处理。
一次性:一次性发送用于需要中等可靠性的情况,如日志收集,发送出去即完成,不用等待发送结果,回调等等。
生产者发送时,会自动轮询当前所有可发送的broker,一条消息发送成功,下次换另外一个broker发送,以达到消息平均落到所有的broker上。
Consumer与NameServer集群中的其中一个节点(随机选择)建立长连接,定期从NameServer获取Topic路由信息,并向提供Topic服务的Master、Slave建立长连接,且定时向Master、Slave发送心跳。Consumer既可以从Master订阅消息,也可以从Slave订阅消息,消费者在向Master拉取消息时,Master服务器会根据拉取偏移量与最大偏移量的距离(判断是否读老消息,产生读I/O),以及从服务器是否可读等因素建议下一次是从Master还是Slave拉取。
先讨论消费者的消费模式,消费者有两种模式消费:集群消费,广播消费。
广播消费:每个消费者消费Topic下的所有队列。
集群消费:一个topic可以由同一个ID下所有消费者分担消费。
具体例子:假如TopicA有6个队列,某个消费者ID起了2个消费者实例,那么每个消费者负责消费3个队列。如果再增加一个消费者ID相同消费者实例,即当前共有3个消费者同时消费6个队列,那每个消费者负责2个队列的消费。
消费者端的负载均衡,就是集群消费模式下,同一个ID的所有消费者实例平均消费该Topic的所有队列。
消费者从用户角度来看有两种类型:
PullConsumer:主动从brokers处拉取消息。Consumer消费的一种类型,应用通常主动调用Consumer的拉消息方法从Broker服务器拉消息、主动权由应用控制。一旦获取了批量消息,应用就会启动消费过程。
PushConsumer:Consumer消费的一种类型,该模式下Broker收到数据后会主动推送给消费端,该消费模式一般实时性较高。
Topic:主题,表示一类消息的集合,每个主题包含若干条消息,每条消息只能属于一个主题,是RocketMQ进行消息订阅的基本单位。Topic与生产者和消费者都是非常松散的关系,一个topic可以有0个或者1个或者多个生产者向其发送消息,换句话说,一个生产者可以同时向不同和topic发送消息。从消费者的解度来说,一个topic可能被0个或者一个或者多个消费组订阅,类似的,一个消费组可以订阅一个或者多个主题只要这个消费组的实例保持他们的订阅一致。
Message:消息消息系统所传输信息的物理载体,生产和消费数据的最小单位,每条消息必须属于一个主题。RocketMQ中每个消息拥有唯一的Message ID,且可以携带具有业务标识的Key。系统提供了通过Message ID和Key查询消息的功能。。
Message Queue:消息队列,一个主题被化分为一个或者多个子主题(sub-topics),“消息队列”.
Tag:标签,为消息设置的标志,用于同一主题下区分不同类型的消息。来自同一业务单元的消息,可以根据不同业务目的在同一主题下设置不同标签。标签能够有效地保持代码的清晰度和连贯性,并优化RocketMQ提供的查询系统。消费者可以根据Tag实现对不同子主题的不同消费逻辑,实现更好的扩展性。使用tag,同一业务模块不同目的的messages就可以用相同topic不同tag来标识。Tags有益于保持你的代码干净而条理清晰,同时促进使用RocketMQ提供的查询系统的效率。Topic:主题,是生产者发送的消息和消费者拉取的消息的归类。Topic与生产者和消费者都是非常松散的关系,一个topic可以有0个或者1个或者多个生产者向其发送消息,换句话说,一个生产者可以同时向不同和topic发送消息。从消费者的解度来说,一个topic可能被0个或者一个或者多个消费组订阅,类似的,一个消费组可以订阅一个或者多个主题只要这个消费组的实例保持他们的订阅一致。
Message Order:当使用DefaultMQPushConsumer时,你需要确定消费消息的方式:
Orderly:顺序地消费消息即表示消费的消息顺序同生产者发送的顺序一致。
Concurrently:并行消费。指定此方式消费,信息消费的最大并行数量仅受限于每个消费者客户端指定的线程池。
Consumer Group:消费组,同一类Consumer的集合,这类Consumer通常消费同一类消息且消费逻辑一致。消费者组使得在消息消费方面,实现负载均衡和容错的目标变得非常容易。要注意的是,消费者组的消费者实例必须订阅完全相同的Topic。RocketMQ 支持两种消息模式:集群消费(Clustering)和广播消费(Broadcasting)。
Producer Group:生产者组,同一类Producer的集合,这类Producer发送同一类消息且发送逻辑一致。如果发送的是事务消息且原始生产者在发送之后崩溃,则Broker服务器会联系同一生产者组的其他生产者实例以提交或回溯消费。
上面的这些我主要参考了 RocketMQ 的 GitHub 介绍和一些优秀网文的介绍,侵权请联系我删除。
]]>在日常使用云服务器的时候,如果要访问上面自建的 mysql,一般要不直接开对应的端口,然后需要对本地 ip 进行授权,但是这个方案会有比较多的限制,比如本地 ip 变了,比如是非固定出口 ip 的家用宽带,或者要在家里跟公司都要访问,如果对所有 ip 都授权的话会不安全,这个时候其实是用 ssh 端口转发是个比较安全方便的方式。
原来在这个之前其实对这块内容不太了解,后面是听朋友说的,vscode 的 Remote - SSH 扩展可以很方便的使用端口转发,在使用该扩展的时候,会在控制台位置里都出现一个”端口” tab
如图中所示,我就是将一个服务器上的 mysql 的 3306 端口转发到本地的 3307 端口,至于为什么不用 3306 是因为本地我也有个 mysql 已经使用了 3306 端口,这个方法是使用的 vscode 的这个扩展,
还有个方式是直接使用 ssh 命令
命令可以如此
ssh -CfNg -L 3307:127.0.0.1:3306 user1@199.199.199.199
简单介绍下这个命令-C 表示的是压缩数据包-f 表示后台执行命令-N 是表示不执行具体命令只用于端口转发-g 表示允许远程主机连接本地转发端口-L 则是具体端口转发的映射配置
上面的命令就是将远程主机的 127.0.0.1:3306 对应转发到本地 3307
而后面的用户则就是登录主机的用户名user1和ip地址199.199.199.199,当然这个配置也不是唯一的
还可以在ssh 的 config 配置中加对应的配置
Host host1
HostName 199.199.199.199
User user1
IdentityFile /Users/user1/.ssh/id_rsa
ServerAliveInterval 60
LocalForward 3310 127.0.0.1:3306
然后通过 ssh host1 连接服务器的时候就能顺带做端口转发
]]>先聊聊这个事情,整体看下来我的一些理解,IPCC给中国的方案其实是个很大的陷阱,它里面有几个隐藏的点是容易被我们外行忽略的,第一点是基数,首先发达国家目前(指2010年采访或者IPCC方案时间)的人均碳排放量已经是远高于发展中国家的了,这也就导致了所谓的发达国家承诺减排80%是个非常有诚意的承诺其实就是忽悠;第二点是碳排放是个累计过程,从1900年开始到2050年,或者说到2010年,发达国家已经排的量是远超过发展中国家的,这是非常不公平的;第三点其实是通过前两点推导出来的,也就是即使发达国家这么有诚意地说减排80%,扒开这层虚伪的外衣,其实是给他们11亿人分走了48%的碳排放量,留给发展中国家55亿人口的只剩下了52%;第四点,人是否因为国家的发达与否而应受到不平等待遇,如果按国家维度,丁老说的,摩纳哥要跟中国分同样的排放量么,中国人还算不算人;第五点,这点算是我自己想的,也可能是柴静屁股决定脑袋想不到的点,她作为一个物质生活条件已经足够好了,那么对于那些生活在物质条件平均线以下的,他们是否能像城里人那样有空调地暖,洗澡有热水器浴霸,上下班能开车,这些其实都直接或者间接地导致了碳排放;他们有没有改善物质生活条件地权利呢,并且再说回来,其实丁老也给了我们觉得合理地方案,我们保证不管发达国家不管减排多少,我们都不会超过他们的80%,我觉得这是真正的诚意,而不是接着减排80%的噱头来忽悠人,也是像丁老这样的专家才能看破这个陷阱,碳排放权其实就是发展权,就是人权,中国人就不是人了么,或者说站在贫困线以下的人民是否有改善物质条件的权利,而不是说像柴静这样,只是管她自己,可能觉得小孩因为空气污染导致身体不好,所以做了穹顶之下这个纪录片,想去改善这个事情,空气污染不是说对的,只是每个国家都有这个过程,如果不发展,哪里有资源去让人活得好,活得好了是前提,然后再去各方面都改善。
对于这个问题其实更想说的是人的认知偏差,之前总觉得美帝是更自由民主,公平啥的,或者说觉得美帝啥都好,有种无脑愤青的感觉,外国的月亮比较圆,但是经历了像川普当选美国总统以来的各种魔幻操作,还有对于疫情的种种不可思议的美国民众的反应,其实更让人明白第一是外国的月亮没比较圆,第二是事情总是没那么简单粗暴非黑即白,美国不像原先设想地那么领先优秀,但是的确有很多方面是全球领先的,天朝也有体制所带来的优势,不可妄自菲薄,也不能忙不自大,还是要多学习知识,提升认知水平。
]]>zsh: no matches found: root@100.100.100.100://root/prefix*
这里就比较奇怪了,这个前缀的文件肯定是有的,这里其实是由于 zsh 会对 * 进行展开,这个可以在例如 ls 命令在使用中就可以发现 zsh 有这个特性
需要使用双引号或单引号将路径包起来或者在*之前加反斜杠\来阻止对*展开和转义
scp root@100.100.100.100://root/prefix* .
通过使用双引号"进行转义
scp root@100.100.100.100:"//root/prefix*" .
或者可以将 shell 从 zsh 切换成 bash
]]>前面这两周周末也都去老丈人家帮忙了,上上周周六先是去了那个在装修的旧房子那,把三楼收拾了下,因为要搬进来住,来不及等二楼装修好,就要把三楼里的东西都整理干净,这个活感觉是比较 easy,原来是就准备把三楼当放东西仓储的地方了,我们乡下大部分三层楼都是这么用的,这次也是没办法,之前搬进来的木头什么的都搬出去,主要是这上面灰尘太多,后面清理鼻孔的时候都是黑色的了,把东西都搬出去以后主要是地还是很脏,就扫了地拖了地,因为是水泥地,灰尘又太多了,拖起来都是会灰尘扬起来,整个脱完了的确干净很多,然而这会就出了个大乌龙,我们清理的是三楼的西边一间,结果老丈人上来说要住东边那间的🤦♂️,不过其实西边的也得清理,因为还是要放被子什么的,不算是白费功夫,接着清理东边那间,之前这个房子做过群租房,里面有个高低铺的床,当时觉得可以用在放被子什么的就没扔,只是拆掉了放旁边,我们就把它擦干净了又装好,发现螺丝🔩少了几个,亘古不变的真理,拆了以后装要不就多几个要不就少几个,不是很牢靠,不过用来放放被子省得放地上总还是可以的,对了前面还做了个事情就是铺地毯,其实也不是地毯,就是类似于墙布雨篷布那种,别人不用了送给我们的,三楼水泥地也不会铺瓷砖地板了就放一下,干净好看点,不过大小不合适要裁一下,那把剪刀是真的太难用了,我手都要抽筋了,它就是刀口只有一小个点是能剪下来的,其他都是钝的,后来还是用刀片直接裁,铺好以后,真的感觉也不太一样了,焕然一新的感觉
差不多中午了就去吃饭了,之前两次是去了一家小饭店,还是还比较干净,但是店里菜不好吃,还死贵,这次去了一家小快餐店,口味好,便宜,味道是真的不错,带鱼跟黄鱼都好吃,一点都不腥,我对这类比较腥的鱼真的是很挑剔的,基本上除了家里做的很少吃外面的,那天抱着试试的态度吃了下,真的还不错,后来丈母娘说好像这家老板是给别人结婚喜事酒席当厨师的,怪不得做的好吃,其实本来是有一点小抗拒,怕不干净什么的,后来发现菜很好吃,而且可能是老丈人跟干活的师傅去吃的比较多,老板很客气,我们吃完饭,还给我们买了葡萄吃,不过这家店有一个槽点,就是饭比较不好吃,有时候会夹生,不过后面聊起来其实是这种小菜馆饭点的通病,烧的太早太多容易多出来浪费,烧的迟了不够吃,而且大的电饭锅比较不容易烧好。
下午前面还是在处理三楼的,窗户上各种钉子,实在是太多了,我后面在走廊上排了一排🤦♂️,有些是直接断了,有些是就撬了出来,感觉我在杭州租房也没有这样子各种钉钉子,挂下衣服什么的也不用这么多吧,比较不能理解,搞得到处都是钉子。那天我爸也去帮忙了,主要是在卫生间里做白缝,其实也是个技术活,印象中好像我小时候自己家里也做过这个事情,但是比较模糊了,后面我们三楼搞完了就去帮我爸了,前面是我老婆二爹在那先刷上白缝,这里叫白缝,有些考究的也叫美缝,就是瓷砖铺完之后的缝,如果不去弄的话,里面水泥的颜色就露出来了,而且容易渗水,所以就要用白水泥加胶水搅拌之后糊在缝上,但是也不是直接糊,先要把缝抠一抠,因为铺瓷砖的还不会仔细到每个缝里的水泥都是一样满,而且也需要一些空间糊上去,不然就太表面的一层很容易被水直接冲掉了,然后这次其实也不是用的白水泥,而是直接现成买来就已经配好的用来填缝的,兑水搅拌均匀就好了,后面就主要是我跟我爸在搞,那个时候真的觉得我实在是太胖了,蹲下去真的没一会就受不了了,膝盖什么的太难受了,后面我跪着刷,然后膝盖又疼,也是比较不容易,不过我爸动作很快,我中间跪累了休息一会,我爸就能搞一大片,后面其实我也没做多少(谦虚一下),总体来讲这次不是很累,就是蹲着跪着腿有点受不了,是应该好好减肥了。
第四周去的时候让我们去了现在在住的房子里,去三楼整理东西了,蛮多的东西需要收拾整理,有些需要丢一下,以前往往是把不太要用的东西就放三楼了,但是后面就不会再去收拾整理,LD 跟丈母娘负责收拾,我不太知道哪些还要的,哪些不要了,而且本来也不擅长这种收拾🤦♂️,然后就变成她们收拾出来废纸箱,我负责拆掉,压平,这时候终于觉得体重还算是有点作用,总体来说这个事情我其实也不擅长,不擅长的主要是捆起来,可能我总是小题大做,因为纸箱大小不一,如果不做一下分类,然后把大的折小一些的话,直接绑起来,容易拎起来就散掉了,而且一些鞋盒子这种小件的纸盒会比较薄,冰箱这种大件的比较厚,厚的比较不容易变形,需要大力踩踏,而且扎的时候需要用体重压住捆实了之后那样子才是真的捆实的,不然待会又是松松垮垮容易滑出来散架,因为压住了捆好后,下来了之后箱子就会弹开了把绳子崩紧实,感觉又是掌握到生活小技巧了😃,我这里其实比较单调无聊,然后 LD 那可以说非常厉害了,一共理出来 11 把旧电扇,还有好多没用过全新的不锈钢脸盆大大小小的,感觉比店里在卖的还多,还有是有比较多小时候的东西,特别多小时候的衣服,其实这种对我来说最难了,可能需要读一下断舍离,蛮多东西都舍不得扔,但是其实是没啥用了,然后还占地方,这天应该算是比较轻松的一天了,上午主要是把收拾出来要的和不要的搬下楼,然后下午要去把纸板给卖掉。中午还是去小快餐店吃的,在住的家里理东西还有个好处就是中午吃完饭可以小憩一下,因为我个人是非常依赖午休的,不然下午完全没精神,而且心态也会比较烦躁,一方面是客观的的确比较疲惫,另一方面应该主观心理作用也有点影响,就像上班的时候也是觉得不午睡就会很难受,心理作用也有一点,不过总之能睡还是睡一会,真的没办法就心态好点,吃完午饭之后我们就推着小平板车去收废品的地方卖掉了上午我收拾捆起来的纸板,好像卖了一百多,都是直接过地磅了,不用一捆一捆地称,不过有个小插曲,那里另外一个大爷在倒他的三轮车的时候撞了我一下,还好车速慢,屁股上肉垫后,接下来就比较麻烦了,是LD 她们两姐妹从小到大的书,也要去卖掉,小平板车就载不下了,而且着实也不太好推,轮子不太平,导致推着很累,书有好多箱,本来是想去亲戚家借电动三轮车,因为不会开摩托的那种,摩托的那种 LD 邻居家就有,可是到了那发现那个也是很大,而且刹车是用脚踩的那种,俺爹不太放心,就说第二天周日他有空会帮忙去载了卖掉的,然后比较搞笑的来了,丈母娘看错了时间,以为已经快五点了,就让我们顺便在车里带点东西去在修的房子,放到那边三楼去,到了那还跟老丈人说已经这么迟了要赶紧去菜场买菜了,结果我们回来以后才发现看错了一个小时🤦♂️。
前面可以没提,前三周去的我们一般就周六去一天,然后周日因为要早点回杭州,而且可能想让我们周日能休息下,但是这周就因为周日的时候我爸要去帮忙载书,然后 LD 姐姐也会过来收拾东西,我们周日就又去整理收拾了,周日由于俺爹去的很早,我过去的时候书已经木有了,主要是去收拾东西了,把一些有用没用的继续整理,基本上三楼的就处理完毕了,舒了一大口气,毕竟让丈母娘一个人收拾实在是太累了,但是要扔掉的衣服比较棘手,附近知道的青蛙回收桶被推倒了,其他地方也不知道哪里有,我们就先载了一些东西去在修的房子那,然后去找青蛙桶,结果一个小区可以进,但是已经满了,另一个不让进,后来只能让 LD 姐姐带去她们小区扔了,塞了满满一车。因为要赶回杭州的车就没有等我爸一起回来,他还在那帮忙搞卫生间的墙缝。
虽然这两天不太热,活也不算很吃力,不过我这个体重和易出汗的体质,还是让短袖不知道湿透了多少次,灌了好多水和冰红茶(下午能提提神),回来周一早上称体重也比较喜人,差一点就达到阶段目标,可以想想去哪里吃之前想好的烤肉跟火锅了(估计吃完立马回到解放前)。
但是你说这不是个灾难片,而是个反映社会问题的,就业比较容易往这个方向猜,只是剧情会是怎么样的,一时也没啥头绪,后来不知道哪里看了下一个剧情透露,是一个穷人给富人做家教,然后把自己一家都带进富人家,如果是这样的话可能会把这个怎么带进去作为一个主线,不过事实告诉我,这没那么重要,从第一步朋友的介绍,就显得无比顺利,要去当家教了,作为一个穷成这样的人,瞬间转变成一个衣着得体,言行举止都没让富人家看出破绽的延世大学学生,这真的挺难让人理解,所谓江山易改,本性难移,还有就是这人也正好有那么好能力去辅导,并且诡异的是,多惠也是瞬间就喜欢上了男主,多惠跟将男主介绍给她做家教,也就是多惠原来的家教敏赫,应该也有不少的相处时间,这变了有点大了吧,当然这里也可能因为时长需要,如果说这一点是因为时长,那可能我所有的槽点都是因为这个吧,因为我理解的应该是把家里的人如何一步步地带进富人家,这应该是整个剧情的一个需要更多铺垫去克服这个矛盾点,有时候也想过如果我去当导演,是能拍出个啥,没这个机会,可能有也会是很扯淡的,当然这也不能阻拦我谈谈对这个点的一些看法,毕竟评价一台电冰箱不是说我必须得自己会制冷对吧,这大概是我觉得这个电影的第一个槽点,接下去接二连三的,就是我说的这个最核心的矛盾点,不知道谁说过,这种影视剧应该是源自于生活又高于生活,越是好的作品,越要接近生活,这样子才更能有感同身受。
接下去的点是金基宇介绍金基婷去给多颂当美术家教,这一步又是我理解的败笔吧,就怎么说呢,没什么铺垫,突然从一个社会底层的穷姑娘,转变成一个气场爆表,把富人家太太唬得一愣一愣的,如果说富太太是比较简单无脑的,那富人自己应该是比较有见识而且是做 IT 的,给自己儿子女儿做家教的,查查底细也很正常吧,但是啥都没有,然后呢,她又开始耍司机的心机了,真的是莫名其妙了,司机真的很惨,窈窕淑女君子好逑,而且这个操作也让我摸不着头脑,这是多腹黑并且有经验才会这么操作,脱内裤真的是让我看得一愣愣的,更看得我一愣一愣的,富人竟然也完全按着这个思路去想了,完全没有别的可能呢,甚至可以去查下行车记录仪或者怎样的,或者有没有毛发体液啥的去检验下,毕竟金基婷也乘坐过这辆车,但是最最让我不懂的还是脱内裤这个操作,究竟是什么样的人才会的呢,值得思考。
金基泽和忠淑的点也是比较奇怪,首先是金基泽,引起最后那个杀人事件的一个由头,大部分观点都是人为朴社长在之前跟老婆啪啪啪的时候说金基泽的身上有股乘地铁的人的味道,简而言之就是穷人的味道,还有去雯光丈夫身下拿钥匙是对金基泽和雯光丈夫身上的味道的鄙夷,可是这个原因真的站不住脚,即使是同样经济水平,如果身上有比较重的异味,背后讨论下,或者闻到了比较重的味道,有不适的表情和动作很正常吧,像雯光丈夫,在地下室里呆了那么久,身上有异味并且比较重太正常了,就跟在厕所呆久了不会觉得味道大,但是从没味道的地方一进有点味道的厕所就会觉得异样,略尴尬的理由;再说忠淑呢,感觉是太厉害了,能胜任这么一家有钱人的各种挑剔的饮食口味要求的保姆职位,也是让人看懵逼了,看到了不禁想到一个问题,这家人开头是那么地穷,不堪,突然转变成这么地像骗子家族,如果有这么好的骗人能力,应该不会到这种地步吧,如果真的是那么穷,没能力,没志气,又怎么会突然变成这么厉害呢,一家人各司其职,把富人家唬得团团转,而这个前提是,这些人的确能胜任这四个位置,这就是我非常不能理解的点。
然后说回这个标题,寄生虫,不知道是不是翻译过来不准确,如果真的是叫寄生虫的话,这个寄生虫智商未免也太低了,没有像新冠那样机制,致死率低一点,传染能力强一点,潜伏期也能传染,这个寄生虫第一次受到免疫系统的攻击就自爆了;还有呢,作为一个社会比较低层的打工者,乡下人,对这个审题也是不太审的清,是指这一家人是社会的寄生虫,不思进取,并且死的应该,富人是傻白甜,又有钱又善良,这是给有钱人洗地了还是啥,这个奥斯卡真不知道是怎么得的,总觉得奥斯卡,甚至低一点,豆瓣,得奖的,评分高的都是被一群“精英党”把持的,有黑人主角的,得分高;有同性恋的,得分高;结局惨的,得分高;看不懂的,得分高;就像肖申克的救赎,真不知道是哪里好了,最近看了关于明朝那些事的三杨,杨溥的经历应该比这个厉害吧,可是外国人看不懂,就像外国人不懂中国为什么有反分裂国家法,经历了鸦片战争,八国联军,抗日战争等等,其实跟外国对于黑人的权益的问题,因为有南北战争,所以极度重视这个问题,相应的中国也有自己的历史,请理解。
简而言之我对寄生虫的评分大概 5~6 分吧。
]]>对于一块待整理区域,通过两个指针,free 在区域的起始端,scan 指针在区域的末端,free 指针从前往后知道找到空闲区域,scan 从后往前一直找到存活对象,当 free 指针未与 scan 指针交叉时,会给 scan 位置的对象特定位置标记上 free 的地址,即将要转移的地址,不过这里有个限制,这种整理算法一般会用于对象大小统一的情况,否则 free 指针扫描时还需要匹配scan 指针扫描到的存活对象的大小。
需要三次完整遍历堆区域
第一遍是遍历后将计算出所有对象的最终地址(转发地址)
第二遍是使用转发地址更新赋值器线程根以及被标记对象中的引用,该操作将确保它们指向对象的新位置
第三次遍历是relocate最终将存活对象移动到其新的目标位置
这个真的长见识了,
可以看到,原来是 A,B,C 对象引用了 N,这里会在第一次遍历的时候把这种引用反过来,让 N 的对象头部保存下 A 的地址,表示这类引用,然后在遍历到 B 的时候在链起来,到最后就会把所有引用了 N 对象的所有对象通过引线链起来,在第二次遍历的时候就把更新A,B,C 对象引用的 N 地址,并且移动 N 对象
这个一直提到过位图的实现方式,
可以看到在第一步会先通过位图标记,标记的方式是位图的每一位对应的堆内存的一个字(这里可能指的是 byte 吧),然后将一个存活对象的内存区域的第一个字跟最后一个字标记,这里如果在通过普通的方式就还需要一个地方在存转发地址,但是因为具体的位置可以通过位图算出来,也就不需要额外记录了
这个一直是属于一知半解的状态,知道 utf8 跟 utf8mb4 的区别主要是能不能支持 emoji,但是具体后面配置的排序规则是用来干嘛,或者有什么区别,应该使用哪个,所以在 stackoverflow 上找了下,有两个比较不错的解答,就搬过来并且配合机翻做了点修改
For those people still arriving at this question in 2020 or later, there are newer options that may be better than both of these. For example, utf8mb4_0900_ai_ci.
All these collations are for the UTF-8 character encoding. The differences are in how text is sorted and compared.
_unicode_ci and _general_ci are two different sets of rules for sorting and comparing text according to the way we expect. Newer versions of MySQL introduce new sets of rules, too, such as _0900_ai_ci for equivalent rules based on Unicode 9.0 - and with no equivalent _general_ci variant. People reading this now should probably use one of these newer collations instead of either _unicode_ci or _general_ci. The description of those older collations below is provided for interest only.
MySQL is currently transitioning away from an older, flawed UTF-8 implementation. For now, you need to use utf8mb4 instead of utf8 for the character encoding part, to ensure you are getting the fixed version. The flawed version remains for backward compatibility, though it is being deprecated.
Key differences
utf8mb4_unicode_ci is based on the official Unicode rules for universal sorting and comparison, which sorts accurately in a wide range of languages.
utf8mb4_general_ci is a simplified set of sorting rules which aims to do as well as it can while taking many short-cuts designed to improve speed. It does not follow the Unicode rules and will result in undesirable sorting or comparison in some situations, such as when using particular languages or characters.
On modern servers, this performance boost will be all but negligible. It was devised in a time when servers had a tiny fraction of the CPU performance of today’s computers.
Benefits of utf8mb4_unicode_ci over utf8mb4_general_ci
utf8mb4_unicode_ci, which uses the Unicode rules for sorting and comparison, employs a fairly complex algorithm for correct sorting in a wide range of languages and when using a wide range of special characters. These rules need to take into account language-specific conventions; not everybody sorts their characters in what we would call ‘alphabetical order’.
As far as Latin (ie “European”) languages go, there is not much difference between the Unicode sorting and the simplified utf8mb4_general_cisorting in MySQL, but there are still a few differences:
For examples, the Unicode collation sorts “ß” like “ss”, and “Œ” like “OE” as people using those characters would normally want, whereas utf8mb4_general_cisorts them as single characters (presumably like “s” and “e” respectively).
Some Unicode characters are defined as ignorable, which means they shouldn’t count toward the sort order and the comparison should move on to the next character instead. utf8mb4_unicode_cihandles these properly.
In non-latin languages, such as Asian languages or languages with different alphabets, there may be a lot more differences between Unicode sorting and the simplified utf8mb4_general_cisorting. The suitability of utf8mb4_general_ciwill depend heavily on the language used. For some languages, it’ll be quite inadequate.
What should you use?
There is almost certainly no reason to use utf8mb4_general_cianymore, as we have left behind the point where CPU speed is low enough that the performance difference would be important. Your database will almost certainly be limited by other bottlenecks than this.
In the past, some people recommended to use utf8mb4_general_ciexcept when accurate sorting was going to be important enough to justify the performance cost. Today, that performance cost has all but disappeared, and developers are treating internationalization more seriously.
There’s an argument to be made that if speed is more important to you than accuracy, you may as well not do any sorting at all. It’s trivial to make an algorithm faster if you do not need it to be accurate. So, utf8mb4_general_ciis a compromise that’s probably not needed for speed reasons and probably also not suitable for accuracy reasons.
One other thing I’ll add is that even if you know your application only supports the English language, it may still need to deal with people’s names, which can often contain characters used in other languages in which it is just as important to sort correctly. Using the Unicode rules for everything helps add peace of mind that the very smart Unicode people have worked very hard to make sorting work properly.
What the parts mean
Firstly, ci is for case-insensitive sorting and comparison. This means it’s suitable for textual data, and case is not important. The other types of collation are cs (case-sensitive) for textual data where case is important, and bin, for where the encoding needs to match, bit for bit, which is suitable for fields which are really encoded binary data (including, for example, Base64). Case-sensitive sorting leads to some weird results and case-sensitive comparison can result in duplicate values differing only in letter case, so case-sensitive collations are falling out of favor for textual data - if case is significant to you, then otherwise ignorable punctuation and so on is probably also significant, and a binary collation might be more appropriate.
Next, unicode or general refers to the specific sorting and comparison rules - in particular, the way text is normalized or compared. There are many different sets of rules for the utf8mb4 character encoding, with unicode and general being two that attempt to work well in all possible languages rather than one specific one. The differences between these two sets of rules are the subject of this answer. Note that unicode uses rules from Unicode 4.0. Recent versions of MySQL add the rulesets unicode_520 using rules from Unicode 5.2, and 0900 (dropping the “unicode_” part) using rules from Unicode 9.0.
And lastly, utf8mb4 is of course the character encoding used internally. In this answer I’m talking only about Unicode based encodings.
对于那些在 2020 年或之后仍会遇到这个问题的人,有可能比这两个更好的新选项。例如,utf8mb4_0900_ai_ci。
所有这些排序规则都用于 UTF-8 字符编码。不同之处在于文本的排序和比较方式。
_unicode_ci和 _general_ci是两组不同的规则,用于按照我们期望的方式对文本进行排序和比较。较新版本的 MySQL 也引入了新的规则集,例如 _0900_ai_ci用于基于 Unicode 9.0 的等效规则 - 并且没有等效的 _general_ci变体。现在阅读本文的人可能应该使用这些较新的排序规则之一,而不是 _unicode_ci或 _general_ci。下面对那些较旧的排序规则的描述仅供参考。
MySQL 目前正在从旧的、有缺陷的 UTF-8 实现过渡。现在,您需要使用 utf8mb4 而不是 utf8作为字符编码部分,以确保您获得的是固定版本。有缺陷的版本仍然是为了向后兼容,尽管它已被弃用。
主要区别
utf8mb4_unicode_ci基于官方 Unicode 规则进行通用排序和比较,可在多种语言中准确排序。
utf8mb4_general_ci是一组简化的排序规则,旨在尽其所能,同时采用许多旨在提高速度的捷径。它不遵循 Unicode 规则,并且在某些情况下会导致不希望的排序或比较,例如在使用特定语言或字符时。
在现代服务器上,这种性能提升几乎可以忽略不计。它是在服务器的 CPU 性能只有当今计算机的一小部分时设计的。
utf8mb4_unicode_ci 相对于 utf8mb4_general_ci的优势
utf8mb4_unicode_ci使用 Unicode 规则进行排序和比较,采用相当复杂的算法在多种语言中以及在使用多种特殊字符时进行正确排序。这些规则需要考虑特定语言的约定;不是每个人都按照我们所说的“字母顺序”对他们的字符进行排序。
就拉丁语(即“欧洲”)语言而言,Unicode 排序和 MySQL 中简化的 utf8mb4_general_ci排序没有太大区别,但仍有一些区别:
例如,Unicode 排序规则将“ß”排序为“ss”,将“Œ”排序为“OE”,因为使用这些字符的人通常需要这些字符,而 utf8mb4_general_ci将它们排序为单个字符(大概分别像“s”和“e” )。
一些 Unicode 字符被定义为可忽略,这意味着它们不应该计入排序顺序,并且比较应该转到下一个字符。 utf8mb4_unicode_ci正确处理这些。
在非拉丁语言中,例如亚洲语言或具有不同字母的语言,Unicode 排序和简化的 utf8mb4_general_ci排序之间可能存在更多差异。 utf8mb4_general_ci的适用性在很大程度上取决于所使用的语言。对于某些语言,这将是非常不充分的。
你应该用什么?
几乎可以肯定没有理由再使用 utf8mb4_general_ci,因为我们已经将 CPU 速度低到会严重影响性能表现的时代远抛在脑后了。您的数据库几乎肯定会受到除此之外的其他瓶颈的限制。
过去,有些人建议使用 utf8mb4_general_ci,除非准确排序足够重要以证明性能成本是合理的。如今,这种性能成本几乎消失了,开发人员正在更加认真地对待国际化。
有一个论点是,如果速度对您来说比准确性更重要,那么您可能根本不进行任何排序。如果您不需要准确的算法,那么使算法更快是微不足道的。因此,utf8mb4_general_ci是一种折衷方案,出于速度原因可能不需要,也可能出于准确性原因也不适合。
我要补充的另一件事是,即使您知道您的应用程序仅支持英语,它可能仍需要处理人名,这些人名通常包含其他语言中使用的字符,在这些语言中正确排序同样重要.对所有事情都使用 Unicode 规则有助于让您更加安心,因为非常聪明的 Unicode 人员已经非常努力地工作以使排序正常工作。
其余各个部分是什么意思
首先, ci 用于不区分大小写的排序和比较。这意味着它适用于文本数据,大小写并不重要。其他类型的排序规则是 cs(区分大小写),用于区分大小写的文本数据,以及 bin,用于编码需要匹配的地方,逐位匹配,适用于真正编码二进制数据的字段(包括,用于例如,Base64)。区分大小写的排序会导致一些奇怪的结果,区分大小写的比较可能会导致重复值仅在字母大小写上有所不同,因此区分大小写的排序规则对文本数据不受欢迎 - 如果大小写对您很重要,那么标点符号就可以忽略等等可能也很重要,二进制排序规则可能更合适。
接下来,unicode 或general 指的是具体的排序和比较规则——特别是文本被规范化或比较的方式。 utf8mb4 字符编码有许多不同的规则集,其中 unicode 和 general 是两种,它们试图在所有可能的语言中都很好地工作,而不是在一种特定的语言中。这两组规则之间的差异是此答案的主题。请注意,unicode 使用 Unicode 4.0 中的规则。 MySQL 的最新版本使用 Unicode 5.2 的规则添加规则集 unicode_520,使用 Unicode 9.0 的规则添加 0900(删除“unicode_”部分)。
最后,utf8mb4 当然是内部使用的字符编码。在这个答案中,我只谈论基于 Unicode 的编码。
UTF-8is a variable-length encoding. In the case of UTF-8, this means that storing one code point requires one to four bytes. However, MySQL’s encoding called “utf8” (alias of “utf8mb3”) only stores a maximum of three bytes per code point.
So the character set “utf8”/“utf8mb3” cannot store all Unicode code points: it only supports the range 0x000 to 0xFFFF, which is called the “Basic Multilingual Plane“. See also Comparison of Unicode encodings.
This is what (a previous version of the same page at)the MySQL documentationhas to say about it:
The character set named utf8[/utf8mb3] uses a maximum of three bytes per character and contains only BMP characters. As of MySQL 5.5.3, the utf8mb4 character set uses a maximum of four bytes per character supports supplemental characters:
- For a BMP character, utf8[/utf8mb3] and utf8mb4 have identical storage characteristics: same code values, same encoding, same length.
- For a supplementary character, utf8[/utf8mb3] cannot store the character at all, while utf8mb4 requires four bytes to store it. Since utf8[/utf8mb3] cannot store the character at all, you do not have any supplementary characters in utf8[/utf8mb3] columns and you need not worry about converting characters or losing data when upgrading utf8[/utf8mb3] data from older versions of MySQL.
So if you want your column to support storing characters lying outside the BMP (and you usually want to), such as emoji, use “utf8mb4”. See also What are the most common non-BMP Unicode characters in actual use?.
UTF-8 是一种可变长度编码。对于 UTF-8,这意味着存储一个代码点需要一到四个字节。但是,MySQL 的编码称为“utf8”(“utf8mb3”的别名)每个代码点最多只能存储三个字节。
所以字符集“utf8”/“utf8mb3”不能存储所有的Unicode码位:它只支持0x000到0xFFFF的范围,被称为“基本多语言平面”。另请参阅 Unicode 编码比较。
这就是(同一页面的先前版本)MySQL 文档 不得不说的:
名为 utf8[/utf8mb3] 的字符集每个字符最多使用三个字节,并且仅包含 BMP 字符。从 MySQL 5.5.3 开始,utf8mb4 字符集每个字符最多使用四个字节,支持补充字符:
- 对于 BMP 字符,utf8[/utf8mb3] 和 utf8mb4 具有相同的存储特性:相同的代码值、相同的编码、相同的长度。
- 对于补充字符,utf8[/utf8mb3] 根本无法存储该字符,而 utf8mb4 需要四个字节来存储它。由于 utf8[/utf8mb3] 根本无法存储字符,因此您在 utf8[/utf8mb3] 列中没有任何补充字符,您不必担心从旧版本升级 utf8[/utf8mb3] 数据时转换字符或丢失数据mysql。
因此,如果您希望您的列支持存储位于 BMP 之外的字符(并且您通常希望这样做),例如 emoji,请使用“utf8mb4”。另请参阅
]]>尝试保持一个比较冷静的状态来聊聊,在看的时候有一点感想就是如果要剧里的坏人排个名,因为明眼看都是孙兴是个穷凶极恶的坏人,干尽了坏事,而且可能是演员表演地好,让人真的恨的牙痒痒,但是更多地还是停留在那些剧情中的表现和他的表情,其实对应的真实案例有更多的,这里尽量不展开,有兴趣可以自行搜索关键字,所以其实我想排个名的话,孙兴的母亲应该是我心目中是造成这个结果的比较大占比的始作俑者,因为是方方面面的,包括对林汉的栽赃迫害,最后串起来是因为他看到了孙兴又出来了,就是那句老话,撒了一个谎以后就要用无数个谎来圆,贺芸为了孙兴,作了第一个恶以后就用了一系列的丧心病狂的操作来保护孙兴,而且这之后所做的事情一件比一件可怕,并且如果不是督导组各种想方设法地去破解谜题,这个事情还可以一直被通过各种操作瞒下去,而孙兴还可以继续地为虎作伥,当然其他的包括高明远以及后面的王政,当然是为了这个操作也提供的各种方式的帮助,甚至是主导了这些操作,但是这里贺芸还是在这个位子上能够通过权力做出非常关键的动作,包括栽赃林汉,并且搞掉了李成阳。其中还有一点是我对剧情设计的质疑,也是我前面提到过一点,因为里面孙兴好像是很爱他的母亲贺芸,似乎想表达的是孙兴作的恶是因为得不到母爱,并且个人感觉如果是一个比较敬爱自己母亲的儿子,似乎应该有所畏惧,对他的行为也会有所限制,不应该变成这样一个无恶不作的恶霸,这也是我一直以来的观点,很多人作恶太多可能是因为没有信仰,不管是信基督耶稣还是信道教佛教,总归有一些制约,当然不是说就绝对不会作恶,只是偏向于有所畏惧敬畏,除了某绿哈。
而对于其他的人感觉演技都不错,只是最后有一些虎头蛇尾吧,不知道是不是审核的原因,也不细说了怕被请喝茶,还有提一点就是麦佳的这个事情,她其实是里面很惨的一个人,把高明远当成最亲近的人,而其实真相令人感觉不寒而栗,杀父杀母的仇人,对于麦佳这个演员,一直觉得印象深刻,后来才想起来就是在爱情公寓里演被关谷救了要以身相遇的那个女孩,长相其实蛮令人印象深刻的,但好像也一直不温不火,不过也不能说演技很好吧,只是在这里演的任务真的是很可怜了,剧情设计里也应该是个很重要的串联人物,最终被高明远献给了大佬,这里扯开一点,好像有的观点说贺芸之前也是这样的,只是一种推测了。
看完这部剧其实有很多想说的,但是也为了不被请喝茶,尽量少说了,只想说珍爱生命,还是自己小心吧
]]>时光飞逝,我在初中高中的时候因为爱打篮球,以为自己体质已经有了质的变化,所以在体育课跑步的时候妄图跟一位体育非常好的同学一起跑,结果跟的快断气了,最终还是确认了自己是个体育渣,特别是到了大学的第一次体测跑一千米,跑完直接吐了,一则是大学太宅不运动,二则的确是底子不好。那么怎么会去跑步了呢,其实也没什么特殊的原因,就是工作以后因为运动得更少,体质差,而且越来越胖,所以就想运动下,加之跑步也是我觉得成本最低的运动了,刚好那时候17 年租的地方附近小区周围的路车不太多,一圈刚好一公里多,就觉得开始跑跑看,其实想想以前觉得一千米是非常远的,学校塑胶跑道才 400 米,一千米要两圈半,太难了,但是后来在这个小区周围跑的时候好像跑了一圈以后还能再跑一点,最后跑了两圈,可把自己牛坏了,我都能跑两千米了,哈哈,这是个什么概念呢,大学里最让我绝望的两项体育相关的内容就是一千米和十二分钟跑,一千米把我跑吐了,十二分钟跑及格五圈半也能让我跑完花一周时间恢复以及提前一周心理压力爆炸,虽然我那时候跑的不快,但是已经能跑两千米了,瞬间让自己自信心爆炸,并且跑完步出完汗的感觉是非常棒的,毕竟吃奶茶鸡排都能心安理得了,谁叫我跑步了呢😄,其实现在回去看,那时候跑得还算快的,因为还比较瘦,现在要跑得那么快心跳就太快了,关于心跳什么的后面说,开始建立起自信心之后,对跑步这件事就开始不那么排斥跟害怕了,毕竟我能跑两千米了,然后试试三公里,哇,也可以了呢,三公里是什么概念呢,我大学里跑过最多的一次是十二分钟跑五圈半还是六圈,也就是两公里多,不到三公里,几乎是生涯最长了,一时间产生了一些我可能是个被埋没的运动天才的错觉,其实细想下也能明白,只是速度足够慢了就能跑多一点,毕竟提测一千米是要跑进四分钟才及格,自己跑的时候一千米跑六分多钟已经算不慢了(对我自己来说),但是即使是这样还是对把跑步坚持下去这件事有了很大的正面激励作用,并且由于那时候上下班骑车,整个体重控制的比较理想,导致一时间误会跑步就能非常快的减肥(其实这是我跑步历程中比较大的误区之一),因为会在跑步前后称下体重,如果跑个五公里(后面可以跑五公里了),可能体重就能降 0.5 千克,但实际上这只是这五公里跑步身体流失的水分,喝杯水就回来了,那时候能控制体重主要是骑车跟跑步一起的作用,并且工作压力相对来讲比较小,没有过劳肥。
后面其实跑步慢慢变得一个比较习惯的运动了,从三公里,到五公里,到七公里,再到十公里,十公里差不多对我来说是个坎,一直还不能比较轻松的跑十公里,可能近一两年好了一些(原谅我只是跟自己比较,跟那些大神比差得不知道多远),其实对我来说每次都是个突破,因为其实与他人比较没有特别大意义,比较顶尖的差得太远,比较普通的也不行,都会打击自信心,比较比我差的就更没意义了,所以其实能挑战自己,能把自己的上限提高才是最有意义的,这也是我看着朋友圈里的一些大神的速度除了佩服赞叹之外没什么其他的惭愧或者说嫌弃自己的感觉(阿 Q 精神😄)。
一直感性地觉得,跑步能解压,跑完浑身汗,有种把身体的负能量都排出去的感觉,也把吃太多的罪恶感排解掉了🤦♂️,之前朋友有看一本书,书名差不多叫越跑越接近自己,这个也是我觉得挺准确的一句话,当跑到接近极限了,还想再继续再跑一点,再跑一点就能突破自己上一次的最远记录了,再跑一点就能又一次突破自己了,成人以后,毕业以后,进入社会以后,世事总是难以件件顺遂,磕磕绊绊的往前走,总觉得要崩溃了,但是还是得坚持,再熬一下,再拼一下,可能还是失败,但人生呢,运气好的人和事总是小概率的,唯有面对挫折,还是日拱一卒,来日方长,我们再坚持下,没准下一次,没准再跑一会,就能突破自己,达到新的境界。
另外个人后期对跑步的一些知识和理解也变得深入一些,比如伤膝盖,其实跑步的确伤膝盖,需要做一些准备和防护,最好的是适合自己的跑鞋和比较好的路(最好的是塑胶跑道了),也要注意热身跟跑后的拉伸(虽然我做的很差),还有就是注意心率,每个人有自己的适宜心率,我这就不冒充科普达人了,可以自行搜索关键字,先说到这吧~
]]>public static void main(String[] args) throws InterruptedException, MQClientException {
/*
* Instantiate with specified consumer group name.
* 首先是new 一个对象出来,然后指定 Consumer 的 Group
* 同一类Consumer的集合,这类Consumer通常消费同一类消息且消费逻辑一致。消费者组使得在消息消费方面,实现负载均衡和容错的目标变得非常容易。要注意的是,消费者组的消费者实例必须订阅完全相同的Topic。RocketMQ 支持两种消息模式:集群消费(Clustering)和广播消费(Broadcasting)。
*/
DefaultMQPushConsumer consumer = new DefaultMQPushConsumer("please_rename_unique_group_name_4");
/*
* Specify name server addresses.
* <p/>
* 这里可以通知指定环境变量或者设置对象参数的形式指定名字空间服务的地址
*
* Alternatively, you may specify name server addresses via exporting environmental variable: NAMESRV_ADDR
* <pre>
* {@code
* consumer.setNamesrvAddr("name-server1-ip:9876;name-server2-ip:9876");
* }
* </pre>
*/
/*
* Specify where to start in case the specified consumer group is a brand new one.
* 指定消费起始点
*/
consumer.setConsumeFromWhere(ConsumeFromWhere.CONSUME_FROM_FIRST_OFFSET);
/*
* Subscribe one more more topics to consume.
* 指定订阅的 topic 跟 tag,注意后面的是个表达式,可以以 tag1 || tag2 || tag3 传入
*/
consumer.subscribe("TopicTest", "*");
/*
* Register callback to execute on arrival of messages fetched from brokers.
* 注册具体获得消息后的处理方法
*/
consumer.registerMessageListener(new MessageListenerConcurrently() {
@Override
public ConsumeConcurrentlyStatus consumeMessage(List<MessageExt> msgs,
ConsumeConcurrentlyContext context) {
System.out.printf("%s Receive New Messages: %s %n", Thread.currentThread().getName(), msgs);
return ConsumeConcurrentlyStatus.CONSUME_SUCCESS;
}
});
/*
* Launch the consumer instance.
* 启动消费者
*/
consumer.start();
System.out.printf("Consumer Started.%n");
}
然后就是看看 start 的过程了
/**
* This method gets internal infrastructure readily to serve. Instances must call this method after configuration.
*
* @throws MQClientException if there is any client error.
*/
@Override
public void start() throws MQClientException {
setConsumerGroup(NamespaceUtil.wrapNamespace(this.getNamespace(), this.consumerGroup));
this.defaultMQPushConsumerImpl.start();
if (null != traceDispatcher) {
try {
traceDispatcher.start(this.getNamesrvAddr(), this.getAccessChannel());
} catch (MQClientException e) {
log.warn("trace dispatcher start failed ", e);
}
}
}
具体的逻辑在this.defaultMQPushConsumerImpl.start(),这个 defaultMQPushConsumerImpl 就是
/**
* Internal implementation. Most of the functions herein are delegated to it.
*/
protected final transient DefaultMQPushConsumerImpl defaultMQPushConsumerImpl;
public synchronized void start() throws MQClientException {
switch (this.serviceState) {
case CREATE_JUST:
log.info("the consumer [{}] start beginning. messageModel={}, isUnitMode={}", this.defaultMQPushConsumer.getConsumerGroup(),
this.defaultMQPushConsumer.getMessageModel(), this.defaultMQPushConsumer.isUnitMode());
// 这里比较巧妙,相当于想设立了个屏障,防止并发启动,不过这里并不是悲观锁,也不算个严格的乐观锁
this.serviceState = ServiceState.START_FAILED;
this.checkConfig();
this.copySubscription();
if (this.defaultMQPushConsumer.getMessageModel() == MessageModel.CLUSTERING) {
this.defaultMQPushConsumer.changeInstanceNameToPID();
}
// 这个mQClientFactory,负责管理client(consumer、producer),并提供多中功能接口供各个Service(Rebalance、PullMessage等)调用;大部分逻辑均在这个类中完成
this.mQClientFactory = MQClientManager.getInstance().getOrCreateMQClientInstance(this.defaultMQPushConsumer, this.rpcHook);
// 这个 rebalanceImpl 主要负责决定,当前的consumer应该从哪些Queue中消费消息;
this.rebalanceImpl.setConsumerGroup(this.defaultMQPushConsumer.getConsumerGroup());
this.rebalanceImpl.setMessageModel(this.defaultMQPushConsumer.getMessageModel());
this.rebalanceImpl.setAllocateMessageQueueStrategy(this.defaultMQPushConsumer.getAllocateMessageQueueStrategy());
this.rebalanceImpl.setmQClientFactory(this.mQClientFactory);
// 长连接,负责从broker处拉取消息,然后利用ConsumeMessageService回调用户的Listener执行消息消费逻辑
this.pullAPIWrapper = new PullAPIWrapper(
mQClientFactory,
this.defaultMQPushConsumer.getConsumerGroup(), isUnitMode());
this.pullAPIWrapper.registerFilterMessageHook(filterMessageHookList);
if (this.defaultMQPushConsumer.getOffsetStore() != null) {
this.offsetStore = this.defaultMQPushConsumer.getOffsetStore();
} else {
switch (this.defaultMQPushConsumer.getMessageModel()) {
case BROADCASTING:
this.offsetStore = new LocalFileOffsetStore(this.mQClientFactory, this.defaultMQPushConsumer.getConsumerGroup());
break;
case CLUSTERING:
this.offsetStore = new RemoteBrokerOffsetStore(this.mQClientFactory, this.defaultMQPushConsumer.getConsumerGroup());
break;
default:
break;
}
this.defaultMQPushConsumer.setOffsetStore(this.offsetStore);
}
// offsetStore 维护当前consumer的消费记录(offset);有两种实现,Local和Rmote,Local存储在本地磁盘上,适用于BROADCASTING广播消费模式;而Remote则将消费进度存储在Broker上,适用于CLUSTERING集群消费模式;
this.offsetStore.load();
if (this.getMessageListenerInner() instanceof MessageListenerOrderly) {
this.consumeOrderly = true;
this.consumeMessageService =
new ConsumeMessageOrderlyService(this, (MessageListenerOrderly) this.getMessageListenerInner());
} else if (this.getMessageListenerInner() instanceof MessageListenerConcurrently) {
this.consumeOrderly = false;
this.consumeMessageService =
new ConsumeMessageConcurrentlyService(this, (MessageListenerConcurrently) this.getMessageListenerInner());
}
// 实现所谓的"Push-被动"消费机制;从Broker拉取的消息后,封装成ConsumeRequest提交给ConsumeMessageSerivce,此service负责回调用户的Listener消费消息;
this.consumeMessageService.start();
boolean registerOK = mQClientFactory.registerConsumer(this.defaultMQPushConsumer.getConsumerGroup(), this);
if (!registerOK) {
this.serviceState = ServiceState.CREATE_JUST;
this.consumeMessageService.shutdown();
throw new MQClientException("The consumer group[" + this.defaultMQPushConsumer.getConsumerGroup()
+ "] has been created before, specify another name please." + FAQUrl.suggestTodo(FAQUrl.GROUP_NAME_DUPLICATE_URL),
null);
}
mQClientFactory.start();
log.info("the consumer [{}] start OK.", this.defaultMQPushConsumer.getConsumerGroup());
this.serviceState = ServiceState.RUNNING;
break;
case RUNNING:
case START_FAILED:
case SHUTDOWN_ALREADY:
throw new MQClientException("The PushConsumer service state not OK, maybe started once, "
+ this.serviceState
+ FAQUrl.suggestTodo(FAQUrl.CLIENT_SERVICE_NOT_OK),
null);
default:
break;
}
this.updateTopicSubscribeInfoWhenSubscriptionChanged();
this.mQClientFactory.checkClientInBroker();
this.mQClientFactory.sendHeartbeatToAllBrokerWithLock();
this.mQClientFactory.rebalanceImmediately();
}
然后我们往下看主要的目光聚焦mQClientFactory.start()
public void start() throws MQClientException {
synchronized (this) {
switch (this.serviceState) {
case CREATE_JUST:
this.serviceState = ServiceState.START_FAILED;
// If not specified,looking address from name server
if (null == this.clientConfig.getNamesrvAddr()) {
this.mQClientAPIImpl.fetchNameServerAddr();
}
// Start request-response channel
// 这里主要是初始化了个网络客户端
this.mQClientAPIImpl.start();
// Start various schedule tasks
// 定时任务
this.startScheduledTask();
// Start pull service
// 这里重点说下
this.pullMessageService.start();
// Start rebalance service
this.rebalanceService.start();
// Start push service
this.defaultMQProducer.getDefaultMQProducerImpl().start(false);
log.info("the client factory [{}] start OK", this.clientId);
this.serviceState = ServiceState.RUNNING;
break;
case START_FAILED:
throw new MQClientException("The Factory object[" + this.getClientId() + "] has been created before, and failed.", null);
default:
break;
}
}
}
我们来看下这个 pullMessageService,org.apache.rocketmq.client.impl.consumer.PullMessageService,
实现了 runnable 接口,
然后可以看到 run 方法
public void run() {
log.info(this.getServiceName() + " service started");
while (!this.isStopped()) {
try {
PullRequest pullRequest = this.pullRequestQueue.take();
this.pullMessage(pullRequest);
} catch (InterruptedException ignored) {
} catch (Exception e) {
log.error("Pull Message Service Run Method exception", e);
}
}
log.info(this.getServiceName() + " service end");
}
接着在看 pullMessage 方法
private void pullMessage(final PullRequest pullRequest) {
final MQConsumerInner consumer = this.mQClientFactory.selectConsumer(pullRequest.getConsumerGroup());
if (consumer != null) {
DefaultMQPushConsumerImpl impl = (DefaultMQPushConsumerImpl) consumer;
impl.pullMessage(pullRequest);
} else {
log.warn("No matched consumer for the PullRequest {}, drop it", pullRequest);
}
}
实际上调用了这个方法,这个方法很长,我在代码里注释下下每一段的功能
public void pullMessage(final PullRequest pullRequest) {
final ProcessQueue processQueue = pullRequest.getProcessQueue();
// 这里开始就是检查状态,确定是否往下执行
if (processQueue.isDropped()) {
log.info("the pull request[{}] is dropped.", pullRequest.toString());
return;
}
pullRequest.getProcessQueue().setLastPullTimestamp(System.currentTimeMillis());
try {
this.makeSureStateOK();
} catch (MQClientException e) {
log.warn("pullMessage exception, consumer state not ok", e);
this.executePullRequestLater(pullRequest, pullTimeDelayMillsWhenException);
return;
}
if (this.isPause()) {
log.warn("consumer was paused, execute pull request later. instanceName={}, group={}", this.defaultMQPushConsumer.getInstanceName(), this.defaultMQPushConsumer.getConsumerGroup());
this.executePullRequestLater(pullRequest, PULL_TIME_DELAY_MILLS_WHEN_SUSPEND);
return;
}
// 这块其实是个类似于限流的功能块,对消息数量和消息大小做限制
long cachedMessageCount = processQueue.getMsgCount().get();
long cachedMessageSizeInMiB = processQueue.getMsgSize().get() / (1024 * 1024);
if (cachedMessageCount > this.defaultMQPushConsumer.getPullThresholdForQueue()) {
this.executePullRequestLater(pullRequest, PULL_TIME_DELAY_MILLS_WHEN_FLOW_CONTROL);
if ((queueFlowControlTimes++ % 1000) == 0) {
log.warn(
"the cached message count exceeds the threshold {}, so do flow control, minOffset={}, maxOffset={}, count={}, size={} MiB, pullRequest={}, flowControlTimes={}",
this.defaultMQPushConsumer.getPullThresholdForQueue(), processQueue.getMsgTreeMap().firstKey(), processQueue.getMsgTreeMap().lastKey(), cachedMessageCount, cachedMessageSizeInMiB, pullRequest, queueFlowControlTimes);
}
return;
}
if (cachedMessageSizeInMiB > this.defaultMQPushConsumer.getPullThresholdSizeForQueue()) {
this.executePullRequestLater(pullRequest, PULL_TIME_DELAY_MILLS_WHEN_FLOW_CONTROL);
if ((queueFlowControlTimes++ % 1000) == 0) {
log.warn(
"the cached message size exceeds the threshold {} MiB, so do flow control, minOffset={}, maxOffset={}, count={}, size={} MiB, pullRequest={}, flowControlTimes={}",
this.defaultMQPushConsumer.getPullThresholdSizeForQueue(), processQueue.getMsgTreeMap().firstKey(), processQueue.getMsgTreeMap().lastKey(), cachedMessageCount, cachedMessageSizeInMiB, pullRequest, queueFlowControlTimes);
}
return;
}
// 若不是顺序消费(即DefaultMQPushConsumerImpl.consumeOrderly等于false),则检查ProcessQueue对象的msgTreeMap:TreeMap<Long,MessageExt>变量的第一个key值与最后一个key值之间的差额,该key值表示查询的队列偏移量queueoffset;若差额大于阈值(由DefaultMQPushConsumer. consumeConcurrentlyMaxSpan指定,默认是2000),则调用PullMessageService.executePullRequestLater方法,在50毫秒之后重新将该PullRequest请求放入PullMessageService.pullRequestQueue队列中;并跳出该方法;这里的意思主要就是消息有堆积了,等会再来拉取
if (!this.consumeOrderly) {
if (processQueue.getMaxSpan() > this.defaultMQPushConsumer.getConsumeConcurrentlyMaxSpan()) {
this.executePullRequestLater(pullRequest, PULL_TIME_DELAY_MILLS_WHEN_FLOW_CONTROL);
if ((queueMaxSpanFlowControlTimes++ % 1000) == 0) {
log.warn(
"the queue's messages, span too long, so do flow control, minOffset={}, maxOffset={}, maxSpan={}, pullRequest={}, flowControlTimes={}",
processQueue.getMsgTreeMap().firstKey(), processQueue.getMsgTreeMap().lastKey(), processQueue.getMaxSpan(),
pullRequest, queueMaxSpanFlowControlTimes);
}
return;
}
} else {
if (processQueue.isLocked()) {
if (!pullRequest.isLockedFirst()) {
final long offset = this.rebalanceImpl.computePullFromWhere(pullRequest.getMessageQueue());
boolean brokerBusy = offset < pullRequest.getNextOffset();
log.info("the first time to pull message, so fix offset from broker. pullRequest: {} NewOffset: {} brokerBusy: {}",
pullRequest, offset, brokerBusy);
if (brokerBusy) {
log.info("[NOTIFYME]the first time to pull message, but pull request offset larger than broker consume offset. pullRequest: {} NewOffset: {}",
pullRequest, offset);
}
pullRequest.setLockedFirst(true);
pullRequest.setNextOffset(offset);
}
} else {
this.executePullRequestLater(pullRequest, pullTimeDelayMillsWhenException);
log.info("pull message later because not locked in broker, {}", pullRequest);
return;
}
}
// 以PullRequest.messageQueue对象的topic值为参数从RebalanceImpl.subscriptionInner: ConcurrentHashMap, SubscriptionData>中获取对应的SubscriptionData对象,若该对象为null,考虑到并发的关系,调用executePullRequestLater方法,稍后重试;并跳出该方法;
final SubscriptionData subscriptionData = this.rebalanceImpl.getSubscriptionInner().get(pullRequest.getMessageQueue().getTopic());
if (null == subscriptionData) {
this.executePullRequestLater(pullRequest, pullTimeDelayMillsWhenException);
log.warn("find the consumer's subscription failed, {}", pullRequest);
return;
}
final long beginTimestamp = System.currentTimeMillis();
// 异步拉取回调,先不讨论细节
PullCallback pullCallback = new PullCallback() {
@Override
public void onSuccess(PullResult pullResult) {
if (pullResult != null) {
pullResult = DefaultMQPushConsumerImpl.this.pullAPIWrapper.processPullResult(pullRequest.getMessageQueue(), pullResult,
subscriptionData);
switch (pullResult.getPullStatus()) {
case FOUND:
long prevRequestOffset = pullRequest.getNextOffset();
pullRequest.setNextOffset(pullResult.getNextBeginOffset());
long pullRT = System.currentTimeMillis() - beginTimestamp;
DefaultMQPushConsumerImpl.this.getConsumerStatsManager().incPullRT(pullRequest.getConsumerGroup(),
pullRequest.getMessageQueue().getTopic(), pullRT);
long firstMsgOffset = Long.MAX_VALUE;
if (pullResult.getMsgFoundList() == null || pullResult.getMsgFoundList().isEmpty()) {
DefaultMQPushConsumerImpl.this.executePullRequestImmediately(pullRequest);
} else {
firstMsgOffset = pullResult.getMsgFoundList().get(0).getQueueOffset();
DefaultMQPushConsumerImpl.this.getConsumerStatsManager().incPullTPS(pullRequest.getConsumerGroup(),
pullRequest.getMessageQueue().getTopic(), pullResult.getMsgFoundList().size());
boolean dispatchToConsume = processQueue.putMessage(pullResult.getMsgFoundList());
DefaultMQPushConsumerImpl.this.consumeMessageService.submitConsumeRequest(
pullResult.getMsgFoundList(),
processQueue,
pullRequest.getMessageQueue(),
dispatchToConsume);
if (DefaultMQPushConsumerImpl.this.defaultMQPushConsumer.getPullInterval() > 0) {
DefaultMQPushConsumerImpl.this.executePullRequestLater(pullRequest,
DefaultMQPushConsumerImpl.this.defaultMQPushConsumer.getPullInterval());
} else {
DefaultMQPushConsumerImpl.this.executePullRequestImmediately(pullRequest);
}
}
if (pullResult.getNextBeginOffset() < prevRequestOffset
|| firstMsgOffset < prevRequestOffset) {
log.warn(
"[BUG] pull message result maybe data wrong, nextBeginOffset: {} firstMsgOffset: {} prevRequestOffset: {}",
pullResult.getNextBeginOffset(),
firstMsgOffset,
prevRequestOffset);
}
break;
case NO_NEW_MSG:
pullRequest.setNextOffset(pullResult.getNextBeginOffset());
DefaultMQPushConsumerImpl.this.correctTagsOffset(pullRequest);
DefaultMQPushConsumerImpl.this.executePullRequestImmediately(pullRequest);
break;
case NO_MATCHED_MSG:
pullRequest.setNextOffset(pullResult.getNextBeginOffset());
DefaultMQPushConsumerImpl.this.correctTagsOffset(pullRequest);
DefaultMQPushConsumerImpl.this.executePullRequestImmediately(pullRequest);
break;
case OFFSET_ILLEGAL:
log.warn("the pull request offset illegal, {} {}",
pullRequest.toString(), pullResult.toString());
pullRequest.setNextOffset(pullResult.getNextBeginOffset());
pullRequest.getProcessQueue().setDropped(true);
DefaultMQPushConsumerImpl.this.executeTaskLater(new Runnable() {
@Override
public void run() {
try {
DefaultMQPushConsumerImpl.this.offsetStore.updateOffset(pullRequest.getMessageQueue(),
pullRequest.getNextOffset(), false);
DefaultMQPushConsumerImpl.this.offsetStore.persist(pullRequest.getMessageQueue());
DefaultMQPushConsumerImpl.this.rebalanceImpl.removeProcessQueue(pullRequest.getMessageQueue());
log.warn("fix the pull request offset, {}", pullRequest);
} catch (Throwable e) {
log.error("executeTaskLater Exception", e);
}
}
}, 10000);
break;
default:
break;
}
}
}
@Override
public void onException(Throwable e) {
if (!pullRequest.getMessageQueue().getTopic().startsWith(MixAll.RETRY_GROUP_TOPIC_PREFIX)) {
log.warn("execute the pull request exception", e);
}
DefaultMQPushConsumerImpl.this.executePullRequestLater(pullRequest, pullTimeDelayMillsWhenException);
}
};
// 如果为集群模式,即可置commitOffsetEnable为 true
boolean commitOffsetEnable = false;
long commitOffsetValue = 0L;
if (MessageModel.CLUSTERING == this.defaultMQPushConsumer.getMessageModel()) {
commitOffsetValue = this.offsetStore.readOffset(pullRequest.getMessageQueue(), ReadOffsetType.READ_FROM_MEMORY);
if (commitOffsetValue > 0) {
commitOffsetEnable = true;
}
}
// 将上面获得的commitOffsetEnable更新到订阅关系里
String subExpression = null;
boolean classFilter = false;
SubscriptionData sd = this.rebalanceImpl.getSubscriptionInner().get(pullRequest.getMessageQueue().getTopic());
if (sd != null) {
if (this.defaultMQPushConsumer.isPostSubscriptionWhenPull() && !sd.isClassFilterMode()) {
subExpression = sd.getSubString();
}
classFilter = sd.isClassFilterMode();
}
// 组成 sysFlag
int sysFlag = PullSysFlag.buildSysFlag(
commitOffsetEnable, // commitOffset
true, // suspend
subExpression != null, // subscription
classFilter // class filter
);
// 调用真正的拉取消息接口
try {
this.pullAPIWrapper.pullKernelImpl(
pullRequest.getMessageQueue(),
subExpression,
subscriptionData.getExpressionType(),
subscriptionData.getSubVersion(),
pullRequest.getNextOffset(),
this.defaultMQPushConsumer.getPullBatchSize(),
sysFlag,
commitOffsetValue,
BROKER_SUSPEND_MAX_TIME_MILLIS,
CONSUMER_TIMEOUT_MILLIS_WHEN_SUSPEND,
CommunicationMode.ASYNC,
pullCallback
);
} catch (Exception e) {
log.error("pullKernelImpl exception", e);
this.executePullRequestLater(pullRequest, pullTimeDelayMillsWhenException);
}
}
以下就是拉取消息的底层 api,不够不是特别复杂,主要是在找 broker,和设置请求参数
public PullResult pullKernelImpl(
final MessageQueue mq,
final String subExpression,
final String expressionType,
final long subVersion,
final long offset,
final int maxNums,
final int sysFlag,
final long commitOffset,
final long brokerSuspendMaxTimeMillis,
final long timeoutMillis,
final CommunicationMode communicationMode,
final PullCallback pullCallback
) throws MQClientException, RemotingException, MQBrokerException, InterruptedException {
FindBrokerResult findBrokerResult =
this.mQClientFactory.findBrokerAddressInSubscribe(mq.getBrokerName(),
this.recalculatePullFromWhichNode(mq), false);
if (null == findBrokerResult) {
this.mQClientFactory.updateTopicRouteInfoFromNameServer(mq.getTopic());
findBrokerResult =
this.mQClientFactory.findBrokerAddressInSubscribe(mq.getBrokerName(),
this.recalculatePullFromWhichNode(mq), false);
}
if (findBrokerResult != null) {
{
// check version
if (!ExpressionType.isTagType(expressionType)
&& findBrokerResult.getBrokerVersion() < MQVersion.Version.V4_1_0_SNAPSHOT.ordinal()) {
throw new MQClientException("The broker[" + mq.getBrokerName() + ", "
+ findBrokerResult.getBrokerVersion() + "] does not upgrade to support for filter message by " + expressionType, null);
}
}
int sysFlagInner = sysFlag;
if (findBrokerResult.isSlave()) {
sysFlagInner = PullSysFlag.clearCommitOffsetFlag(sysFlagInner);
}
PullMessageRequestHeader requestHeader = new PullMessageRequestHeader();
requestHeader.setConsumerGroup(this.consumerGroup);
requestHeader.setTopic(mq.getTopic());
requestHeader.setQueueId(mq.getQueueId());
requestHeader.setQueueOffset(offset);
requestHeader.setMaxMsgNums(maxNums);
requestHeader.setSysFlag(sysFlagInner);
requestHeader.setCommitOffset(commitOffset);
requestHeader.setSuspendTimeoutMillis(brokerSuspendMaxTimeMillis);
requestHeader.setSubscription(subExpression);
requestHeader.setSubVersion(subVersion);
requestHeader.setExpressionType(expressionType);
String brokerAddr = findBrokerResult.getBrokerAddr();
if (PullSysFlag.hasClassFilterFlag(sysFlagInner)) {
brokerAddr = computPullFromWhichFilterServer(mq.getTopic(), brokerAddr);
}
PullResult pullResult = this.mQClientFactory.getMQClientAPIImpl().pullMessage(
brokerAddr,
requestHeader,
timeoutMillis,
communicationMode,
pullCallback);
return pullResult;
}
throw new MQClientException("The broker[" + mq.getBrokerName() + "] not exist", null);
}
再看下一步的
public PullResult pullMessage(
final String addr,
final PullMessageRequestHeader requestHeader,
final long timeoutMillis,
final CommunicationMode communicationMode,
final PullCallback pullCallback
) throws RemotingException, MQBrokerException, InterruptedException {
RemotingCommand request = RemotingCommand.createRequestCommand(RequestCode.PULL_MESSAGE, requestHeader);
switch (communicationMode) {
case ONEWAY:
assert false;
return null;
case ASYNC:
this.pullMessageAsync(addr, request, timeoutMillis, pullCallback);
return null;
case SYNC:
return this.pullMessageSync(addr, request, timeoutMillis);
default:
assert false;
break;
}
return null;
}
通过 communicationMode 判断是同步拉取还是异步拉取,异步就调用
private void pullMessageAsync(
final String addr,
final RemotingCommand request,
final long timeoutMillis,
final PullCallback pullCallback
) throws RemotingException, InterruptedException {
this.remotingClient.invokeAsync(addr, request, timeoutMillis, new InvokeCallback() {
@Override
public void operationComplete(ResponseFuture responseFuture) {
异步
RemotingCommand response = responseFuture.getResponseCommand();
if (response != null) {
try {
PullResult pullResult = MQClientAPIImpl.this.processPullResponse(response);
assert pullResult != null;
pullCallback.onSuccess(pullResult);
} catch (Exception e) {
pullCallback.onException(e);
}
} else {
if (!responseFuture.isSendRequestOK()) {
pullCallback.onException(new MQClientException("send request failed to " + addr + ". Request: " + request, responseFuture.getCause()));
} else if (responseFuture.isTimeout()) {
pullCallback.onException(new MQClientException("wait response from " + addr + " timeout :" + responseFuture.getTimeoutMillis() + "ms" + ". Request: " + request,
responseFuture.getCause()));
} else {
pullCallback.onException(new MQClientException("unknown reason. addr: " + addr + ", timeoutMillis: " + timeoutMillis + ". Request: " + request, responseFuture.getCause()));
}
}
}
});
}
并且会调用前面 pullCallback 的onSuccess和onException方法,同步的就是调用
private PullResult pullMessageSync(
final String addr,
final RemotingCommand request,
final long timeoutMillis
) throws RemotingException, InterruptedException, MQBrokerException {
RemotingCommand response = this.remotingClient.invokeSync(addr, request, timeoutMillis);
assert response != null;
return this.processPullResponse(response);
}
然后就是这个 remotingClient 的 invokeAsync 跟 invokeSync 方法
@Override
public void invokeAsync(String addr, RemotingCommand request, long timeoutMillis, InvokeCallback invokeCallback)
throws InterruptedException, RemotingConnectException, RemotingTooMuchRequestException, RemotingTimeoutException,
RemotingSendRequestException {
long beginStartTime = System.currentTimeMillis();
final Channel channel = this.getAndCreateChannel(addr);
if (channel != null && channel.isActive()) {
try {
doBeforeRpcHooks(addr, request);
long costTime = System.currentTimeMillis() - beginStartTime;
if (timeoutMillis < costTime) {
throw new RemotingTooMuchRequestException("invokeAsync call timeout");
}
this.invokeAsyncImpl(channel, request, timeoutMillis - costTime, invokeCallback);
} catch (RemotingSendRequestException e) {
log.warn("invokeAsync: send request exception, so close the channel[{}]", addr);
this.closeChannel(addr, channel);
throw e;
}
} else {
this.closeChannel(addr, channel);
throw new RemotingConnectException(addr);
}
}
@Override
public RemotingCommand invokeSync(String addr, final RemotingCommand request, long timeoutMillis)
throws InterruptedException, RemotingConnectException, RemotingSendRequestException, RemotingTimeoutException {
long beginStartTime = System.currentTimeMillis();
final Channel channel = this.getAndCreateChannel(addr);
if (channel != null && channel.isActive()) {
try {
doBeforeRpcHooks(addr, request);
long costTime = System.currentTimeMillis() - beginStartTime;
if (timeoutMillis < costTime) {
throw new RemotingTimeoutException("invokeSync call timeout");
}
RemotingCommand response = this.invokeSyncImpl(channel, request, timeoutMillis - costTime);
doAfterRpcHooks(RemotingHelper.parseChannelRemoteAddr(channel), request, response);
return response;
} catch (RemotingSendRequestException e) {
log.warn("invokeSync: send request exception, so close the channel[{}]", addr);
this.closeChannel(addr, channel);
throw e;
} catch (RemotingTimeoutException e) {
if (nettyClientConfig.isClientCloseSocketIfTimeout()) {
this.closeChannel(addr, channel);
log.warn("invokeSync: close socket because of timeout, {}ms, {}", timeoutMillis, addr);
}
log.warn("invokeSync: wait response timeout exception, the channel[{}]", addr);
throw e;
}
} else {
this.closeChannel(addr, channel);
throw new RemotingConnectException(addr);
}
}
再往下看
public RemotingCommand invokeSyncImpl(final Channel channel, final RemotingCommand request,
final long timeoutMillis)
throws InterruptedException, RemotingSendRequestException, RemotingTimeoutException {
final int opaque = request.getOpaque();
try {
同步跟异步都是会把结果用ResponseFuture抱起来
final ResponseFuture responseFuture = new ResponseFuture(channel, opaque, timeoutMillis, null, null);
this.responseTable.put(opaque, responseFuture);
final SocketAddress addr = channel.remoteAddress();
channel.writeAndFlush(request).addListener(new ChannelFutureListener() {
@Override
public void operationComplete(ChannelFuture f) throws Exception {
if (f.isSuccess()) {
responseFuture.setSendRequestOK(true);
return;
} else {
responseFuture.setSendRequestOK(false);
}
responseTable.remove(opaque);
responseFuture.setCause(f.cause());
responseFuture.putResponse(null);
log.warn("send a request command to channel <" + addr + "> failed.");
}
});
// 区别是同步的是在这等待
RemotingCommand responseCommand = responseFuture.waitResponse(timeoutMillis);
if (null == responseCommand) {
if (responseFuture.isSendRequestOK()) {
throw new RemotingTimeoutException(RemotingHelper.parseSocketAddressAddr(addr), timeoutMillis,
responseFuture.getCause());
} else {
throw new RemotingSendRequestException(RemotingHelper.parseSocketAddressAddr(addr), responseFuture.getCause());
}
}
return responseCommand;
} finally {
this.responseTable.remove(opaque);
}
}
public void invokeAsyncImpl(final Channel channel, final RemotingCommand request, final long timeoutMillis,
final InvokeCallback invokeCallback)
throws InterruptedException, RemotingTooMuchRequestException, RemotingTimeoutException, RemotingSendRequestException {
long beginStartTime = System.currentTimeMillis();
final int opaque = request.getOpaque();
boolean acquired = this.semaphoreAsync.tryAcquire(timeoutMillis, TimeUnit.MILLISECONDS);
if (acquired) {
final SemaphoreReleaseOnlyOnce once = new SemaphoreReleaseOnlyOnce(this.semaphoreAsync);
long costTime = System.currentTimeMillis() - beginStartTime;
if (timeoutMillis < costTime) {
once.release();
throw new RemotingTimeoutException("invokeAsyncImpl call timeout");
}
final ResponseFuture responseFuture = new ResponseFuture(channel, opaque, timeoutMillis - costTime, invokeCallback, once);
this.responseTable.put(opaque, responseFuture);
try {
channel.writeAndFlush(request).addListener(new ChannelFutureListener() {
@Override
public void operationComplete(ChannelFuture f) throws Exception {
if (f.isSuccess()) {
responseFuture.setSendRequestOK(true);
return;
}
requestFail(opaque);
log.warn("send a request command to channel <{}> failed.", RemotingHelper.parseChannelRemoteAddr(channel));
}
});
} catch (Exception e) {
responseFuture.release();
log.warn("send a request command to channel <" + RemotingHelper.parseChannelRemoteAddr(channel) + "> Exception", e);
throw new RemotingSendRequestException(RemotingHelper.parseChannelRemoteAddr(channel), e);
}
} else {
if (timeoutMillis <= 0) {
throw new RemotingTooMuchRequestException("invokeAsyncImpl invoke too fast");
} else {
String info =
String.format("invokeAsyncImpl tryAcquire semaphore timeout, %dms, waiting thread nums: %d semaphoreAsyncValue: %d",
timeoutMillis,
this.semaphoreAsync.getQueueLength(),
this.semaphoreAsync.availablePermits()
);
log.warn(info);
throw new RemotingTimeoutException(info);
}
}
}
]]>public static void main(String[] args) {
main0(args);
}
public static NamesrvController main0(String[] args) {
try {
NamesrvController controller = createNamesrvController(args);
start(controller);
String tip = "The Name Server boot success. serializeType=" + RemotingCommand.getSerializeTypeConfigInThisServer();
log.info(tip);
System.out.printf("%s%n", tip);
return controller;
} catch (Throwable e) {
e.printStackTrace();
System.exit(-1);
}
return null;
}
入口的代码时这样子,其实主要的逻辑在createNamesrvController和start方法,来看下这两个的实现
public static NamesrvController createNamesrvController(String[] args) throws IOException, JoranException {
System.setProperty(RemotingCommand.REMOTING_VERSION_KEY, Integer.toString(MQVersion.CURRENT_VERSION));
//PackageConflictDetect.detectFastjson();
Options options = ServerUtil.buildCommandlineOptions(new Options());
commandLine = ServerUtil.parseCmdLine("mqnamesrv", args, buildCommandlineOptions(options), new PosixParser());
if (null == commandLine) {
System.exit(-1);
return null;
}
final NamesrvConfig namesrvConfig = new NamesrvConfig();
final NettyServerConfig nettyServerConfig = new NettyServerConfig();
nettyServerConfig.setListenPort(9876);
if (commandLine.hasOption('c')) {
String file = commandLine.getOptionValue('c');
if (file != null) {
InputStream in = new BufferedInputStream(new FileInputStream(file));
properties = new Properties();
properties.load(in);
MixAll.properties2Object(properties, namesrvConfig);
MixAll.properties2Object(properties, nettyServerConfig);
namesrvConfig.setConfigStorePath(file);
System.out.printf("load config properties file OK, %s%n", file);
in.close();
}
}
if (commandLine.hasOption('p')) {
InternalLogger console = InternalLoggerFactory.getLogger(LoggerName.NAMESRV_CONSOLE_NAME);
MixAll.printObjectProperties(console, namesrvConfig);
MixAll.printObjectProperties(console, nettyServerConfig);
System.exit(0);
}
MixAll.properties2Object(ServerUtil.commandLine2Properties(commandLine), namesrvConfig);
if (null == namesrvConfig.getRocketmqHome()) {
System.out.printf("Please set the %s variable in your environment to match the location of the RocketMQ installation%n", MixAll.ROCKETMQ_HOME_ENV);
System.exit(-2);
}
LoggerContext lc = (LoggerContext) LoggerFactory.getILoggerFactory();
JoranConfigurator configurator = new JoranConfigurator();
configurator.setContext(lc);
lc.reset();
configurator.doConfigure(namesrvConfig.getRocketmqHome() + "/conf/logback_namesrv.xml");
log = InternalLoggerFactory.getLogger(LoggerName.NAMESRV_LOGGER_NAME);
MixAll.printObjectProperties(log, namesrvConfig);
MixAll.printObjectProperties(log, nettyServerConfig);
final NamesrvController controller = new NamesrvController(namesrvConfig, nettyServerConfig);
// remember all configs to prevent discard
controller.getConfiguration().registerConfig(properties);
return controller;
}
这个方法里其实主要是读取一些配置啥的,不是很复杂,
public static NamesrvController start(final NamesrvController controller) throws Exception {
if (null == controller) {
throw new IllegalArgumentException("NamesrvController is null");
}
boolean initResult = controller.initialize();
if (!initResult) {
controller.shutdown();
System.exit(-3);
}
Runtime.getRuntime().addShutdownHook(new ShutdownHookThread(log, new Callable<Void>() {
@Override
public Void call() throws Exception {
controller.shutdown();
return null;
}
}));
controller.start();
return controller;
}
这个start里主要关注initialize方法,后面就是一个停机的hook,来看下initialize方法
public boolean initialize() {
this.kvConfigManager.load();
this.remotingServer = new NettyRemotingServer(this.nettyServerConfig, this.brokerHousekeepingService);
this.remotingExecutor =
Executors.newFixedThreadPool(nettyServerConfig.getServerWorkerThreads(), new ThreadFactoryImpl("RemotingExecutorThread_"));
this.registerProcessor();
this.scheduledExecutorService.scheduleAtFixedRate(new Runnable() {
@Override
public void run() {
NamesrvController.this.routeInfoManager.scanNotActiveBroker();
}
}, 5, 10, TimeUnit.SECONDS);
this.scheduledExecutorService.scheduleAtFixedRate(new Runnable() {
@Override
public void run() {
NamesrvController.this.kvConfigManager.printAllPeriodically();
}
}, 1, 10, TimeUnit.MINUTES);
if (TlsSystemConfig.tlsMode != TlsMode.DISABLED) {
// Register a listener to reload SslContext
try {
fileWatchService = new FileWatchService(
new String[] {
TlsSystemConfig.tlsServerCertPath,
TlsSystemConfig.tlsServerKeyPath,
TlsSystemConfig.tlsServerTrustCertPath
},
new FileWatchService.Listener() {
boolean certChanged, keyChanged = false;
@Override
public void onChanged(String path) {
if (path.equals(TlsSystemConfig.tlsServerTrustCertPath)) {
log.info("The trust certificate changed, reload the ssl context");
reloadServerSslContext();
}
if (path.equals(TlsSystemConfig.tlsServerCertPath)) {
certChanged = true;
}
if (path.equals(TlsSystemConfig.tlsServerKeyPath)) {
keyChanged = true;
}
if (certChanged && keyChanged) {
log.info("The certificate and private key changed, reload the ssl context");
certChanged = keyChanged = false;
reloadServerSslContext();
}
}
private void reloadServerSslContext() {
((NettyRemotingServer) remotingServer).loadSslContext();
}
});
} catch (Exception e) {
log.warn("FileWatchService created error, can't load the certificate dynamically");
}
}
return true;
}
这里的kvConfigManager主要是来加载NameServer的配置参数,存到org.apache.rocketmq.namesrv.kvconfig.KVConfigManager#configTable中,然后是以BrokerHousekeepingService对象为参数初始化NettyRemotingServer对象,BrokerHousekeepingService对象作为该Netty连接中Socket链接的监听器(ChannelEventListener);监听与Broker建立的渠道的状态(空闲、关闭、异常三个状态),并调用BrokerHousekeepingService的相应onChannel方法。其中渠道的空闲、关闭、异常状态均调用RouteInfoManager.onChannelDestory方法处理。这个BrokerHousekeepingService可以字面化地理解为broker的管家服务,这个类内部三个状态方法其实都是调用的org.apache.rocketmq.namesrv.NamesrvController#getRouteInfoManager方法,而这个RouteInfoManager里面的对象有这些
public class RouteInfoManager {
private static final InternalLogger log = InternalLoggerFactory.getLogger(LoggerName.NAMESRV_LOGGER_NAME);
private final static long BROKER_CHANNEL_EXPIRED_TIME = 1000 * 60 * 2;
private final ReadWriteLock lock = new ReentrantReadWriteLock();
// topic与queue的对应关系
private final HashMap<String/* topic */, List<QueueData>> topicQueueTable;
// Broker名称与broker属性的map
private final HashMap<String/* brokerName */, BrokerData> brokerAddrTable;
// 集群与broker集合的对应关系
private final HashMap<String/* clusterName */, Set<String/* brokerName */>> clusterAddrTable;
// 活跃的broker信息
private final HashMap<String/* brokerAddr */, BrokerLiveInfo> brokerLiveTable;
// Broker地址与过滤器
private final HashMap<String/* brokerAddr */, List<String>/* Filter Server */> filterServerTable;
然后接下去就是初始化了一个线程池,然后注册默认的处理类this.registerProcessor();默认都是这个处理器去处理请求 org.apache.rocketmq.namesrv.processor.DefaultRequestProcessor#DefaultRequestProcessor然后是初始化两个定时任务
第一是每10秒检查一遍Broker的状态的定时任务,调用scanNotActiveBroker方法;遍历brokerLiveTable集合,查看每个broker的最后更新时间(BrokerLiveInfo.lastUpdateTimestamp)是否超过2分钟,若超过则关闭该broker的渠道并调用RouteInfoManager.onChannelDestory方法清理RouteInfoManager类的topicQueueTable、brokerAddrTable、clusterAddrTable、filterServerTable成员变量。
this.scheduledExecutorService.scheduleAtFixedRate(new Runnable() {
@Override
public void run() {
NamesrvController.this.routeInfoManager.scanNotActiveBroker();
}
}, 5, 10, TimeUnit.SECONDS);
public void scanNotActiveBroker() {
Iterator<Entry<String, BrokerLiveInfo>> it = this.brokerLiveTable.entrySet().iterator();
while (it.hasNext()) {
Entry<String, BrokerLiveInfo> next = it.next();
long last = next.getValue().getLastUpdateTimestamp();
if ((last + BROKER_CHANNEL_EXPIRED_TIME) < System.currentTimeMillis()) {
RemotingUtil.closeChannel(next.getValue().getChannel());
it.remove();
log.warn("The broker channel expired, {} {}ms", next.getKey(), BROKER_CHANNEL_EXPIRED_TIME);
this.onChannelDestroy(next.getKey(), next.getValue().getChannel());
}
}
}
public void onChannelDestroy(String remoteAddr, Channel channel) {
String brokerAddrFound = null;
if (channel != null) {
try {
try {
this.lock.readLock().lockInterruptibly();
Iterator<Entry<String, BrokerLiveInfo>> itBrokerLiveTable =
this.brokerLiveTable.entrySet().iterator();
while (itBrokerLiveTable.hasNext()) {
Entry<String, BrokerLiveInfo> entry = itBrokerLiveTable.next();
if (entry.getValue().getChannel() == channel) {
brokerAddrFound = entry.getKey();
break;
}
}
} finally {
this.lock.readLock().unlock();
}
} catch (Exception e) {
log.error("onChannelDestroy Exception", e);
}
}
if (null == brokerAddrFound) {
brokerAddrFound = remoteAddr;
} else {
log.info("the broker's channel destroyed, {}, clean it's data structure at once", brokerAddrFound);
}
if (brokerAddrFound != null && brokerAddrFound.length() > 0) {
try {
try {
this.lock.writeLock().lockInterruptibly();
this.brokerLiveTable.remove(brokerAddrFound);
this.filterServerTable.remove(brokerAddrFound);
String brokerNameFound = null;
boolean removeBrokerName = false;
Iterator<Entry<String, BrokerData>> itBrokerAddrTable =
this.brokerAddrTable.entrySet().iterator();
while (itBrokerAddrTable.hasNext() && (null == brokerNameFound)) {
BrokerData brokerData = itBrokerAddrTable.next().getValue();
Iterator<Entry<Long, String>> it = brokerData.getBrokerAddrs().entrySet().iterator();
while (it.hasNext()) {
Entry<Long, String> entry = it.next();
Long brokerId = entry.getKey();
String brokerAddr = entry.getValue();
if (brokerAddr.equals(brokerAddrFound)) {
brokerNameFound = brokerData.getBrokerName();
it.remove();
log.info("remove brokerAddr[{}, {}] from brokerAddrTable, because channel destroyed",
brokerId, brokerAddr);
break;
}
}
if (brokerData.getBrokerAddrs().isEmpty()) {
removeBrokerName = true;
itBrokerAddrTable.remove();
log.info("remove brokerName[{}] from brokerAddrTable, because channel destroyed",
brokerData.getBrokerName());
}
}
if (brokerNameFound != null && removeBrokerName) {
Iterator<Entry<String, Set<String>>> it = this.clusterAddrTable.entrySet().iterator();
while (it.hasNext()) {
Entry<String, Set<String>> entry = it.next();
String clusterName = entry.getKey();
Set<String> brokerNames = entry.getValue();
boolean removed = brokerNames.remove(brokerNameFound);
if (removed) {
log.info("remove brokerName[{}], clusterName[{}] from clusterAddrTable, because channel destroyed",
brokerNameFound, clusterName);
if (brokerNames.isEmpty()) {
log.info("remove the clusterName[{}] from clusterAddrTable, because channel destroyed and no broker in this cluster",
clusterName);
it.remove();
}
break;
}
}
}
if (removeBrokerName) {
Iterator<Entry<String, List<QueueData>>> itTopicQueueTable =
this.topicQueueTable.entrySet().iterator();
while (itTopicQueueTable.hasNext()) {
Entry<String, List<QueueData>> entry = itTopicQueueTable.next();
String topic = entry.getKey();
List<QueueData> queueDataList = entry.getValue();
Iterator<QueueData> itQueueData = queueDataList.iterator();
while (itQueueData.hasNext()) {
QueueData queueData = itQueueData.next();
if (queueData.getBrokerName().equals(brokerNameFound)) {
itQueueData.remove();
log.info("remove topic[{} {}], from topicQueueTable, because channel destroyed",
topic, queueData);
}
}
if (queueDataList.isEmpty()) {
itTopicQueueTable.remove();
log.info("remove topic[{}] all queue, from topicQueueTable, because channel destroyed",
topic);
}
}
}
} finally {
this.lock.writeLock().unlock();
}
} catch (Exception e) {
log.error("onChannelDestroy Exception", e);
}
}
}
第二个是每10分钟打印一次NameServer的配置参数。即KVConfigManager.configTable变量的内容。
this.scheduledExecutorService.scheduleAtFixedRate(new Runnable() {
@Override
public void run() {
NamesrvController.this.kvConfigManager.printAllPeriodically();
}
}, 1, 10, TimeUnit.MINUTES);
然后这个初始化就差不多完成了,后面只需要把remotingServer start一下就好了
直接上代码,其实主体是swtich case去判断
@Override
public RemotingCommand processRequest(ChannelHandlerContext ctx,
RemotingCommand request) throws RemotingCommandException {
if (ctx != null) {
log.debug("receive request, {} {} {}",
request.getCode(),
RemotingHelper.parseChannelRemoteAddr(ctx.channel()),
request);
}
switch (request.getCode()) {
case RequestCode.PUT_KV_CONFIG:
return this.putKVConfig(ctx, request);
case RequestCode.GET_KV_CONFIG:
return this.getKVConfig(ctx, request);
case RequestCode.DELETE_KV_CONFIG:
return this.deleteKVConfig(ctx, request);
case RequestCode.QUERY_DATA_VERSION:
return queryBrokerTopicConfig(ctx, request);
case RequestCode.REGISTER_BROKER:
Version brokerVersion = MQVersion.value2Version(request.getVersion());
if (brokerVersion.ordinal() >= MQVersion.Version.V3_0_11.ordinal()) {
return this.registerBrokerWithFilterServer(ctx, request);
} else {
return this.registerBroker(ctx, request);
}
case RequestCode.UNREGISTER_BROKER:
return this.unregisterBroker(ctx, request);
case RequestCode.GET_ROUTEINTO_BY_TOPIC:
return this.getRouteInfoByTopic(ctx, request);
case RequestCode.GET_BROKER_CLUSTER_INFO:
return this.getBrokerClusterInfo(ctx, request);
case RequestCode.WIPE_WRITE_PERM_OF_BROKER:
return this.wipeWritePermOfBroker(ctx, request);
case RequestCode.GET_ALL_TOPIC_LIST_FROM_NAMESERVER:
return getAllTopicListFromNameserver(ctx, request);
case RequestCode.DELETE_TOPIC_IN_NAMESRV:
return deleteTopicInNamesrv(ctx, request);
case RequestCode.GET_KVLIST_BY_NAMESPACE:
return this.getKVListByNamespace(ctx, request);
case RequestCode.GET_TOPICS_BY_CLUSTER:
return this.getTopicsByCluster(ctx, request);
case RequestCode.GET_SYSTEM_TOPIC_LIST_FROM_NS:
return this.getSystemTopicListFromNs(ctx, request);
case RequestCode.GET_UNIT_TOPIC_LIST:
return this.getUnitTopicList(ctx, request);
case RequestCode.GET_HAS_UNIT_SUB_TOPIC_LIST:
return this.getHasUnitSubTopicList(ctx, request);
case RequestCode.GET_HAS_UNIT_SUB_UNUNIT_TOPIC_LIST:
return this.getHasUnitSubUnUnitTopicList(ctx, request);
case RequestCode.UPDATE_NAMESRV_CONFIG:
return this.updateConfig(ctx, request);
case RequestCode.GET_NAMESRV_CONFIG:
return this.getConfig(ctx, request);
default:
break;
}
return null;
}
以broker注册为例,
case RequestCode.REGISTER_BROKER:
Version brokerVersion = MQVersion.value2Version(request.getVersion());
if (brokerVersion.ordinal() >= MQVersion.Version.V3_0_11.ordinal()) {
return this.registerBrokerWithFilterServer(ctx, request);
} else {
return this.registerBroker(ctx, request);
}
做了个简单的版本管理,我们看下前面一个的代码
public RemotingCommand registerBrokerWithFilterServer(ChannelHandlerContext ctx, RemotingCommand request)
throws RemotingCommandException {
final RemotingCommand response = RemotingCommand.createResponseCommand(RegisterBrokerResponseHeader.class);
final RegisterBrokerResponseHeader responseHeader = (RegisterBrokerResponseHeader) response.readCustomHeader();
final RegisterBrokerRequestHeader requestHeader =
(RegisterBrokerRequestHeader) request.decodeCommandCustomHeader(RegisterBrokerRequestHeader.class);
if (!checksum(ctx, request, requestHeader)) {
response.setCode(ResponseCode.SYSTEM_ERROR);
response.setRemark("crc32 not match");
return response;
}
RegisterBrokerBody registerBrokerBody = new RegisterBrokerBody();
if (request.getBody() != null) {
try {
registerBrokerBody = RegisterBrokerBody.decode(request.getBody(), requestHeader.isCompressed());
} catch (Exception e) {
throw new RemotingCommandException("Failed to decode RegisterBrokerBody", e);
}
} else {
registerBrokerBody.getTopicConfigSerializeWrapper().getDataVersion().setCounter(new AtomicLong(0));
registerBrokerBody.getTopicConfigSerializeWrapper().getDataVersion().setTimestamp(0);
}
RegisterBrokerResult result = this.namesrvController.getRouteInfoManager().registerBroker(
requestHeader.getClusterName(),
requestHeader.getBrokerAddr(),
requestHeader.getBrokerName(),
requestHeader.getBrokerId(),
requestHeader.getHaServerAddr(),
registerBrokerBody.getTopicConfigSerializeWrapper(),
registerBrokerBody.getFilterServerList(),
ctx.channel());
responseHeader.setHaServerAddr(result.getHaServerAddr());
responseHeader.setMasterAddr(result.getMasterAddr());
byte[] jsonValue = this.namesrvController.getKvConfigManager().getKVListByNamespace(NamesrvUtil.NAMESPACE_ORDER_TOPIC_CONFIG);
response.setBody(jsonValue);
response.setCode(ResponseCode.SUCCESS);
response.setRemark(null);
return response;
}
可以看到主要的逻辑还是在org.apache.rocketmq.namesrv.routeinfo.RouteInfoManager#registerBroker这个方法里
public RegisterBrokerResult registerBroker(
final String clusterName,
final String brokerAddr,
final String brokerName,
final long brokerId,
final String haServerAddr,
final TopicConfigSerializeWrapper topicConfigWrapper,
final List<String> filterServerList,
final Channel channel) {
RegisterBrokerResult result = new RegisterBrokerResult();
try {
try {
this.lock.writeLock().lockInterruptibly();
// 更新这个clusterAddrTable
Set<String> brokerNames = this.clusterAddrTable.get(clusterName);
if (null == brokerNames) {
brokerNames = new HashSet<String>();
this.clusterAddrTable.put(clusterName, brokerNames);
}
brokerNames.add(brokerName);
boolean registerFirst = false;
// 更新brokerAddrTable
BrokerData brokerData = this.brokerAddrTable.get(brokerName);
if (null == brokerData) {
registerFirst = true;
brokerData = new BrokerData(clusterName, brokerName, new HashMap<Long, String>());
this.brokerAddrTable.put(brokerName, brokerData);
}
Map<Long, String> brokerAddrsMap = brokerData.getBrokerAddrs();
//Switch slave to master: first remove <1, IP:PORT> in namesrv, then add <0, IP:PORT>
//The same IP:PORT must only have one record in brokerAddrTable
Iterator<Entry<Long, String>> it = brokerAddrsMap.entrySet().iterator();
while (it.hasNext()) {
Entry<Long, String> item = it.next();
if (null != brokerAddr && brokerAddr.equals(item.getValue()) && brokerId != item.getKey()) {
it.remove();
}
}
String oldAddr = brokerData.getBrokerAddrs().put(brokerId, brokerAddr);
registerFirst = registerFirst || (null == oldAddr);
// 更新了org.apache.rocketmq.namesrv.routeinfo.RouteInfoManager#topicQueueTable中的数据
if (null != topicConfigWrapper
&& MixAll.MASTER_ID == brokerId) {
if (this.isBrokerTopicConfigChanged(brokerAddr, topicConfigWrapper.getDataVersion())
|| registerFirst) {
ConcurrentMap<String, TopicConfig> tcTable =
topicConfigWrapper.getTopicConfigTable();
if (tcTable != null) {
for (Map.Entry<String, TopicConfig> entry : tcTable.entrySet()) {
this.createAndUpdateQueueData(brokerName, entry.getValue());
}
}
}
}
// 更新活跃broker信息
BrokerLiveInfo prevBrokerLiveInfo = this.brokerLiveTable.put(brokerAddr,
new BrokerLiveInfo(
System.currentTimeMillis(),
topicConfigWrapper.getDataVersion(),
channel,
haServerAddr));
if (null == prevBrokerLiveInfo) {
log.info("new broker registered, {} HAServer: {}", brokerAddr, haServerAddr);
}
// 处理filter
if (filterServerList != null) {
if (filterServerList.isEmpty()) {
this.filterServerTable.remove(brokerAddr);
} else {
this.filterServerTable.put(brokerAddr, filterServerList);
}
}
// 当当前broker非master时返回master信息
if (MixAll.MASTER_ID != brokerId) {
String masterAddr = brokerData.getBrokerAddrs().get(MixAll.MASTER_ID);
if (masterAddr != null) {
BrokerLiveInfo brokerLiveInfo = this.brokerLiveTable.get(masterAddr);
if (brokerLiveInfo != null) {
result.setHaServerAddr(brokerLiveInfo.getHaServerAddr());
result.setMasterAddr(masterAddr);
}
}
}
} finally {
this.lock.writeLock().unlock();
}
} catch (Exception e) {
log.error("registerBroker Exception", e);
}
return result;
}
这个是注册 broker 的逻辑,再看下根据 topic 获取 broker 信息和 topic 信息,org.apache.rocketmq.namesrv.processor.DefaultRequestProcessor#getRouteInfoByTopic 主要是这个方法的逻辑
public RemotingCommand getRouteInfoByTopic(ChannelHandlerContext ctx,
RemotingCommand request) throws RemotingCommandException {
final RemotingCommand response = RemotingCommand.createResponseCommand(null);
final GetRouteInfoRequestHeader requestHeader =
(GetRouteInfoRequestHeader) request.decodeCommandCustomHeader(GetRouteInfoRequestHeader.class);
TopicRouteData topicRouteData = this.namesrvController.getRouteInfoManager().pickupTopicRouteData(requestHeader.getTopic());
if (topicRouteData != null) {
if (this.namesrvController.getNamesrvConfig().isOrderMessageEnable()) {
String orderTopicConf =
this.namesrvController.getKvConfigManager().getKVConfig(NamesrvUtil.NAMESPACE_ORDER_TOPIC_CONFIG,
requestHeader.getTopic());
topicRouteData.setOrderTopicConf(orderTopicConf);
}
byte[] content = topicRouteData.encode();
response.setBody(content);
response.setCode(ResponseCode.SUCCESS);
response.setRemark(null);
return response;
}
response.setCode(ResponseCode.TOPIC_NOT_EXIST);
response.setRemark("No topic route info in name server for the topic: " + requestHeader.getTopic()
+ FAQUrl.suggestTodo(FAQUrl.APPLY_TOPIC_URL));
return response;
}
首先调用org.apache.rocketmq.namesrv.routeinfo.RouteInfoManager#pickupTopicRouteData从org.apache.rocketmq.namesrv.routeinfo.RouteInfoManager#topicQueueTable获取到org.apache.rocketmq.common.protocol.route.QueueData这里面存了 brokerName,再通过org.apache.rocketmq.namesrv.routeinfo.RouteInfoManager#brokerAddrTable里获取到 broker 的地址信息等,然后再获取 orderMessage 的配置。
简要分析了下 RocketMQ 的 NameServer 的代码,比较粗粒度。
]]>read(file, tmp_buf, len);
write(socket, tmp_buf, len);

如上面的图显示的,要在用户态跟内核态进行切换,数据还需要在内核缓冲跟用户缓冲之间拷贝多次,
- 第一步是调用 read,需要在用户态切换成内核态,DMA模块从磁盘中读取文件,并存储在内核缓冲区,相当于是第一次复制
- 数据从内核缓冲区被拷贝到用户缓冲区,read 调用返回,伴随着内核态又切换成用户态,完成了第二次复制
- 然后是write 写入,这里也会伴随着用户态跟内核态的切换,数据从用户缓冲区被复制到内核空间缓冲区,完成了第三次复制,这次有点不一样的是数据不是在内核缓冲区了,会复制到 socket buffer 中。
- write 系统调用返回,又切换回了用户态,然后数据由 DMA 拷贝到协议引擎。
如此就能看出其实默认的读写操作代价是非常大的,而在 rocketmq 等高性能中间件中都有使用的零拷贝技术,其中 rocketmq 使用的是 mmap
mmap基于 OS 的 mmap 的内存映射技术,通过MMU 映射文件,将文件直接映射到用户态的内存地址,使得对文件的操作不再是 write/read,而转化为直接对内存地址的操作,使随机读写文件和读写内存相似的速度。
mmap 把文件映射到用户空间里的虚拟内存,省去了从内核缓冲区复制到用户空间的过程,文件中的位置在虚拟内存中有了对应的地址,可以像操作内存一样操作这个文件,这样的文件读写文件方式少了数据从内核缓存到用户空间的拷贝,效率很高。
tmp_buf = mmap(file, len);
write(socket, tmp_buf, len);

]]>第一步:mmap系统调用使得文件内容被DMA引擎复制到内核缓冲区。然后该缓冲区与用户进程共享,在内核和用户内存空间之间不进行任何拷贝。
第二步:写系统调用使得内核将数据从原来的内核缓冲区复制到与套接字相关的内核缓冲区。
第三步:第三次拷贝发生在DMA引擎将数据从内核套接字缓冲区传递给协议引擎时。
通过使用mmap而不是read,我们将内核需要拷贝的数据量减少了一半。当大量的数据被传输时,这将有很好的效果。然而,这种改进并不是没有代价的;在使用mmap+write方法时,有一些隐藏的陷阱。例如当你对一个文件进行内存映射,然后在另一个进程截断同一文件时调用写。你的写系统调用将被总线错误信号SIGBUS打断,因为你执行了一个错误的内存访问。该信号的默认行为是杀死进程并dumpcore–这对网络服务器来说不是最理想的操作。
有两种方法可以解决这个问题。
第一种方法是为SIGBUS信号安装一个信号处理程序,然后在处理程序中简单地调用返回。通过这样做,写系统调用会返回它在被打断之前所写的字节数,并将errno设置为成功。让我指出,这将是一个糟糕的解决方案,一个治标不治本的解决方案。因为SIGBUS预示着进程出了严重的问题,所以不鼓励使用这种解决方案。
第二个解决方案涉及内核的文件租赁(在Windows中称为 “机会锁”)。这是解决这个问题的正确方法。通过在文件描述符上使用租赁,你与内核在一个特定的文件上达成租约。然后你可以向内核请求一个读/写租约。当另一个进程试图截断你正在传输的文件时,内核会向你发送一个实时信号,即RT_SIGNAL_LEASE信号。它告诉你内核即将终止你对该文件的写或读租约。在你的程序访问一个无效的地址和被SIGBUS信号杀死之前,你的写调用会被打断了。写入调用的返回值是中断前写入的字节数,errno将被设置为成功。下面是一些示例代码,显示了如何从内核中获得租约。
if(fcntl(fd, F_SETSIG, RT_SIGNAL_LEASE) == -1) { perror("kernel lease set signal"); return -1; } /* l_type can be F_RDLCK F_WRLCK */ if(fcntl(fd, F_SETLEASE, l_type)){ perror("kernel lease set type"); return -1; }
// ConsumeQueue file size,default is 30W
private int mapedFileSizeConsumeQueue = 300000 * ConsumeQueue.CQ_STORE_UNIT_SIZE;
public static final int CQ_STORE_UNIT_SIZE = 20;
所以文件大小是5.7M 左右

ConsumeQueue 的构建是通过org.apache.rocketmq.store.DefaultMessageStore.ReputMessageService运行后的 doReput 方法,而启动是的 reputFromOffset 则是通过org.apache.rocketmq.store.DefaultMessageStore#start中下面代码设置并启动
log.info("[SetReputOffset] maxPhysicalPosInLogicQueue={} clMinOffset={} clMaxOffset={} clConfirmedOffset={}",
maxPhysicalPosInLogicQueue, this.commitLog.getMinOffset(), this.commitLog.getMaxOffset(), this.commitLog.getConfirmOffset());
this.reputMessageService.setReputFromOffset(maxPhysicalPosInLogicQueue);
this.reputMessageService.start();
看一下 doReput 的逻辑
private void doReput() {
if (this.reputFromOffset < DefaultMessageStore.this.commitLog.getMinOffset()) {
log.warn("The reputFromOffset={} is smaller than minPyOffset={}, this usually indicate that the dispatch behind too much and the commitlog has expired.",
this.reputFromOffset, DefaultMessageStore.this.commitLog.getMinOffset());
this.reputFromOffset = DefaultMessageStore.this.commitLog.getMinOffset();
}
for (boolean doNext = true; this.isCommitLogAvailable() && doNext; ) {
if (DefaultMessageStore.this.getMessageStoreConfig().isDuplicationEnable()
&& this.reputFromOffset >= DefaultMessageStore.this.getConfirmOffset()) {
break;
}
// 根据偏移量获取消息
SelectMappedBufferResult result = DefaultMessageStore.this.commitLog.getData(reputFromOffset);
if (result != null) {
try {
this.reputFromOffset = result.getStartOffset();
for (int readSize = 0; readSize < result.getSize() && doNext; ) {
// 消息校验和转换
DispatchRequest dispatchRequest =
DefaultMessageStore.this.commitLog.checkMessageAndReturnSize(result.getByteBuffer(), false, false);
int size = dispatchRequest.getBufferSize() == -1 ? dispatchRequest.getMsgSize() : dispatchRequest.getBufferSize();
if (dispatchRequest.isSuccess()) {
if (size > 0) {
// 进行分发处理,包括 ConsumeQueue 和 IndexFile
DefaultMessageStore.this.doDispatch(dispatchRequest);
if (BrokerRole.SLAVE != DefaultMessageStore.this.getMessageStoreConfig().getBrokerRole()
&& DefaultMessageStore.this.brokerConfig.isLongPollingEnable()) {
DefaultMessageStore.this.messageArrivingListener.arriving(dispatchRequest.getTopic(),
dispatchRequest.getQueueId(), dispatchRequest.getConsumeQueueOffset() + 1,
dispatchRequest.getTagsCode(), dispatchRequest.getStoreTimestamp(),
dispatchRequest.getBitMap(), dispatchRequest.getPropertiesMap());
}
this.reputFromOffset += size;
readSize += size;
if (DefaultMessageStore.this.getMessageStoreConfig().getBrokerRole() == BrokerRole.SLAVE) {
DefaultMessageStore.this.storeStatsService
.getSinglePutMessageTopicTimesTotal(dispatchRequest.getTopic()).incrementAndGet();
DefaultMessageStore.this.storeStatsService
.getSinglePutMessageTopicSizeTotal(dispatchRequest.getTopic())
.addAndGet(dispatchRequest.getMsgSize());
}
} else if (size == 0) {
this.reputFromOffset = DefaultMessageStore.this.commitLog.rollNextFile(this.reputFromOffset);
readSize = result.getSize();
}
} else if (!dispatchRequest.isSuccess()) {
if (size > 0) {
log.error("[BUG]read total count not equals msg total size. reputFromOffset={}", reputFromOffset);
this.reputFromOffset += size;
} else {
doNext = false;
// If user open the dledger pattern or the broker is master node,
// it will not ignore the exception and fix the reputFromOffset variable
if (DefaultMessageStore.this.getMessageStoreConfig().isEnableDLegerCommitLog() ||
DefaultMessageStore.this.brokerConfig.getBrokerId() == MixAll.MASTER_ID) {
log.error("[BUG]dispatch message to consume queue error, COMMITLOG OFFSET: {}",
this.reputFromOffset);
this.reputFromOffset += result.getSize() - readSize;
}
}
}
}
} finally {
result.release();
}
} else {
doNext = false;
}
}
}
分发的逻辑看到这
class CommitLogDispatcherBuildConsumeQueue implements CommitLogDispatcher {
@Override
public void dispatch(DispatchRequest request) {
final int tranType = MessageSysFlag.getTransactionValue(request.getSysFlag());
switch (tranType) {
case MessageSysFlag.TRANSACTION_NOT_TYPE:
case MessageSysFlag.TRANSACTION_COMMIT_TYPE:
DefaultMessageStore.this.putMessagePositionInfo(request);
break;
case MessageSysFlag.TRANSACTION_PREPARED_TYPE:
case MessageSysFlag.TRANSACTION_ROLLBACK_TYPE:
break;
}
}
}
public void putMessagePositionInfo(DispatchRequest dispatchRequest) {
ConsumeQueue cq = this.findConsumeQueue(dispatchRequest.getTopic(), dispatchRequest.getQueueId());
cq.putMessagePositionInfoWrapper(dispatchRequest);
}
真正存储的是在这
private boolean putMessagePositionInfo(final long offset, final int size, final long tagsCode,
final long cqOffset) {
if (offset + size <= this.maxPhysicOffset) {
log.warn("Maybe try to build consume queue repeatedly maxPhysicOffset={} phyOffset={}", maxPhysicOffset, offset);
return true;
}
this.byteBufferIndex.flip();
this.byteBufferIndex.limit(CQ_STORE_UNIT_SIZE);
this.byteBufferIndex.putLong(offset);
this.byteBufferIndex.putInt(size);
this.byteBufferIndex.putLong(tagsCode);
这里也可以看到 ConsumeQueue 的存储格式,

偏移量,消息大小,跟 tag 的 hashCode
]]>CommitLog 是 rocketmq 的服务端,也就是 broker 存储消息的的文件,跟 kafka 一样,也是顺序写入,当然消息是变长的,生成的规则是每个文件的默认1G =1024 * 1024 * 1024,commitlog的文件名fileName,名字长度为20位,左边补零,剩余为起始偏移量;比如00000000000000000000代表了第一个文件,起始偏移量为0,文件大小为1G=1 073 741 824Byte;当这个文件满了,第二个文件名字为00000000001073741824,起始偏移量为1073741824, 消息存储的时候会顺序写入文件,当文件满了则写入下一个文件,代码中的定义
// CommitLog file size,default is 1G
private int mapedFileSizeCommitLog = 1024 * 1024 * 1024;

本地跑个 demo 验证下,也是这样,这里奇妙有几个比较巧妙的点(个人观点),首先文件就刚好是 1G,并且按照大小偏移量去生成下一个文件,这样获取消息的时候按大小算一下就知道在哪个文件里了,
代码中写入 CommitLog 的逻辑可以从这开始看
public PutMessageResult putMessage(final MessageExtBrokerInner msg) {
// Set the storage time
msg.setStoreTimestamp(System.currentTimeMillis());
// Set the message body BODY CRC (consider the most appropriate setting
// on the client)
msg.setBodyCRC(UtilAll.crc32(msg.getBody()));
// Back to Results
AppendMessageResult result = null;
StoreStatsService storeStatsService = this.defaultMessageStore.getStoreStatsService();
String topic = msg.getTopic();
int queueId = msg.getQueueId();
final int tranType = MessageSysFlag.getTransactionValue(msg.getSysFlag());
if (tranType == MessageSysFlag.TRANSACTION_NOT_TYPE
|| tranType == MessageSysFlag.TRANSACTION_COMMIT_TYPE) {
// Delay Delivery
if (msg.getDelayTimeLevel() > 0) {
if (msg.getDelayTimeLevel() > this.defaultMessageStore.getScheduleMessageService().getMaxDelayLevel()) {
msg.setDelayTimeLevel(this.defaultMessageStore.getScheduleMessageService().getMaxDelayLevel());
}
topic = ScheduleMessageService.SCHEDULE_TOPIC;
queueId = ScheduleMessageService.delayLevel2QueueId(msg.getDelayTimeLevel());
// Backup real topic, queueId
MessageAccessor.putProperty(msg, MessageConst.PROPERTY_REAL_TOPIC, msg.getTopic());
MessageAccessor.putProperty(msg, MessageConst.PROPERTY_REAL_QUEUE_ID, String.valueOf(msg.getQueueId()));
msg.setPropertiesString(MessageDecoder.messageProperties2String(msg.getProperties()));
msg.setTopic(topic);
msg.setQueueId(queueId);
}
}
long eclipseTimeInLock = 0;
MappedFile unlockMappedFile = null;
MappedFile mappedFile = this.mappedFileQueue.getLastMappedFile();
putMessageLock.lock(); //spin or ReentrantLock ,depending on store config
try {
long beginLockTimestamp = this.defaultMessageStore.getSystemClock().now();
this.beginTimeInLock = beginLockTimestamp;
// Here settings are stored timestamp, in order to ensure an orderly
// global
msg.setStoreTimestamp(beginLockTimestamp);
if (null == mappedFile || mappedFile.isFull()) {
mappedFile = this.mappedFileQueue.getLastMappedFile(0); // Mark: NewFile may be cause noise
}
if (null == mappedFile) {
log.error("create mapped file1 error, topic: " + msg.getTopic() + " clientAddr: " + msg.getBornHostString());
beginTimeInLock = 0;
return new PutMessageResult(PutMessageStatus.CREATE_MAPEDFILE_FAILED, null);
}
result = mappedFile.appendMessage(msg, this.appendMessageCallback);
switch (result.getStatus()) {
case PUT_OK:
break;
case END_OF_FILE:
unlockMappedFile = mappedFile;
// Create a new file, re-write the message
mappedFile = this.mappedFileQueue.getLastMappedFile(0);
if (null == mappedFile) {
// XXX: warn and notify me
log.error("create mapped file2 error, topic: " + msg.getTopic() + " clientAddr: " + msg.getBornHostString());
beginTimeInLock = 0;
return new PutMessageResult(PutMessageStatus.CREATE_MAPEDFILE_FAILED, result);
}
result = mappedFile.appendMessage(msg, this.appendMessageCallback);
break;
case MESSAGE_SIZE_EXCEEDED:
case PROPERTIES_SIZE_EXCEEDED:
beginTimeInLock = 0;
return new PutMessageResult(PutMessageStatus.MESSAGE_ILLEGAL, result);
case UNKNOWN_ERROR:
beginTimeInLock = 0;
return new PutMessageResult(PutMessageStatus.UNKNOWN_ERROR, result);
default:
beginTimeInLock = 0;
return new PutMessageResult(PutMessageStatus.UNKNOWN_ERROR, result);
}
eclipseTimeInLock = this.defaultMessageStore.getSystemClock().now() - beginLockTimestamp;
beginTimeInLock = 0;
} finally {
putMessageLock.unlock();
}
if (eclipseTimeInLock > 500) {
log.warn("[NOTIFYME]putMessage in lock cost time(ms)={}, bodyLength={} AppendMessageResult={}", eclipseTimeInLock, msg.getBody().length, result);
}
if (null != unlockMappedFile && this.defaultMessageStore.getMessageStoreConfig().isWarmMapedFileEnable()) {
this.defaultMessageStore.unlockMappedFile(unlockMappedFile);
}
PutMessageResult putMessageResult = new PutMessageResult(PutMessageStatus.PUT_OK, result);
// Statistics
storeStatsService.getSinglePutMessageTopicTimesTotal(msg.getTopic()).incrementAndGet();
storeStatsService.getSinglePutMessageTopicSizeTotal(topic).addAndGet(result.getWroteBytes());
handleDiskFlush(result, putMessageResult, msg);
handleHA(result, putMessageResult, msg);
return putMessageResult;
}
前面也看到在CommitLog 目录下是有大小为 1G 的文件组成,在实现逻辑中,其实是通过 org.apache.rocketmq.store.MappedFileQueue ,内部是存的一个MappedFile的队列,对于写入的场景每次都是通过org.apache.rocketmq.store.MappedFileQueue#getLastMappedFile() 获取最后一个文件,如果还没有创建,或者最后这个文件已经满了,那就调用 org.apache.rocketmq.store.MappedFileQueue#getLastMappedFile(long)
public MappedFile getLastMappedFile(final long startOffset, boolean needCreate) {
long createOffset = -1;
// 调用前面的方法,只是从 mappedFileQueue 获取最后一个
MappedFile mappedFileLast = getLastMappedFile();
// 如果为空,计算下创建的偏移量
if (mappedFileLast == null) {
createOffset = startOffset - (startOffset % this.mappedFileSize);
}
// 如果不为空,但是当前的文件写满了
if (mappedFileLast != null && mappedFileLast.isFull()) {
// 前一个的偏移量加上单个文件的偏移量,也就是 1G
createOffset = mappedFileLast.getFileFromOffset() + this.mappedFileSize;
}
if (createOffset != -1 && needCreate) {
// 根据 createOffset 转换成文件名进行创建
String nextFilePath = this.storePath + File.separator + UtilAll.offset2FileName(createOffset);
String nextNextFilePath = this.storePath + File.separator
+ UtilAll.offset2FileName(createOffset + this.mappedFileSize);
MappedFile mappedFile = null;
// 这里如果allocateMappedFileService 存在,就提交请求
if (this.allocateMappedFileService != null) {
mappedFile = this.allocateMappedFileService.putRequestAndReturnMappedFile(nextFilePath,
nextNextFilePath, this.mappedFileSize);
} else {
try {
// 否则就直接创建
mappedFile = new MappedFile(nextFilePath, this.mappedFileSize);
} catch (IOException e) {
log.error("create mappedFile exception", e);
}
}
if (mappedFile != null) {
if (this.mappedFiles.isEmpty()) {
mappedFile.setFirstCreateInQueue(true);
}
this.mappedFiles.add(mappedFile);
}
return mappedFile;
}
return mappedFileLast;
}
首先看下直接创建的,
public MappedFile(final String fileName, final int fileSize) throws IOException {
init(fileName, fileSize);
}
private void init(final String fileName, final int fileSize) throws IOException {
this.fileName = fileName;
this.fileSize = fileSize;
this.file = new File(fileName);
this.fileFromOffset = Long.parseLong(this.file.getName());
boolean ok = false;
ensureDirOK(this.file.getParent());
try {
// 通过 RandomAccessFile 创建 fileChannel
this.fileChannel = new RandomAccessFile(this.file, "rw").getChannel();
// 做 mmap 映射
this.mappedByteBuffer = this.fileChannel.map(MapMode.READ_WRITE, 0, fileSize);
TOTAL_MAPPED_VIRTUAL_MEMORY.addAndGet(fileSize);
TOTAL_MAPPED_FILES.incrementAndGet();
ok = true;
} catch (FileNotFoundException e) {
log.error("create file channel " + this.fileName + " Failed. ", e);
throw e;
} catch (IOException e) {
log.error("map file " + this.fileName + " Failed. ", e);
throw e;
} finally {
if (!ok && this.fileChannel != null) {
this.fileChannel.close();
}
}
}
如果是提交给AllocateMappedFileService的话就用到了一些异步操作
public MappedFile putRequestAndReturnMappedFile(String nextFilePath, String nextNextFilePath, int fileSize) {
int canSubmitRequests = 2;
if (this.messageStore.getMessageStoreConfig().isTransientStorePoolEnable()) {
if (this.messageStore.getMessageStoreConfig().isFastFailIfNoBufferInStorePool()
&& BrokerRole.SLAVE != this.messageStore.getMessageStoreConfig().getBrokerRole()) { //if broker is slave, don't fast fail even no buffer in pool
canSubmitRequests = this.messageStore.getTransientStorePool().remainBufferNumbs() - this.requestQueue.size();
}
}
// 将请求放在 requestTable 中
AllocateRequest nextReq = new AllocateRequest(nextFilePath, fileSize);
boolean nextPutOK = this.requestTable.putIfAbsent(nextFilePath, nextReq) == null;
// requestTable 使用了 concurrentHashMap,用文件名作为 key,防止并发
if (nextPutOK) {
// 这里判断了是否可以提交到 TransientStorePool,涉及读写分离,后面再细聊
if (canSubmitRequests <= 0) {
log.warn("[NOTIFYME]TransientStorePool is not enough, so create mapped file error, " +
"RequestQueueSize : {}, StorePoolSize: {}", this.requestQueue.size(), this.messageStore.getTransientStorePool().remainBufferNumbs());
this.requestTable.remove(nextFilePath);
return null;
}
// 塞到阻塞队列中
boolean offerOK = this.requestQueue.offer(nextReq);
if (!offerOK) {
log.warn("never expected here, add a request to preallocate queue failed");
}
canSubmitRequests--;
}
// 这里的两个提交我猜测是为了多生成一个 CommitLog,
AllocateRequest nextNextReq = new AllocateRequest(nextNextFilePath, fileSize);
boolean nextNextPutOK = this.requestTable.putIfAbsent(nextNextFilePath, nextNextReq) == null;
if (nextNextPutOK) {
if (canSubmitRequests <= 0) {
log.warn("[NOTIFYME]TransientStorePool is not enough, so skip preallocate mapped file, " +
"RequestQueueSize : {}, StorePoolSize: {}", this.requestQueue.size(), this.messageStore.getTransientStorePool().remainBufferNumbs());
this.requestTable.remove(nextNextFilePath);
} else {
boolean offerOK = this.requestQueue.offer(nextNextReq);
if (!offerOK) {
log.warn("never expected here, add a request to preallocate queue failed");
}
}
}
if (hasException) {
log.warn(this.getServiceName() + " service has exception. so return null");
return null;
}
AllocateRequest result = this.requestTable.get(nextFilePath);
try {
// 这里就异步等着
if (result != null) {
boolean waitOK = result.getCountDownLatch().await(waitTimeOut, TimeUnit.MILLISECONDS);
if (!waitOK) {
log.warn("create mmap timeout " + result.getFilePath() + " " + result.getFileSize());
return null;
} else {
this.requestTable.remove(nextFilePath);
return result.getMappedFile();
}
} else {
log.error("find preallocate mmap failed, this never happen");
}
} catch (InterruptedException e) {
log.warn(this.getServiceName() + " service has exception. ", e);
}
return null;
}
而真正去执行文件操作的就是 AllocateMappedFileService的 run 方法
public void run() {
log.info(this.getServiceName() + " service started");
while (!this.isStopped() && this.mmapOperation()) {
}
log.info(this.getServiceName() + " service end");
}
private boolean mmapOperation() {
boolean isSuccess = false;
AllocateRequest req = null;
try {
// 从阻塞队列里获取请求
req = this.requestQueue.take();
AllocateRequest expectedRequest = this.requestTable.get(req.getFilePath());
if (null == expectedRequest) {
log.warn("this mmap request expired, maybe cause timeout " + req.getFilePath() + " "
+ req.getFileSize());
return true;
}
if (expectedRequest != req) {
log.warn("never expected here, maybe cause timeout " + req.getFilePath() + " "
+ req.getFileSize() + ", req:" + req + ", expectedRequest:" + expectedRequest);
return true;
}
if (req.getMappedFile() == null) {
long beginTime = System.currentTimeMillis();
MappedFile mappedFile;
if (messageStore.getMessageStoreConfig().isTransientStorePoolEnable()) {
try {
// 通过 transientStorePool 创建
mappedFile = ServiceLoader.load(MappedFile.class).iterator().next();
mappedFile.init(req.getFilePath(), req.getFileSize(), messageStore.getTransientStorePool());
} catch (RuntimeException e) {
log.warn("Use default implementation.");
// 默认创建
mappedFile = new MappedFile(req.getFilePath(), req.getFileSize(), messageStore.getTransientStorePool());
}
} else {
// 默认创建
mappedFile = new MappedFile(req.getFilePath(), req.getFileSize());
}
long eclipseTime = UtilAll.computeEclipseTimeMilliseconds(beginTime);
if (eclipseTime > 10) {
int queueSize = this.requestQueue.size();
log.warn("create mappedFile spent time(ms) " + eclipseTime + " queue size " + queueSize
+ " " + req.getFilePath() + " " + req.getFileSize());
}
// pre write mappedFile
if (mappedFile.getFileSize() >= this.messageStore.getMessageStoreConfig()
.getMapedFileSizeCommitLog()
&&
this.messageStore.getMessageStoreConfig().isWarmMapedFileEnable()) {
mappedFile.warmMappedFile(this.messageStore.getMessageStoreConfig().getFlushDiskType(),
this.messageStore.getMessageStoreConfig().getFlushLeastPagesWhenWarmMapedFile());
}
req.setMappedFile(mappedFile);
this.hasException = false;
isSuccess = true;
}
} catch (InterruptedException e) {
log.warn(this.getServiceName() + " interrupted, possibly by shutdown.");
this.hasException = true;
return false;
} catch (IOException e) {
log.warn(this.getServiceName() + " service has exception. ", e);
this.hasException = true;
if (null != req) {
requestQueue.offer(req);
try {
Thread.sleep(1);
} catch (InterruptedException ignored) {
}
}
} finally {
if (req != null && isSuccess)
// 通知前面等待的
req.getCountDownLatch().countDown();
}
return true;
}
]]>IndexFile 的构建则是分发给这个进行处理
class CommitLogDispatcherBuildIndex implements CommitLogDispatcher {
@Override
public void dispatch(DispatchRequest request) {
if (DefaultMessageStore.this.messageStoreConfig.isMessageIndexEnable()) {
DefaultMessageStore.this.indexService.buildIndex(request);
}
}
}
public void buildIndex(DispatchRequest req) {
IndexFile indexFile = retryGetAndCreateIndexFile();
if (indexFile != null) {
long endPhyOffset = indexFile.getEndPhyOffset();
DispatchRequest msg = req;
String topic = msg.getTopic();
String keys = msg.getKeys();
if (msg.getCommitLogOffset() < endPhyOffset) {
return;
}
final int tranType = MessageSysFlag.getTransactionValue(msg.getSysFlag());
switch (tranType) {
case MessageSysFlag.TRANSACTION_NOT_TYPE:
case MessageSysFlag.TRANSACTION_PREPARED_TYPE:
case MessageSysFlag.TRANSACTION_COMMIT_TYPE:
break;
case MessageSysFlag.TRANSACTION_ROLLBACK_TYPE:
return;
}
if (req.getUniqKey() != null) {
indexFile = putKey(indexFile, msg, buildKey(topic, req.getUniqKey()));
if (indexFile == null) {
log.error("putKey error commitlog {} uniqkey {}", req.getCommitLogOffset(), req.getUniqKey());
return;
}
}
if (keys != null && keys.length() > 0) {
String[] keyset = keys.split(MessageConst.KEY_SEPARATOR);
for (int i = 0; i < keyset.length; i++) {
String key = keyset[i];
if (key.length() > 0) {
indexFile = putKey(indexFile, msg, buildKey(topic, key));
if (indexFile == null) {
log.error("putKey error commitlog {} uniqkey {}", req.getCommitLogOffset(), req.getUniqKey());
return;
}
}
}
}
} else {
log.error("build index error, stop building index");
}
}
配置的数量
private boolean messageIndexEnable = true;
private int maxHashSlotNum = 5000000;
private int maxIndexNum = 5000000 * 4;
最核心的其实是 IndexFile 的结构和如何写入
public boolean putKey(final String key, final long phyOffset, final long storeTimestamp) {
if (this.indexHeader.getIndexCount() < this.indexNum) {
// 获取 key 的 hash
int keyHash = indexKeyHashMethod(key);
// 计算属于哪个 slot
int slotPos = keyHash % this.hashSlotNum;
// 计算 slot 位置 因为结构是有个 indexHead,主要是分为三段 header,slot 和 index
int absSlotPos = IndexHeader.INDEX_HEADER_SIZE + slotPos * hashSlotSize;
FileLock fileLock = null;
try {
// fileLock = this.fileChannel.lock(absSlotPos, hashSlotSize,
// false);
int slotValue = this.mappedByteBuffer.getInt(absSlotPos);
if (slotValue <= invalidIndex || slotValue > this.indexHeader.getIndexCount()) {
slotValue = invalidIndex;
}
long timeDiff = storeTimestamp - this.indexHeader.getBeginTimestamp();
timeDiff = timeDiff / 1000;
if (this.indexHeader.getBeginTimestamp() <= 0) {
timeDiff = 0;
} else if (timeDiff > Integer.MAX_VALUE) {
timeDiff = Integer.MAX_VALUE;
} else if (timeDiff < 0) {
timeDiff = 0;
}
// 计算索引存放位置,头部 + slot 数量 * slot 大小 + 已有的 index 数量 + index 大小
int absIndexPos =
IndexHeader.INDEX_HEADER_SIZE + this.hashSlotNum * hashSlotSize
+ this.indexHeader.getIndexCount() * indexSize;
this.mappedByteBuffer.putInt(absIndexPos, keyHash);
this.mappedByteBuffer.putLong(absIndexPos + 4, phyOffset);
this.mappedByteBuffer.putInt(absIndexPos + 4 + 8, (int) timeDiff);
this.mappedByteBuffer.putInt(absIndexPos + 4 + 8 + 4, slotValue);
// 存放的是数量位移,不是绝对位置
this.mappedByteBuffer.putInt(absSlotPos, this.indexHeader.getIndexCount());
if (this.indexHeader.getIndexCount() <= 1) {
this.indexHeader.setBeginPhyOffset(phyOffset);
this.indexHeader.setBeginTimestamp(storeTimestamp);
}
this.indexHeader.incHashSlotCount();
this.indexHeader.incIndexCount();
this.indexHeader.setEndPhyOffset(phyOffset);
this.indexHeader.setEndTimestamp(storeTimestamp);
return true;
} catch (Exception e) {
log.error("putKey exception, Key: " + key + " KeyHashCode: " + key.hashCode(), e);
} finally {
if (fileLock != null) {
try {
fileLock.release();
} catch (IOException e) {
log.error("Failed to release the lock", e);
}
}
}
} else {
log.warn("Over index file capacity: index count = " + this.indexHeader.getIndexCount()
+ "; index max num = " + this.indexNum);
}
return false;
}
具体可以看一下这个简略的示意图
电驴看的比较草率,主要是考虑续航,然后锂电池外加 48v 和 24AH,这样一般来讲还是价格比较高的,只是原来没预料到这个限速,以为现在的车子都比较快,但是现在的新国标车子都是 25km/h 的限速,然后 15km/h 都是会要提醒,虽然说有一些特殊的解除限速的方法,但是解了也就 35km/h ,差距不是特别大,而且现在的车子都是比较小,也不太能载东西,特别是上下班路程也不远的情况下,其实不是那么需要速度,就像我朋友说的,可能骑车的时间还不如等红绿灯多,所以就还好,也不打算解除限速,只是品牌上也仔细看,后来选了绿源,目前大部分还是雅迪,爱玛,台羚,绿源,小牛等,路上看的话还是雅迪比较多,不过价格也比较贵一点,还有就是小牛了,是比较新兴的品牌,手机 App 什么的做得比较好,而且也比较贵,最后以相对比较便宜的价格买了个锂电 48V24AH 的小车子,后来发现还是有点不方便的点就是没有比较大的筐,也不好装,这样就是下雨天雨衣什么的比较不方便放。
聊回来主题上牌这个事情,这个事情也是颇费心力,提车的时候店里的让我跟他早上一起去,但是因为不确定时间,也比较远就没跟着去,因为我是线上买的,线下自提,线下的店可能没啥利润可以拿,就不肯帮忙代上牌,朋友说在线下店里买是可以代上的,自己上牌过程也比较曲折,一开始是头盔没到,然后是等开发票,主要的东西就是需要骑着车子去车管所,不能只自己去,然后需要预约,附近比较近的都是提前一周就预约完了号了,要提前在支付宝上进行预约,比较空的就是店里推荐的景区大队,但是随之而来就是比较蛋疼的,这个景区大队太远了,看下骑车距离有十几公里,所以就有点拖延症,但是总归要上的,不然一直不能开是白买了,上牌的材料主要是车辆合格证,发票,然后车子上的浙品码,在车架上和电池上,然后车架号什么的都要跟合格证上完全对应,整体车子要跟合格证上一毛一样,如果有额外的反光镜,后面副座都需要拆掉,脚踏板要装上,到了那其实还比较顺利,就是十几公里外加那天比较冷,吹得头疼。
]]>首先有一种情况是全局的有序,比如对于一个 topic 里就得发送线程保证只有一个,内部的 queue 也只有一个,消费线程也只有一个,这样就能比较容易的保证全局顺序性了,但是这里的问题就是完全限制了性能,不是很现实,在真实场景里很多都是比如对于同一个订单,需要去保证状态的轮转是按照预期的顺序来,而不必要全局的有序性。
对于这类的有序性,需要在发送和接收方都有对应的处理,在发送消息中,需要去指定 selector,即MessageQueueSelector,能够以固定的方式是分配到对应的 MessageQueue
比如像 RocketMQ 中的示例
SendResult sendResult = producer.send(msg, new MessageQueueSelector() {
@Override
public MessageQueue select(List<MessageQueue> mqs, Message msg, Object arg) {
Long id = (Long) arg; //message queue is selected by #salesOrderID
long index = id % mqs.size();
return mqs.get((int) index);
}
}, orderList.get(i).getOrderId());
而在消费侧有几个点比较重要,首先我们要保证一个 MessageQueue只被一个消费者消费,消费队列存在broker端,要保证 MessageQueue 只被一个消费者消费,那么消费者在进行消息拉取消费时就必须向mq服务器申请队列锁,消费者申请队列锁的代码存在于RebalanceService消息队列负载的实现代码中。
List<PullRequest> pullRequestList = new ArrayList<PullRequest>();
for (MessageQueue mq : mqSet) {
if (!this.processQueueTable.containsKey(mq)) {
// 判断是否顺序,如果是顺序消费的,则需要加锁
if (isOrder && !this.lock(mq)) {
log.warn("doRebalance, {}, add a new mq failed, {}, because lock failed", consumerGroup, mq);
continue;
}
this.removeDirtyOffset(mq);
ProcessQueue pq = new ProcessQueue();
long nextOffset = this.computePullFromWhere(mq);
if (nextOffset >= 0) {
ProcessQueue pre = this.processQueueTable.putIfAbsent(mq, pq);
if (pre != null) {
log.info("doRebalance, {}, mq already exists, {}", consumerGroup, mq);
} else {
log.info("doRebalance, {}, add a new mq, {}", consumerGroup, mq);
PullRequest pullRequest = new PullRequest();
pullRequest.setConsumerGroup(consumerGroup);
pullRequest.setNextOffset(nextOffset);
pullRequest.setMessageQueue(mq);
pullRequest.setProcessQueue(pq);
pullRequestList.add(pullRequest);
changed = true;
}
} else {
log.warn("doRebalance, {}, add new mq failed, {}", consumerGroup, mq);
}
}
}
在申请到锁之后会创建 pullRequest 进行消息拉取,消息拉取部分的代码实现在PullMessageService中,
@Override
public void run() {
log.info(this.getServiceName() + " service started");
while (!this.isStopped()) {
try {
PullRequest pullRequest = this.pullRequestQueue.take();
this.pullMessage(pullRequest);
} catch (InterruptedException ignored) {
} catch (Exception e) {
log.error("Pull Message Service Run Method exception", e);
}
}
log.info(this.getServiceName() + " service end");
}
消息拉取完后,需要提交到ConsumeMessageService中进行消费,顺序消费的实现为ConsumeMessageOrderlyService,提交消息进行消费的方法为ConsumeMessageOrderlyService#submitConsumeRequest,具体实现如下:
@Override
public void submitConsumeRequest(
final List<MessageExt> msgs,
final ProcessQueue processQueue,
final MessageQueue messageQueue,
final boolean dispathToConsume) {
if (dispathToConsume) {
ConsumeRequest consumeRequest = new ConsumeRequest(processQueue, messageQueue);
this.consumeExecutor.submit(consumeRequest);
}
}
构建了一个ConsumeRequest对象,它是个实现了 runnable 接口的类,并提交给了线程池来并行消费,看下顺序消费的ConsumeRequest的run方法实现:
@Override
public void run() {
if (this.processQueue.isDropped()) {
log.warn("run, the message queue not be able to consume, because it's dropped. {}", this.messageQueue);
return;
}
// 获得 Consumer 消息队列锁,即单个线程独占
final Object objLock = messageQueueLock.fetchLockObject(this.messageQueue);
synchronized (objLock) {
// (广播模式) 或者 (集群模式 && Broker消息队列锁有效)
if (MessageModel.BROADCASTING.equals(ConsumeMessageOrderlyService.this.defaultMQPushConsumerImpl.messageModel())
|| (this.processQueue.isLocked() && !this.processQueue.isLockExpired())) {
final long beginTime = System.currentTimeMillis();
// 循环
for (boolean continueConsume = true; continueConsume; ) {
if (this.processQueue.isDropped()) {
log.warn("the message queue not be able to consume, because it's dropped. {}", this.messageQueue);
break;
}
// 消息队列分布式锁未锁定,提交延迟获得锁并消费请求
if (MessageModel.CLUSTERING.equals(ConsumeMessageOrderlyService.this.defaultMQPushConsumerImpl.messageModel())
&& !this.processQueue.isLocked()) {
log.warn("the message queue not locked, so consume later, {}", this.messageQueue);
ConsumeMessageOrderlyService.this.tryLockLaterAndReconsume(this.messageQueue, this.processQueue, 10);
break;
}
// 消息队列分布式锁已经过期,提交延迟获得锁并消费请求
if (MessageModel.CLUSTERING.equals(ConsumeMessageOrderlyService.this.defaultMQPushConsumerImpl.messageModel())
&& this.processQueue.isLockExpired()) {
log.warn("the message queue lock expired, so consume later, {}", this.messageQueue);
ConsumeMessageOrderlyService.this.tryLockLaterAndReconsume(this.messageQueue, this.processQueue, 10);
break;
}
// 当前周期消费时间超过连续时长,默认:60s,提交延迟消费请求。默认情况下,每消费1分钟休息10ms。
long interval = System.currentTimeMillis() - beginTime;
if (interval > MAX_TIME_CONSUME_CONTINUOUSLY) {
ConsumeMessageOrderlyService.this.submitConsumeRequestLater(processQueue, messageQueue, 10);
break;
}
// 获取消费消息。此处和并发消息请求不同,并发消息请求已经带了消费哪些消息。
final int consumeBatchSize =
ConsumeMessageOrderlyService.this.defaultMQPushConsumer.getConsumeMessageBatchMaxSize();
List<MessageExt> msgs = this.processQueue.takeMessags(consumeBatchSize);
defaultMQPushConsumerImpl.resetRetryAndNamespace(msgs, defaultMQPushConsumer.getConsumerGroup());
if (!msgs.isEmpty()) {
final ConsumeOrderlyContext context = new ConsumeOrderlyContext(this.messageQueue);
ConsumeOrderlyStatus status = null;
ConsumeMessageContext consumeMessageContext = null;
if (ConsumeMessageOrderlyService.this.defaultMQPushConsumerImpl.hasHook()) {
consumeMessageContext = new ConsumeMessageContext();
consumeMessageContext
.setConsumerGroup(ConsumeMessageOrderlyService.this.defaultMQPushConsumer.getConsumerGroup());
consumeMessageContext.setNamespace(defaultMQPushConsumer.getNamespace());
consumeMessageContext.setMq(messageQueue);
consumeMessageContext.setMsgList(msgs);
consumeMessageContext.setSuccess(false);
// init the consume context type
consumeMessageContext.setProps(new HashMap<String, String>());
ConsumeMessageOrderlyService.this.defaultMQPushConsumerImpl.executeHookBefore(consumeMessageContext);
}
// 执行消费
long beginTimestamp = System.currentTimeMillis();
ConsumeReturnType returnType = ConsumeReturnType.SUCCESS;
boolean hasException = false;
try {
this.processQueue.getLockConsume().lock(); // 锁定处理队列
if (this.processQueue.isDropped()) {
log.warn("consumeMessage, the message queue not be able to consume, because it's dropped. {}",
this.messageQueue);
break;
}
status = messageListener.consumeMessage(Collections.unmodifiableList(msgs), context);
} catch (Throwable e) {
log.warn("consumeMessage exception: {} Group: {} Msgs: {} MQ: {}",
RemotingHelper.exceptionSimpleDesc(e),
ConsumeMessageOrderlyService.this.consumerGroup,
msgs,
messageQueue);
hasException = true;
} finally {
this.processQueue.getLockConsume().unlock(); // 解锁
}
if (null == status
|| ConsumeOrderlyStatus.ROLLBACK == status
|| ConsumeOrderlyStatus.SUSPEND_CURRENT_QUEUE_A_MOMENT == status) {
log.warn("consumeMessage Orderly return not OK, Group: {} Msgs: {} MQ: {}",
ConsumeMessageOrderlyService.this.consumerGroup,
msgs,
messageQueue);
}
long consumeRT = System.currentTimeMillis() - beginTimestamp;
if (null == status) {
if (hasException) {
returnType = ConsumeReturnType.EXCEPTION;
} else {
returnType = ConsumeReturnType.RETURNNULL;
}
} else if (consumeRT >= defaultMQPushConsumer.getConsumeTimeout() * 60 * 1000) {
returnType = ConsumeReturnType.TIME_OUT;
} else if (ConsumeOrderlyStatus.SUSPEND_CURRENT_QUEUE_A_MOMENT == status) {
returnType = ConsumeReturnType.FAILED;
} else if (ConsumeOrderlyStatus.SUCCESS == status) {
returnType = ConsumeReturnType.SUCCESS;
}
if (ConsumeMessageOrderlyService.this.defaultMQPushConsumerImpl.hasHook()) {
consumeMessageContext.getProps().put(MixAll.CONSUME_CONTEXT_TYPE, returnType.name());
}
if (null == status) {
status = ConsumeOrderlyStatus.SUSPEND_CURRENT_QUEUE_A_MOMENT;
}
if (ConsumeMessageOrderlyService.this.defaultMQPushConsumerImpl.hasHook()) {
consumeMessageContext.setStatus(status.toString());
consumeMessageContext
.setSuccess(ConsumeOrderlyStatus.SUCCESS == status || ConsumeOrderlyStatus.COMMIT == status);
ConsumeMessageOrderlyService.this.defaultMQPushConsumerImpl.executeHookAfter(consumeMessageContext);
}
ConsumeMessageOrderlyService.this.getConsumerStatsManager()
.incConsumeRT(ConsumeMessageOrderlyService.this.consumerGroup, messageQueue.getTopic(), consumeRT);
continueConsume = ConsumeMessageOrderlyService.this.processConsumeResult(msgs, status, context, this);
} else {
continueConsume = false;
}
}
} else {
if (this.processQueue.isDropped()) {
log.warn("the message queue not be able to consume, because it's dropped. {}", this.messageQueue);
return;
}
ConsumeMessageOrderlyService.this.tryLockLaterAndReconsume(this.messageQueue, this.processQueue, 100);
}
}
}
获取到锁对象后,使用synchronized尝试申请线程级独占锁。
如果加锁成功,同一时刻只有一个线程进行消息消费。
如果加锁失败,会延迟100ms重新尝试向broker端申请锁定messageQueue,锁定成功后重新提交消费请求
创建消息拉取任务时,消息客户端向broker端申请锁定MessageQueue,使得一个MessageQueue同一个时刻只能被一个消费客户端消费。
消息消费时,多线程针对同一个消息队列的消费先尝试使用synchronized申请独占锁,加锁成功才能进行消费,使得一个MessageQueue同一个时刻只能被一个消费客户端中一个线程消费。
这里其实还有很重要的一点是对processQueue的加锁,这里其实是保证了在 rebalance的过程中如果 processQueue 被分配给了另一个 consumer,但是当前已经被我这个 consumer 再消费,但是没提交,就有可能出现被两个消费者消费,所以得进行加锁保证不受 rebalance 影响。
@Configuration
@ConditionalOnClass({ EnableAspectJAutoProxy.class, Aspect.class, Advice.class })
@ConditionalOnProperty(prefix = "spring.aop", name = "auto", havingValue = "true", matchIfMissing = true)
public class AopAutoConfiguration {
@Configuration
@EnableAspectJAutoProxy(proxyTargetClass = false)
@ConditionalOnProperty(prefix = "spring.aop", name = "proxy-target-class", havingValue = "false", matchIfMissing = true)
public static class JdkDynamicAutoProxyConfiguration {
}
@Configuration
@EnableAspectJAutoProxy(proxyTargetClass = true)
@ConditionalOnProperty(prefix = "spring.aop", name = "proxy-target-class", havingValue = "true", matchIfMissing = false)
public static class CglibAutoProxyConfiguration {
}
}
而在 2.x 中变成了这样
@Configuration(proxyBeanMethods = false)
@ConditionalOnProperty(prefix = "spring.aop", name = "auto", havingValue = "true", matchIfMissing = true)
public class AopAutoConfiguration {
@Configuration(proxyBeanMethods = false)
@ConditionalOnClass(Advice.class)
static class AspectJAutoProxyingConfiguration {
@Configuration(proxyBeanMethods = false)
@EnableAspectJAutoProxy(proxyTargetClass = false)
@ConditionalOnProperty(prefix = "spring.aop", name = "proxy-target-class", havingValue = "false")
static class JdkDynamicAutoProxyConfiguration {
}
@Configuration(proxyBeanMethods = false)
@EnableAspectJAutoProxy(proxyTargetClass = true)
@ConditionalOnProperty(prefix = "spring.aop", name = "proxy-target-class", havingValue = "true",
matchIfMissing = true)
static class CglibAutoProxyConfiguration {
}
}
为何会加载 AopAutoConfiguration 在前面的文章聊聊 SpringBoot 自动装配里已经介绍过,有兴趣的可以看下,可以发现 springboot 在 2.x 版本开始使用 cglib 作为默认的动态代理实现。
然后就是出现的问题了,代码是这样的,一个简单的基于 springboot 的带有数据库的插入,对插入代码加了事务注解,
@Mapper
public interface StudentMapper {
// 就是插入一条数据
@Insert("insert into student(name, age)" + "values ('nick', '18')")
public Long insert();
}
@Component
public class StudentManager {
@Resource
private StudentMapper studentMapper;
public Long createStudent() {
return studentMapper.insert();
}
}
@Component
public class StudentServiceImpl implements StudentService {
@Resource
private StudentManager studentManager;
// 自己引用
@Resource
private StudentServiceImpl studentService;
@Override
@Transactional
public Long createStudent() {
Long id = studentManager.createStudent();
Long id2 = studentService.createStudent2();
return 1L;
}
@Transactional
private Long createStudent2() {
// Integer t = Integer.valueOf("aaa");
return studentManager.createStudent();
}
}
第一个公有方法 createStudent 首先调用了 manager 层的创建方法,然后再通过引入的 studentService 调用了createStudent2,我们先跑一下看看会出现啥情况,果不其然报错了,正是这个报错让我纠结了很久

报了个空指针,而且是在 createStudent2 已经被调用到了,在它的内部,报的 studentManager 是 null,首先 cglib 作为动态代理它是通过继承的方式来实现的,相当于是会在调用目标对象的代理方法时调用 cglib 生成的子类,具体的代理切面逻辑在子类实现,然后在调用目标对象的目标方法,但是继承的方式对于 final 和私有方法其实是没法进行代理的,因为没法继承,所以我最开始的想法是应该通过 studentService 调用 createStudent2 的时候就报错了,也就是不会进入这个方法内部,后面才发现犯了个特别二的错误,继承的方式去调用父类的私有方法,对于 Java 来说是可以调用到的,父类的私有方法并不由子类的InstanceKlass维护,只能通过子类的InstanceKlass找到Java类对应的_super,这样间接地访问。也就是说子类其实是可以访问的,那为啥访问了会报空指针呢,这里报的是studentManager 是空的,可以往依赖注入方面去想,如果忽略依赖注入,我这个studentManager 的确是 null,那是不是就没有被依赖注入呢,但是为啥前面那个可以呢
这个问题着实查了很久,不废话来看代码
@Override
protected Object invokeJoinpoint() throws Throwable {
if (this.methodProxy != null) {
// 这里的 target 就是被代理的 bean
return this.methodProxy.invoke(this.target, this.arguments);
}
else {
return super.invokeJoinpoint();
}
}
这个是org.springframework.aop.framework.CglibAopProxy.CglibMethodInvocation的代码,其实它在这里不是直接调用 super 也就是父类的方法,而是通过 methodProxy 调用 target 目标对象的方法,也就是原始的 studentService bean 的方法,这样子 spring 管理的已经做好依赖注入的 bean 就能正常起作用,否则就会出现上面的问题,因为 cglib 其实是通过继承来实现,通过将调用转移到子类上加入代理逻辑,我们在简单使用的时候会直接 invokeSuper() 调用父类的方法,但是在这里 spring 的场景里需要去支持 spring 的功能逻辑,所以上面的问题就可以开始来解释了,因为 createStudent 是公共方法,cglib 可以对其进行继承代理,但是在执行逻辑的时候其实是通过调用目标对象,也就是 spring 管理的被代理的目标对象的 bean 调用的 createStudent,而对于下面的 createStudent2 方法因为是私有方法,不会走代理逻辑,也就不会有调用回目标对象的逻辑,只是通过继承关系,在子类中没有这个方法,所以会通过子类的InstanceKlass找到这个类对应的_super,然后调用父类的这个私有方法,这里要搞清楚一个点,从这个代理类直接找到其父类然后调用这个私有方法,这个类是由 cglib 生成的,不是被 spring 管理起来经过依赖注入的 bean,所以是没有 studentManager 这个依赖的,也就出现了前面的问题
而在前面提到的cglib通过methodProxy调用到目标对象,目标对象是在什么时候设置的呢,其实是在bean的生命周期中,org.springframework.beans.factory.config.BeanPostProcessor#postProcessAfterInitialization这个接口的在bean的初始化过程中,会调用实现了这个接口的方法,
@Override
public Object postProcessAfterInitialization(@Nullable Object bean, String beanName) {
if (bean != null) {
Object cacheKey = getCacheKey(bean.getClass(), beanName);
if (this.earlyProxyReferences.remove(cacheKey) != bean) {
return wrapIfNecessary(bean, beanName, cacheKey);
}
}
return bean;
}
具体的逻辑在 org.springframework.aop.framework.autoproxy.AbstractAutoProxyCreator#wrapIfNecessary这个方法里
protected Object getCacheKey(Class<?> beanClass, @Nullable String beanName) {
if (StringUtils.hasLength(beanName)) {
return (FactoryBean.class.isAssignableFrom(beanClass) ?
BeanFactory.FACTORY_BEAN_PREFIX + beanName : beanName);
}
else {
return beanClass;
}
}
/**
* Wrap the given bean if necessary, i.e. if it is eligible for being proxied.
* @param bean the raw bean instance
* @param beanName the name of the bean
* @param cacheKey the cache key for metadata access
* @return a proxy wrapping the bean, or the raw bean instance as-is
*/
protected Object wrapIfNecessary(Object bean, String beanName, Object cacheKey) {
if (StringUtils.hasLength(beanName) && this.targetSourcedBeans.contains(beanName)) {
return bean;
}
if (Boolean.FALSE.equals(this.advisedBeans.get(cacheKey))) {
return bean;
}
if (isInfrastructureClass(bean.getClass()) || shouldSkip(bean.getClass(), beanName)) {
this.advisedBeans.put(cacheKey, Boolean.FALSE);
return bean;
}
// Create proxy if we have advice.
Object[] specificInterceptors = getAdvicesAndAdvisorsForBean(bean.getClass(), beanName, null);
if (specificInterceptors != DO_NOT_PROXY) {
this.advisedBeans.put(cacheKey, Boolean.TRUE);
Object proxy = createProxy(
bean.getClass(), beanName, specificInterceptors, new SingletonTargetSource(bean));
this.proxyTypes.put(cacheKey, proxy.getClass());
return proxy;
}
this.advisedBeans.put(cacheKey, Boolean.FALSE);
return bean;
}
然后在 org.springframework.aop.framework.autoproxy.AbstractAutoProxyCreator#createProxy 中创建了代理类
首先这里的场景跟我原来用的有点点区别,在项目中使用的是通过配置中心控制数据源切换,统一切换,而这里的例子多加了个可以根据接口注解配置
第一部分是最核心的,如何基于 Spring JDBC 和 Druid 来实现数据源切换,是继承了org.springframework.jdbc.datasource.lookup.AbstractRoutingDataSource 这个类,他的determineCurrentLookupKey方法会被调用来获得用来决定选择那个数据源的对象,也就是 lookupKey,也可以通过这个类看到就是通过这个 lookupKey 来路由找到数据源。
public class DynamicDataSource extends AbstractRoutingDataSource {
@Override
protected Object determineCurrentLookupKey() {
if (DatabaseContextHolder.getDatabaseType() != null) {
return DatabaseContextHolder.getDatabaseType().getName();
}
return DatabaseType.MASTER1.getName();
}
}
而如何使用这个 lookupKey 呢,就涉及到我们的 DataSource 配置了,原来就是我们可以直接通过spring 的 jdbc 配置数据源,像这样

现在我们要使用 Druid 作为数据源了,然后配置 DynamicDataSource 的参数,通过 key 来选择对应的 DataSource,也就是下面配的 master1 和 master2
<bean id="master1" class="com.alibaba.druid.pool.DruidDataSource" init-method="init"
destroy-method="close"
p:driverClassName="com.mysql.cj.jdbc.Driver"
p:url="${master1.demo.datasource.url}"
p:username="${master1.demo.datasource.username}"
p:password="${master1.demo.datasource.password}"
p:initialSize="5"
p:minIdle="1"
p:maxActive="10"
p:maxWait="60000"
p:timeBetweenEvictionRunsMillis="60000"
p:minEvictableIdleTimeMillis="300000"
p:validationQuery="SELECT 'x'"
p:testWhileIdle="true"
p:testOnBorrow="false"
p:testOnReturn="false"
p:poolPreparedStatements="false"
p:maxPoolPreparedStatementPerConnectionSize="20"
p:connectionProperties="config.decrypt=true"
p:filters="stat,config"/>
<bean id="master2" class="com.alibaba.druid.pool.DruidDataSource" init-method="init"
destroy-method="close"
p:driverClassName="com.mysql.cj.jdbc.Driver"
p:url="${master2.demo.datasource.url}"
p:username="${master2.demo.datasource.username}"
p:password="${master2.demo.datasource.password}"
p:initialSize="5"
p:minIdle="1"
p:maxActive="10"
p:maxWait="60000"
p:timeBetweenEvictionRunsMillis="60000"
p:minEvictableIdleTimeMillis="300000"
p:validationQuery="SELECT 'x'"
p:testWhileIdle="true"
p:testOnBorrow="false"
p:testOnReturn="false"
p:poolPreparedStatements="false"
p:maxPoolPreparedStatementPerConnectionSize="20"
p:connectionProperties="config.decrypt=true"
p:filters="stat,config"/>
<bean id="dataSource" class="com.nicksxs.springdemo.config.DynamicDataSource">
<property name="targetDataSources">
<map key-type="java.lang.String">
<!-- master -->
<entry key="master1" value-ref="master1"/>
<!-- slave -->
<entry key="master2" value-ref="master2"/>
</map>
</property>
<property name="defaultTargetDataSource" ref="master1"/>
</bean>
现在就要回到头上,介绍下这个DatabaseContextHolder,这里使用了 ThreadLocal 存放这个 DatabaseType,为啥要用这个是因为前面说的我们想要让接口层面去配置不同的数据源,要把持相互隔离不受影响,就使用了 ThreadLocal,关于它也可以看我前面写的一篇文章聊聊传说中的 ThreadLocal,而 DatabaseType 就是个简单的枚举
public class DatabaseContextHolder {
public static final ThreadLocal<DatabaseType> databaseTypeThreadLocal = new ThreadLocal<>();
public static DatabaseType getDatabaseType() {
return databaseTypeThreadLocal.get();
}
public static void putDatabaseType(DatabaseType databaseType) {
databaseTypeThreadLocal.set(databaseType);
}
public static void clearDatabaseType() {
databaseTypeThreadLocal.remove();
}
}
public enum DatabaseType {
MASTER1("master1", "1"),
MASTER2("master2", "2");
private final String name;
private final String value;
DatabaseType(String name, String value) {
this.name = name;
this.value = value;
}
public String getName() {
return name;
}
public String getValue() {
return value;
}
public static DatabaseType getDatabaseType(String name) {
if (MASTER2.name.equals(name)) {
return MASTER2;
}
return MASTER1;
}
}
这边可以看到就是通过动态地通过putDatabaseType设置lookupKey来进行数据源切换,要通过接口注解配置来进行设置的话,我们就需要一个注解
@Retention(RetentionPolicy.RUNTIME)
@Target(ElementType.METHOD)
public @interface DataSource {
String value();
}
这个注解可以配置在我的接口方法上,比如这样
public interface StudentService {
@DataSource("master1")
public Student queryOne();
@DataSource("master2")
public Student queryAnother();
}
通过切面来进行数据源的设置
@Aspect
@Component
@Order(-1)
public class DataSourceAspect {
@Pointcut("execution(* com.nicksxs.springdemo.service..*.*(..))")
public void pointCut() {
}
@Before("pointCut()")
public void before(JoinPoint point)
{
Object target = point.getTarget();
System.out.println(target.toString());
String method = point.getSignature().getName();
System.out.println(method);
Class<?>[] classz = target.getClass().getInterfaces();
Class<?>[] parameterTypes = ((MethodSignature) point.getSignature())
.getMethod().getParameterTypes();
try {
Method m = classz[0].getMethod(method, parameterTypes);
System.out.println("method"+ m.getName());
if (m.isAnnotationPresent(DataSource.class)) {
DataSource data = m.getAnnotation(DataSource.class);
System.out.println("dataSource:"+data.value());
DatabaseContextHolder.putDatabaseType(DatabaseType.getDatabaseType(data.value()));
}
} catch (Exception e) {
e.printStackTrace();
}
}
@After("pointCut()")
public void after() {
DatabaseContextHolder.clearDatabaseType();
}
}
通过接口判断是否带有注解跟是注解的值,DatabaseType 的配置不太好,不过先忽略了,然后在切点后进行清理
这是我 master1 的数据,

master2 的数据

然后跑一下简单的 demo,
@Override
public void run(String...args) {
LOGGER.info("run here");
System.out.println(studentService.queryOne());
System.out.println(studentService.queryAnother());
}
看一下运行结果

其实这个方法应用场景不止可以用来迁移数据库,还能实现精细化的读写数据源分离之类的,算是做个简单记录和分享。
]]>其实最开始是举重项目,侯志慧是女子 49 公斤级的冠军,这场比赛是全场都看,其实看中国队的举重比赛跟跳水有点像,每一轮都需要到最后才能等到中国队,跳水其实每轮都有,举重会按照自己报的试举重量进行排名,重量大的会在后面举,抓举和挺举各三次试举机会,有时候会看着比较焦虑,一直等不来,怕一上来就没试举成功,而且中国队一般试举重量就是很大的,容易一次试举不成功就马上下一次,连着举其实压力会非常大,说实话真的是外行看热闹,每次都是多懂一点点,这次由于实在是比较无聊,所以看的会比较专心点,对于对应的规则知识点也会多了解一点,同时对于举重,没想到我们国家的这些运动员有这么强,最后八块金牌拿了七块,有一块拿到银牌也是有点因为教练的策略问题,这里其实也稍微知道一点,因为报上去的试举重量是谁小谁先举,并且我们国家都是实力非常强的,所以都会报大一些,并且如果这个项目有实力相近的选手,会比竞对多报一公斤,这样子如果前面竞争对手没举成功,我们把握就很大了,最坏的情况即使对手试举成功了,我们还有机会搏一把,比如谌利军这样的,只是说说感想,举重运动员真的是个比较单纯的群体,而且训练是非常痛苦枯燥的,非常容易受伤,像挺举就有点会压迫呼吸通道,看到好几个都是脸憋得通红,甚至直接因为压迫气道而没法完成后面的挺举,像之前 16 年的举重比赛,有个运动员没成功夺冠就非常愧疚地哭着说对不起祖国,没有获得冠军,这是怎么样的一种歉疚,怎么样的一种纯粹的感情呢,相对应地来说,我又要举男足,男篮的例子了,很多人在那嘲笑我这样对男足男篮愤愤不平的人,说可能我这样的人都没交个税(从缴纳个税的数量比例来算有可能),只是这里有两个打脸的事情,我足额缴纳个税,接近 20%的薪资都缴了个税,并且我买的所有东西都缴了增值税,如果让我这样缴纳了个税,缴纳了增值税的有个人的投票权,我一定会投票不让男足男篮使用我缴纳我的税金,用我们的缴纳的税,打出这么烂的表现,想乒乓球混双,拿个亚军都会被喷,那可是世界第二了,而且是就输了那么一场,足球篮球呢,我觉得是一方面成绩差,因为比赛真的有状态跟心态的影响,偶尔有一场失误非常正常,NBA 被黑八的有这么多强队,但是如果像男足男篮,成绩是越来越差,用范志毅的话来说就是脸都不要了,还有就是精气神,要在比赛中打出胜负欲,保持这种争胜心,才有机会再进步,前火箭队主教练鲁迪·汤姆贾诺维奇的话,“永远不要低估冠军的决心”,即使我现在打不过你,我会在下一次,下下次打败你,竞技体育永远要有这种精神,可以接受一时的失败,但是要保持永远争胜的心。
第一块金牌是杨倩拿下的,中国队拿奥运会首金也是有政治任务的,而恰恰杨倩这个金牌也有点碰巧是对手最后一枪失误了,当然竞技体育,特别是射击,真的是容不得一点点失误,像前面几届的美国神通埃蒙斯,失之毫厘差之千里,但是这个具体评价就比较少,唯一一点让我比较出戏的就是杨倩真的非常像王刚的徒弟漆二娃,哈哈,微博上也有挺多人觉得像,射击还是个比较可以接受年纪稍大的运动员,需要经验和稳定性,相对来说爆发力体力稍好一点,像庞伟这样的,混合团体10米气手枪金牌,36 岁可能其他项目已经是年龄很大了,不过前面说的举重的吕小军军神也是年纪蛮大了,但是非常强,而且在油管上简直就是个神,相对来说射击是关注比较少,杨倩的也只是看了后面拿到冠军这个结果,有些因为时间或者电视上没放,但是成绩还是不错的,没多少喷点。
第二篇先到这,纯主观,轻喷。
]]>这次碰到一个比较奇怪的问题,应该统一发布脚本统一给应用启动参数传了个 -Dserver.port=xxxx,其实这个端口会作为 dubbo 的服务端口,并且应用也不提供 web 服务,但是在启动的时候会报embedded servlet container failed to start. port xxxx was already in use就觉得有点奇怪,仔细看了启动参数猜测可能是这个问题,有可能是依赖的二方三方包带了 spring-web 的包,然后基于 springboot 的 auto configuration 会把这个自己加载,就在本地复现了下这个问题,结果的确是这个问题。
比较老的 springboot 版本,可以使用
SpringApplication app = new SpringApplication(XXXXXApplication.class);
app.setWebEnvironment(false);
app.run(args);
新版本的 springboot (>= 2.0.0)可以在 properties 里配置
spring.main.web-application-type=none
或者
SpringApplication app = new SpringApplication(XXXXXApplication.class);
app.setWebApplicationType(WebApplicationType.NONE);
这个枚举里还有其他两种配置
public enum WebApplicationType {
/**
* The application should not run as a web application and should not start an
* embedded web server.
*/
NONE,
/**
* The application should run as a servlet-based web application and should start an
* embedded servlet web server.
*/
SERVLET,
/**
* The application should run as a reactive web application and should start an
* embedded reactive web server.
*/
REACTIVE
}
相当于是把none 的类型和包括 servlet 和 reactive 放进了枚举类进行控制。
]]>还有奥运会像乒乓球,篮球,跳水这几个都是比较喜欢的项目,篮球🏀是从初中开始就也有在自己在玩的,虽然因为身高啊体质基本没什么天赋,但也算是热爱驱动,差不多到了大学因为比较懒才放下了,初中高中还是有很多时间花在上面,不像别人经常打球跑跑跳跳还能长高,我反而一直都没长个子,也因为这个其实蛮遗憾的,后面想想可能是初中的时候远走他乡去住宿读初中,伙食营养跟不上导致的,可能也是自己的一厢情愿吧,总觉得应该还能再长点个,这一点以后我自己的小孩我应该会特别注意这段时间他/她的营养摄入了;然后像乒乓球🏓的话其实小时候是比较讨厌的,因为家里人,父母都没有这类爱好习惯,我也完全不会,但是小学那会班里的“恶霸”就以公平之名要我们男生每个人都排队打几个,我这种不会的反而又要被嘲笑,这个小时候的阴影让我有了比较不好的印象,对它🏓的改观是在工作以后,前司跟一个同样不会的同事经常在饭点会打打,而且那会因为这个其实身体得到了锻炼,感觉是个不错的健身方式,然后又是中国的优势项目,小时候跟着我爸看孔令辉,那时候完全不懂,印象就觉得老瓦很牛,后面其实也没那么关注,上一届好像看了马龙的比赛;跳水也是中国的优势项目,而且也比较简单,不是说真的很简单,就是我们外行观众看着就看看水花大小图一乐。
这次的观赛过程其实主要还是在乒乓球上面,现在都有点怪我的乌鸦嘴,混双我一直就不太放心(关我什么事,我也不专业),然后一直觉得混双是不是不太稳,结果那天看的时候也是因为央视一套跟五套都没放,我家的有线电视又是没有五加体育,然后用电脑投屏就很卡,看得也很不爽,同时那天因为看的时候已经是 2:0还是再后面点了,一方面是不懂每队只有一次暂停,另一方面不知道已经用过暂停了,所以就特别怀疑马林是不是只会无脑鼓掌,感觉作为教练,并且是前冠军,应该也能在擦汗间隙,或者局间休息调整的时候多给些战略战术的指导,类似于后面男团小胖打奥恰洛夫,像解说都看出来了,其实奥恰那会的反手特别顺,打得特别凶,那就不能让他能特别顺手的上反手位,这当然是外行比较粗浅的看法,在混双过程中其实除了这个,还有让人很不爽的就是我们的许昕跟刘诗雯有种拿不出破釜沉舟的勇气的感觉,在气势上完全被对面两位日本乒乓球最讨厌的两位对手压制着,我都要输了,我就每一颗都要不让你好过,因为真的不是说没有实力,对面水谷隼也不是多么多么强的,可能上一届男团许昕输给他还留着阴影,但是以许昕 19 年男单世界第一的实力,目前也排在世界前三,输一场不应该成为这种阻力,有一些失误也很可惜,后面孙颖莎真的打得很解气,第二局一度以为又要被翻盘了,结果来了个大逆转,女团的时候也是,感觉在心态上孙颖莎还是很值得肯定的,少年老成这个词很适合,看其他的视频也觉得莎莎萌萌哒,陈梦总感觉还欠一点王者霸气,王曼昱还是可以的,反手很凶,我觉得其实这一届日本女乒就是打得非常凶,即使像平野这种看着很弱的妹子,打的球可一点都不弱,也是这种凶狠的打法,有点要压制中国的感觉,这方面我觉得是需要改善的,打这种要不就是实力上的完全碾压,要不就是我实力虽然比较没强多少,但是你狠我打得比你还狠,越保守越要输,我不太成熟的想法是这样的,还有就是面对逆境,这个就要说到男队的了,樊振东跟马龙在半决赛的时候,特别是男团的第二盘,樊振东打奥恰很好地表现了这个心态,当然樊振东我不是特别了解,据说他是比较善于打相持,比较善于焦灼的情况,不过整体看下来樊振东还是有一些欠缺,就是面对情况的快速转变应对,这一点也是马龙特别强的,虽然看起来马龙真的是年纪大了点,没有 16 年那会满头发胶,油光锃亮的大背头和满脸胶原蛋白的意气风发,大范围运动能力也弱了一点,但是经验和能力的全面性也让他最终能再次站上巅峰,还是非常佩服的,这里提一下张继科,虽然可能天赋上是张继科更强点,但是男乒一直都是有强者出现,能为国家队付出这么多并且一直坚持的可不是人人都可以,即使现在同台竞技马龙打不过张继科我还是更喜欢马龙。再来说说我们的对手,主要分三部分,德国男乒,里面有波尔(我刚听到的时候在想怎么又出来个叫波尔的,是不是像举重的石智勇一样,又来一个同名的,结果是同一个,已经四十岁了),这真是个让人敬佩的对手,实力强,经验丰富,虽然男单有点可惜,但是帮助男团获得银牌,真的是起到了定海神针的作用;奥恰洛夫,以前完全不认识,或者说看过也忘了,这次是真的有点意外,竟然有这么个马龙护法,其实他也坦言非常想赢一次马龙,并且在半决赛也非常接近赢得比赛,是个实力非常强的对手,就是男团半决赛输给张本智和有点可惜,有点被打蒙的感觉,佛朗西斯卡的话也是实力不错的选手,就是可能被奥恰跟波尔的光芒掩盖了,跟波尔在男团第一盘男双的比赛中打败日本那对男双也是非常给力的,说实话,最后打国乒的时候的确是国乒实力更胜一筹,但是即使德国赢了我也是充满尊敬,拼的就是硬实力,就像第二盘奥恰打樊振东,反手是真的很强,反过来看奥恰可能也不是很善于快速调整,樊振东打出来自己的节奏,主攻奥恰的中路,他好像没什么好办法解决。再来说我最讨厌的日本,嗯,小日本,张本智和、水谷隼、伊藤美诚,一一评价下(我是外行,绝对主观评价),张本智和,父母也是中国人,原来叫张智和,改日本籍后加了个本,被微博网友笑称日本尖叫鸡,男单输给了斯洛文尼亚选手,男团里是赢了两场,但是在我看来其实实力上可能比不上全力的奥恰,主要是特别能叫,会干扰对手,如果觉得这种也是种能力我也无话可说,要是有那种吼声能直接把对手震聋的,都不需要打比赛了,我简单记了下,赢一颗球,他要叫八声,用 LD 的话来说烦都烦死了,心态是在面对一些困境顺境的应对调整适应能力,而不是对这种噪音的适应能力,至少我是这么看的,所以我很期待樊振东能好好地虐虐他,因为其他像林昀儒真的是非常优秀的新选手,所谓的国乒克星估计也是小日本自己说说的,国乒其实有很多对手,马龙跟樊振东在男单半决赛碰到的这两个几乎都差点把他们掀翻了,所以还是练好自己的实力再来吹吧,免得打脸;水谷隼的话真的是长相就是特别地讨厌,还搞出那套不打比赛的姿态,男团里被波尔干掉就是很好的例子,波尔虽然真的很强,但毕竟 40 岁了,跟伊藤美诚一起说了吧,伊藤实力说实话是有的,混双中很大一部分的赢面来自于她,刘诗雯做了手术状态不好,许昕失误稍多,但是这种赢球了就感觉我赢了你一辈子一场没输的感觉,还有那种不知道怎么形容的笑,实力强的正常打比赛的我都佩服,像女团决赛里,平野跟石川佳纯的打法其实也很凶狠,但是都是正常的比赛,即使中国队两位实力不济输了也很正常,这种就真的需要像孙颖莎这样的小魔王无视各种魔法攻击,无视你各种花里胡哨的打法的人好好教训一下,混双输了以后了解了下她,感觉实力真的不错,是个大威胁,但是其实我们孙颖莎也是经历了九个月的继续成长,像张怡宁也评价了她,可能后面就没什么空间了,当然如果由张怡宁来打她就更适合了,净整这些有的没的,就打得你没脾气。
乒乓球的说的有点多,就分篇说了,第一篇先到这。
]]>
看上面的图,java.sql.Driver就是 spi,对应在classpath 的 META-INF/services 目录下的这个文件,里边的内容就是具体的实现类

简单介绍了 Java的 SPI,再来说说 dubbo 的,dubbo 中为啥要用 SPI 呢,主要是为了框架的可扩展性和性能方面的考虑,比如协议层 dubbo 默认使用 dubbo 协议,同时也支持很多其他协议,也支持用户自己实现协议,那么跟 Java 的 SPI 会有什么区别呢,我们也来看个文件

是不是看着很想,又有点不一样,在 Java 的 SPI 配置文件里每一行只有一个实现类的全限定名,在 Dubbo的 SPI配置文件中是 key=value 的形式,我们只需要对应的 key 就能加载对应的实现,
/**
* 返回指定名字的扩展。如果指定名字的扩展不存在,则抛异常 {@link IllegalStateException}.
*
* @param name
* @return
*/
@SuppressWarnings("unchecked")
public T getExtension(String name) {
if (name == null || name.length() == 0)
throw new IllegalArgumentException("Extension name == null");
if ("true".equals(name)) {
return getDefaultExtension();
}
Holder<Object> holder = cachedInstances.get(name);
if (holder == null) {
cachedInstances.putIfAbsent(name, new Holder<Object>());
holder = cachedInstances.get(name);
}
Object instance = holder.get();
if (instance == null) {
synchronized (holder) {
instance = holder.get();
if (instance == null) {
instance = createExtension(name);
holder.set(instance);
}
}
}
return (T) instance;
}
这里其实就可以看出来第二个不同点了,就是这个cachedInstances,第一个是不用像 Java 原生的 SPI 那样去遍历加载对应的服务类,只需要通过 key 去寻找,并且寻找的时候会先从缓存的对象里去取,还有就是注意下这里的 DCL(double check lock)
@SuppressWarnings("unchecked")
private T createExtension(String name) {
Class<?> clazz = getExtensionClasses().get(name);
if (clazz == null) {
throw findException(name);
}
try {
T instance = (T) EXTENSION_INSTANCES.get(clazz);
if (instance == null) {
EXTENSION_INSTANCES.putIfAbsent(clazz, (T) clazz.newInstance());
instance = (T) EXTENSION_INSTANCES.get(clazz);
}
injectExtension(instance);
Set<Class<?>> wrapperClasses = cachedWrapperClasses;
if (wrapperClasses != null && wrapperClasses.size() > 0) {
for (Class<?> wrapperClass : wrapperClasses) {
instance = injectExtension((T) wrapperClass.getConstructor(type).newInstance(instance));
}
}
return instance;
} catch (Throwable t) {
throw new IllegalStateException("Extension instance(name: " + name + ", class: " +
type + ") could not be instantiated: " + t.getMessage(), t);
}
}
然后就是创建扩展了,这里如果 wrapperClasses 就会遍历生成wrapper实例,并做 setter 依赖注入,但是这里cachedWrapperClasses的来源还是有点搞不清楚,得再看下 com.alibaba.dubbo.common.extension.ExtensionLoader#loadFile的具体逻辑
又看了遍新的代码,这个函数被抽出来了
/**
* test if clazz is a wrapper class
* <p>
* which has Constructor with given class type as its only argument
*/
private boolean isWrapperClass(Class<?> clazz) {
try {
clazz.getConstructor(type);
return true;
} catch (NoSuchMethodException e) {
return false;
}
}
是否是 wrapperClass 其实就看构造函数的。
]]>这个应该是 Dubbo SPI 里最玄妙的东西了,一开始没懂,自适应扩展点加载,dubbo://123.123.123.123:1234/com.nicksxs.demo.service.HelloWorldService?anyhost=true&application=demo&default.loadbalance=random&default.service.filter=LoggerFilter&dubbo=2.5.3&interface=com.nicksxs.demo.service.HelloWorldService&logger=slf4j&methods=method1,method2,method3,method4&pid=4292&retries=0&side=provider&threadpool=fixed&threads=200&timeout=2000×tamp=1590647155886
那我从比较能理解的角度或者说思路去讲讲我的理解,因为直接将原理如果脱离了使用,对于我这样的理解能力比较差的可能会比较吃力,从使用场景开始讲可能会比较舒服了,这里可以看到参数里有蛮多的,举个例子,比如这个 threadpool = fixed,说明线程池使用的是 fixed 对应的实现,也就是下图的这个
这样子似乎没啥问题了,反正就是用dubbo 的 spi 加载嘛,好像没啥问题,其实问题还是存在的,或者说不太优雅,比如要先判断我这个 fixed 对应的实现类是哪个,这里可能就有个 if-else 判断了,但是 dubbo 的开发人员似乎不太想这么做这个事情,
譬如我们在引用一个服务时,在ReferenceConfig 中的
private static final Protocol refprotocol = ExtensionLoader.getExtensionLoader(Protocol.class).getAdaptiveExtension();
就获取了自适应拓展,
public T getAdaptiveExtension() {
Object instance = cachedAdaptiveInstance.get();
if (instance == null) {
if (createAdaptiveInstanceError == null) {
synchronized (cachedAdaptiveInstance) {
instance = cachedAdaptiveInstance.get();
if (instance == null) {
try {
instance = createAdaptiveExtension();
cachedAdaptiveInstance.set(instance);
} catch (Throwable t) {
createAdaptiveInstanceError = t;
throw new IllegalStateException("fail to create adaptive instance: " + t.toString(), t);
}
}
}
} else {
throw new IllegalStateException("fail to create adaptive instance: " + createAdaptiveInstanceError.toString(), createAdaptiveInstanceError);
}
}
return (T) instance;
}
这里也使用了 DCL,来锁cachedAdaptiveInstance,当缓存中没有时就去创建自适应拓展
private T createAdaptiveExtension() {
try {
// 获取自适应拓展类然后实例化
return injectExtension((T) getAdaptiveExtensionClass().newInstance());
} catch (Exception e) {
throw new IllegalStateException("Can not create adaptive extension " + type + ", cause: " + e.getMessage(), e);
}
}
private Class<?> getAdaptiveExtensionClass() {
// 这里会获取拓展类,如果没有自适应的拓展类,那么就需要调用createAdaptiveExtensionClass
getExtensionClasses();
if (cachedAdaptiveClass != null) {
return cachedAdaptiveClass;
}
return cachedAdaptiveClass = createAdaptiveExtensionClass();
}
private Class<?> createAdaptiveExtensionClass() {
// 这里去生成了自适应拓展的代码,具体生成逻辑比较复杂先不展开讲
String code = createAdaptiveExtensionClassCode();
ClassLoader classLoader = findClassLoader();
com.alibaba.dubbo.common.compiler.Compiler compiler = ExtensionLoader.getExtensionLoader(com.alibaba.dubbo.common.compiler.Compiler.class).getAdaptiveExtension();
return compiler.compile(code, classLoader);
}
生成的代码像这样
package com.alibaba.dubbo.rpc;
import com.alibaba.dubbo.common.extension.ExtensionLoader;
public class Protocol$Adaptive implements com.alibaba.dubbo.rpc.Protocol {
public void destroy() {
throw new UnsupportedOperationException(
"method public abstract void com.alibaba.dubbo.rpc.Protocol.destroy() of interface com.alibaba.dubbo.rpc.Protocol is not adaptive method!");
}
public int getDefaultPort() {
throw new UnsupportedOperationException(
"method public abstract int com.alibaba.dubbo.rpc.Protocol.getDefaultPort() of interface com.alibaba.dubbo.rpc.Protocol is not adaptive method!");
}
public com.alibaba.dubbo.rpc.Exporter export(
com.alibaba.dubbo.rpc.Invoker arg0)
throws com.alibaba.dubbo.rpc.RpcException {
if (arg0 == null) {
throw new IllegalArgumentException(
"com.alibaba.dubbo.rpc.Invoker argument == null");
}
if (arg0.getUrl() == null) {
throw new IllegalArgumentException(
"com.alibaba.dubbo.rpc.Invoker argument getUrl() == null");
}
com.alibaba.dubbo.common.URL url = arg0.getUrl();
String extName = ((url.getProtocol() == null) ? "dubbo"
: url.getProtocol());
if (extName == null) {
throw new IllegalStateException(
"Fail to get extension(com.alibaba.dubbo.rpc.Protocol) name from url(" +
url.toString() + ") use keys([protocol])");
}
com.alibaba.dubbo.rpc.Protocol extension = (com.alibaba.dubbo.rpc.Protocol) ExtensionLoader.getExtensionLoader(com.alibaba.dubbo.rpc.Protocol.class)
.getExtension(extName);
return extension.export(arg0);
}
public com.alibaba.dubbo.rpc.Invoker refer(java.lang.Class arg0,
com.alibaba.dubbo.common.URL arg1)
throws com.alibaba.dubbo.rpc.RpcException {
if (arg1 == null) {
throw new IllegalArgumentException("url == null");
}
com.alibaba.dubbo.common.URL url = arg1;
// 其实前面所说的逻辑就在这里呈现了
String extName = ((url.getProtocol() == null) ? "dubbo"
: url.getProtocol());
if (extName == null) {
throw new IllegalStateException(
"Fail to get extension(com.alibaba.dubbo.rpc.Protocol) name from url(" +
url.toString() + ") use keys([protocol])");
}
// 在这就是实际的通过dubbo 的 spi 去加载实际对应的扩展
com.alibaba.dubbo.rpc.Protocol extension = (com.alibaba.dubbo.rpc.Protocol) ExtensionLoader.getExtensionLoader(com.alibaba.dubbo.rpc.Protocol.class)
.getExtension(extName);
return extension.refer(arg0, arg1);
}
}
]]>Invoker 是 Provider 的一个可调用 Service 的抽象,Invoker 封装了 Provider 地址及 Service 接口信息Directory 代表多个 Invoker,可以把它看成 List<Invoker> ,但与 List 不同的是,它的值可能是动态变化的,比如注册中心推送变更Cluster 将 Directory 中的多个 Invoker 伪装成一个 Invoker,对上层透明,伪装过程包含了容错逻辑,调用失败后,重试另一个Router 负责从多个 Invoker 中按路由规则选出子集,比如读写分离,应用隔离等LoadBalance 负责从多个 Invoker 中选出具体的一个用于本次调用,选的过程包含了负载均衡算法,调用失败后,需要重选失败自动切换,当出现失败,重试其它服务器 1。通常用于读操作,但重试会带来更长延迟。可通过 retries=”2” 来设置重试次数(不含第一次)。
重试次数配置如下:
<dubbo:service retries=”2” />
这里重点看下 Failover Cluster集群模式的实现
public class FailoverCluster implements Cluster {
public final static String NAME = "failover";
public <T> Invoker<T> join(Directory<T> directory) throws RpcException {
return new FailoverClusterInvoker<T>(directory);
}
}
这个代码就非常简单,重点需要看FailoverClusterInvoker里的代码,FailoverClusterInvoker继承了AbstractClusterInvoker类,其中invoke 方法是在抽象类里实现的
@Override
public Result invoke(final Invocation invocation) throws RpcException {
checkWhetherDestroyed();
// binding attachments into invocation.
// 绑定 attachments 到 invocation 中.
Map<String, Object> contextAttachments = RpcContext.getContext().getObjectAttachments();
if (contextAttachments != null && contextAttachments.size() != 0) {
((RpcInvocation) invocation).addObjectAttachments(contextAttachments);
}
// 列举 Invoker
List<Invoker<T>> invokers = list(invocation);
// 加载 LoadBalance 负载均衡器
LoadBalance loadbalance = initLoadBalance(invokers, invocation);
RpcUtils.attachInvocationIdIfAsync(getUrl(), invocation);
// 调用 实际的 doInvoke 进行后续操作
return doInvoke(invocation, invokers, loadbalance);
}
// 这是个抽象方法,实际是由子类实现的
protected abstract Result doInvoke(Invocation invocation, List<Invoker<T>> invokers,
LoadBalance loadbalance) throws RpcException;
然后重点就是FailoverClusterInvoker中的doInvoke方法了,其实它里面也就这么一个方法
@Override
@SuppressWarnings({"unchecked", "rawtypes"})
public Result doInvoke(Invocation invocation, final List<Invoker<T>> invokers, LoadBalance loadbalance) throws RpcException {
List<Invoker<T>> copyInvokers = invokers;
checkInvokers(copyInvokers, invocation);
String methodName = RpcUtils.getMethodName(invocation);
// 获取重试次数,这里默认是 2 次,还有可以注意下后面的+1
int len = getUrl().getMethodParameter(methodName, RETRIES_KEY, DEFAULT_RETRIES) + 1;
if (len <= 0) {
len = 1;
}
// retry loop.
RpcException le = null; // last exception.
List<Invoker<T>> invoked = new ArrayList<Invoker<T>>(copyInvokers.size()); // invoked invokers.
Set<String> providers = new HashSet<String>(len);
// 循环调用,失败重试
for (int i = 0; i < len; i++) {
//Reselect before retry to avoid a change of candidate `invokers`.
//NOTE: if `invokers` changed, then `invoked` also lose accuracy.
if (i > 0) {
checkWhetherDestroyed();
// 在进行重试前重新列举 Invoker,这样做的好处是,如果某个服务挂了,
// 通过调用 list 可得到最新可用的 Invoker 列表
copyInvokers = list(invocation);
// check again
// 对 copyinvokers 进行判空检查
checkInvokers(copyInvokers, invocation);
}
// 通过负载均衡来选择 invoker
Invoker<T> invoker = select(loadbalance, invocation, copyInvokers, invoked);
// 将其添加到 invoker 到 invoked 列表中
invoked.add(invoker);
// 设置上下文
RpcContext.getContext().setInvokers((List) invoked);
try {
// 正式调用
Result result = invoker.invoke(invocation);
if (le != null && logger.isWarnEnabled()) {
logger.warn("Although retry the method " + methodName
+ " in the service " + getInterface().getName()
+ " was successful by the provider " + invoker.getUrl().getAddress()
+ ", but there have been failed providers " + providers
+ " (" + providers.size() + "/" + copyInvokers.size()
+ ") from the registry " + directory.getUrl().getAddress()
+ " on the consumer " + NetUtils.getLocalHost()
+ " using the dubbo version " + Version.getVersion() + ". Last error is: "
+ le.getMessage(), le);
}
return result;
} catch (RpcException e) {
if (e.isBiz()) { // biz exception.
throw e;
}
le = e;
} catch (Throwable e) {
le = new RpcException(e.getMessage(), e);
} finally {
providers.add(invoker.getUrl().getAddress());
}
}
throw new RpcException(le.getCode(), "Failed to invoke the method "
+ methodName + " in the service " + getInterface().getName()
+ ". Tried " + len + " times of the providers " + providers
+ " (" + providers.size() + "/" + copyInvokers.size()
+ ") from the registry " + directory.getUrl().getAddress()
+ " on the consumer " + NetUtils.getLocalHost() + " using the dubbo version "
+ Version.getVersion() + ". Last error is: "
+ le.getMessage(), le.getCause() != null ? le.getCause() : le);
}
快速失败,只发起一次调用,失败立即报错。通常用于非幂等性的写操作,比如新增记录。
失败安全,出现异常时,直接忽略。通常用于写入审计日志等操作。
失败自动恢复,后台记录失败请求,定时重发。通常用于消息通知操作。
并行调用多个服务器,只要一个成功即返回。通常用于实时性要求较高的读操作,但需要浪费更多服务资源。可通过 forks=”2” 来设置最大并行数。
广播调用所有提供者,逐个调用,任意一台报错则报错 2。通常用于通知所有提供者更新缓存或日志等本地资源信息。
]]>public class SynchronizedDemo {
public static void main(String[] args) {
SynchronizedDemo synchronizedDemo = new SynchronizedDemo();
synchronizedDemo.lockMethod();
}
public synchronized void lockMethod() {
System.out.println("here i'm locked");
}
public void lockSynchronizedDemo() {
synchronized (this) {
System.out.println("here lock class");
}
}
}
然后来查看反编译结果,其实代码(日光)之下并无新事,即使是完全不懂的也可以通过一些词义看出一些意义
Last modified 2021年6月20日; size 729 bytes
MD5 checksum dd9c529863bd7ff839a95481db578ad9
Compiled from "SynchronizedDemo.java"
public class SynchronizedDemo
minor version: 0
major version: 53
flags: (0x0021) ACC_PUBLIC, ACC_SUPER
this_class: #2 // SynchronizedDemo
super_class: #9 // java/lang/Object
interfaces: 0, fields: 0, methods: 4, attributes: 1
Constant pool:
#1 = Methodref #9.#22 // java/lang/Object."<init>":()V
#2 = Class #23 // SynchronizedDemo
#3 = Methodref #2.#22 // SynchronizedDemo."<init>":()V
#4 = Methodref #2.#24 // SynchronizedDemo.lockMethod:()V
#5 = Fieldref #25.#26 // java/lang/System.out:Ljava/io/PrintStream;
#6 = String #27 // here i\'m locked
#7 = Methodref #28.#29 // java/io/PrintStream.println:(Ljava/lang/String;)V
#8 = String #30 // here lock class
#9 = Class #31 // java/lang/Object
#10 = Utf8 <init>
#11 = Utf8 ()V
#12 = Utf8 Code
#13 = Utf8 LineNumberTable
#14 = Utf8 main
#15 = Utf8 ([Ljava/lang/String;)V
#16 = Utf8 lockMethod
#17 = Utf8 lockSynchronizedDemo
#18 = Utf8 StackMapTable
#19 = Class #32 // java/lang/Throwable
#20 = Utf8 SourceFile
#21 = Utf8 SynchronizedDemo.java
#22 = NameAndType #10:#11 // "<init>":()V
#23 = Utf8 SynchronizedDemo
#24 = NameAndType #16:#11 // lockMethod:()V
#25 = Class #33 // java/lang/System
#26 = NameAndType #34:#35 // out:Ljava/io/PrintStream;
#27 = Utf8 here i\'m locked
#28 = Class #36 // java/io/PrintStream
#29 = NameAndType #37:#38 // println:(Ljava/lang/String;)V
#30 = Utf8 here lock class
#31 = Utf8 java/lang/Object
#32 = Utf8 java/lang/Throwable
#33 = Utf8 java/lang/System
#34 = Utf8 out
#35 = Utf8 Ljava/io/PrintStream;
#36 = Utf8 java/io/PrintStream
#37 = Utf8 println
#38 = Utf8 (Ljava/lang/String;)V
{
public SynchronizedDemo();
descriptor: ()V
flags: (0x0001) ACC_PUBLIC
Code:
stack=1, locals=1, args_size=1
0: aload_0
1: invokespecial #1 // Method java/lang/Object."<init>":()V
4: return
LineNumberTable:
line 5: 0
public static void main(java.lang.String[]);
descriptor: ([Ljava/lang/String;)V
flags: (0x0009) ACC_PUBLIC, ACC_STATIC
Code:
stack=2, locals=2, args_size=1
0: new #2 // class SynchronizedDemo
3: dup
4: invokespecial #3 // Method "<init>":()V
7: astore_1
8: aload_1
9: invokevirtual #4 // Method lockMethod:()V
12: return
LineNumberTable:
line 8: 0
line 9: 8
line 10: 12
public synchronized void lockMethod();
descriptor: ()V
flags: (0x0021) ACC_PUBLIC, ACC_SYNCHRONIZED
Code:
stack=2, locals=1, args_size=1
0: getstatic #5 // Field java/lang/System.out:Ljava/io/PrintStream;
3: ldc #6 // String here i\'m locked
5: invokevirtual #7 // Method java/io/PrintStream.println:(Ljava/lang/String;)V
8: return
LineNumberTable:
line 13: 0
line 14: 8
public void lockSynchronizedDemo();
descriptor: ()V
flags: (0x0001) ACC_PUBLIC
Code:
stack=2, locals=3, args_size=1
0: aload_0
1: dup
2: astore_1
3: monitorenter
4: getstatic #5 // Field java/lang/System.out:Ljava/io/PrintStream;
7: ldc #8 // String here lock class
9: invokevirtual #7 // Method java/io/PrintStream.println:(Ljava/lang/String;)V
12: aload_1
13: monitorexit
14: goto 22
17: astore_2
18: aload_1
19: monitorexit
20: aload_2
21: athrow
22: return
Exception table:
from to target type
4 14 17 any
17 20 17 any
LineNumberTable:
line 17: 0
line 18: 4
line 19: 12
line 20: 22
StackMapTable: number_of_entries = 2
frame_type = 255 /* full_frame */
offset_delta = 17
locals = [ class SynchronizedDemo, class java/lang/Object ]
stack = [ class java/lang/Throwable ]
frame_type = 250 /* chop */
offset_delta = 4
}
SourceFile: "SynchronizedDemo.java"
其中lockMethod中可以看到是通过 ACC_SYNCHRONIZED flag 来标记是被 synchronized 修饰,前面的 ACC 应该是 access 的意思,并且通过 ACC_PUBLIC 也可以看出来他们是同一类访问权限关键字来控制的,而修饰类则是通过3: monitorenter和13: monitorexit来控制并发,这个是原来就知道,后来看了下才知道修饰方法是不一样的,但是在前期都比较诟病是 synchronized 的性能,像 monitor 也是通过操作系统的mutex lock互斥锁来实现的,相对是比较重的锁,于是在 JDK 1.6 之后对 synchronized 做了一系列优化,包括偏向锁,轻量级锁,并且包括像 ConcurrentHashMap 这类并发集合都有在使用 synchronized 关键字配合 cas 来做并发保护,
jdk 对于 synchronized 的优化主要在于多重状态锁的升级,最初会使用偏向锁,当一个线程访问同步块并获取锁时,会在对象头和栈帧中的锁记录里存储锁偏向的线程ID,以后该线程在进入和退出同步块时不需要进行CAS操作来加锁和解锁,只需简单地测试一下对象头的Mark Word里是否存储着指向当前线程的偏向锁。引入偏向锁是为了在无多线程竞争的情况下尽量减少不必要的轻量级锁执行路径,因为轻量级锁的获取及释放依赖多次CAS原子指令,而偏向锁只需要在置换ThreadID的时候依赖一次CAS原子指令(由于一旦出现多线程竞争的情况就必须撤销偏向锁,所以偏向锁的撤销操作的性能损耗必须小于节省下来的CAS原子指令的性能消耗)。
而当出现线程尝试进入同步块时发现已有偏向锁,并且是其他线程时,会将锁升级成轻量级锁,并且自旋尝试获取锁,如果自旋成功则表示获取轻量级锁成功,否则将会升级成重量级锁进行阻塞,当然这里具体的还很复杂,说的比较浅薄主体还是想将原先的阻塞互斥锁进行轻量化,区分特殊情况进行加锁。
A more generic solution for running several HTTPS servers on a single IP address is TLS Server Name Indication extension (SNI, RFC 6066), which allows a browser to pass a requested server name during the SSL handshake and, therefore, the server will know which certificate it should use for the connection. SNI is currently supported by most modern browsers, though may not be used by some old or special clients.
来源
机翻一下:在单个 IP 地址上运行多个 HTTPS 服务器的更通用的解决方案是 TLS 服务器名称指示扩展(SNI,RFC 6066),它允许浏览器在 SSL 握手期间传递请求的服务器名称,因此,服务器将知道哪个 它应该用于连接的证书。 目前大多数现代浏览器都支持 SNI,但某些旧的或特殊的客户端可能不使用 SNI。
首先我们需要确认 sni 已被支持
在实际的配置中就可以这样
stream {
map $ssl_preread_server_name $stream_map {
nicksxs.me nme;
nicksxs.com ncom;
}
upstream nme {
server 127.0.0.1:8000;
}
upstream ncom {
server 127.0.0.1:8001;
}
server {
listen 443 reuseport;
proxy_pass $stream_map;
ssl_preread on;
}
}
类似这样,但是这个理解是非常肤浅和不完善的,只是简单记忆下,后续再进行补充完整
还有一点就是我们在配置的时候经常配置就是 server_name,但是会看到直接在使用 ssl_server_name,
其实在listen 标识了 ssl, 对应的 ssl_server_name 就等于 server_name,不需要额外处理了。
以上验证、准备、解析 三个阶段又合称为链接阶段,链接阶段要做的是将加载到JVM中的二进制字节流的类数据信息合并到JVM的运行时状态中。
最终,方法区会存储当前类类信息,包括类的静态变量、类初始化代码(定义静态变量时的赋值语句 和 静态初始化代码块)、实例变量定义、实例初始化代码(定义实例变量时的赋值语句实例代码块和构造方法)和实例方法,还有父类的类信息引用。
]]>类加载机制中说来说去其实也逃不开类加载器这个话题,我们就来说下类加载器这个话题,Java 在 jdk1.2 以后开始有了
Java 虚拟机设计团队有意把加载阶段中的“通过一个类的全限定名来获取描述该类的二进制字节流”这个动作放到 Java 虚拟机外部去实现,以便让应用程序自己去决定如何去获取所需的类。实现这个动作的代码被称为“类加载器”(Class Loader).
其实在 Java 中类加载器有一个很常用的作用,比如一个类的唯一性,其实是由加载它的类加载器和这个类一起来确定这个类在虚拟机的唯一性,这里也参考下周志明书里的例子
public class ClassLoaderTest {
public static void main(String[] args) throws Exception {
ClassLoader myLoader = new ClassLoader() {
@Override
public Class<?> loadClass(String name) throws ClassNotFoundException {
try {
String fileName = name.substring(name.lastIndexOf(".") + 1) + ".class";
InputStream is = getClass().getResourceAsStream(fileName);
if (is == null) {
return super.loadClass(name);
}
byte[] b = new byte[is.available()];
is.read(b);
return defineClass(name, b, 0, b.length);
} catch (IOException e) {
throw new ClassNotFoundException(name);
}
}
};
Object object = myLoader.loadClass("com.nicksxs.demo.ClassLoaderTest").newInstance();
System.out.println(object.getClass());
System.out.println(object instanceof ClassLoaderTest);
}
}
可以看下结果
这里说明了当一个是由虚拟机的应用程序类加载器所加载的和另一个由自己写的自定义类加载器加载的,虽然是同一个类,但是 instanceof 的结果就是 false 的
自 JDK1.2 以来,Java 一直有些三层类加载器、双亲委派的类加载架构
首先是启动类加载器,Bootstrap Class Loader,这个类加载器负责加载放在
/**
* Returns the class loader for the class. Some implementations may use
* null to represent the bootstrap class loader. This method will return
* null in such implementations if this class was loaded by the bootstrap
* class loader.
*
* <p> If a security manager is present, and the caller's class loader is
* not null and the caller's class loader is not the same as or an ancestor of
* the class loader for the class whose class loader is requested, then
* this method calls the security manager's {@code checkPermission}
* method with a {@code RuntimePermission("getClassLoader")}
* permission to ensure it's ok to access the class loader for the class.
*
* <p>If this object
* represents a primitive type or void, null is returned.
*
* @return the class loader that loaded the class or interface
* represented by this object.
* @throws SecurityException
* if a security manager exists and its
* {@code checkPermission} method denies
* access to the class loader for the class.
* @see java.lang.ClassLoader
* @see SecurityManager#checkPermission
* @see java.lang.RuntimePermission
*/
@CallerSensitive
public ClassLoader getClassLoader() {
ClassLoader cl = getClassLoader0();
if (cl == null)
return null;
SecurityManager sm = System.getSecurityManager();
if (sm != null) {
ClassLoader.checkClassLoaderPermission(cl, Reflection.getCallerClass());
}
return cl;
}
这个类加载器是在类sun.misc.Launcher.ExtClassLoader中以 Java 代码的形式实现的,它负责在家
这个类加载器是由sun.misc.Launcher.AppClassLoader实现,通过 java 代码,并且是 ClassLoader 类中的 getSystemClassLoader()方法的返回值,可以看一下代码
/**
* Returns the system class loader for delegation. This is the default
* delegation parent for new <tt>ClassLoader</tt> instances, and is
* typically the class loader used to start the application.
*
* <p> This method is first invoked early in the runtime's startup
* sequence, at which point it creates the system class loader and sets it
* as the context class loader of the invoking <tt>Thread</tt>.
*
* <p> The default system class loader is an implementation-dependent
* instance of this class.
*
* <p> If the system property "<tt>java.system.class.loader</tt>" is defined
* when this method is first invoked then the value of that property is
* taken to be the name of a class that will be returned as the system
* class loader. The class is loaded using the default system class loader
* and must define a public constructor that takes a single parameter of
* type <tt>ClassLoader</tt> which is used as the delegation parent. An
* instance is then created using this constructor with the default system
* class loader as the parameter. The resulting class loader is defined
* to be the system class loader.
*
* <p> If a security manager is present, and the invoker's class loader is
* not <tt>null</tt> and the invoker's class loader is not the same as or
* an ancestor of the system class loader, then this method invokes the
* security manager's {@link
* SecurityManager#checkPermission(java.security.Permission)
* <tt>checkPermission</tt>} method with a {@link
* RuntimePermission#RuntimePermission(String)
* <tt>RuntimePermission("getClassLoader")</tt>} permission to verify
* access to the system class loader. If not, a
* <tt>SecurityException</tt> will be thrown. </p>
*
* @return The system <tt>ClassLoader</tt> for delegation, or
* <tt>null</tt> if none
*
* @throws SecurityException
* If a security manager exists and its <tt>checkPermission</tt>
* method doesn't allow access to the system class loader.
*
* @throws IllegalStateException
* If invoked recursively during the construction of the class
* loader specified by the "<tt>java.system.class.loader</tt>"
* property.
*
* @throws Error
* If the system property "<tt>java.system.class.loader</tt>"
* is defined but the named class could not be loaded, the
* provider class does not define the required constructor, or an
* exception is thrown by that constructor when it is invoked. The
* underlying cause of the error can be retrieved via the
* {@link Throwable#getCause()} method.
*
* @revised 1.4
*/
@CallerSensitive
public static ClassLoader getSystemClassLoader() {
initSystemClassLoader();
if (scl == null) {
return null;
}
SecurityManager sm = System.getSecurityManager();
if (sm != null) {
checkClassLoaderPermission(scl, Reflection.getCallerClass());
}
return scl;
}
private static synchronized void initSystemClassLoader() {
if (!sclSet) {
if (scl != null)
throw new IllegalStateException("recursive invocation");
// 主要的第一步是这
sun.misc.Launcher l = sun.misc.Launcher.getLauncher();
if (l != null) {
Throwable oops = null;
// 然后是这
scl = l.getClassLoader();
try {
scl = AccessController.doPrivileged(
new SystemClassLoaderAction(scl));
} catch (PrivilegedActionException pae) {
oops = pae.getCause();
if (oops instanceof InvocationTargetException) {
oops = oops.getCause();
}
}
if (oops != null) {
if (oops instanceof Error) {
throw (Error) oops;
} else {
// wrap the exception
throw new Error(oops);
}
}
}
sclSet = true;
}
}
// 接着跟到sun.misc.Launcher#getClassLoader
public ClassLoader getClassLoader() {
return this.loader;
}
// 然后看到这 sun.misc.Launcher#Launcher
public Launcher() {
Launcher.ExtClassLoader var1;
try {
var1 = Launcher.ExtClassLoader.getExtClassLoader();
} catch (IOException var10) {
throw new InternalError("Could not create extension class loader", var10);
}
try {
// 可以看到 就是 AppClassLoader
this.loader = Launcher.AppClassLoader.getAppClassLoader(var1);
} catch (IOException var9) {
throw new InternalError("Could not create application class loader", var9);
}
Thread.currentThread().setContextClassLoader(this.loader);
String var2 = System.getProperty("java.security.manager");
if (var2 != null) {
SecurityManager var3 = null;
if (!"".equals(var2) && !"default".equals(var2)) {
try {
var3 = (SecurityManager)this.loader.loadClass(var2).newInstance();
} catch (IllegalAccessException var5) {
} catch (InstantiationException var6) {
} catch (ClassNotFoundException var7) {
} catch (ClassCastException var8) {
}
} else {
var3 = new SecurityManager();
}
if (var3 == null) {
throw new InternalError("Could not create SecurityManager: " + var2);
}
System.setSecurityManager(var3);
}
}
它负责加载用户类路径(ClassPath)上所有的类库,我们可以直接在代码中使用这个类加载器,如果我们的代码中没有自定义的类在加载器,一般情况下这个就是程序中默认的类加载器

双亲委派模型的工作过程是:如果一个类加载器收到了类加载的请求,它首先不会自己去尝试家在这个类,而是把这个请求为派给父类加载器去完成,每一个层次的类加载器都是如此,因此所有的家在请求最终都应该传送到最顶层的启动类加载器中,只有当父类加载器反馈自己无法完成加载请求(它的搜索范围中没有找到所需要的类)时,子加载器才会尝试自己去完成加载。
使用双亲委派模型来组织类加载器之间的关系,一个显而易见的好处就是 Java 中的类随着它的类加载器一起举杯了一种带有优先级的层次关系。例如类 java.lang.Object,它存放在 rt.jar 之中,无论哪一个类加载器要家在这个类,最终都是委派给处于模型最顶层的启动类加载器进行加载,因此 Object 类在程序的各种类加载器环境中都能够保证是同一个类。反之,如果没有使用双薪委派模型,都由各个类加载器自行去加载的话,如果用户自己也编写了一个名为 java.lang.Object 的类,并放在程序的 ClassPath 中,那系统中就会出现多个不同的 Object 类,Java 类型体系中最基础的行为也就无从保证,应用程序将会变得一片混乱。
可以来看下双亲委派模型的代码实现
/**
* Loads the class with the specified <a href="#name">binary name</a>. The
* default implementation of this method searches for classes in the
* following order:
*
* <ol>
*
* <li><p> Invoke {@link #findLoadedClass(String)} to check if the class
* has already been loaded. </p></li>
*
* <li><p> Invoke the {@link #loadClass(String) <tt>loadClass</tt>} method
* on the parent class loader. If the parent is <tt>null</tt> the class
* loader built-in to the virtual machine is used, instead. </p></li>
*
* <li><p> Invoke the {@link #findClass(String)} method to find the
* class. </p></li>
*
* </ol>
*
* <p> If the class was found using the above steps, and the
* <tt>resolve</tt> flag is true, this method will then invoke the {@link
* #resolveClass(Class)} method on the resulting <tt>Class</tt> object.
*
* <p> Subclasses of <tt>ClassLoader</tt> are encouraged to override {@link
* #findClass(String)}, rather than this method. </p>
*
* <p> Unless overridden, this method synchronizes on the result of
* {@link #getClassLoadingLock <tt>getClassLoadingLock</tt>} method
* during the entire class loading process.
*
* @param name
* The <a href="#name">binary name</a> of the class
*
* @param resolve
* If <tt>true</tt> then resolve the class
*
* @return The resulting <tt>Class</tt> object
*
* @throws ClassNotFoundException
* If the class could not be found
*/
protected Class<?> loadClass(String name, boolean resolve)
throws ClassNotFoundException
{
synchronized (getClassLoadingLock(name)) {
// First, check if the class has already been loaded
Class<?> c = findLoadedClass(name);
if (c == null) {
long t0 = System.nanoTime();
try {
if (parent != null) {
// 委托父类加载
c = parent.loadClass(name, false);
} else {
// 使用启动类加载器
c = findBootstrapClassOrNull(name);
}
} catch (ClassNotFoundException e) {
// ClassNotFoundException thrown if class not found
// from the non-null parent class loader
}
if (c == null) {
// If still not found, then invoke findClass in order
// to find the class.
long t1 = System.nanoTime();
// 调用自己的 findClass() 方法尝试进行加载
c = findClass(name);
// this is the defining class loader; record the stats
sun.misc.PerfCounter.getParentDelegationTime().addTime(t1 - t0);
sun.misc.PerfCounter.getFindClassTime().addElapsedTimeFrom(t1);
sun.misc.PerfCounter.getFindClasses().increment();
}
}
if (resolve) {
resolveClass(c);
}
return c;
}
}
关于破坏双亲委派模型,第一次是在 JDK1.2 之后引入了双亲委派模型之前,那么在那之前已经有了类加载器,所以java.lang.ClassLoader 中添加了一个 protected 方法 findClass(),并引导用户编写的类加载逻辑时尽可能去重写这个方法,而不是在 loadClass()中编写代码。这个跟上面的逻辑其实类似,当父类加载失败,会调用 findClass()来完成加载;第二次是因为这个模型本身还有一些不足之处,比如 SPI 这种,所以有设计了线程下上下文类加载器(Thread Context ClassLoader)。这个类加载器可以通过 java.lang.Thread 类的 java.lang.Thread#setContextClassLoader() 进行设置,然后第三种是为了追求程序动态性,这里有涉及到了 osgi 等概念,就不展开了
]]>dump thread 是不现实的,毕竟服务器环境的没法这么操作,那就得用 Java 的那些工具了
譬如 jstack,这个命令其实不能更简单了
看看 help 信息
用-l参数可以打出锁的额外信息,然后后面的 pid 就是进程 id 咯,机智的小伙伴会问了(就你这个小白才问这么蠢的问题🤦♂️),怎么看 Java 应用的进程呢
那就是 jps 了,命令也很简单,一般直接用 jps命令就好了,不过也可以 help 看一下
稍微解释下,-q是只显示进程 id,-m是输出给main 方法的参数,比如我在配置中加给参数
然后用 jps -m查看
-v加上小 v 的话就是打印 jvm 参数
还是有点东西,然后就继续介绍 jstack 了,然后我们看看 jstack 出来是啥,为了加点内容我加了个死锁
public static void main(String[] args) throws InterruptedException {
SpringApplication.run(ThreadDumpDemoApplication.class, args);
ReentrantLock lock1 = new ReentrantLock();
ReentrantLock lock2 = new ReentrantLock();
Thread t1 = new Thread() {
@Override
public void run() {
try {
lock1.lock();
TimeUnit.SECONDS.sleep(1);
lock2.lock();
} catch (InterruptedException e) {
e.printStackTrace();
}
}
};
Thread t2 = new Thread() {
@Override
public void run() {
try {
lock2.lock();
TimeUnit.SECONDS.sleep(1);
lock1.lock();
} catch (InterruptedException e) {
e.printStackTrace();
}
}
};
t1.setName("mythread1");
t2.setName("mythread2");
t1.start();
t2.start();
Thread.sleep(10000);
}
然后看看出来时怎么样的
2020-08-02 21:50:32
Full thread dump Java HotSpot(TM) 64-Bit Server VM (25.201-b09 mixed mode):
"DestroyJavaVM" #147 prio=5 os_prio=31 tid=0x00007fc9dd807000 nid=0x2603 waiting on condition [0x0000000000000000]
java.lang.Thread.State: RUNNABLE
Locked ownable synchronizers:
- None
"mythread2" #140 prio=5 os_prio=31 tid=0x00007fc9dd877000 nid=0x9903 waiting on condition [0x0000700006fb9000]
java.lang.Thread.State: WAITING (parking)
at sun.misc.Unsafe.park(Native Method)
- parking to wait for <0x000000076f5d4330> (a java.util.concurrent.locks.ReentrantLock$NonfairSync)
at java.util.concurrent.locks.LockSupport.park(LockSupport.java:175)
at java.util.concurrent.locks.AbstractQueuedSynchronizer.parkAndCheckInterrupt(AbstractQueuedSynchronizer.java:836)
at java.util.concurrent.locks.AbstractQueuedSynchronizer.acquireQueued(AbstractQueuedSynchronizer.java:870)
at java.util.concurrent.locks.AbstractQueuedSynchronizer.acquire(AbstractQueuedSynchronizer.java:1199)
at java.util.concurrent.locks.ReentrantLock$NonfairSync.lock(ReentrantLock.java:209)
at java.util.concurrent.locks.ReentrantLock.lock(ReentrantLock.java:285)
at com.nicksxs.thread_dump_demo.ThreadDumpDemoApplication$2.run(ThreadDumpDemoApplication.java:34)
Locked ownable synchronizers:
- <0x000000076f5d4360> (a java.util.concurrent.locks.ReentrantLock$NonfairSync)
"mythread1" #139 prio=5 os_prio=31 tid=0x00007fc9de873800 nid=0x9a03 waiting on condition [0x0000700006eb6000]
java.lang.Thread.State: WAITING (parking)
at sun.misc.Unsafe.park(Native Method)
- parking to wait for <0x000000076f5d4360> (a java.util.concurrent.locks.ReentrantLock$NonfairSync)
at java.util.concurrent.locks.LockSupport.park(LockSupport.java:175)
at java.util.concurrent.locks.AbstractQueuedSynchronizer.parkAndCheckInterrupt(AbstractQueuedSynchronizer.java:836)
at java.util.concurrent.locks.AbstractQueuedSynchronizer.acquireQueued(AbstractQueuedSynchronizer.java:870)
at java.util.concurrent.locks.AbstractQueuedSynchronizer.acquire(AbstractQueuedSynchronizer.java:1199)
at java.util.concurrent.locks.ReentrantLock$NonfairSync.lock(ReentrantLock.java:209)
at java.util.concurrent.locks.ReentrantLock.lock(ReentrantLock.java:285)
at com.nicksxs.thread_dump_demo.ThreadDumpDemoApplication$1.run(ThreadDumpDemoApplication.java:22)
Locked ownable synchronizers:
- <0x000000076f5d4330> (a java.util.concurrent.locks.ReentrantLock$NonfairSync)
"http-nio-8080-Acceptor" #137 daemon prio=5 os_prio=31 tid=0x00007fc9de1ac000 nid=0x9b03 runnable [0x0000700006db3000]
java.lang.Thread.State: RUNNABLE
at sun.nio.ch.ServerSocketChannelImpl.accept0(Native Method)
at sun.nio.ch.ServerSocketChannelImpl.accept(ServerSocketChannelImpl.java:422)
at sun.nio.ch.ServerSocketChannelImpl.accept(ServerSocketChannelImpl.java:250)
- locked <0x000000076f1e4820> (a java.lang.Object)
at org.apache.tomcat.util.net.NioEndpoint.serverSocketAccept(NioEndpoint.java:469)
at org.apache.tomcat.util.net.NioEndpoint.serverSocketAccept(NioEndpoint.java:71)
at org.apache.tomcat.util.net.Acceptor.run(Acceptor.java:95)
at java.lang.Thread.run(Thread.java:748)
Locked ownable synchronizers:
- None
"http-nio-8080-ClientPoller" #136 daemon prio=5 os_prio=31 tid=0x00007fc9dd876800 nid=0x6503 runnable [0x0000700006cb0000]
java.lang.Thread.State: RUNNABLE
at sun.nio.ch.KQueueArrayWrapper.kevent0(Native Method)
at sun.nio.ch.KQueueArrayWrapper.poll(KQueueArrayWrapper.java:198)
at sun.nio.ch.KQueueSelectorImpl.doSelect(KQueueSelectorImpl.java:117)
at sun.nio.ch.SelectorImpl.lockAndDoSelect(SelectorImpl.java:86)
- locked <0x000000076f2978c8> (a sun.nio.ch.Util$3)
- locked <0x000000076f2978b8> (a java.util.Collections$UnmodifiableSet)
- locked <0x000000076f297798> (a sun.nio.ch.KQueueSelectorImpl)
at sun.nio.ch.SelectorImpl.select(SelectorImpl.java:97)
at org.apache.tomcat.util.net.NioEndpoint$Poller.run(NioEndpoint.java:709)
at java.lang.Thread.run(Thread.java:748)
Locked ownable synchronizers:
- None
"http-nio-8080-exec-10" #135 daemon prio=5 os_prio=31 tid=0x00007fc9de1af000 nid=0x9d03 waiting on condition [0x0000700006bad000]
java.lang.Thread.State: WAITING (parking)
at sun.misc.Unsafe.park(Native Method)
- parking to wait for <0x000000076f26aa00> (a java.util.concurrent.locks.AbstractQueuedSynchronizer$ConditionObject)
at java.util.concurrent.locks.LockSupport.park(LockSupport.java:175)
at java.util.concurrent.locks.AbstractQueuedSynchronizer$ConditionObject.await(AbstractQueuedSynchronizer.java:2039)
at java.util.concurrent.LinkedBlockingQueue.take(LinkedBlockingQueue.java:442)
at org.apache.tomcat.util.threads.TaskQueue.take(TaskQueue.java:107)
at org.apache.tomcat.util.threads.TaskQueue.take(TaskQueue.java:33)
at java.util.concurrent.ThreadPoolExecutor.getTask(ThreadPoolExecutor.java:1074)
at java.util.concurrent.ThreadPoolExecutor.runWorker(ThreadPoolExecutor.java:1134)
at java.util.concurrent.ThreadPoolExecutor$Worker.run(ThreadPoolExecutor.java:624)
at org.apache.tomcat.util.threads.TaskThread$WrappingRunnable.run(TaskThread.java:61)
at java.lang.Thread.run(Thread.java:748)
Locked ownable synchronizers:
- None
"http-nio-8080-exec-9" #134 daemon prio=5 os_prio=31 tid=0x00007fc9de1ab800 nid=0x6403 waiting on condition [0x0000700006aaa000]
java.lang.Thread.State: WAITING (parking)
at sun.misc.Unsafe.park(Native Method)
- parking to wait for <0x000000076f26aa00> (a java.util.concurrent.locks.AbstractQueuedSynchronizer$ConditionObject)
at java.util.concurrent.locks.LockSupport.park(LockSupport.java:175)
at java.util.concurrent.locks.AbstractQueuedSynchronizer$ConditionObject.await(AbstractQueuedSynchronizer.java:2039)
at java.util.concurrent.LinkedBlockingQueue.take(LinkedBlockingQueue.java:442)
at org.apache.tomcat.util.threads.TaskQueue.take(TaskQueue.java:107)
at org.apache.tomcat.util.threads.TaskQueue.take(TaskQueue.java:33)
at java.util.concurrent.ThreadPoolExecutor.getTask(ThreadPoolExecutor.java:1074)
at java.util.concurrent.ThreadPoolExecutor.runWorker(ThreadPoolExecutor.java:1134)
at java.util.concurrent.ThreadPoolExecutor$Worker.run(ThreadPoolExecutor.java:624)
at org.apache.tomcat.util.threads.TaskThread$WrappingRunnable.run(TaskThread.java:61)
at java.lang.Thread.run(Thread.java:748)
Locked ownable synchronizers:
- None
"http-nio-8080-exec-8" #133 daemon prio=5 os_prio=31 tid=0x00007fc9de873000 nid=0x9f03 waiting on condition [0x00007000069a7000]
java.lang.Thread.State: WAITING (parking)
at sun.misc.Unsafe.park(Native Method)
- parking to wait for <0x000000076f26aa00> (a java.util.concurrent.locks.AbstractQueuedSynchronizer$ConditionObject)
at java.util.concurrent.locks.LockSupport.park(LockSupport.java:175)
at java.util.concurrent.locks.AbstractQueuedSynchronizer$ConditionObject.await(AbstractQueuedSynchronizer.java:2039)
at java.util.concurrent.LinkedBlockingQueue.take(LinkedBlockingQueue.java:442)
at org.apache.tomcat.util.threads.TaskQueue.take(TaskQueue.java:107)
at org.apache.tomcat.util.threads.TaskQueue.take(TaskQueue.java:33)
at java.util.concurrent.ThreadPoolExecutor.getTask(ThreadPoolExecutor.java:1074)
at java.util.concurrent.ThreadPoolExecutor.runWorker(ThreadPoolExecutor.java:1134)
at java.util.concurrent.ThreadPoolExecutor$Worker.run(ThreadPoolExecutor.java:624)
at org.apache.tomcat.util.threads.TaskThread$WrappingRunnable.run(TaskThread.java:61)
at java.lang.Thread.run(Thread.java:748)
Locked ownable synchronizers:
- None
"http-nio-8080-exec-7" #132 daemon prio=5 os_prio=31 tid=0x00007fc9df0a1800 nid=0xa103 waiting on condition [0x00007000068a4000]
java.lang.Thread.State: WAITING (parking)
at sun.misc.Unsafe.park(Native Method)
- parking to wait for <0x000000076f26aa00> (a java.util.concurrent.locks.AbstractQueuedSynchronizer$ConditionObject)
at java.util.concurrent.locks.LockSupport.park(LockSupport.java:175)
at java.util.concurrent.locks.AbstractQueuedSynchronizer$ConditionObject.await(AbstractQueuedSynchronizer.java:2039)
at java.util.concurrent.LinkedBlockingQueue.take(LinkedBlockingQueue.java:442)
at org.apache.tomcat.util.threads.TaskQueue.take(TaskQueue.java:107)
at org.apache.tomcat.util.threads.TaskQueue.take(TaskQueue.java:33)
at java.util.concurrent.ThreadPoolExecutor.getTask(ThreadPoolExecutor.java:1074)
at java.util.concurrent.ThreadPoolExecutor.runWorker(ThreadPoolExecutor.java:1134)
at java.util.concurrent.ThreadPoolExecutor$Worker.run(ThreadPoolExecutor.java:624)
at org.apache.tomcat.util.threads.TaskThread$WrappingRunnable.run(TaskThread.java:61)
at java.lang.Thread.run(Thread.java:748)
Locked ownable synchronizers:
- None
"http-nio-8080-exec-6" #131 daemon prio=5 os_prio=31 tid=0x00007fc9df242800 nid=0x6103 waiting on condition [0x00007000067a1000]
java.lang.Thread.State: WAITING (parking)
at sun.misc.Unsafe.park(Native Method)
- parking to wait for <0x000000076f26aa00> (a java.util.concurrent.locks.AbstractQueuedSynchronizer$ConditionObject)
at java.util.concurrent.locks.LockSupport.park(LockSupport.java:175)
at java.util.concurrent.locks.AbstractQueuedSynchronizer$ConditionObject.await(AbstractQueuedSynchronizer.java:2039)
at java.util.concurrent.LinkedBlockingQueue.take(LinkedBlockingQueue.java:442)
at org.apache.tomcat.util.threads.TaskQueue.take(TaskQueue.java:107)
at org.apache.tomcat.util.threads.TaskQueue.take(TaskQueue.java:33)
at java.util.concurrent.ThreadPoolExecutor.getTask(ThreadPoolExecutor.java:1074)
at java.util.concurrent.ThreadPoolExecutor.runWorker(ThreadPoolExecutor.java:1134)
at java.util.concurrent.ThreadPoolExecutor$Worker.run(ThreadPoolExecutor.java:624)
at org.apache.tomcat.util.threads.TaskThread$WrappingRunnable.run(TaskThread.java:61)
at java.lang.Thread.run(Thread.java:748)
Locked ownable synchronizers:
- None
"http-nio-8080-exec-5" #130 daemon prio=5 os_prio=31 tid=0x00007fc9de872000 nid=0x5f03 waiting on condition [0x000070000669e000]
java.lang.Thread.State: WAITING (parking)
at sun.misc.Unsafe.park(Native Method)
- parking to wait for <0x000000076f26aa00> (a java.util.concurrent.locks.AbstractQueuedSynchronizer$ConditionObject)
at java.util.concurrent.locks.LockSupport.park(LockSupport.java:175)
at java.util.concurrent.locks.AbstractQueuedSynchronizer$ConditionObject.await(AbstractQueuedSynchronizer.java:2039)
at java.util.concurrent.LinkedBlockingQueue.take(LinkedBlockingQueue.java:442)
at org.apache.tomcat.util.threads.TaskQueue.take(TaskQueue.java:107)
at org.apache.tomcat.util.threads.TaskQueue.take(TaskQueue.java:33)
at java.util.concurrent.ThreadPoolExecutor.getTask(ThreadPoolExecutor.java:1074)
at java.util.concurrent.ThreadPoolExecutor.runWorker(ThreadPoolExecutor.java:1134)
at java.util.concurrent.ThreadPoolExecutor$Worker.run(ThreadPoolExecutor.java:624)
at org.apache.tomcat.util.threads.TaskThread$WrappingRunnable.run(TaskThread.java:61)
at java.lang.Thread.run(Thread.java:748)
Locked ownable synchronizers:
- None
"http-nio-8080-exec-4" #129 daemon prio=5 os_prio=31 tid=0x00007fc9de1a6000 nid=0x5e03 waiting on condition [0x000070000659b000]
java.lang.Thread.State: WAITING (parking)
at sun.misc.Unsafe.park(Native Method)
- parking to wait for <0x000000076f26aa00> (a java.util.concurrent.locks.AbstractQueuedSynchronizer$ConditionObject)
at java.util.concurrent.locks.LockSupport.park(LockSupport.java:175)
at java.util.concurrent.locks.AbstractQueuedSynchronizer$ConditionObject.await(AbstractQueuedSynchronizer.java:2039)
at java.util.concurrent.LinkedBlockingQueue.take(LinkedBlockingQueue.java:442)
at org.apache.tomcat.util.threads.TaskQueue.take(TaskQueue.java:107)
at org.apache.tomcat.util.threads.TaskQueue.take(TaskQueue.java:33)
at java.util.concurrent.ThreadPoolExecutor.getTask(ThreadPoolExecutor.java:1074)
at java.util.concurrent.ThreadPoolExecutor.runWorker(ThreadPoolExecutor.java:1134)
at java.util.concurrent.ThreadPoolExecutor$Worker.run(ThreadPoolExecutor.java:624)
at org.apache.tomcat.util.threads.TaskThread$WrappingRunnable.run(TaskThread.java:61)
at java.lang.Thread.run(Thread.java:748)
Locked ownable synchronizers:
- None
"http-nio-8080-exec-3" #128 daemon prio=5 os_prio=31 tid=0x00007fc9de871800 nid=0x5c03 waiting on condition [0x0000700006498000]
java.lang.Thread.State: WAITING (parking)
at sun.misc.Unsafe.park(Native Method)
- parking to wait for <0x000000076f26aa00> (a java.util.concurrent.locks.AbstractQueuedSynchronizer$ConditionObject)
at java.util.concurrent.locks.LockSupport.park(LockSupport.java:175)
at java.util.concurrent.locks.AbstractQueuedSynchronizer$ConditionObject.await(AbstractQueuedSynchronizer.java:2039)
at java.util.concurrent.LinkedBlockingQueue.take(LinkedBlockingQueue.java:442)
at org.apache.tomcat.util.threads.TaskQueue.take(TaskQueue.java:107)
at org.apache.tomcat.util.threads.TaskQueue.take(TaskQueue.java:33)
at java.util.concurrent.ThreadPoolExecutor.getTask(ThreadPoolExecutor.java:1074)
at java.util.concurrent.ThreadPoolExecutor.runWorker(ThreadPoolExecutor.java:1134)
at java.util.concurrent.ThreadPoolExecutor$Worker.run(ThreadPoolExecutor.java:624)
at org.apache.tomcat.util.threads.TaskThread$WrappingRunnable.run(TaskThread.java:61)
at java.lang.Thread.run(Thread.java:748)
Locked ownable synchronizers:
- None
"http-nio-8080-exec-2" #127 daemon prio=5 os_prio=31 tid=0x00007fc9dead9000 nid=0x5b03 waiting on condition [0x0000700006395000]
java.lang.Thread.State: WAITING (parking)
at sun.misc.Unsafe.park(Native Method)
- parking to wait for <0x000000076f26aa00> (a java.util.concurrent.locks.AbstractQueuedSynchronizer$ConditionObject)
at java.util.concurrent.locks.LockSupport.park(LockSupport.java:175)
at java.util.concurrent.locks.AbstractQueuedSynchronizer$ConditionObject.await(AbstractQueuedSynchronizer.java:2039)
at java.util.concurrent.LinkedBlockingQueue.take(LinkedBlockingQueue.java:442)
at org.apache.tomcat.util.threads.TaskQueue.take(TaskQueue.java:107)
at org.apache.tomcat.util.threads.TaskQueue.take(TaskQueue.java:33)
at java.util.concurrent.ThreadPoolExecutor.getTask(ThreadPoolExecutor.java:1074)
at java.util.concurrent.ThreadPoolExecutor.runWorker(ThreadPoolExecutor.java:1134)
at java.util.concurrent.ThreadPoolExecutor$Worker.run(ThreadPoolExecutor.java:624)
at org.apache.tomcat.util.threads.TaskThread$WrappingRunnable.run(TaskThread.java:61)
at java.lang.Thread.run(Thread.java:748)
Locked ownable synchronizers:
- None
"http-nio-8080-exec-1" #126 daemon prio=5 os_prio=31 tid=0x00007fc9ddb00000 nid=0x5a03 waiting on condition [0x0000700006292000]
java.lang.Thread.State: WAITING (parking)
at sun.misc.Unsafe.park(Native Method)
- parking to wait for <0x000000076f26aa00> (a java.util.concurrent.locks.AbstractQueuedSynchronizer$ConditionObject)
at java.util.concurrent.locks.LockSupport.park(LockSupport.java:175)
at java.util.concurrent.locks.AbstractQueuedSynchronizer$ConditionObject.await(AbstractQueuedSynchronizer.java:2039)
at java.util.concurrent.LinkedBlockingQueue.take(LinkedBlockingQueue.java:442)
at org.apache.tomcat.util.threads.TaskQueue.take(TaskQueue.java:107)
at org.apache.tomcat.util.threads.TaskQueue.take(TaskQueue.java:33)
at java.util.concurrent.ThreadPoolExecutor.getTask(ThreadPoolExecutor.java:1074)
at java.util.concurrent.ThreadPoolExecutor.runWorker(ThreadPoolExecutor.java:1134)
at java.util.concurrent.ThreadPoolExecutor$Worker.run(ThreadPoolExecutor.java:624)
at org.apache.tomcat.util.threads.TaskThread$WrappingRunnable.run(TaskThread.java:61)
at java.lang.Thread.run(Thread.java:748)
Locked ownable synchronizers:
- None
"http-nio-8080-BlockPoller" #125 daemon prio=5 os_prio=31 tid=0x00007fc9df242000 nid=0xa503 runnable [0x000070000618f000]
java.lang.Thread.State: RUNNABLE
at sun.nio.ch.KQueueArrayWrapper.kevent0(Native Method)
at sun.nio.ch.KQueueArrayWrapper.poll(KQueueArrayWrapper.java:198)
at sun.nio.ch.KQueueSelectorImpl.doSelect(KQueueSelectorImpl.java:117)
at sun.nio.ch.SelectorImpl.lockAndDoSelect(SelectorImpl.java:86)
- locked <0x000000076f1eea30> (a sun.nio.ch.Util$3)
- locked <0x000000076f1ee198> (a java.util.Collections$UnmodifiableSet)
- locked <0x000000076f1ee010> (a sun.nio.ch.KQueueSelectorImpl)
at sun.nio.ch.SelectorImpl.select(SelectorImpl.java:97)
at org.apache.tomcat.util.net.NioBlockingSelector$BlockPoller.run(NioBlockingSelector.java:313)
Locked ownable synchronizers:
- None
"container-0" #124 prio=5 os_prio=31 tid=0x00007fc9df06a000 nid=0x5803 waiting on condition [0x000070000608c000]
java.lang.Thread.State: TIMED_WAITING (sleeping)
at java.lang.Thread.sleep(Native Method)
at org.apache.catalina.core.StandardServer.await(StandardServer.java:570)
at org.springframework.boot.web.embedded.tomcat.TomcatWebServer$1.run(TomcatWebServer.java:197)
Locked ownable synchronizers:
- None
"Catalina-utility-2" #123 prio=1 os_prio=31 tid=0x00007fc9de886000 nid=0xa80f waiting on condition [0x0000700005f89000]
java.lang.Thread.State: WAITING (parking)
at sun.misc.Unsafe.park(Native Method)
- parking to wait for <0x000000076c88ab58> (a java.util.concurrent.locks.AbstractQueuedSynchronizer$ConditionObject)
at java.util.concurrent.locks.LockSupport.park(LockSupport.java:175)
at java.util.concurrent.locks.AbstractQueuedSynchronizer$ConditionObject.await(AbstractQueuedSynchronizer.java:2039)
at java.util.concurrent.ScheduledThreadPoolExecutor$DelayedWorkQueue.take(ScheduledThreadPoolExecutor.java:1088)
at java.util.concurrent.ScheduledThreadPoolExecutor$DelayedWorkQueue.take(ScheduledThreadPoolExecutor.java:809)
at java.util.concurrent.ThreadPoolExecutor.getTask(ThreadPoolExecutor.java:1074)
at java.util.concurrent.ThreadPoolExecutor.runWorker(ThreadPoolExecutor.java:1134)
at java.util.concurrent.ThreadPoolExecutor$Worker.run(ThreadPoolExecutor.java:624)
at org.apache.tomcat.util.threads.TaskThread$WrappingRunnable.run(TaskThread.java:61)
at java.lang.Thread.run(Thread.java:748)
Locked ownable synchronizers:
- None
"Catalina-utility-1" #122 prio=1 os_prio=31 tid=0x00007fc9de884000 nid=0x5667 waiting on condition [0x0000700005e86000]
java.lang.Thread.State: TIMED_WAITING (parking)
at sun.misc.Unsafe.park(Native Method)
- parking to wait for <0x000000076c88ab58> (a java.util.concurrent.locks.AbstractQueuedSynchronizer$ConditionObject)
at java.util.concurrent.locks.LockSupport.parkNanos(LockSupport.java:215)
at java.util.concurrent.locks.AbstractQueuedSynchronizer$ConditionObject.awaitNanos(AbstractQueuedSynchronizer.java:2078)
at java.util.concurrent.ScheduledThreadPoolExecutor$DelayedWorkQueue.take(ScheduledThreadPoolExecutor.java:1093)
at java.util.concurrent.ScheduledThreadPoolExecutor$DelayedWorkQueue.take(ScheduledThreadPoolExecutor.java:809)
at java.util.concurrent.ThreadPoolExecutor.getTask(ThreadPoolExecutor.java:1074)
at java.util.concurrent.ThreadPoolExecutor.runWorker(ThreadPoolExecutor.java:1134)
at java.util.concurrent.ThreadPoolExecutor$Worker.run(ThreadPoolExecutor.java:624)
at org.apache.tomcat.util.threads.TaskThread$WrappingRunnable.run(TaskThread.java:61)
at java.lang.Thread.run(Thread.java:748)
Locked ownable synchronizers:
- None
"RMI Scheduler(0)" #15 daemon prio=5 os_prio=31 tid=0x00007fc9de9ee000 nid=0x5503 waiting on condition [0x0000700005d83000]
java.lang.Thread.State: TIMED_WAITING (parking)
at sun.misc.Unsafe.park(Native Method)
- parking to wait for <0x00000006c0015410> (a java.util.concurrent.locks.AbstractQueuedSynchronizer$ConditionObject)
at java.util.concurrent.locks.LockSupport.parkNanos(LockSupport.java:215)
at java.util.concurrent.locks.AbstractQueuedSynchronizer$ConditionObject.awaitNanos(AbstractQueuedSynchronizer.java:2078)
at java.util.concurrent.ScheduledThreadPoolExecutor$DelayedWorkQueue.take(ScheduledThreadPoolExecutor.java:1093)
at java.util.concurrent.ScheduledThreadPoolExecutor$DelayedWorkQueue.take(ScheduledThreadPoolExecutor.java:809)
at java.util.concurrent.ThreadPoolExecutor.getTask(ThreadPoolExecutor.java:1074)
at java.util.concurrent.ThreadPoolExecutor.runWorker(ThreadPoolExecutor.java:1134)
at java.util.concurrent.ThreadPoolExecutor$Worker.run(ThreadPoolExecutor.java:624)
at java.lang.Thread.run(Thread.java:748)
Locked ownable synchronizers:
- None
"Attach Listener" #13 daemon prio=9 os_prio=31 tid=0x00007fc9df149800 nid=0x3c07 waiting on condition [0x0000000000000000]
java.lang.Thread.State: RUNNABLE
Locked ownable synchronizers:
- None
"RMI TCP Accept-0" #11 daemon prio=5 os_prio=31 tid=0x00007fc9df100000 nid=0x4003 runnable [0x0000700005977000]
java.lang.Thread.State: RUNNABLE
at java.net.PlainSocketImpl.socketAccept(Native Method)
at java.net.AbstractPlainSocketImpl.accept(AbstractPlainSocketImpl.java:409)
at java.net.ServerSocket.implAccept(ServerSocket.java:545)
at java.net.ServerSocket.accept(ServerSocket.java:513)
at sun.management.jmxremote.LocalRMIServerSocketFactory$1.accept(LocalRMIServerSocketFactory.java:52)
at sun.rmi.transport.tcp.TCPTransport$AcceptLoop.executeAcceptLoop(TCPTransport.java:405)
at sun.rmi.transport.tcp.TCPTransport$AcceptLoop.run(TCPTransport.java:377)
at java.lang.Thread.run(Thread.java:748)
Locked ownable synchronizers:
- None
"Service Thread" #9 daemon prio=9 os_prio=31 tid=0x00007fc9df0ce800 nid=0x4103 runnable [0x0000000000000000]
java.lang.Thread.State: RUNNABLE
Locked ownable synchronizers:
- None
"C1 CompilerThread2" #8 daemon prio=9 os_prio=31 tid=0x00007fc9df0ce000 nid=0x4203 waiting on condition [0x0000000000000000]
java.lang.Thread.State: RUNNABLE
Locked ownable synchronizers:
- None
"C2 CompilerThread1" #7 daemon prio=9 os_prio=31 tid=0x00007fc9de0a3800 nid=0x3503 waiting on condition [0x0000000000000000]
java.lang.Thread.State: RUNNABLE
Locked ownable synchronizers:
- None
"C2 CompilerThread0" #6 daemon prio=9 os_prio=31 tid=0x00007fc9de89b000 nid=0x3403 waiting on condition [0x0000000000000000]
java.lang.Thread.State: RUNNABLE
Locked ownable synchronizers:
- None
"Monitor Ctrl-Break" #5 daemon prio=5 os_prio=31 tid=0x00007fc9df0ca000 nid=0x3303 runnable [0x0000700005468000]
java.lang.Thread.State: RUNNABLE
at java.net.SocketInputStream.socketRead0(Native Method)
at java.net.SocketInputStream.socketRead(SocketInputStream.java:116)
at java.net.SocketInputStream.read(SocketInputStream.java:171)
at java.net.SocketInputStream.read(SocketInputStream.java:141)
at sun.nio.cs.StreamDecoder.readBytes(StreamDecoder.java:284)
at sun.nio.cs.StreamDecoder.implRead(StreamDecoder.java:326)
at sun.nio.cs.StreamDecoder.read(StreamDecoder.java:178)
- locked <0x00000006c001b760> (a java.io.InputStreamReader)
at java.io.InputStreamReader.read(InputStreamReader.java:184)
at java.io.BufferedReader.fill(BufferedReader.java:161)
at java.io.BufferedReader.readLine(BufferedReader.java:324)
- locked <0x00000006c001b760> (a java.io.InputStreamReader)
at java.io.BufferedReader.readLine(BufferedReader.java:389)
at com.intellij.rt.execution.application.AppMainV2$1.run(AppMainV2.java:64)
Locked ownable synchronizers:
- None
"Signal Dispatcher" #4 daemon prio=9 os_prio=31 tid=0x00007fc9de824000 nid=0x4503 runnable [0x0000000000000000]
java.lang.Thread.State: RUNNABLE
Locked ownable synchronizers:
- None
"Finalizer" #3 daemon prio=8 os_prio=31 tid=0x00007fc9dd811800 nid=0x4f03 in Object.wait() [0x0000700005262000]
java.lang.Thread.State: WAITING (on object monitor)
at java.lang.Object.wait(Native Method)
- waiting on <0x00000006c0008348> (a java.lang.ref.ReferenceQueue$Lock)
at java.lang.ref.ReferenceQueue.remove(ReferenceQueue.java:144)
- locked <0x00000006c0008348> (a java.lang.ref.ReferenceQueue$Lock)
at java.lang.ref.ReferenceQueue.remove(ReferenceQueue.java:165)
at java.lang.ref.Finalizer$FinalizerThread.run(Finalizer.java:216)
Locked ownable synchronizers:
- None
"Reference Handler" #2 daemon prio=10 os_prio=31 tid=0x00007fc9de02a000 nid=0x5003 in Object.wait() [0x000070000515f000]
java.lang.Thread.State: WAITING (on object monitor)
at java.lang.Object.wait(Native Method)
- waiting on <0x00000006c001b940> (a java.lang.ref.Reference$Lock)
at java.lang.Object.wait(Object.java:502)
at java.lang.ref.Reference.tryHandlePending(Reference.java:191)
- locked <0x00000006c001b940> (a java.lang.ref.Reference$Lock)
at java.lang.ref.Reference$ReferenceHandler.run(Reference.java:153)
Locked ownable synchronizers:
- None
"VM Thread" os_prio=31 tid=0x00007fc9df00b800 nid=0x2c03 runnable
"GC task thread#0 (ParallelGC)" os_prio=31 tid=0x00007fc9de805000 nid=0x1e07 runnable
"GC task thread#1 (ParallelGC)" os_prio=31 tid=0x00007fc9de003800 nid=0x2a03 runnable
"GC task thread#2 (ParallelGC)" os_prio=31 tid=0x00007fc9df002000 nid=0x5403 runnable
"GC task thread#3 (ParallelGC)" os_prio=31 tid=0x00007fc9df002800 nid=0x5203 runnable
"VM Periodic Task Thread" os_prio=31 tid=0x00007fc9df11a800 nid=0x3a03 waiting on condition
JNI global references: 1087
Found one Java-level deadlock:
=============================
"mythread2":
waiting for ownable synchronizer 0x000000076f5d4330, (a java.util.concurrent.locks.ReentrantLock$NonfairSync),
which is held by "mythread1"
"mythread1":
waiting for ownable synchronizer 0x000000076f5d4360, (a java.util.concurrent.locks.ReentrantLock$NonfairSync),
which is held by "mythread2"
Java stack information for the threads listed above:
===================================================
"mythread2":
at sun.misc.Unsafe.park(Native Method)
- parking to wait for <0x000000076f5d4330> (a java.util.concurrent.locks.ReentrantLock$NonfairSync)
at java.util.concurrent.locks.LockSupport.park(LockSupport.java:175)
at java.util.concurrent.locks.AbstractQueuedSynchronizer.parkAndCheckInterrupt(AbstractQueuedSynchronizer.java:836)
at java.util.concurrent.locks.AbstractQueuedSynchronizer.acquireQueued(AbstractQueuedSynchronizer.java:870)
at java.util.concurrent.locks.AbstractQueuedSynchronizer.acquire(AbstractQueuedSynchronizer.java:1199)
at java.util.concurrent.locks.ReentrantLock$NonfairSync.lock(ReentrantLock.java:209)
at java.util.concurrent.locks.ReentrantLock.lock(ReentrantLock.java:285)
at com.nicksxs.thread_dump_demo.ThreadDumpDemoApplication$2.run(ThreadDumpDemoApplication.java:34)
"mythread1":
at sun.misc.Unsafe.park(Native Method)
- parking to wait for <0x000000076f5d4360> (a java.util.concurrent.locks.ReentrantLock$NonfairSync)
at java.util.concurrent.locks.LockSupport.park(LockSupport.java:175)
at java.util.concurrent.locks.AbstractQueuedSynchronizer.parkAndCheckInterrupt(AbstractQueuedSynchronizer.java:836)
at java.util.concurrent.locks.AbstractQueuedSynchronizer.acquireQueued(AbstractQueuedSynchronizer.java:870)
at java.util.concurrent.locks.AbstractQueuedSynchronizer.acquire(AbstractQueuedSynchronizer.java:1199)
at java.util.concurrent.locks.ReentrantLock$NonfairSync.lock(ReentrantLock.java:209)
at java.util.concurrent.locks.ReentrantLock.lock(ReentrantLock.java:285)
at com.nicksxs.thread_dump_demo.ThreadDumpDemoApplication$1.run(ThreadDumpDemoApplication.java:22)
Found 1 deadlock.
前面的信息其实上次就看过了,后面就可以发现有个死锁了,
上面比较长,把主要的截出来,就是这边的,这点就很强大了。
惯例还是看一下帮助信息
这个相对命令比较多,不过因为现在 dump 下来我们可能会用文件模式,然后将文件下载下来使用 mat 进行分析,所以可以使用jmap -dump:live,format=b,file=heap.bin <pid>
命令照着上面看的就是打印活着的对象,然后以二进制格式,文件名叫 heap.bin 然后最后就是进程 id,打印出来以后可以用 mat 打开
这样就可以很清晰的看到应用里的各种信息,jmap 直接在命令中还可以看很多信息,比如使用jmap -histo <pid>打印对象的实例数和对象占用的内存
jmap -finalizerinfo <pid> 打印正在等候回收的对象
对于一些应用内存已经占满了,jstack 和 jmap 可能会连不上的情况,可以使用-F参数强制打印线程或者 dump 文件,但是要注意这两者使用的用户必须与 java 进程启动用户一致,并且使用的 jdk 也要一致
首先是org.apache.rocketmq.broker.BrokerStartup中的 main 函数,org.apache.rocketmq.broker.BrokerStartup#createBrokerController基本就是读取参数,这里差点把最核心的初始化给漏了,
final BrokerController controller = new BrokerController(
brokerConfig,
nettyServerConfig,
nettyClientConfig,
messageStoreConfig);
// remember all configs to prevent discard
controller.getConfiguration().registerConfig(properties);
boolean initResult = controller.initialize();
前面是以 broker 配置,netty 的服务端和客户端配置,以及消息存储配置在实例化 BrokerController,然后就是初始化了
public boolean initialize() throws CloneNotSupportedException {
boolean result = this.topicConfigManager.load();
result = result && this.consumerOffsetManager.load();
result = result && this.subscriptionGroupManager.load();
result = result && this.consumerFilterManager.load();
前面这些就是各个配置的 load 了,然后是个我认为比较重要的部分messageStore 的实例化,
if (result) {
try {
this.messageStore =
new DefaultMessageStore(this.messageStoreConfig, this.brokerStatsManager, this.messageArrivingListener,
this.brokerConfig);
if (messageStoreConfig.isEnableDLegerCommitLog()) {
DLedgerRoleChangeHandler roleChangeHandler = new DLedgerRoleChangeHandler(this, (DefaultMessageStore) messageStore);
((DLedgerCommitLog)((DefaultMessageStore) messageStore).getCommitLog()).getdLedgerServer().getdLedgerLeaderElector().addRoleChangeHandler(roleChangeHandler);
}
this.brokerStats = new BrokerStats((DefaultMessageStore) this.messageStore);
//load plugin
MessageStorePluginContext context = new MessageStorePluginContext(messageStoreConfig, brokerStatsManager, messageArrivingListener, brokerConfig);
this.messageStore = MessageStoreFactory.build(context, this.messageStore);
this.messageStore.getDispatcherList().addFirst(new CommitLogDispatcherCalcBitMap(this.brokerConfig, this.consumerFilterManager));
} catch (IOException e) {
result = false;
log.error("Failed to initialize", e);
}
}
result = result && this.messageStore.load();
先是实例化,实例化构造函数里的代码比较重要,重点看一下
public DefaultMessageStore(final MessageStoreConfig messageStoreConfig, final BrokerStatsManager brokerStatsManager,
final MessageArrivingListener messageArrivingListener, final BrokerConfig brokerConfig) throws IOException {
this.messageArrivingListener = messageArrivingListener;
this.brokerConfig = brokerConfig;
this.messageStoreConfig = messageStoreConfig;
this.brokerStatsManager = brokerStatsManager;
this.allocateMappedFileService = new AllocateMappedFileService(this);
if (messageStoreConfig.isEnableDLegerCommitLog()) {
this.commitLog = new DLedgerCommitLog(this);
} else {
this.commitLog = new CommitLog(this);
}
this.consumeQueueTable = new ConcurrentHashMap<>(32);
this.flushConsumeQueueService = new FlushConsumeQueueService();
this.cleanCommitLogService = new CleanCommitLogService();
this.cleanConsumeQueueService = new CleanConsumeQueueService();
this.storeStatsService = new StoreStatsService();
this.indexService = new IndexService(this);
if (!messageStoreConfig.isEnableDLegerCommitLog()) {
this.haService = new HAService(this);
} else {
this.haService = null;
}
this.reputMessageService = new ReputMessageService();
this.scheduleMessageService = new ScheduleMessageService(this);
this.transientStorePool = new TransientStorePool(messageStoreConfig);
if (messageStoreConfig.isTransientStorePoolEnable()) {
this.transientStorePool.init();
}
this.allocateMappedFileService.start();
this.indexService.start();
this.dispatcherList = new LinkedList<>();
this.dispatcherList.addLast(new CommitLogDispatcherBuildConsumeQueue());
this.dispatcherList.addLast(new CommitLogDispatcherBuildIndex());
File file = new File(StorePathConfigHelper.getLockFile(messageStoreConfig.getStorePathRootDir()));
MappedFile.ensureDirOK(file.getParent());
lockFile = new RandomAccessFile(file, "rw");
}
这里面有很多类,不过先把从构造函数里传进来的忽略下,接下来就是 AllocateMappedFileService 这个service,前面看过文章的可能会根据上面的代码猜到,这也是个 ServiceThread,如果是对RocketMQ 有所了解的可能从名字可以看出这个类是关于 RocketMQ 消息怎么落盘的,当需要创建MappedFile时(在MapedFileQueue.getLastMapedFile方法中),向该线程的requestQueue队列中放入AllocateRequest请求对象,该线程会在后台监听该队列,并在后台创建MapedFile对象,即同时创建了物理文件。然后是创建了 IndexService 服务线程,用来给创建索引;还有是FlushConsumeQueueService是将ConsumeQueue 刷入磁盘;CleanCommitLogService用来清理过期的 CommitLog,默认是 72 小时以上;CleanConsumeQueueService是将小于最新的 CommitLog 偏移量的 ConsumeQueue 清理掉;StoreStatsService是储存统计服务;HAService用于CommitLog 的主备同步;ScheduleMessageService用于定时消息;还有就是这个ReputMessageService非常重要,就是由它实现了将 CommitLog 以 topic+queue 纬度构建 ConsumeQueue,后面TransientStorePool是异步刷盘时的存储buffer,也可以从后面的判断中看出来
public boolean isTransientStorePoolEnable() {
return transientStorePoolEnable && FlushDiskType.ASYNC_FLUSH == getFlushDiskType()
&& BrokerRole.SLAVE != getBrokerRole();
}
再然后就是启动两个服务线程,dispatcherList是为CommitLog文件转发请求,差不多这个初始化就这些内容。
然后回到外层,下面是主备切换的配置,然后是数据统计,接着是存储插件加载,然后是往转发器链表里再加一个过滤器
if (messageStoreConfig.isEnableDLegerCommitLog()) {
DLedgerRoleChangeHandler roleChangeHandler = new DLedgerRoleChangeHandler(this, (DefaultMessageStore) messageStore);
((DLedgerCommitLog)((DefaultMessageStore) messageStore).getCommitLog()).getdLedgerServer().getdLedgerLeaderElector().addRoleChangeHandler(roleChangeHandler);
}
this.brokerStats = new BrokerStats((DefaultMessageStore) this.messageStore);
//load plugin
MessageStorePluginContext context = new MessageStorePluginContext(messageStoreConfig, brokerStatsManager, messageArrivingListener, brokerConfig);
this.messageStore = MessageStoreFactory.build(context, this.messageStore);
this.messageStore.getDispatcherList().addFirst(new CommitLogDispatcherCalcBitMap(this.brokerConfig, this.consumerFilterManager));
接下来就是org.apache.rocketmq.store.MessageStore#load的过程了,
2)调用CommitLog.load方法,在此方法中调用MapedFileQueue.load方法,将$HOME /store/commitlog目录下的所有文件加载到MapedFileQueue的List
3)调用DefaultMessageStore.loadConsumeQueue方法加载consumequeue文件数据到DefaultMessageStore.consumeQueueTable集合中。
初始化StoreCheckPoint对象,加载$HOME/store/checkpoint文件,该文件记录三个字段值,分别是物理队列消息时间戳、逻辑队列消息时间戳、索引队列消息时间戳。
调用IndexService.load方法加载$HOME/store/index目录下的文件。对该目录下的每个文件初始化一个IndexFile对象。然后调用IndexFile对象的load方法将IndexHeader加载到对象的变量中;再根据检查是否存在abort文件,若有存在abort文件,则表示Broker表示上次是异常退出的,则检查checkpoint的indexMsgTimestamp字段值是否小于IndexHeader的endTimestamp值,indexMsgTimestamp值表示最后刷盘的时间,若小于则表示在最后刷盘之后在该文件中还创建了索引,则要删除该Index文件,否则将该IndexFile对象放入indexFileList:ArrayList
然后调用org.apache.rocketmq.store.DefaultMessageStore#recover恢复,前面有根据boolean lastExitOK = !this.isTempFileExist();临时文件是否存在来判断上一次是否正常退出,根据这个状态来选择什么恢复策略
接下去是初始化 Netty 服务端,初始化发送消息线程池(sendMessageExecutor)、拉取消息线程池(pullMessageExecutor)、管理Broker线程池(adminBrokerExecutor)、客户端管理线程池(clientManageExecutor),注册事件处理器,包括发送消息事件处理器(SendMessageProcessor)、拉取消息事件处理器、查询消息事件处理器(QueryMessageProcessor,包括客户端的心跳事件、注销事件、获取消费者列表事件、更新更新和查询消费进度consumerOffset)、客户端管理事件处理器(ClientManageProcessor)、结束事务处理器(EndTransactionProcessor)、默认事件处理器(AdminBrokerProcessor),然后是定时任务
BrokerController.this.getBrokerStats().record(); 记录 Broker 状态
BrokerController.this.consumerOffsetManager.persist(); 持久化consumerOffset
BrokerController.this.consumerFilterManager.persist();持久化consumerFilter
BrokerController.this.protectBroker(); 保护 broker,消费慢,不让继续投递
BrokerController.this.printWaterMark(); 打印水位
log.info("dispatch behind commit log {} bytes", BrokerController.this.getMessageStore().dispatchBehindBytes()); 检查落后程度
BrokerController.this.brokerOuterAPI.fetchNameServerAddr(); 定时获取 nameserver
BrokerController.this.printMasterAndSlaveDiff(); 打印主从不一致
然后是 tsl,初始化事务消息,初始化 RPCHook
请把害怕打到公屏上🤦♂️,从线程池名字和调用的方法应该可以看出大部分的用途
this.remotingServer = new NettyRemotingServer(this.nettyServerConfig, this.clientHousekeepingService);
NettyServerConfig fastConfig = (NettyServerConfig) this.nettyServerConfig.clone();
fastConfig.setListenPort(nettyServerConfig.getListenPort() - 2);
this.fastRemotingServer = new NettyRemotingServer(fastConfig, this.clientHousekeepingService);
this.sendMessageExecutor = new BrokerFixedThreadPoolExecutor(
this.brokerConfig.getSendMessageThreadPoolNums(),
1000 * 60,
TimeUnit.MILLISECONDS,
this.sendThreadPoolQueue,
new ThreadFactoryImpl("SendMessageThread_"));
this.pullMessageExecutor = new BrokerFixedThreadPoolExecutor(
this.brokerConfig.getPullMessageThreadPoolNums(),
1000 * 60,
TimeUnit.MILLISECONDS,
this.pullThreadPoolQueue,
new ThreadFactoryImpl("PullMessageThread_"));
this.replyMessageExecutor = new BrokerFixedThreadPoolExecutor(
this.brokerConfig.getProcessReplyMessageThreadPoolNums(),
1000 * 60,
TimeUnit.MILLISECONDS,
this.replyThreadPoolQueue,
new ThreadFactoryImpl("ProcessReplyMessageThread_"));
this.queryMessageExecutor = new BrokerFixedThreadPoolExecutor(
this.brokerConfig.getQueryMessageThreadPoolNums(),
1000 * 60,
TimeUnit.MILLISECONDS,
this.queryThreadPoolQueue,
new ThreadFactoryImpl("QueryMessageThread_"));
this.adminBrokerExecutor =
Executors.newFixedThreadPool(this.brokerConfig.getAdminBrokerThreadPoolNums(), new ThreadFactoryImpl(
"AdminBrokerThread_"));
this.clientManageExecutor = new ThreadPoolExecutor(
this.brokerConfig.getClientManageThreadPoolNums(),
1000 * 60,
TimeUnit.MILLISECONDS,
this.clientManagerThreadPoolQueue,
new ThreadFactoryImpl("ClientManageThread_"));
this.heartbeatExecutor = new BrokerFixedThreadPoolExecutor(
this.brokerConfig.getHeartbeatThreadPoolNums(),
1000 * 60,
TimeUnit.MILLISECONDS,
this.heartbeatThreadPoolQueue,
new ThreadFactoryImpl("HeartbeatThread_", true));
this.endTransactionExecutor = new BrokerFixedThreadPoolExecutor(
this.brokerConfig.getEndTransactionThreadPoolNums(),
1000 * 60,
TimeUnit.MILLISECONDS,
this.endTransactionThreadPoolQueue,
new ThreadFactoryImpl("EndTransactionThread_"));
this.consumerManageExecutor =
Executors.newFixedThreadPool(this.brokerConfig.getConsumerManageThreadPoolNums(), new ThreadFactoryImpl(
"ConsumerManageThread_"));
this.registerProcessor();
final long initialDelay = UtilAll.computeNextMorningTimeMillis() - System.currentTimeMillis();
final long period = 1000 * 60 * 60 * 24;
this.scheduledExecutorService.scheduleAtFixedRate(new Runnable() {
@Override
public void run() {
try {
BrokerController.this.getBrokerStats().record();
} catch (Throwable e) {
log.error("schedule record error.", e);
}
}
}, initialDelay, period, TimeUnit.MILLISECONDS);
this.scheduledExecutorService.scheduleAtFixedRate(new Runnable() {
@Override
public void run() {
try {
BrokerController.this.consumerOffsetManager.persist();
} catch (Throwable e) {
log.error("schedule persist consumerOffset error.", e);
}
}
}, 1000 * 10, this.brokerConfig.getFlushConsumerOffsetInterval(), TimeUnit.MILLISECONDS);
this.scheduledExecutorService.scheduleAtFixedRate(new Runnable() {
@Override
public void run() {
try {
BrokerController.this.consumerFilterManager.persist();
} catch (Throwable e) {
log.error("schedule persist consumer filter error.", e);
}
}
}, 1000 * 10, 1000 * 10, TimeUnit.MILLISECONDS);
this.scheduledExecutorService.scheduleAtFixedRate(new Runnable() {
@Override
public void run() {
try {
BrokerController.this.protectBroker();
} catch (Throwable e) {
log.error("protectBroker error.", e);
}
}
}, 3, 3, TimeUnit.MINUTES);
this.scheduledExecutorService.scheduleAtFixedRate(new Runnable() {
@Override
public void run() {
try {
BrokerController.this.printWaterMark();
} catch (Throwable e) {
log.error("printWaterMark error.", e);
}
}
}, 10, 1, TimeUnit.SECONDS);
this.scheduledExecutorService.scheduleAtFixedRate(new Runnable() {
@Override
public void run() {
try {
log.info("dispatch behind commit log {} bytes", BrokerController.this.getMessageStore().dispatchBehindBytes());
} catch (Throwable e) {
log.error("schedule dispatchBehindBytes error.", e);
}
}
}, 1000 * 10, 1000 * 60, TimeUnit.MILLISECONDS);
if (this.brokerConfig.getNamesrvAddr() != null) {
this.brokerOuterAPI.updateNameServerAddressList(this.brokerConfig.getNamesrvAddr());
log.info("Set user specified name server address: {}", this.brokerConfig.getNamesrvAddr());
} else if (this.brokerConfig.isFetchNamesrvAddrByAddressServer()) {
this.scheduledExecutorService.scheduleAtFixedRate(new Runnable() {
@Override
public void run() {
try {
BrokerController.this.brokerOuterAPI.fetchNameServerAddr();
} catch (Throwable e) {
log.error("ScheduledTask fetchNameServerAddr exception", e);
}
}
}, 1000 * 10, 1000 * 60 * 2, TimeUnit.MILLISECONDS);
}
if (!messageStoreConfig.isEnableDLegerCommitLog()) {
if (BrokerRole.SLAVE == this.messageStoreConfig.getBrokerRole()) {
if (this.messageStoreConfig.getHaMasterAddress() != null && this.messageStoreConfig.getHaMasterAddress().length() >= 6) {
this.messageStore.updateHaMasterAddress(this.messageStoreConfig.getHaMasterAddress());
this.updateMasterHAServerAddrPeriodically = false;
} else {
this.updateMasterHAServerAddrPeriodically = true;
}
} else {
this.scheduledExecutorService.scheduleAtFixedRate(new Runnable() {
@Override
public void run() {
try {
BrokerController.this.printMasterAndSlaveDiff();
} catch (Throwable e) {
log.error("schedule printMasterAndSlaveDiff error.", e);
}
}
}, 1000 * 10, 1000 * 60, TimeUnit.MILLISECONDS);
}
}
if (TlsSystemConfig.tlsMode != TlsMode.DISABLED) {
// Register a listener to reload SslContext
try {
fileWatchService = new FileWatchService(
new String[] {
TlsSystemConfig.tlsServerCertPath,
TlsSystemConfig.tlsServerKeyPath,
TlsSystemConfig.tlsServerTrustCertPath
},
new FileWatchService.Listener() {
boolean certChanged, keyChanged = false;
@Override
public void onChanged(String path) {
if (path.equals(TlsSystemConfig.tlsServerTrustCertPath)) {
log.info("The trust certificate changed, reload the ssl context");
reloadServerSslContext();
}
if (path.equals(TlsSystemConfig.tlsServerCertPath)) {
certChanged = true;
}
if (path.equals(TlsSystemConfig.tlsServerKeyPath)) {
keyChanged = true;
}
if (certChanged && keyChanged) {
log.info("The certificate and private key changed, reload the ssl context");
certChanged = keyChanged = false;
reloadServerSslContext();
}
}
private void reloadServerSslContext() {
((NettyRemotingServer) remotingServer).loadSslContext();
((NettyRemotingServer) fastRemotingServer).loadSslContext();
}
});
} catch (Exception e) {
log.warn("FileWatchService created error, can't load the certificate dynamically");
}
}
initialTransaction();
initialAcl();
initialRpcHooks();
}
return result;
Broker 启动过程
贴代码
public void start() throws Exception {
if (this.messageStore != null) {
this.messageStore.start();
}
if (this.remotingServer != null) {
this.remotingServer.start();
}
if (this.fastRemotingServer != null) {
this.fastRemotingServer.start();
}
if (this.fileWatchService != null) {
this.fileWatchService.start();
}
if (this.brokerOuterAPI != null) {
this.brokerOuterAPI.start();
}
if (this.pullRequestHoldService != null) {
this.pullRequestHoldService.start();
}
if (this.clientHousekeepingService != null) {
this.clientHousekeepingService.start();
}
if (this.filterServerManager != null) {
this.filterServerManager.start();
}
if (!messageStoreConfig.isEnableDLegerCommitLog()) {
startProcessorByHa(messageStoreConfig.getBrokerRole());
handleSlaveSynchronize(messageStoreConfig.getBrokerRole());
this.registerBrokerAll(true, false, true);
}
this.scheduledExecutorService.scheduleAtFixedRate(new Runnable() {
@Override
public void run() {
try {
BrokerController.this.registerBrokerAll(true, false, brokerConfig.isForceRegister());
} catch (Throwable e) {
log.error("registerBrokerAll Exception", e);
}
}
}, 1000 * 10, Math.max(10000, Math.min(brokerConfig.getRegisterNameServerPeriod(), 60000)), TimeUnit.MILLISECONDS);
if (this.brokerStatsManager != null) {
this.brokerStatsManager.start();
}
if (this.brokerFastFailure != null) {
this.brokerFastFailure.start();
}
}
首先是启动messageStore,调用 start 方法,这里面又调用了一些代码
public void start() throws Exception {
lock = lockFile.getChannel().tryLock(0, 1, false);
if (lock == null || lock.isShared() || !lock.isValid()) {
throw new RuntimeException("Lock failed,MQ already started");
}
lockFile.getChannel().write(ByteBuffer.wrap("lock".getBytes()));
lockFile.getChannel().force(true);
{
/**
* 1. Make sure the fast-forward messages to be truncated during the recovering according to the max physical offset of the commitlog;
* 2. DLedger committedPos may be missing, so the maxPhysicalPosInLogicQueue maybe bigger that maxOffset returned by DLedgerCommitLog, just let it go;
* 3. Calculate the reput offset according to the consume queue;
* 4. Make sure the fall-behind messages to be dispatched before starting the commitlog, especially when the broker role are automatically changed.
*/
long maxPhysicalPosInLogicQueue = commitLog.getMinOffset();
for (ConcurrentMap<Integer, ConsumeQueue> maps : this.consumeQueueTable.values()) {
for (ConsumeQueue logic : maps.values()) {
if (logic.getMaxPhysicOffset() > maxPhysicalPosInLogicQueue) {
maxPhysicalPosInLogicQueue = logic.getMaxPhysicOffset();
}
}
}
if (maxPhysicalPosInLogicQueue < 0) {
maxPhysicalPosInLogicQueue = 0;
}
if (maxPhysicalPosInLogicQueue < this.commitLog.getMinOffset()) {
maxPhysicalPosInLogicQueue = this.commitLog.getMinOffset();
/**
* This happens in following conditions:
* 1. If someone removes all the consumequeue files or the disk get damaged.
* 2. Launch a new broker, and copy the commitlog from other brokers.
*
* All the conditions has the same in common that the maxPhysicalPosInLogicQueue should be 0.
* If the maxPhysicalPosInLogicQueue is gt 0, there maybe something wrong.
*/
log.warn("[TooSmallCqOffset] maxPhysicalPosInLogicQueue={} clMinOffset={}", maxPhysicalPosInLogicQueue, this.commitLog.getMinOffset());
}
log.info("[SetReputOffset] maxPhysicalPosInLogicQueue={} clMinOffset={} clMaxOffset={} clConfirmedOffset={}",
maxPhysicalPosInLogicQueue, this.commitLog.getMinOffset(), this.commitLog.getMaxOffset(), this.commitLog.getConfirmOffset());
this.reputMessageService.setReputFromOffset(maxPhysicalPosInLogicQueue);
this.reputMessageService.start();
/**
* 1. Finish dispatching the messages fall behind, then to start other services.
* 2. DLedger committedPos may be missing, so here just require dispatchBehindBytes <= 0
*/
while (true) {
if (dispatchBehindBytes() <= 0) {
break;
}
Thread.sleep(1000);
log.info("Try to finish doing reput the messages fall behind during the starting, reputOffset={} maxOffset={} behind={}", this.reputMessageService.getReputFromOffset(), this.getMaxPhyOffset(), this.dispatchBehindBytes());
}
this.recoverTopicQueueTable();
}
if (!messageStoreConfig.isEnableDLegerCommitLog()) {
this.haService.start();
this.handleScheduleMessageService(messageStoreConfig.getBrokerRole());
}
this.flushConsumeQueueService.start();
this.commitLog.start();
this.storeStatsService.start();
this.createTempFile();
this.addScheduleTask();
this.shutdown = false;
}
调用DefaultMessageStore.start方法启动DefaultMessageStore对象中的一些服务线程。
然后是启动ClientHousekeepingService的 netty 服务端和客户端,然后是启动fileWatchService证书服务,接着启动BrokerOuterAPI中的NettyRemotingClient,即建立与NameServer的链接,用于自身Broker与其他模块的RPC功能调用;包括获取NameServer的地址、注册Broker、注销Broker、获取Topic配置、获取消息进度信息、获取订阅关系等RPC功能,然后是PullRequestHoldService服务线程,这个就是实现长轮询的,然后启动管家ClientHousekeepingService服务,负责扫描不活跃的生产者,消费者和 filter,启动FilterServerManager 过滤器服务管理,然后启动定时任务调用org.apache.rocketmq.broker.BrokerController#registerBrokerAll向所有 nameserver 注册 broker,最后是按需开启org.apache.rocketmq.store.stats.BrokerStatsManager和org.apache.rocketmq.broker.latency.BrokerFastFailure,基本上启动过程就完成了
]]>-H进入线程模式
-H :Threads-mode operation
Instructs top to display individual threads. Without this command-line option a summation of all threads in each process is shown. Later
this can be changed with the `H' interactive command.
这样就能用在 Java 中去 jstack 中找到对应的线程
其实还有比较重要的两个操作,
一个是在 top 启动状态下,按c键,这样能把比如说是一个 Java 进程,具体的进程命令显示出来
像这样
执行前是这样
执行后是这样
第二个就是排序了
SORTING of task window
For compatibility, this top supports most of the former top sort keys. Since this is primarily a service to former top users, these commands
do not appear on any help screen.
command sorted-field supported
A start time (non-display) No
M %MEM Yes
N PID Yes
P %CPU Yes
T TIME+ Yes
Before using any of the following sort provisions, top suggests that you temporarily turn on column highlighting using the `x' interactive com‐
mand. That will help ensure that the actual sort environment matches your intent.
The following interactive commands will only be honored when the current sort field is visible. The sort field might not be visible because:
1) there is insufficient Screen Width
2) the `f' interactive command turned it Off
< :Move-Sort-Field-Left
Moves the sort column to the left unless the current sort field is the first field being displayed.
> :Move-Sort-Field-Right
Moves the sort column to the right unless the current sort field is the last field being displayed.
查看 man page 可以找到这一段,其实一般 man page 都是最细致的,只不过因为太多了,有时候懒得看,这里可以通过大写 M 和大写 P 分别按内存和 CPU 排序,下面还有两个小技巧,通过按 x 可以将当前活跃的排序列用不同颜色标出来,然后可以通过<和>直接左右移动排序列
<dependency>
<groupId>org.apache.shardingsphere</groupId>
<artifactId>shardingsphere-jdbc-core</artifactId>
<version>5.0.0-beta</version>
</dependency>
因为前面有聊过 Spring Boot 的自动加载,在这里 spring 就会自己去找 DataSource 的配置,所以要在入口把它干掉
@SpringBootApplication(exclude = { DataSourceAutoConfiguration.class})
public class ShardingJdbcDemoApplication implements CommandLineRunner {
然后因为想在入口跑代码,就实现了下 org.springframework.boot.CommandLineRunner 主要是后面的 Java Config 代码
// 注意这里的注解,可以让 Spring 自动帮忙加载,也就是 Java Config 的核心
@Configuration
public class MysqlConfig {
@Bean
public DataSource dataSource() throws SQLException {
// Configure actual data sources
Map<String, DataSource> dataSourceMap = new HashMap<>();
// Configure the first data source
// 使用了默认的Hikari连接池的 DataSource
HikariDataSource dataSource1 = new HikariDataSource();
dataSource1.setDriverClassName("com.mysql.jdbc.Driver");
dataSource1.setJdbcUrl("jdbc:mysql://localhost:3306/sharding");
dataSource1.setUsername("username");
dataSource1.setPassword("password");
dataSourceMap.put("ds0", dataSource1);
// Configure student table rule
// 这里是配置分表逻辑,逻辑表是 student,对应真实的表是 student_0 到 student_1, 这个配置方式就是有多少表可以用 student_$->{0..n}
ShardingTableRuleConfiguration studentTableRuleConfig = new ShardingTableRuleConfiguration("student", "ds0.student_$->{0..1}");
// 设置分表字段
studentTableRuleConfig.setTableShardingStrategy(new StandardShardingStrategyConfiguration("user_id", "tableShardingAlgorithm"));
// Configure sharding rule
// 配置 studentTableRuleConfig
ShardingRuleConfiguration shardingRuleConfig = new ShardingRuleConfiguration();
shardingRuleConfig.getTables().add(studentTableRuleConfig);
// Configure table sharding algorithm
Properties tableShardingAlgorithmrProps = new Properties();
// 算法表达式就是根据 user_id 对 2 进行取模
tableShardingAlgorithmrProps.setProperty("algorithm-expression", "student_${user_id % 2}");
shardingRuleConfig.getShardingAlgorithms().put("tableShardingAlgorithm", new ShardingSphereAlgorithmConfiguration("INLINE", tableShardingAlgorithmrProps));
// 然后创建这个 DataSource
return ShardingSphereDataSourceFactory.createDataSource(dataSourceMap, Collections.singleton(shardingRuleConfig), new Properties());
}
}
然后我们就可以在使用这个 DataSource 了,先看下这两个表的数据

@Override
public void run(String... args) {
LOGGER.info("run here");
String sql = "SELECT * FROM student WHERE user_id=? ";
try (
Connection conn = dataSource.getConnection();
PreparedStatement ps = conn.prepareStatement(sql)) {
// 参数就是 user_id,然后也是分表键,对 2 取模就是 1,应该是去 student_1 取数据
ps.setInt(1, 1001);
ResultSet resultSet = ps.executeQuery();
while (resultSet.next()) {
final int id = resultSet.getInt("id");
final String name = resultSet.getString("name");
final int userId = resultSet.getInt("user_id");
final int age = resultSet.getInt("age");
System.out.println("奇数表 id:" + id + " 姓名:" + name
+ " 用户 id:" + userId + " 年龄:" + age );
System.out.println("=============================");
}
// 参数就是 user_id,然后也是分表键,对 2 取模就是 0,应该是去 student_0 取数据
ps.setInt(1, 1000);
resultSet = ps.executeQuery();
while (resultSet.next()) {
final int id = resultSet.getInt("id");
final String name = resultSet.getString("name");
final int userId = resultSet.getInt("user_id");
final int age = resultSet.getInt("age");
System.out.println("偶数表 id:" + id + " 姓名:" + name
+ " 用户 id:" + userId + " 年龄:" + age );
System.out.println("=============================");
}
} catch (SQLException e) {
e.printStackTrace();
}
}
看下查询结果
CREATE TABLE `student_time_0` (
`id` int(11) unsigned NOT NULL AUTO_INCREMENT,
`user_id` int(11) NOT NULL,
`name` varchar(200) COLLATE utf8_bin DEFAULT NULL,
`age` tinyint(3) unsigned DEFAULT NULL,
`create_time` bigint(20) DEFAULT NULL,
PRIMARY KEY (`id`)
) ENGINE=InnoDB AUTO_INCREMENT=674 DEFAULT CHARSET=utf8 COLLATE=utf8_bin;
有这样的三个表,student_time_0, student_time_1, student_time_2, 以 user_id 作为分表键,根据表数量取模作为分表依据
这里先构造点数据,
insert into student_time (`name`, `user_id`, `age`, `create_time`) values (?, ?, ?, ?)
主要是为了保证 create_time 唯一比较好说明问题,
int i = 0;
try (
Connection conn = dataSource.getConnection();
PreparedStatement ps = conn.prepareStatement(insertSql)) {
do {
ps.setString(1, localName + new Random().nextInt(100));
ps.setLong(2, 10086L + (new Random().nextInt(100)));
ps.setInt(3, 18);
ps.setLong(4, new Date().getTime());
int result = ps.executeUpdate();
LOGGER.info("current execute result: {}", result);
Thread.sleep(new Random().nextInt(100));
i++;
} while (i <= 2000);
三个表的数据分别是 673,678,650,说明符合预期了,各个表数据不一样,接下来比如我们想要做一个这样的分页查询
select * from student_time ORDER BY create_time ASC limit 1000, 5;
student_time 对于我们使用的 sharding-jdbc 来说当然是逻辑表,首先从一无所知去想这个查询如果我们自己来处理应该是怎么做,
首先是不是可以每个表都从 333 开始取 5 条数据,类似于下面的查询,然后进行 15 条的合并重排序获取前面的 5 条
select * from student_time_0 ORDER BY create_time ASC limit 333, 5;
select * from student_time_1 ORDER BY create_time ASC limit 333, 5;
select * from student_time_2 ORDER BY create_time ASC limit 333, 5;
忽略前面 limit 差的 1,这个结果除非三个表的分布是绝对的均匀,否则结果肯定会出现一定的偏差,以为每个表的 333 这个位置对于其他表来说都不一定是一样的,这样对于最后整体的结果,就会出现偏差
因为一直在纠结怎么让这个更直观的表现出来,所以尝试画了个图
黑色的框代表我从每个表里按排序从 334 到 338 的 5 条数据, 他们在每个表里都是代表了各自正确的排序值,但是对于我们想要的其实是合表后的 1001,1005 这五条,然后我们假设总的排序值位于前 1000 的分布是第 0 个表是 320 条,第 1 个表是 340 条,第 2 个表是 340 条,那么可以明显地看出来我这么查的结果简单合并肯定是不对的。
那么 sharding-jdbc 是如何保证这个结果的呢,其实就是我在每个表里都查分页偏移量和分页大小那么多的数据,在我这个例子里就是对于 0,1,2 三个分表每个都查 1005 条数据,即使我的数据不平衡到最极端的情况,前 1005 条数据都出在某个分表中,也可以正确获得最后的结果,但是明显的问题就是大分页,数据较多,就会导致非常大的问题,即使如 sharding-jdbc 对于合并排序的优化做得比较好,也还是需要传输那么大量的数据,并且查询也耗时,那么有没有解决方案呢,应该说有两个,或者说主要是想讲后者
第一个办法是像这种查询,如果业务上不需要进行跳页,而是只给下一页,那么我们就能把前一次的最大偏移量的 create_time 记录下来,下一页就可以拿着这个偏移量进行查询,这个比较简单易懂,就不多说了
第二个办法是看的58 沈剑的一篇文章,尝试理解讲述一下,
这个办法的第一步跟前面那个错误的方法或者说不准确的方法一样,先是将分页偏移量平均后在三个表里进行查询
t0
334 10158 nick95 18 1641548941767
335 10098 nick11 18 1641548941879
336 10167 nick51 18 1641548942089
337 10167 nick3 18 1641548942119
338 10170 nick57 18 1641548942169
t1
334 10105 nick98 18 1641548939071 最小
335 10174 nick94 18 1641548939377
336 10129 nick85 18 1641548939442
337 10141 nick84 18 1641548939480
338 10096 nick74 18 1641548939668
t2
334 10184 nick11 18 1641548945075
335 10109 nick93 18 1641548945382
336 10181 nick41 18 1641548945583
337 10130 nick80 18 1641548945993
338 10184 nick19 18 1641548946294 最大
然后要做什么呢,其实目标比较明白,因为前面那种方法其实就是我知道了前一页的偏移量,所以可以直接当做条件来进行查询,那这里我也想着拿到这个条件,所以我将第一遍查出来的最小的 create_time 和最大的 create_time 找出来,然后再去三个表里查询,其实主要是最小值,因为我拿着最小值去查以后我就能知道这个最小值在每个表里处在什么位置,
t0
322 10161 nick81 18 1641548939284
323 10113 nick16 18 1641548939393
324 10110 nick56 18 1641548939577
325 10116 nick69 18 1641548939588
326 10173 nick51 18 1641548939646
t1
334 10105 nick98 18 1641548939071
335 10174 nick94 18 1641548939377
336 10129 nick85 18 1641548939442
337 10141 nick84 18 1641548939480
338 10096 nick74 18 1641548939668
t2
297 10136 nick28 18 1641548939161
298 10142 nick68 18 1641548939177
299 10124 nick41 18 1641548939237
300 10148 nick87 18 1641548939510
301 10169 nick23 18 1641548939715
我只贴了前五条数据,为了方便知道偏移量,每个分表都使用了自增主键,我们可以看到前一次查询的最小值分别在其他两个表里的位置分别是 322-1 和 297-1,那么对于总体来说这个时间应该是在 322 - 1 + 333 + 297 - 1 = 951,那这样子我只要对后面的数据最多每个表查 1000 - 951 + 5 = 54 条数据再进行合并排序就可以获得最终正确的结果。
这个就是传说中的二次查询法。
ResultSet resultSet = ps.executeQuery(sql);
实际上应该是
ResultSet resultSet = ps.executeQuery();
而这里的差别就是,是否传 sql 这个参数,首先我们要知道这个 ps 是什么,它也是个接口java.sql.PreparedStatement,而真正的实现类是org.apache.shardingsphere.driver.jdbc.core.statement.ShardingSpherePreparedStatement,我们来看下继承关系
这里可以看到继承关系里有org.apache.shardingsphere.driver.jdbc.unsupported.AbstractUnsupportedOperationPreparedStatement
那么在我上面的写错的代码里
@Override
public final ResultSet executeQuery(final String sql) throws SQLException {
throw new SQLFeatureNotSupportedException("executeQuery with SQL for PreparedStatement");
}
这个报错一开始让我有点懵,后来点进去了发现是这么个异常,但是我其实一开始是用的更新语句,以为更新不支持,因为平时使用没有深究过,以为是不是需要使用 Mybatis 才可以执行更新,但是理论上也不应该,再往上看原来这些异常是由 sharding-jdbc 包装的,也就是在上面说的AbstractUnsupportedOperationPreparedStatement,这其实也是一种设计思想,本身 jdbc 提供了一系列接口,由各家去支持,包括 mysql,sql server,oracle 等,而正因为这个设计,所以 sharding-jdbc 也可以在此基础上进行设计,我们可以总体地看下 sharding-jdbc 的实现基础
看了前面ShardingSpherePreparedStatement的继承关系,应该也能猜到这里的几个类都是实现了 jdbc 的基础接口,
在前一篇的 demo 中的
Connection conn = dataSource.getConnection();
其实就获得了org.apache.shardingsphere.driver.jdbc.core.connection.ShardingSphereConnection#ShardingSphereConnection
然后获得java.sql.PreparedStatement
PreparedStatement ps = conn.prepareStatement(sql)
就是获取了org.apache.shardingsphere.driver.jdbc.core.statement.ShardingSpherePreparedStatement
然后就是执行
ResultSet resultSet = ps.executeQuery();
然后获得结果org.apache.shardingsphere.driver.jdbc.core.resultset.ShardingSphereResultSet
其实像 mybatis 也是基于这样去实现的
]]>/**
Opens a read view where exactly the transactions serialized before this
point in time are seen in the view.
@param id Creator transaction id */
void ReadView::prepare(trx_id_t id) {
ut_ad(mutex_own(&trx_sys->mutex));
m_creator_trx_id = id;
m_low_limit_no = m_low_limit_id = m_up_limit_id = trx_sys->max_trx_id;
m_low_limit_id赋的值是trx_sys->max_trx_id,代表的是当前系统最小的未分配的事务 id,所以呢,举个例子,当前有三个活跃事务,事务 id 分别是 100,200,300,而 m_up_limit_id = 100, m_low_limit_id = 301,当事务 id 是 200 的提交之后,它的更新就是可以被 100 和 300 看到,而不是说 m_ids 里没了 200,并且 200 比 100 大就应该不可见了
还有一个问题是幻读的问题,这貌似也是个高频面试题,啥意思呢,或者说跟它最常拿来比较的脏读,脏读是指读到了别的事务未提交的数据,因为未提交,严格意义上来讲,不一定是会被最后落到库里,可能会回滚,也就是在 read uncommitted 级别下会出现的问题,但是幻读不太一样,幻读是指两次查询的结果数量不一样,比如我查了第一次是 select * from table1 where id < 10 for update,查出来了一条结果 id 是 5,然后再查一下发现出来了一条 id 是 5,一条 id 是 7,那是不是有点尴尬了,其实呢这个点我觉得脏读跟幻读也比较是从原理层面来命名,如果第一次接触的同学发觉有点不理解也比较正常,因为从逻辑上讲总之都是数据不符合预期,但是基于源码层面其实是不同的情况,幻读是在原先的 read view 无法完全解决的,怎么解决呢,简单的来说就是锁咯,我们知道innodb 是基于 record lock 行锁的,但是貌似没有办法解决这种问题,那么 innodb 就引入了 gap lock 间隙锁,比如上面说的情况下,id 小于 10 的情况下,是都应该锁住的,gap lock 其实是基于索引结构来锁的,因为索引树除了树形结构之外,还有一个next record 的指针,gap lock 也是基于这个来锁的
看一下 mysql 的文档
SELECT … FOR UPDATE sets an exclusive next-key lock on every record the search encounters. However, only an index record lock is required for statements that lock rows using a unique index to search for a unique row.
对于一个 for update 查询,在 RR 级别下,会设置一个 next-key lock在每一条被查询到的记录上,next-lock 又是啥呢,其实就是 gap 锁和 record 锁的结合体,比如我在数据库里有 id 是 1,3,5,7,10,对于上面那条查询,查出来的结果就是 1,3,5,7,那么按照文档里描述的,对于这几条记录都会加上next-key lock,也就是(-∞, 1], (1, 3], (3, 5], (5, 7], (7, 10) 这些区间和记录会被锁起来,不让插入,再唠叨一下呢,就是其实如果是只读的事务,光 read view 一致性读就够了,如果是有写操作的呢,就需要锁了。
]]>public Executor getExecutor(URL url) {
String name = url.getParameter("threadname", "Dubbo");
int threads = url.getParameter("threads", 200);
int queues = url.getParameter("queues", 0);
return new ThreadPoolExecutor(threads, threads, 0L, TimeUnit.MILLISECONDS, (BlockingQueue)(queues == 0 ? new SynchronousQueue() : (queues < 0 ? new LinkedBlockingQueue() : new LinkedBlockingQueue(queues))), new NamedThreadFactory(name, true), new AbortPolicyWithReport(name, url));
}
可以看到核心线程数跟最大线程数一致,也就是说就不会在核心线程数和最大线程数之间动态变化了public Executor getExecutor(URL url) {
String name = url.getParameter("threadname", "Dubbo");
int cores = url.getParameter("corethreads", 0);
int threads = url.getParameter("threads", 200);
int queues = url.getParameter("queues", 0);
return new ThreadPoolExecutor(cores, threads, 9223372036854775807L, TimeUnit.MILLISECONDS, (BlockingQueue)(queues == 0 ? new SynchronousQueue() : (queues < 0 ? new LinkedBlockingQueue() : new LinkedBlockingQueue(queues))), new NamedThreadFactory(name, true), new AbortPolicyWithReport(name, url));
}
这个特点主要是创建了保活时间特别长,即可以认为不会被回收了public Executor getExecutor(URL url) {
String name = url.getParameter("threadname", "Dubbo");
int cores = url.getParameter("corethreads", 0);
int threads = url.getParameter("threads", 2147483647);
int queues = url.getParameter("queues", 0);
int alive = url.getParameter("alive", 60000);
TaskQueue<Runnable> taskQueue = new TaskQueue(queues <= 0 ? 1 : queues);
EagerThreadPoolExecutor executor = new EagerThreadPoolExecutor(cores, threads, (long)alive, TimeUnit.MILLISECONDS, taskQueue, new NamedThreadFactory(name, true), new AbortPolicyWithReport(name, url));
taskQueue.setExecutor(executor);
return executor;
}
这个是改动最多的一个了,因为需要实现这个机制,有兴趣的可以详细看下public Executor getExecutor(URL url) {
String name = url.getParameter("threadname", "Dubbo");
int cores = url.getParameter("corethreads", 0);
int threads = url.getParameter("threads", 2147483647);
int queues = url.getParameter("queues", 0);
int alive = url.getParameter("alive", 60000);
return new ThreadPoolExecutor(cores, threads, (long)alive, TimeUnit.MILLISECONDS, (BlockingQueue)(queues == 0 ? new SynchronousQueue() : (queues < 0 ? new LinkedBlockingQueue() : new LinkedBlockingQueue(queues))), new NamedThreadFactory(name, true), new AbortPolicyWithReport(name, url));
}
这里可以看到线程池的配置,核心是 0,最大线程数是 2147483647,保活时间是一分钟range revert来进行 git revert, 用法就是
git revert OLDER_COMMIT^..NEWER_COMMIT
这样就可以解决上面的问题了,但是还有个问题是这样会根据前面的 commit 数量提交对应数量个 revert commit 会显得比较乱,如果要比较干净的 commit 历史,
可以看下 git revert 命令说明
然后就可以用 -n 参数,表示不自动提交
git revert -n OLDER_COMMIT^..NEWER_COMMIT
git commit -m "revert OLDER_COMMIT to NEWER_COMMIT"
]]>其中 innodb 的事务隔离用到了标题里说到的 mvcc,Multiversion concurrency control, 直译过来就是多版本并发控制,先不讲这个究竟是个啥,考虑下如果纯猜测,这个事务隔离级别应该会是怎么样实现呢,愚钝的我想了下,可以在事务开始的时候拷贝一个表,这个可以支持 RR 级别,RC 级别就不支持了,而且要是个非常大的表,想想就不可行
腆着脸说虽然这个不可行,但是思路是对的,具体实行起来需要做一系列(肥肠多)的改动,首先根据我的理解,其实这个拷贝一个表是变成拷贝一条记录,但是如果有多个事务,那就得拷贝多次,这个问题其实可以借助版本管理系统来解释,在用版本管理系统,git 之类的之前,很原始的可能是开发完一个功能后,就打个压缩包用时间等信息命名,然后如果后面要找回这个就直接用这个压缩包的就行了,后来有了 svn,git 中心式和分布式的版本管理系统,它的一个特点是粒度可以控制到文件和代码行级别,对应的我们的 mysql 事务是不是也可以从一开始预想的表级别细化到行的级别,可能之前很多人都了解过,数据库的一行记录除了我们用户自定义的字段,还有一些额外的字段,去源码data0type.h里捞一下
/* Precise data types for system columns and the length of those columns;
NOTE: the values must run from 0 up in the order given! All codes must
be less than 256 */
#define DATA_ROW_ID 0 /* row id: a 48-bit integer */
#define DATA_ROW_ID_LEN 6 /* stored length for row id */
/** Transaction id: 6 bytes */
constexpr size_t DATA_TRX_ID = 1;
/** Transaction ID type size in bytes. */
constexpr size_t DATA_TRX_ID_LEN = 6;
/** Rollback data pointer: 7 bytes */
constexpr size_t DATA_ROLL_PTR = 2;
/** Rollback data pointer type size in bytes. */
constexpr size_t DATA_ROLL_PTR_LEN = 7;
一个是 DATA_ROW_ID,这个是在数据没指定主键的时候会生成一个隐藏的,如果用户有指定主键就是主键了
一个是 DATA_TRX_ID,这个表示这条记录的事务 ID
还有一个是 DATA_ROLL_PTR 指向回滚段的指针
指向的回滚段其实就是我们常说的 undo log,这里面的具体结构就是个链表,在 mvcc 里会使用到这个,还有就是这个 DATA_TRX_ID,每条记录都记录了这个事务 ID,表示的是这条记录的当前值是被哪个事务修改的,下面就扯回事务了,我们知道 Read Uncommitted, 其实用不到隔离,直接读取当前值就好了,到了 Read Committed 级别,我们要让事务读取到提交过的值,mysql 使用了一个叫 read view 的玩意,它里面有这些值是我们需要注意的,
m_low_limit_id, 这个是 read view 创建时最大的活跃事务 id
m_up_limit_id, 这个是 read view 创建时最小的活跃事务 id
m_ids, 这个是 read view 创建时所有的活跃事务 id 数组
m_creator_trx_id 这个是当前记录的创建事务 id
判断事务的可见性主要的逻辑是这样,
id 小于最小活跃事务 id,说明是可见的,id 等于当前事务 id,说明是自己的更改,可见id 大于最大的活跃事务 id, 不可见id 介于 m_low_limit_id 和 m_up_limit_id 之间,则要判断它是否在 m_ids 中,如果在,不可见,如果不在,表示已提交,可见/** Check whether the changes by id are visible.
@param[in] id transaction id to check against the view
@param[in] name table name
@return whether the view sees the modifications of id. */
bool changes_visible(trx_id_t id, const table_name_t &name) const
MY_ATTRIBUTE((warn_unused_result)) {
ut_ad(id > 0);
if (id < m_up_limit_id || id == m_creator_trx_id) {
return (true);
}
check_trx_id_sanity(id, name);
if (id >= m_low_limit_id) {
return (false);
} else if (m_ids.empty()) {
return (true);
}
const ids_t::value_type *p = m_ids.data();
return (!std::binary_search(p, p + m_ids.size(), id));
}
剩下来一点是啥呢,就是 Read Committed 和 Repeated Read 也不一样,那前面说的 read view 都能支持吗,又是怎么支持呢,假如这个 read view 是在事务一开始就创建,那好像能支持的只是 RR 事务隔离级别,其实呢,这是通过创建 read view的时机,对于 RR 级别,就是在事务的第一个 select 语句是创建,对于 RC 级别,是在每个 select 语句执行前都是创建一次,那样就可以保证能读到所有已提交的数据CREATE TABLE `null_index_t` (
`id` int(10) unsigned NOT NULL AUTO_INCREMENT,
`null_key` varchar(255) DEFAULT NULL,
`null_key1` varchar(255) DEFAULT NULL,
`null_key2` varchar(255) DEFAULT NULL,
PRIMARY KEY (`id`),
KEY `idx_1` (`null_key`) USING BTREE,
KEY `idx_2` (`null_key1`) USING BTREE,
KEY `idx_3` (`null_key2`) USING BTREE
) ENGINE=InnoDB DEFAULT CHARSET=utf8mb4;
用个存储过程来插入数据
delimiter $ #以delimiter来标记用$表示存储过程结束
create procedure nullIndex1()
begin
declare i int;
declare j int;
set i=1;
set j=1;
while(i<=100) do
while(j<=100) do
IF (i % 3 = 0) THEN
INSERT INTO null_index_t ( `null_key`, `null_key1`, `null_key2` ) VALUES (null , LEFT(MD5(RAND()), 8), LEFT(MD5(RAND()), 8));
ELSEIF (i % 3 = 1) THEN
INSERT INTO null_index_t ( `null_key`, `null_key1`, `null_key2` ) VALUES (LEFT(MD5(RAND()), 8), NULL, LEFT(MD5(RAND()), 8));
ELSE
INSERT INTO null_index_t ( `null_key`, `null_key1`, `null_key2` ) VALUES (LEFT(MD5(RAND()), 8), LEFT(MD5(RAND()), 8), NULL);
END IF;
set j=j+1;
end while;
set i=i+1;
set j=1;
end while;
end
$
call nullIndex1();
然后看下我们的 is null 查询
EXPLAIN select * from null_index_t WHERE null_key is null;

再来看看另一个
EXPLAIN select * from null_index_t WHERE null_key is not null;

从这里能看出来啥呢,可以思考下
从上面可以发现,is null应该是用上了索引了,所以至少不是一刀切不能用,但是看着is not null好像不太行额
我们在做一点小改动,把这个表里的数据改成 9100 条是 null,剩下 900 条是有值的,然后再执行下
然后再来看看执行结果
EXPLAIN select * from null_index_t WHERE null_key is null;

EXPLAIN select * from null_index_t WHERE null_key is not null;

是不是不一样了,这里再补充下我试验使用的 mysql 是 5.7 的,不保证在其他版本的一致性,
其实可以看出随着数据量的变化,mysql 会不会使用索引是会变化的,不是说 is not null 一定会使用,也不是一定不会使用,而是优化器会根据查询成本做个预判,这个预判尽可能会减小查询成本,主要包括回表啥的,但是也不一定完全准确。
缓存穿透是指当数据库中本身就不存在这个数据的时候,使用一般的缓存策略时访问不到缓存后就访问数据库,但是因为数据库也没数据,所以如果不做任何策略优化的话,这类数据就每次都会访问一次数据库,对数据库压力也会比较大。
缓存击穿跟穿透比较类似的,都是访问缓存不在,然后去访问数据库,与穿透不一样的是击穿是在数据库中存在数据,但是可能由于第一次访问,或者缓存过期了,需要访问到数据库,这对于访问量小的情况其实算是个正常情况,但是随着请求量变高就会引发一些性能隐患。
缓存雪崩就是击穿的大规模集群效应,当大量的缓存过期失效的时候,这些请求都是直接访问到数据库了,会对数据库造成很大的压力。
对于以上三种场景也有一些比较常见的解决方案,但也不能说是万无一失的,需要随着业务去寻找合适的方案
对于数据库中就没这个数据的时候,一种是可以对这个 key 设置下空值,即以一个特定的表示是数据库不存在的,这种情况需要合理地调整过期时间,当这个 key 在数据库中有数据了的话,也需要有策略去更新这个值,并且如果这类 key 非常多,这个方法就会不太合适,就可以使用第二种方法,就是布隆过滤器,bloom filter,前置一个布隆过滤器,当这个 key 在数据库不存在的话,先用布隆过滤器挡一道,如果不在的话就直接返回了,当然布隆过滤器不是绝对的准确的
当一个 key 的缓存过期了,如果大量请求过来访问这个 key,请求都会落在数据库里,这个时候就可以使用一些类似于互斥锁的方式去让一个线程去访问数据库,更新缓存,但是这里其实也有个问题,就是如果是热点 key 其实这种方式也比较危险,万一更新失败,或者更新操作的时候耗时比较久,就会有一大堆请求卡在那,这种情况可能需要有一些异步提前刷新缓存,可以结合具体场景选择方式
雪崩的情况是指大批量的 key 都一起过期了,击穿的放大版,大批量的请求都打到数据库上了,一方面有可能直接缓存不可用了,就需要用集群化高可用的缓存服务,然后对于实际使用中也可以使用本地缓存结合 redis 缓存,去提高可用性,再配合一些限流措施,然后就是缓存使用过程总的过期时间最好能加一些随机值,防止在同一时间过期而导致雪崩,结合互斥锁防止大量请求打到数据库。
]]>Spring Boot应用,在这个应用范围内,我的常规 bean 是单例的,意味着 getBean 的时候其实永远只会拿到那一个对象,那要怎么来写一个单例呢,首先就是传说中的饿汉模式,也是最简单的
public class Singleton1 {
// 首先,将构造方法变成私有的
private Singleton1() {};
// 创建私有静态实例,这样第一次使用的时候就会进行创建
private static Singleton instance = new Singleton1();
// 使用这个对象都是通过这个 getInstance 来获取
public static Singleton1 getInstance() {
return instance;
}
// 瞎写一个静态方法。这里想说的是,如果我们只是要调用 Singleton.getDate(...),
// 本来是不想要生成 Singleton 实例的,不过没办法,已经生成了
public static Date getDate(String mode) {return new Date();}
}
上面借鉴了一些代码,其实这是最基本,也不会错的方法,但是正如其中getDate方法里说的问题,有时候并没有想那这个对象,但是因为我调用了这个类的静态方法,导致对象已经生成了,可能这也是饿汉模式名字的来由,不管三七二十一给你生成个单例就完事了,不管有没有用,但是这种个人觉得也没啥大问题,如果是面试的话最好说出来它的缺点
public class Singleton2 {
// 首先,也是先堵死 new Singleton() 这条路,将构造方法变成私有
private Singleton2() {}
// 和饿汉模式相比,这边不需要先实例化出来,注意这里的 volatile,它是必须的
private static volatile Singleton2 instance = null;
private int m = 9;
public static Singleton getInstance() {
if (instance == null) {
// 加锁
synchronized (Singleton2.class) {
// 这一次判断也是必须的,不然会有并发问题
if (instance == null) {
instance = new Singleton2();
}
}
}
return instance;
}
}
这里容易错的有三点,理解了其实就比较好记了
第一点,为啥不在 getInstance 上整个代码块加 synchronized,这个其实比较容易理解,就是锁的力度太大,性能太差了,这点其实也要去理解,可以举个夸张的例子,比如我一个电商的服务,如果为了避免一个人的订单出现问题,是不是可以从请求入口就把他锁住,到请求结束释放,那么里面做的事情都有保障,然而这显然不可能,因为我们想要这种竞态条件抢占资源的时间尽量减少,防止其他线程等待。
第二点,为啥synchronized之已经检查了 instance == null,还要在里面再检查一次,这个有个术语,叫 double check lock,但是为啥要这么做呢,其实很简单,想象当有两个线程,都过了第一步为空判断,这个时候只有一个线程能拿到这个锁,另一个线程就等待了,如果不再判断一次,那么第一个线程新建完对象释放锁之后,第二个线程又能拿到锁,再去创建一个对象。
第三点,为啥要volatile关键字,原先对它的理解是它修饰的变量在 JMM 中能及时将变量值写到主存中,但是它还有个很重要的作用,就是防止指令重排序,instance = new Singleton();这行代码其实在底层是分成三条指令执行的,第一条是在堆上申请了一块内存放这个对象,但是对象的字段啥的都还是默认值,第二条是设置对象的值,比如上面的 m 是 9,然后第三条是将这个对象和虚拟机栈上的指针建立引用关联,那么如果我不用volatile关键字,这三条指令就有可能出现重排,比如变成了 1-3-2 这种顺序,当执行完第二步时,有个线程来访问这个对象了,先判断是不是空,发现不是空的,就拿去直接用了,是不是就出现问题了,所以这个volatile也是不可缺少的
public class Singleton3 {
private Singleton3() {}
// 主要是使用了 嵌套类可以访问外部类的静态属性和静态方法 的特性
private static class Holder {
private static Singleton3 instance = new Singleton3();
}
public static Singleton3 getInstance() {
return Holder.instance;
}
}
这个我个人感觉是饿汉模式的升级版,可以在调用getInstance的时候去实例化对象,也是比较推荐的
public enum Singleton {
INSTANCE;
public void doSomething(){
//todo doSomething
}
}
枚举很特殊,它在类加载的时候会初始化里面的所有的实例,而且 JVM 保证了它们不会再被实例化,所以它天生就是单例的。
]]>springboot 相比 spring能更方便开发人员上手,比较重要的一点就是自动装配,大致来看下这个逻辑
public static void main(String[] args) {
SpringApplication.run(SpbDemoApplication.class, args);
}
/**
* Static helper that can be used to run a {@link SpringApplication} from the
* specified source using default settings.
* @param primarySource the primary source to load
* @param args the application arguments (usually passed from a Java main method)
* @return the running {@link ApplicationContext}
*/
然后就是上面调用的 run 方法
public static ConfigurableApplicationContext run(Class<?> primarySource, String... args) {
return run(new Class<?>[] { primarySource }, args);
}
/**
* Static helper that can be used to run a {@link SpringApplication} from the
* specified sources using default settings and user supplied arguments.
* @param primarySources the primary sources to load
* @param args the application arguments (usually passed from a Java main method)
* @return the running {@link ApplicationContext}
*/
继续往下看
public static ConfigurableApplicationContext run(Class<?>[] primarySources, String[] args) {
return new SpringApplication(primarySources).run(args);
}
调用SpringApplication的构造方法
/**
* Create a new {@link SpringApplication} instance. The application context will load
* beans from the specified primary sources (see {@link SpringApplication class-level}
* documentation for details. The instance can be customized before calling
* {@link #run(String...)}.
* @param primarySources the primary bean sources
* @see #run(Class, String[])
* @see #SpringApplication(ResourceLoader, Class...)
* @see #setSources(Set)
*/
public SpringApplication(Class<?>... primarySources) {
this(null, primarySources);
}
/**
* Create a new {@link SpringApplication} instance. The application context will load
* beans from the specified primary sources (see {@link SpringApplication class-level}
* documentation for details. The instance can be customized before calling
* {@link #run(String...)}.
* @param resourceLoader the resource loader to use
* @param primarySources the primary bean sources
* @see #run(Class, String[])
* @see #setSources(Set)
*/
@SuppressWarnings({ "unchecked", "rawtypes" })
public SpringApplication(ResourceLoader resourceLoader, Class<?>... primarySources) {
this.resourceLoader = resourceLoader;
Assert.notNull(primarySources, "PrimarySources must not be null");
this.primarySources = new LinkedHashSet<>(Arrays.asList(primarySources));
this.webApplicationType = WebApplicationType.deduceFromClasspath();
// 注意看这里的,通过 SpringFactories 获取
this.bootstrapRegistryInitializers = getBootstrapRegistryInitializersFromSpringFactories();
setInitializers((Collection) getSpringFactoriesInstances(ApplicationContextInitializer.class));
setListeners((Collection) getSpringFactoriesInstances(ApplicationListener.class));
this.mainApplicationClass = deduceMainApplicationClass();
}
这里就是重点了
private List<BootstrapRegistryInitializer> getBootstrapRegistryInitializersFromSpringFactories() {
ArrayList<BootstrapRegistryInitializer> initializers = new ArrayList<>();
getSpringFactoriesInstances(Bootstrapper.class).stream()
.map((bootstrapper) -> ((BootstrapRegistryInitializer) bootstrapper::initialize))
.forEach(initializers::add);
initializers.addAll(getSpringFactoriesInstances(BootstrapRegistryInitializer.class));
return initializers;
}
private <T> Collection<T> getSpringFactoriesInstances(Class<T> type) {
return getSpringFactoriesInstances(type, new Class<?>[] {});
}
private <T> Collection<T> getSpringFactoriesInstances(Class<T> type, Class<?>[] parameterTypes, Object... args) {
ClassLoader classLoader = getClassLoader();
// Use names and ensure unique to protect against duplicates
// 去加载所有FACTORIES_RESOURCE_LOCATION路径下面,也就是 META-INF/spring.factories
Set<String> names = new LinkedHashSet<>(SpringFactoriesLoader.loadFactoryNames(type, classLoader));
List<T> instances = createSpringFactoriesInstances(type, parameterTypes, classLoader, args, names);
AnnotationAwareOrderComparator.sort(instances);
return instances;
}
/**
* Load the fully qualified class names of factory implementations of the
* given type from {@value #FACTORIES_RESOURCE_LOCATION}, using the given
* class loader.
* <p>As of Spring Framework 5.3, if a particular implementation class name
* is discovered more than once for the given factory type, duplicates will
* be ignored.
* @param factoryType the interface or abstract class representing the factory
* @param classLoader the ClassLoader to use for loading resources; can be
* {@code null} to use the default
* @throws IllegalArgumentException if an error occurs while loading factory names
* @see #loadFactories
*/
public static List<String> loadFactoryNames(Class<?> factoryType, @Nullable ClassLoader classLoader) {
ClassLoader classLoaderToUse = classLoader;
if (classLoaderToUse == null) {
classLoaderToUse = SpringFactoriesLoader.class.getClassLoader();
}
String factoryTypeName = factoryType.getName();
return loadSpringFactories(classLoaderToUse).getOrDefault(factoryTypeName, Collections.emptyList());
}
private static Map<String, List<String>> loadSpringFactories(ClassLoader classLoader) {
Map<String, List<String>> result = cache.get(classLoader);
if (result != null) {
return result;
}
result = new HashMap<>();
try {
// 获取此 resources,作为 AutoConfiguration 的配置
Enumeration<URL> urls = classLoader.getResources(FACTORIES_RESOURCE_LOCATION);
while (urls.hasMoreElements()) {
URL url = urls.nextElement();
UrlResource resource = new UrlResource(url);
Properties properties = PropertiesLoaderUtils.loadProperties(resource);
for (Map.Entry<?, ?> entry : properties.entrySet()) {
String factoryTypeName = ((String) entry.getKey()).trim();
String[] factoryImplementationNames =
StringUtils.commaDelimitedListToStringArray((String) entry.getValue());
for (String factoryImplementationName : factoryImplementationNames) {
result.computeIfAbsent(factoryTypeName, key -> new ArrayList<>())
.add(factoryImplementationName.trim());
}
}
}
// Replace all lists with unmodifiable lists containing unique elements
result.replaceAll((factoryType, implementations) -> implementations.stream().distinct()
.collect(Collectors.collectingAndThen(Collectors.toList(), Collections::unmodifiableList)));
cache.put(classLoader, result);
}
catch (IOException ex) {
throw new IllegalArgumentException("Unable to load factories from location [" +
FACTORIES_RESOURCE_LOCATION + "]", ex);
}
return result;
}
我们可以看下 spring-boot-autoconfigure 的 META-INF/spring.factories
# Initializers
org.springframework.context.ApplicationContextInitializer=\
org.springframework.boot.autoconfigure.SharedMetadataReaderFactoryContextInitializer,\
org.springframework.boot.autoconfigure.logging.ConditionEvaluationReportLoggingListener
# Application Listeners
org.springframework.context.ApplicationListener=\
org.springframework.boot.autoconfigure.BackgroundPreinitializer
# Environment Post Processors
org.springframework.boot.env.EnvironmentPostProcessor=\
org.springframework.boot.autoconfigure.integration.IntegrationPropertiesEnvironmentPostProcessor
# Auto Configuration Import Listeners
org.springframework.boot.autoconfigure.AutoConfigurationImportListener=\
org.springframework.boot.autoconfigure.condition.ConditionEvaluationReportAutoConfigurationImportListener
# Auto Configuration Import Filters
org.springframework.boot.autoconfigure.AutoConfigurationImportFilter=\
org.springframework.boot.autoconfigure.condition.OnBeanCondition,\
org.springframework.boot.autoconfigure.condition.OnClassCondition,\
org.springframework.boot.autoconfigure.condition.OnWebApplicationCondition
# 注意这里,其实就是类似于 dubbo spi 的通过 org.springframework.boot.autoconfigure.EnableAutoConfiguration作为 key
# 获取下面所有的 AutoConfiguration 配置类
# Auto Configure
org.springframework.boot.autoconfigure.EnableAutoConfiguration=\
org.springframework.boot.autoconfigure.admin.SpringApplicationAdminJmxAutoConfiguration,\
org.springframework.boot.autoconfigure.aop.AopAutoConfiguration,\
org.springframework.boot.autoconfigure.amqp.RabbitAutoConfiguration,\
org.springframework.boot.autoconfigure.batch.BatchAutoConfiguration,\
org.springframework.boot.autoconfigure.cache.CacheAutoConfiguration,\
org.springframework.boot.autoconfigure.cassandra.CassandraAutoConfiguration,\
org.springframework.boot.autoconfigure.context.ConfigurationPropertiesAutoConfiguration,\
org.springframework.boot.autoconfigure.context.LifecycleAutoConfiguration,\
org.springframework.boot.autoconfigure.context.MessageSourceAutoConfiguration,\
org.springframework.boot.autoconfigure.context.PropertyPlaceholderAutoConfiguration,\
org.springframework.boot.autoconfigure.couchbase.CouchbaseAutoConfiguration,\
org.springframework.boot.autoconfigure.dao.PersistenceExceptionTranslationAutoConfiguration,\
org.springframework.boot.autoconfigure.data.cassandra.CassandraDataAutoConfiguration,\
org.springframework.boot.autoconfigure.data.cassandra.CassandraReactiveDataAutoConfiguration,\
org.springframework.boot.autoconfigure.data.cassandra.CassandraReactiveRepositoriesAutoConfiguration,\
org.springframework.boot.autoconfigure.data.cassandra.CassandraRepositoriesAutoConfiguration,\
org.springframework.boot.autoconfigure.data.couchbase.CouchbaseDataAutoConfiguration,\
org.springframework.boot.autoconfigure.data.couchbase.CouchbaseReactiveDataAutoConfiguration,\
org.springframework.boot.autoconfigure.data.couchbase.CouchbaseReactiveRepositoriesAutoConfiguration,\
org.springframework.boot.autoconfigure.data.couchbase.CouchbaseRepositoriesAutoConfiguration,\
org.springframework.boot.autoconfigure.data.elasticsearch.ElasticsearchDataAutoConfiguration,\
org.springframework.boot.autoconfigure.data.elasticsearch.ElasticsearchRepositoriesAutoConfiguration,\
org.springframework.boot.autoconfigure.data.elasticsearch.ReactiveElasticsearchRepositoriesAutoConfiguration,\
org.springframework.boot.autoconfigure.data.elasticsearch.ReactiveElasticsearchRestClientAutoConfiguration,\
org.springframework.boot.autoconfigure.data.jdbc.JdbcRepositoriesAutoConfiguration,\
org.springframework.boot.autoconfigure.data.jpa.JpaRepositoriesAutoConfiguration,\
org.springframework.boot.autoconfigure.data.ldap.LdapRepositoriesAutoConfiguration,\
org.springframework.boot.autoconfigure.data.mongo.MongoDataAutoConfiguration,\
org.springframework.boot.autoconfigure.data.mongo.MongoReactiveDataAutoConfiguration,\
org.springframework.boot.autoconfigure.data.mongo.MongoReactiveRepositoriesAutoConfiguration,\
org.springframework.boot.autoconfigure.data.mongo.MongoRepositoriesAutoConfiguration,\
org.springframework.boot.autoconfigure.data.neo4j.Neo4jDataAutoConfiguration,\
org.springframework.boot.autoconfigure.data.neo4j.Neo4jReactiveDataAutoConfiguration,\
org.springframework.boot.autoconfigure.data.neo4j.Neo4jReactiveRepositoriesAutoConfiguration,\
org.springframework.boot.autoconfigure.data.neo4j.Neo4jRepositoriesAutoConfiguration,\
org.springframework.boot.autoconfigure.data.r2dbc.R2dbcDataAutoConfiguration,\
org.springframework.boot.autoconfigure.data.r2dbc.R2dbcRepositoriesAutoConfiguration,\
org.springframework.boot.autoconfigure.data.redis.RedisAutoConfiguration,\
org.springframework.boot.autoconfigure.data.redis.RedisReactiveAutoConfiguration,\
org.springframework.boot.autoconfigure.data.redis.RedisRepositoriesAutoConfiguration,\
org.springframework.boot.autoconfigure.data.rest.RepositoryRestMvcAutoConfiguration,\
org.springframework.boot.autoconfigure.data.web.SpringDataWebAutoConfiguration,\
org.springframework.boot.autoconfigure.elasticsearch.ElasticsearchRestClientAutoConfiguration,\
org.springframework.boot.autoconfigure.flyway.FlywayAutoConfiguration,\
org.springframework.boot.autoconfigure.freemarker.FreeMarkerAutoConfiguration,\
org.springframework.boot.autoconfigure.groovy.template.GroovyTemplateAutoConfiguration,\
org.springframework.boot.autoconfigure.gson.GsonAutoConfiguration,\
org.springframework.boot.autoconfigure.h2.H2ConsoleAutoConfiguration,\
org.springframework.boot.autoconfigure.hateoas.HypermediaAutoConfiguration,\
org.springframework.boot.autoconfigure.hazelcast.HazelcastAutoConfiguration,\
org.springframework.boot.autoconfigure.hazelcast.HazelcastJpaDependencyAutoConfiguration,\
org.springframework.boot.autoconfigure.http.HttpMessageConvertersAutoConfiguration,\
org.springframework.boot.autoconfigure.http.codec.CodecsAutoConfiguration,\
org.springframework.boot.autoconfigure.influx.InfluxDbAutoConfiguration,\
org.springframework.boot.autoconfigure.info.ProjectInfoAutoConfiguration,\
org.springframework.boot.autoconfigure.integration.IntegrationAutoConfiguration,\
org.springframework.boot.autoconfigure.jackson.JacksonAutoConfiguration,\
org.springframework.boot.autoconfigure.jdbc.DataSourceAutoConfiguration,\
org.springframework.boot.autoconfigure.jdbc.JdbcTemplateAutoConfiguration,\
org.springframework.boot.autoconfigure.jdbc.JndiDataSourceAutoConfiguration,\
org.springframework.boot.autoconfigure.jdbc.XADataSourceAutoConfiguration,\
org.springframework.boot.autoconfigure.jdbc.DataSourceTransactionManagerAutoConfiguration,\
org.springframework.boot.autoconfigure.jms.JmsAutoConfiguration,\
org.springframework.boot.autoconfigure.jmx.JmxAutoConfiguration,\
org.springframework.boot.autoconfigure.jms.JndiConnectionFactoryAutoConfiguration,\
org.springframework.boot.autoconfigure.jms.activemq.ActiveMQAutoConfiguration,\
org.springframework.boot.autoconfigure.jms.artemis.ArtemisAutoConfiguration,\
org.springframework.boot.autoconfigure.jersey.JerseyAutoConfiguration,\
org.springframework.boot.autoconfigure.jooq.JooqAutoConfiguration,\
org.springframework.boot.autoconfigure.jsonb.JsonbAutoConfiguration,\
org.springframework.boot.autoconfigure.kafka.KafkaAutoConfiguration,\
org.springframework.boot.autoconfigure.availability.ApplicationAvailabilityAutoConfiguration,\
org.springframework.boot.autoconfigure.ldap.embedded.EmbeddedLdapAutoConfiguration,\
org.springframework.boot.autoconfigure.ldap.LdapAutoConfiguration,\
org.springframework.boot.autoconfigure.liquibase.LiquibaseAutoConfiguration,\
org.springframework.boot.autoconfigure.mail.MailSenderAutoConfiguration,\
org.springframework.boot.autoconfigure.mail.MailSenderValidatorAutoConfiguration,\
org.springframework.boot.autoconfigure.mongo.embedded.EmbeddedMongoAutoConfiguration,\
org.springframework.boot.autoconfigure.mongo.MongoAutoConfiguration,\
org.springframework.boot.autoconfigure.mongo.MongoReactiveAutoConfiguration,\
org.springframework.boot.autoconfigure.mustache.MustacheAutoConfiguration,\
org.springframework.boot.autoconfigure.neo4j.Neo4jAutoConfiguration,\
org.springframework.boot.autoconfigure.netty.NettyAutoConfiguration,\
org.springframework.boot.autoconfigure.orm.jpa.HibernateJpaAutoConfiguration,\
org.springframework.boot.autoconfigure.quartz.QuartzAutoConfiguration,\
org.springframework.boot.autoconfigure.r2dbc.R2dbcAutoConfiguration,\
org.springframework.boot.autoconfigure.r2dbc.R2dbcTransactionManagerAutoConfiguration,\
org.springframework.boot.autoconfigure.rsocket.RSocketMessagingAutoConfiguration,\
org.springframework.boot.autoconfigure.rsocket.RSocketRequesterAutoConfiguration,\
org.springframework.boot.autoconfigure.rsocket.RSocketServerAutoConfiguration,\
org.springframework.boot.autoconfigure.rsocket.RSocketStrategiesAutoConfiguration,\
org.springframework.boot.autoconfigure.security.servlet.SecurityAutoConfiguration,\
org.springframework.boot.autoconfigure.security.servlet.UserDetailsServiceAutoConfiguration,\
org.springframework.boot.autoconfigure.security.servlet.SecurityFilterAutoConfiguration,\
org.springframework.boot.autoconfigure.security.reactive.ReactiveSecurityAutoConfiguration,\
org.springframework.boot.autoconfigure.security.reactive.ReactiveUserDetailsServiceAutoConfiguration,\
org.springframework.boot.autoconfigure.security.rsocket.RSocketSecurityAutoConfiguration,\
org.springframework.boot.autoconfigure.security.saml2.Saml2RelyingPartyAutoConfiguration,\
org.springframework.boot.autoconfigure.sendgrid.SendGridAutoConfiguration,\
org.springframework.boot.autoconfigure.session.SessionAutoConfiguration,\
org.springframework.boot.autoconfigure.security.oauth2.client.servlet.OAuth2ClientAutoConfiguration,\
org.springframework.boot.autoconfigure.security.oauth2.client.reactive.ReactiveOAuth2ClientAutoConfiguration,\
org.springframework.boot.autoconfigure.security.oauth2.resource.servlet.OAuth2ResourceServerAutoConfiguration,\
org.springframework.boot.autoconfigure.security.oauth2.resource.reactive.ReactiveOAuth2ResourceServerAutoConfiguration,\
org.springframework.boot.autoconfigure.solr.SolrAutoConfiguration,\
org.springframework.boot.autoconfigure.sql.init.SqlInitializationAutoConfiguration,\
org.springframework.boot.autoconfigure.task.TaskExecutionAutoConfiguration,\
org.springframework.boot.autoconfigure.task.TaskSchedulingAutoConfiguration,\
org.springframework.boot.autoconfigure.thymeleaf.ThymeleafAutoConfiguration,\
org.springframework.boot.autoconfigure.transaction.TransactionAutoConfiguration,\
org.springframework.boot.autoconfigure.transaction.jta.JtaAutoConfiguration,\
org.springframework.boot.autoconfigure.validation.ValidationAutoConfiguration,\
org.springframework.boot.autoconfigure.web.client.RestTemplateAutoConfiguration,\
org.springframework.boot.autoconfigure.web.embedded.EmbeddedWebServerFactoryCustomizerAutoConfiguration,\
org.springframework.boot.autoconfigure.web.reactive.HttpHandlerAutoConfiguration,\
org.springframework.boot.autoconfigure.web.reactive.ReactiveWebServerFactoryAutoConfiguration,\
org.springframework.boot.autoconfigure.web.reactive.WebFluxAutoConfiguration,\
org.springframework.boot.autoconfigure.web.reactive.error.ErrorWebFluxAutoConfiguration,\
org.springframework.boot.autoconfigure.web.reactive.function.client.ClientHttpConnectorAutoConfiguration,\
org.springframework.boot.autoconfigure.web.reactive.function.client.WebClientAutoConfiguration,\
org.springframework.boot.autoconfigure.web.servlet.DispatcherServletAutoConfiguration,\
org.springframework.boot.autoconfigure.web.servlet.ServletWebServerFactoryAutoConfiguration,\
org.springframework.boot.autoconfigure.web.servlet.error.ErrorMvcAutoConfiguration,\
org.springframework.boot.autoconfigure.web.servlet.HttpEncodingAutoConfiguration,\
org.springframework.boot.autoconfigure.web.servlet.MultipartAutoConfiguration,\
org.springframework.boot.autoconfigure.web.servlet.WebMvcAutoConfiguration,\
org.springframework.boot.autoconfigure.websocket.reactive.WebSocketReactiveAutoConfiguration,\
org.springframework.boot.autoconfigure.websocket.servlet.WebSocketServletAutoConfiguration,\
org.springframework.boot.autoconfigure.websocket.servlet.WebSocketMessagingAutoConfiguration,\
org.springframework.boot.autoconfigure.webservices.WebServicesAutoConfiguration,\
org.springframework.boot.autoconfigure.webservices.client.WebServiceTemplateAutoConfiguration
# Failure analyzers
org.springframework.boot.diagnostics.FailureAnalyzer=\
org.springframework.boot.autoconfigure.data.redis.RedisUrlSyntaxFailureAnalyzer,\
org.springframework.boot.autoconfigure.diagnostics.analyzer.NoSuchBeanDefinitionFailureAnalyzer,\
org.springframework.boot.autoconfigure.flyway.FlywayMigrationScriptMissingFailureAnalyzer,\
org.springframework.boot.autoconfigure.jdbc.DataSourceBeanCreationFailureAnalyzer,\
org.springframework.boot.autoconfigure.jdbc.HikariDriverConfigurationFailureAnalyzer,\
org.springframework.boot.autoconfigure.r2dbc.ConnectionFactoryBeanCreationFailureAnalyzer,\
org.springframework.boot.autoconfigure.session.NonUniqueSessionRepositoryFailureAnalyzer
# Template availability providers
org.springframework.boot.autoconfigure.template.TemplateAvailabilityProvider=\
org.springframework.boot.autoconfigure.freemarker.FreeMarkerTemplateAvailabilityProvider,\
org.springframework.boot.autoconfigure.mustache.MustacheTemplateAvailabilityProvider,\
org.springframework.boot.autoconfigure.groovy.template.GroovyTemplateAvailabilityProvider,\
org.springframework.boot.autoconfigure.thymeleaf.ThymeleafTemplateAvailabilityProvider,\
org.springframework.boot.autoconfigure.web.servlet.JspTemplateAvailabilityProvider
# DataSource initializer detectors
org.springframework.boot.sql.init.dependency.DatabaseInitializerDetector=\
org.springframework.boot.autoconfigure.flyway.FlywayMigrationInitializerDatabaseInitializerDetector
上面根据 org.springframework.boot.autoconfigure.EnableAutoConfiguration 获取的各个配置类,在通过反射加载就能得到一堆 JavaConfig配置类,然后再根据 ConditionalOnProperty等条件配置加载具体的 bean,大致就是这么个逻辑
]]>dyld: Library not loaded: /usr/local/opt/icu4c/lib/libicui18n.64.dylib
这是什么鬼啊,然后我去这个目录下看了下,已经都是libicui18n.67.dylib了,而且它没有把原来的版本保留下来,首先这个是个叫 icu4c是啥玩意,谷歌了一下
ICU4C是ICU在C/C++平台下的版本, ICU(International Component for Unicode)是基于”IBM公共许可证”的,与开源组织合作研究的, 用于支持软件国际化的开源项目。ICU4C提供了C/C++平台强大的国际化开发能力,软件开发者几乎可以使用ICU4C解决任何国际化的问题,根据各地的风俗和语言习惯,实现对数字、货币、时间、日期、和消息的格式化、解析,对字符串进行大小写转换、整理、搜索和排序等功能,必须一提的是,ICU4C提供了强大的BIDI算法,对阿拉伯语等BIDI语言提供了完善的支持。
然后首先想到的解决方案就是能不能我使用brew install icu4c@64来重装下原来的版本,发现不行,并木有,之前的做法就只能是去网上把 64 的下载下来,然后放到这个目录,比较麻烦不智能,虽然没抱着希望在谷歌着,不过这次竟然给我找到了一个我认为非常 nice 的解决方案,因为是在 Stack Overflow 找到的,本着写给像我这样的小小白看的,那就稍微翻译一下
第一步,我们到 brew的目录下
cd $(brew --prefix)/Homebrew/Library/Taps/homebrew/homebrew-core/Formula
这个可以理解为是 maven 的 pom 文件,不过有很多不同之处,使用ruby 写的,然后一个文件对应一个组件或者软件,那我们看下有个叫icu4c.rb的文件,
第二步看看它的提交历史
git log --follow icu4c.rb
在 git log 的海洋中寻找,寻找它的(64版本)的身影
第三步注意这三个红框,Stack Overflow 给出来的答案这一步是找到这个 commit id 直接切出一个新分支
git checkout -b icu4c-63 e7f0f10dc63b1dc1061d475f1a61d01b70ef2cb7
其实注意 commit id 旁边的红框,这个是有tag 的,可以直接
git checkout icu4c-64
PS: 因为我的问题是出在 64 的问题,Stack Overflow 回答的是 63 的,反正是一样的解决方法
第四部,切回去之后我们就可以用 brew 提供的基于文件的安装命令来重新装上 64 版本
brew reinstall ./icu4c.rb
然后就是第五步,切换版本
brew switch icu4c 64.2
最后把分支切回来
git checkout master
是不是感觉很厉害的解决方法,大佬还提供了一个更牛的,直接写个 zsh 方法
# zsh
function hiicu64() {
local last_dir=$(pwd)
cd $(brew --prefix)/Homebrew/Library/Taps/homebrew/homebrew-core/Formula
git checkout icu4c-4
brew reinstall ./icu4c.rb
brew switch icu4c 64.2
git checkout master
cd $last_dir
}
对应自己的版本改改版本号就可以了,非常好用。
]]>比如我们在代码中 new 一个 ThreadLocal,
public static void main(String[] args) {
ThreadLocal<Man> tl = new ThreadLocal<>();
new Thread(() -> {
try {
TimeUnit.SECONDS.sleep(2);
} catch (InterruptedException e) {
e.printStackTrace();
}
System.out.println(tl.get());
}).start();
new Thread(() -> {
try {
TimeUnit.SECONDS.sleep(1);
} catch (InterruptedException e) {
e.printStackTrace();
}
tl.set(new Man());
}).start();
}
static class Man {
String name = "nick";
}
这里构造了两个线程,一个先往里设值,一个后从里取,运行看下结果,
知道这个用法的话肯定知道是取不到值的,只是具体的原理原来搞错了,我们来看下设值 set 方法
public void set(T value) {
Thread t = Thread.currentThread();
ThreadLocalMap map = getMap(t);
if (map != null)
map.set(this, value);
else
createMap(t, value);
}
写博客这会我才明白我原来咋会错得这么离谱,看到第一行代码 t 就是当前线程,然后第二行就是用这个线程去getMap,然后我是把这个当成从 map 里取值了,其实这里是
ThreadLocalMap getMap(Thread t) {
return t.threadLocals;
}
获取 t 的 threadLocals 成员变量,那这个 threadLocals 又是啥呢
它其实是线程 Thread 中的一个类型是java.lang.ThreadLocal.ThreadLocalMap的成员变量
这是 ThreadLocal 的一个静态成员变量
static class ThreadLocalMap {
/**
* The entries in this hash map extend WeakReference, using
* its main ref field as the key (which is always a
* ThreadLocal object). Note that null keys (i.e. entry.get()
* == null) mean that the key is no longer referenced, so the
* entry can be expunged from table. Such entries are referred to
* as "stale entries" in the code that follows.
*/
static class Entry extends WeakReference<ThreadLocal<?>> {
/** The value associated with this ThreadLocal. */
Object value;
Entry(ThreadLocal<?> k, Object v) {
super(k);
value = v;
}
}
}
全部代码有点长,只截取了一小部分,然后我们再回头来分析前面说的 set 过程,再 copy 下代码
public void set(T value) {
Thread t = Thread.currentThread();
ThreadLocalMap map = getMap(t);
if (map != null)
map.set(this, value);
else
createMap(t, value);
}
获取到 map 以后呢,如果 map 不为空,就往 map 里 set,这里注意 key 是啥,其实是当前这个 ThreadLocal,这里就比较明白了究竟是啥结构,每个线程都会维护自身的 ThreadLocalMap,它是线程的一个成员变量,当创建 ThreadLocal 的时候,进行设值的时候其实是往这个 map 里以 ThreadLocal 作为 key,往里设 value。
这里又要看下前面的 ThreadLocalMap 结构了,类似 HashMap,它有个 Entry 结构,在设置的时候会先包装成一个 Entry
private void set(ThreadLocal<?> key, Object value) {
// We don't use a fast path as with get() because it is at
// least as common to use set() to create new entries as
// it is to replace existing ones, in which case, a fast
// path would fail more often than not.
Entry[] tab = table;
int len = tab.length;
int i = key.threadLocalHashCode & (len-1);
for (Entry e = tab[i];
e != null;
e = tab[i = nextIndex(i, len)]) {
ThreadLocal<?> k = e.get();
if (k == key) {
e.value = value;
return;
}
if (k == null) {
replaceStaleEntry(key, value, i);
return;
}
}
tab[i] = new Entry(key, value);
int sz = ++size;
if (!cleanSomeSlots(i, sz) && sz >= threshold)
rehash();
}
这里其实比较重要的就是前面的 Entry 的构造方法,Entry 是个 WeakReference 的子类,然后在构造方法里可以看到 key 会被包装成一个弱引用,这里为什么使用弱引用,其实是方便这个 key 被回收,如果前面的 ThreadLocal tl实例被设置成 null 了,如果这里是直接的强引用的话,就只能等到线程整个回收了,但是其实是弱引用也会有问题,主要是因为这个 value,如果在 ThreadLocal tl 被设置成 null 了,那么其实这个 value 就会没法被访问到,所以最好的操作还是在使用完了就 remove 掉
]]>这里看上去是有点民国时期的建筑风格,部分像那种电视里的租界啥的,不过这次去的时候都在翻修,路一大半拦起来了,听导游说这里往里面走有个局口街,然后上次听前同事说厦门比较有名的就是沙茶面和海蛎煎,不出意料的不太爱吃,沙茶面比较普通,可能是没吃到正宗的,海蛎煎吃不惯,倒是有个大叔的沙茶里脊还不错,在局口街那,还有小哥在那拍,应该也算是个网红打卡点了,然后吃了个油条麻糍也还不错,总体如果是看建筑的话可能最近不是个好时间,个人也没这方面爱好,吃的话最好多打听打听沙茶面跟海蛎煎哪里正宗。如果不知道哪家好吃,也不爱看这类建筑的可以排个坑。
鼓浪屿也是完全没啥概念,需要乘船过去,但是只要二十分钟,岛上没有机动车,基本都靠走,有几个比较有名的地方,菽庄花园,里面有钢琴博物馆,对这个感兴趣的可以去看看,旁边是沙滩还可以逛逛,然后有各种博物馆,风琴啥的,岛上最大的特色是巷子多,道听途说有三百多条小巷,还有几个网红打卡点,周杰伦晴天墙,还有个最美转角,都是挤满了人排队打卡拍照,不过如果不着急,慢慢悠悠逛逛还是不错的,比较推荐,推荐值☆☆
一直读不对这个字,都是叫:那个曾什么垵,愧对语文老师,这里到算是意外之喜,鼓浪屿回来已经挺累了,不过由于比较饿(什么原因后面说),并且离住的地方不远,就过去逛了逛,东西还蛮好吃的,芒果挺便宜,一大杯才十块,无骨鸡爪很贵,不是特别爱,臭豆腐不错的,也不算很贵,这里想起来,那边八婆婆的豆乳烧仙草还不错的,去中山路那会喝了,来曾厝垵也买了,奶茶爱好者可以试试,含糖量应该很高,不爱甜食或者减肥的同学慎重考虑好了再尝试,晚上那边从牌坊出来,沿着环岛路挺多夜宵店什么的,非常推荐,推荐值☆☆☆☆
植物园还是挺名副其实的,有热带植物,沙漠多肉,因为赶时间逛得不多,热带雨林植物那太多人了,都是在那拍照,而且我指的拍照都是拍人照,本身就很小的路,各种十八线网红,或者普通游客在那摆 pose 拍照,挺无语的;沙漠多肉比较惊喜,好多比人高的仙人掌,一大片的仙人球,很可恶的是好多大仙人掌上都有人刻字,越来越体会到,我们社会人多了,什么样的都有,而且不少;还看了下百花厅,但没什么特别的,可能赶时间比较着急,没仔细看,比较推荐,推荐值☆☆☆
对这个其实比较排斥,主要是比较晚了,跑的有点远(我太懒了),一开始真的挺拉低体验感受的,上来个什么书法家,现场画马,卖画;不过后面的还算值回票价,主题是花木兰,空中动作应该很考验基本功,然后那些老外的飞轮还跳绳(不知道学名叫啥),动物那块不太忍心看,应该是吃了不少苦头,不过人都这样就往后点再心疼动物吧。
厦门是个非常适合干饭人的地方,吃饭的地方大部分是差不多一桌菜十个左右就完了,而且上来就一大碗饭,一瓶雪碧一瓶可乐,对于经常是家里跟亲戚吃饭都得十几二十个菜的乡下人来说,不太吃得惯这样的🤦♂️,当然很有可能是我们预算不足,点的差。但是有一点是我回杭州深有感触的,感觉杭州司机的素质真的是跟厦门的司机差了比较多,杭州除非公交车停了,否则人行道很难看到主动让人的,当然这里拿厦门这个旅游城市来对比也不是很公平,不过这也是体现城市现代化文明水平的一个维度吧。
]]>"main@1" prio=5 tid=0x1 nid=NA runnable
java.lang.Thread.State: RUNNABLE
at TreeDistance.treeDist(TreeDistance.java:64)
at TreeDistance.treeDist(TreeDistance.java:65)
at TreeDistance.main(TreeDistance.java:45)
这就是我们主线程的堆栈信息了,main 表示这个线程名,prio表示优先级,默认是 5,tid 表示线程 id,nid 表示对应的系统线程,后面的runnable 表示目前线程状态,因为是被我打了断点,所以是就许状态,然后下面就是对应的线程栈内容了,在TreeDistance类的 treeDist方法中,对应的文件行数是 64 行。
这里使用 thread dump一般也不会是上面我截图代码里的这种代码量很少的,一般是大型项目,有时候跑着跑着没反应,又不知道跑到哪了,特别是一些刚接触的大项目或者需要定位一个大项目的一个疑难问题,一时没思路时,可以使用这个方法,个人觉得非常有帮助。
ACID,是指数据库管理系统(DBMS)在写入或更新资料的过程中,为保证事务(transaction)是正确可靠的,所必须具备的四个特性:原子性(atomicity,或称不可分割性)、一致性(consistency)、隔离性(isolation,又称独立性)、持久性(durability)。
Atomicity(原子性):一个事务(transaction)中的所有操作,或者全部完成,或者全部不完成,不会结束在中间某个环节。事务在执行过程中发生错误,会被回滚(Rollback)到事务开始前的状态,就像这个事务从来没有执行过一样。即,事务不可分割、不可约简。[1]
Consistency(一致性):在事务开始之前和事务结束以后,数据库的完整性没有被破坏。这表示写入的资料必须完全符合所有的预设约束、触发器、级联回滚等。[1]
Isolation(隔离性):数据库允许多个并发事务同时对其数据进行读写和修改的能力,隔离性可以防止多个事务并发执行时由于交叉执行而导致数据的不一致。事务隔离分为不同级别,包括未提交读(Read uncommitted)、提交读(read committed)、可重复读(repeatable read)和串行化(Serializable)。[1]
Durability(持久性):事务处理结束后,对数据的修改就是永久的,即便系统故障也不会丢失。[1]
在mysql中,借助于MVCC,各种级别的锁,日志等特性来实现了事务的ACID,但是这个我们通常是对于一个数据库服务的定义,常见的情况下我们的数据库随着业务发展也会从单实例变成多实例,组成主从Master-Slave架构,这个时候其实会有一些问题随之出现,比如说主从同步延迟,假如在业务代码中做了读写分离,对于一些敏感度较低的数据其实问题不是很大,只要主从延迟不到特别夸张的地步一般都是可以忍受的,但是对于一些核心的业务数据,比如订单之类的,不能忍受数据不一致,下了单了,付了款了,一刷订单列表,发现这个订单还没支付,甚至订单都没在,这对于用户来讲是恨不能容忍的错误,那么这里就需要一些措施,要不就不读写分离,要不就在 redis 这类缓存下订单,或者支付后加个延时等,这些都是一些补偿措施,并且这也是一个不太切当的例子,比较合适的例子也可以用这个下单来说,一般在电商平台下单会有挺多要做的事情,比如像下面这个图

下单的是后要冻结核销优惠券,如果账户里有钱要冻结扣除账户里的钱,如果使用了J 豆也一样,可能还有 E 卡,忽略我借用的平台,因为目前一般后台服务化之后,可能每一项都是对应的一个后台服务,我们期望的执行过程是要不全成功,要不就全保持执行前状态,不能是部分扣减核销成功了,部分还不行,所以我们处理这种情况会引入一些通用的方案,第一种叫二阶段提交,
二阶段提交(英语:Two-phase Commit)是指在计算机网络以及数据库领域内,为了使基于分布式系统架构下的所有节点在进行事务提交时保持一致性而设计的一种算法。通常,二阶段提交也被称为是一种协议(Protocol)。在分布式系统中,每个节点虽然可以知晓自己的操作时成功或者失败,却无法知道其他节点的操作的成功或失败。当一个事务跨越多个节点时,为了保持事务的ACID特性,需要引入一个作为协调者的组件来统一掌控所有节点(称作参与者)的操作结果并最终指示这些节点是否要把操作结果进行真正的提交(比如将更新后的数据写入磁盘等等)。因此,二阶段提交的算法思路可以概括为: 参与者将操作成败通知协调者,再由协调者根据所有参与者的反馈情报决定各参与者是否要提交操作还是中止操作。
对于上面的例子,我们将整个过程分成两个阶段,首先是提交请求阶段,这个阶段大概需要做的是确定资源存在,锁定资源,可能还要做好失败后回滚的准备,如果这些都 ok 了那么就响应成功,这里其实用到了一个叫事务的协调者的角色,类似于裁判员,每个节点都反馈第一阶段成功后,开始执行第二阶段,也就是实际执行操作,这里也是需要所有节点都反馈成功后才是执行成功,要不就是失败回滚。其实常用的分布式事务的解决方案主要也是基于此方案的改进,比如后面介绍的三阶段提交,有三阶段提交就是因为二阶段提交比较尴尬的几个点,
所以三阶段提交引入了各节点的超时机制和一个准备阶段,首先是一个can commit阶段,询问下各个节点有没有资源,能不能进行操作,这个阶段不阻塞,只是提前做个摸底,这个阶段其实人畜无害,但是能提高成功率,在这个阶段如果就有节点反馈是不接受的,那就不用执行下去了,也没有锁资源,然后第二阶段是 pre commit ,这个阶段做的事情跟原来的 第一阶段比较类似,然后是第三阶段do commit,其实三阶段提交我个人觉得只是加了个超时,和准备阶段,好像木有根本性的解决的两阶段提交的问题,后续可以再看看一些论文来思考讨论下。
2020年05月24日22:11 更新
这里跟朋友讨论了下,好像想通了最核心的一点,对于前面说的那个场景,如果是两阶段提交,如果各个节点中有一个没回应,并且协调者也挂了,这个时候会有什么情况呢,再加一个假设,其实比如这个一阶段其实是检验就失败的,理论上应该大家都释放资源,那么对于这种异常情况,其他的参与者就不知所措了,就傻傻地锁着资源阻塞着,那么三阶段提交的意义就出现了,把第一阶段拆开,那么即使在这个阶段出现上述的异常,即也不会锁定资源,同时参与者也有超时机制,在第二阶段锁定资源出现异常是,其他参与者节点等超时后就自动释放资源了,也就没啥问题了,不过对于那种异常恢复后的一些情况还是没有很好地解决,需要借助 zk 等,后面有空可以讲讲 paxos 跟 raft 等
只是这么平淡的生活就有一些自己比较心烦纠结的,之前有提到过的交通,最近似乎又发现了一点,就真相总是让人跌破眼镜,以前觉得我可能是胆子比较小,所以会觉得怎么路上这些电瓶都是这么肆无忌惮的往我冲过来,后面慢慢有一种借用电视剧读心神探的概念,安全距离,觉得大部分人跟我一样,骑电瓶车什么的总还是有个安全距离,只是可能这个安全距离对于不同的人不一样,那些骑电瓶车的潜意识里的安全距离是非常短,所以经常会骑车离着你非常近才会刹车,但是这个安全距离理论最近又被推翻了,因为经历过几次电瓶车就是已经跟你有身体接触了,但是没到把人撞倒的程度,似乎这些骑电瓶车的觉得步行的行人在人行道上是空气,蹭一下也无所谓,反正不能挡我的路,总感觉要不是我在前面骑自行车太慢挡着电瓶车,不然他们都能起飞去干掉 F35 解放湾湾了;
另一个问题应该是说我们交通规则普及的太少,虽然我们没有路权这个名词概念,但是其实是有这个优先级的,包括像杭州是以公交车在人行道礼让行人闻名的,其实这个文明的行为只限于人行道在直行路中间的,大部分在十字路口,右转的公交车很少会让直行人行道的,前提是直行的绿灯的时候,特别是像公交车这样,车身特别长,右转的时候会有比较大的死角,如果是公交车先转,行人或者自行车很容易被卷进去,非常危险的,私家车就更不用说了,反正右转即使人行道上人非常多要转的也是一秒都不等,所以我自己在开车的时候是尽量在右转的时候等人行道上的行人或者骑车的走完,因为总会觉得我是不是有点双标,骑车走路的时候希望开车的能按规则让我,自己开车的时候又想赶紧开走,所以在开车的时候尽量做到让行车和骑车的。
还有个其实是写着写着想起来的,比如我骑车左转的时候,因为我是左转到对角那就到了,跟那些左转后要再直行的不一样,我们应该在学车的时候也学过,超车要从左边超,但是往往那些骑电瓶车的在左转的时候会从我右边超过来再往左边撇过去,如果留的空间大还好,有些电瓶车就是如果车头超过了就不管他的车屁股,如果我不减速,自行车就被刮倒了,可能的确是别人就不是人,只要不把你撞倒就无所谓,反正为了你自己不被撞倒你肯定会让的。
]]>我的一些观点也在前面说了,恋爱到婚姻,即使物质没问题,经济没问题,也会有各种各样的问题,需要一起去解决,因为结婚就意味着需要相互扶持,而不是各取所需,可能我的要求比较高,后面男女主在分手后还一起住了一段时间,我原来还在想会不会通过这个方式让他们继续去磨合同步,只是我失望了,最后给个打分可能是 5 到 6 分吧,勉强及格,好的影视剧应该源于生活高于生活,这一部可能还比不上生活。
]]>前面其实是看的太阳的后裔,跟 LD 一起看的,之前其实算是看过一点,但是没有看的很完整,并且很多剧情也忘了,只是这个我我可能看得更少一点,因为最开始的时候觉得男主应该是男二,可能对长得这样的男主并且是这样的人设有点失望,感觉不是特别像个特种兵,但是由于本来也比较火,而且 LD 比较喜欢就从这个开始看了,有两个点是比较想说的
韩剧虽然被吐槽的很多,但是很多剧的质量,情节把控还是优于目前非常多国内剧的,相对来说剧情发展的前后承接不是那么硬凹出来的,而且人设都立得住,这个是非常重要的,很多国内剧怎么说呢,就是当爹的看起来就比儿子没大几岁,三四十岁的人去演一个十岁出头的小姑娘,除非容貌异常,比如刘晓庆这种,不然就会觉得导演在把我们观众当傻子。瞬间就没有想看下去的欲望了。
再一点就是情节是大众都能接受度比较高的,现在有很多普遍会找一些新奇的视角,比如卖腐,想某某令,两部都叫某某令,这其实是一个点,延伸出去就是跟前面说的一点有点类似,xx 老祖,人看着就二三十,叫 xx 老祖,(喜欢的人轻喷哈)然后名字有一堆,同一个人物一会叫这个名字,一会又叫另一个名字,然后一堆死表情。
因为今天有个特殊的事情发生,所以简短的写(shui)一篇了
]]>这次甚至更夸张,上次还让带回去,我准备好了系统镜像啥的,第二天装,这次直接带了两个老旧笔记本过来说让当天就装好,感觉有点像被当修电脑的使,又说这些电脑其实都不用了的,都是为了她们当医生的要每年看会课,然后只能用电脑浏览器看,结果都在用 360 浏览器,真的是万恶的 360,其实以前对 360 没啥坏印象,毕竟以前也经常用,只是对于这些老电脑,360 全家桶真的就是装了就废了,2G 的内存,开机就开着 360 安全卫士,360 杀毒,有一个还装了腾讯电脑管家,然后腾讯视频跟爱奇艺也开机启动了,然后还打开 360 浏览器看课,就算再好的系统也吃不消这么用,重装了系统,还是这么装这些东西,也是分分钟变卡,可惜他们都没啥这类概念。
对于他们要看的课,更搞笑的是,明明在页面上注明了说要使用 IE 浏览器,结果他们都在用 360 浏览器看,但是这个也不能完全怪他们,因为实在是现在的 IE 啥的也有开始不兼容 flash 的配置,需要开启兼容配置,但是只要开启了之后就可以直接用 IE 看,比 360 靠谱很多, 资源占用也比较少,360 估计是基于 chromium 加了很多内置的插件,本身 chromium 也是内存大户,但是说这些其实他们也不懂,总觉得找我免费装下系统能撑一段时间,反正对我来说也应该很简单(他们觉得),实际上开始工作以后,我自己想装个双系统都是上淘宝买别人的服务装的,台式机更是几年没动过系统了,因为要重装一大堆软件,数据备份啥的,还有驱动什么的,分区格式,那些驱动精灵啥的也都是越来越坑,一装就给你带一堆垃圾软件。
感悟是,总觉得学计算机的就应该会装系统,会修电脑,之前亲戚还拿着一个完全开不起来的笔记本让我来修,这真的是,我说可以找官方维修的,结果我说我搞不定,她直接觉得是修不好了,直接电脑都懒得拿回去了,后面又一次反复解释了才明白,另外就是 360 全家桶,别说老电脑了,新机器都不太吃得消。
]]>转籍其实是很方便的,在交警 12123 App 上申请就行了,在转籍以后,需要去实地验车,验车的话,在支付宝-杭州交警生活号里进行预约,找就近的车管所就好,需要准备一些东西,首先是行驶证,机动车登记证书,身份证,居住证,还有车上需要准备的东西是要有三脚架和反光背心,反光背心是最近几个月开始要的,问过之前去验车的只需要三脚架就好了,预约好了的话建议是赶上班时间越早越好,不然过去排队时间要很久,而且人多了以后会很乱,各种插队,而且有很多都是汽车销售,一个销售带着一堆车,我们附近那个进去的小路没一会就堵满车,进去需要先排队,然后扫码,接着交资料,这两个都排着队,如果去晚了就要排很久的队,交完资料才是排队等验车,验车就是打开引擎盖,有人会帮忙拓印发动机车架号,然后验车的会各种检查一下,车里面,还有后备箱,建议车内整理干净点,后备箱不要放杂物,检验完了之后,需要把三脚架跟反光背心放在后备箱盖子上,人在旁边拍个照,然后需要把车牌遮住后再拍个车子的照片,再之后就是去把车牌卸了,这个多吐槽下,那边应该是本来那边师傅帮忙卸车牌,结果他就说是教我们拆,虽然也不算难,但是不排除师傅有在偷懒,完了之后就是把旧车牌交回去,然后需要在手机上(警察叔叔 App)提交各种资料,包括身份证,行驶证,机动车登记证书,提交了之后就等寄车牌过来了。
这里面缺失的一个环节就是选号了,选号杭州有两个方式,一种就是根据交管局定期发布的选号号段,可以自定义拼 20 个号,在手机上的交警 12123 App 上可以三个一组的形式提交,如果有没被选走的,就可以预选到这个了,但是这种就是也需要有一定策略,最新出的号段能选中的概率大一点,然后数字全是 8,6 这种的肯定会一早就被选走,然后如果跟我一样可以提前选下尾号,因为尾号数字影响限号,我比较有可能周五回家,所以得避开 5,0 的,第二种就是 50 选一跟以前新车选号一样,就不介绍了。第一种选中了以后可以在前面交还旧车牌的时候填上等着寄过来了,因为我是第一种选中的,第二种也可以在手机上选,也在可以在交还车牌的时候现场选。
总体过程其实是 LD 在各种查资料跟帮我跑来跑去,要不是 LD,估计在交管局那边我就懵逼了,各种插队,而且车子开着车子,也不能随便跑,所以建议办这个的时候有个人一起比较好。
]]>zk1 192.168.2.1
zk2 192.168.2.2
zk3 192.168.2.3
在 zoo.cfg 中的配置就是如下
server.1=192.168.2.1:2888:3888
server.2=192.168.2.2:2888:3888
server.3=192.168.2.3:2888:3888
需要将集群迁移到 192.168.2.4(简称 zk4),192.168.2.5(简称 zk5),192.168.2.6(简称 zk6) 这三台机器上,目前新的这三台机器上是没有 zk 部署的, 我们想要的是数据不丢失,那主要考虑的就是滚动升级,这里我其实犯了几个错误,也特别说明下
首先我们想要新的三台机器加进去,所以我在zk4,zk5,zk6 的配置是这样
server.1=192.168.2.1:2888:3888
server.2=192.168.2.2:2888:3888
server.3=192.168.2.3:2888:3888
server.4=192.168.2.4:2888:3888
server.5=192.168.2.5:2888:3888
server.6=192.168.2.6:2888:3888
这样起来发现状态是该节点没起来,
PS:查看当前节点状态可以通过 ./zkServer.sh status 来查看
第一个问题是我需要一个myid文件,标识我是哪个节点,里面的内容就写 4或 5 或 6 这样就行了,并且这个文件的路径应该在配置文件中指定的dataDir=数据目录下
第二个问题是困扰我比较久的,我在按上面的配置启动节点后,发现这几个节点都是没起来的,并且有 FastLeaderElection@xxx - Notification time out: 60000 这个报错,一开始以为是网络不通,端口没开这些原因,检查了下都是通的,结果原因其实跟我之前的一个考虑是相关的,当有六个节点的时候,理论上需要有半数以上的节点可用,集群才会是健康的,但是按我这个方式起来,其实我配置了六个节点,但是其中三个都是不可用的(包括自身节点),那么它自然是没办法正常工作,所以这里其实也需要滚动添加,类似于这样
我的 zk4 的配置应该是这样
server.1=192.168.2.1:2888:3888
server.2=192.168.2.2:2888:3888
server.3=192.168.2.3:2888:3888
server.4=192.168.2.4:2888:3888
然后 zk5 的配置
server.1=192.168.2.1:2888:3888
server.2=192.168.2.2:2888:3888
server.3=192.168.2.3:2888:3888
server.4=192.168.2.4:2888:3888
server.5=192.168.2.5:2888:3888
接着 zk6 的配置就可以是全部了
server.1=192.168.2.1:2888:3888
server.2=192.168.2.2:2888:3888
server.3=192.168.2.3:2888:3888
server.4=192.168.2.4:2888:3888
server.5=192.168.2.5:2888:3888
server.6=192.168.2.6:2888:3888
然后为了集群完全更新,就继续在 zk4 和 zk5 加上其他节点,这样我的 6 节点集群就起来了
这里我踩了另外一个坑,或者说没搞清楚两种方式的差别,
首先说说我没采用的第一种方式,(也是比较合理的)其实上面这个集群有个明显的问题,老集群其实还是各自认了一个三节点的集群,其中 zk3 是主节点,对于 zk1,zk2,zk3 来说它们能看到的就只有这三个节点,对于后三个 zk4,zk5,zk6 节点来说他们能连上其余五个节点,可以认为这是个六节点的集群,那么比较合理的操作应该是在老的三节点上把后面三个也都加进来,即每个节点的配置里 server 都有 6 个,然后我再对老的节点进行下线,这里下线需要注意的比较理想的是下一个节点就要修改配置,挪掉下线的节点后进行一遍重启,比如我知道了集群中的 leader 是在 zk3 上面,那么我先将 zk1 和 zk2 下掉,那么在我将 zk1 下线的之后,我将其他的五个节点都删除 zk1 的配置,然后重启,这样其实不是必须,但相对会可靠些,理论上我也可以在下掉 zk1 和 zk2 之后再修改配置重启其余节点。而当只剩下 zk3,zk4,zk5,zk6 四个节点的集群后,并且每个节点里的配置也只有这四个 server,我再下线 zk3 这个 leader 的时候,就会进行选举,再选出新的 leader,因为刚好是三节点,同样保证了最小可用。
这也是我踩坑的一种方式,就是我没有修改原来三节点的配置,并且我一开始以为可以通过下线 zk1,zk2,zk3(进行选举)的方式完成下线,然后再进行重启,但是这种方式就是我上面说的,原来的三节点里我下掉 zk1 还是能够正常运行,但是我下线 zk2 的时候,这个集群就等于是挂了,小于最小可用了,这样三节点都挂了,而且对于新加入的三个节点来说,又回到了最初起不来一样状态,六节点里只有三节点在线,导致整个集群都挂了,所以对于我这样的操作来说,我需要滚动修改启动,在下线 zk1 的时候就需要把 zk4,zk5,zk6 中的 zk1 移除后重启,当然这样唯一的好处就是可以少重启几个,同样继续下线 zk2 的时候,把 zk2 移除掉再重启,其实在移除 zk1 后修改重启后,在下线 zk2 的时候,集群就会重新选举了,因为 zk2 下线的时候,zk3 还是会一起下线。这个是我们需要特别注意的
]]>stream 中自带的 distinct 只能对元素进行去重
比如下面代码
public static void main(String[] args) {
List<Integer> list = new ArrayList<>();
list.add(1);
list.add(1);
list.add(2);
list = list.stream().distinct().collect(Collectors.toList());
System.out.println(list);
}
结果就是去了重的
[1, 2]
但是当我的元素是个复杂对象,我想根据对象里的某个元素进行过滤的时候,就需要用到自定义的 distinctByKey 了,比如下面的想对 userId 进行去重
public static void main(String[] args) {
List<StudentRecord> list = new ArrayList<>();
StudentRecord s1 = new StudentRecord();
s1.setUserId(11L);
s1.setCourseId(100L);
s1.setScore(100);
list.add(s1);
StudentRecord s2 = new StudentRecord();
s2.setUserId(11L);
s2.setCourseId(101L);
s2.setScore(100);
list.add(s2);
StudentRecord s3 = new StudentRecord();
s3.setUserId(12L);
s3.setCourseId(100L);
s3.setScore(100);
list.add(s3);
System.out.println(list.stream().distinct().collect(Collectors.toList()));
}
@Data
static class StudentRecord {
Long id;
Long userId;
Long courseId;
Integer score;
}
结果就是
[StudentRecord(id=null, userId=11, courseId=100, score=100), StudentRecord(id=null, userId=11, courseId=101, score=100), StudentRecord(id=null, userId=12, courseId=100, score=100)]
因为对象都不一样,所以就没法去重了,这里就需要用
public static <T> Predicate<T> distinctByKey(
Function<? super T, ?> keyExtractor) {
Map<Object, Boolean> seen = new ConcurrentHashMap<>();
return t -> seen.putIfAbsent(keyExtractor.apply(t), Boolean.TRUE) == null;
}
然后就可以用它来去重了
System.out.println(list.stream().filter(distinctByKey(StudentRecord::getUserId)).collect(Collectors.toList()));
看下结果
[StudentRecord(id=null, userId=11, courseId=100, score=100), StudentRecord(id=null, userId=12, courseId=100, score=100)]
但是说实在的这个功能感觉应该是 stream 默认给实现的
这个使用场景还是蛮多的,上面的场景里比如我要对 userId 进行分组,就一行代码就解决了
System.out.println(list.stream().collect(Collectors.groupingBy(StudentRecord::getUserId)));
{11=[StudentRecord(id=null, userId=11, courseId=100, score=100), StudentRecord(id=null, userId=11, courseId=101, score=100)], 12=[StudentRecord(id=null, userId=12, courseId=100, score=100)]}
很方便的变成了以 userId 作为 key,以相同 userId 的 StudentRecord 的 List 作为 value 的 map 结构
乌丝兰玛是个贯穿两部,甚至在蛮荒的最后还要再搞事情,极其坚定的自以为是的大 boss,其实除了最后被我们的主人公打败,前面几乎就是无所不能,下了一盘无比巨大的棋,主人公都只是其中一个棋子和意外,但是正如很多反派,一直以来都是背着一个信念,并且这个所谓的信念是比较正义的,只是为了这个正义的信念和目标却做了各种丧尽天良的事情,说起来跟灭霸有点像,为了环保哈哈,相对来说感觉姬远玄也只是个最大牌的工具人,或者说是中间人,深爱的妹妹冰夷也意外被蚩尤怒拿一血。
但是中间那个赤霞仙子一定要给烈烟石的心上锁,导致最后认不出来蚩尤,也间接导致了蚩尤被杀,如果不考虑最后情节或者推动故事的需求,这个还是我很讨厌的,有点类似于《驴得水》里那个校长,看着貌似是个正常的,做的事情也是正派,但是其实是害人不浅,即使南阳仙子因此被抛进了火山,那也是有贱人在那挑食,并且赤松子是赤飚怒的儿子,烈烟石跟蚩尤又没这层关系,就很像倚天屠龙记里的灭绝师太和极品家丁里的那个玉德仙坊的院主,后者还好一些,前者几乎就是导致周芷若一生悲剧的始作俑者,自己偏执的善恶观,还要给徒弟灌输如此恶毒的理念和让她立下像紧箍咒似的誓言,在人一生中本来就有很多不能如愿的,又被最亲最尊敬的人下了这样的紧箍咒,人生的不幸也加倍了。
似乎习惯了总要有个总结的,想说的应该是我觉得这些剧也好,书也好,我觉得最坏的人可能是大部分人眼中的一些次要人物,或者至少大 boss 才是最坏的人,当然这个坏也不是严格的二分法,只是我觉得最让我觉得负面的人物,这些人可能看起来情景出现的不多,只是说了很少的话,做了很少的事,但是在我看来却做了最大的恶。
]]>对对面这户人家的印象,就是对面的老头子经常是我出门上班去了他回来,看着他颤颤巍巍地走楼梯,我看到了都靠边走,而且有几次还听见好像是他儿子在说他,”年假这么大了,还是少出去吧”,说实话除了这次的事情,之前就有一次水管阀门爆裂了,算是有点交集,那次大概是去年冬天,天气已经很冷了,我们周日下午回来看到楼梯有点湿,但是没什么特别的异常就没怎么注意,到晚上洗完澡,楼下的邻居就来敲门,说我们门外的水表那一直在流水,出门一看真的是懵了,外面水表那在哗哗哗地流水,导致楼梯那就跟水帘洞一样,仔细看看是对面家的水表阀门那在漏水,我只能先用塑料袋包一下,然后大冬天(刚洗完澡)穿着凉拖跑下去找物业保安,走到一楼的时候发现水一直流到一楼了,楼梯上都是水流下来,五楼那是最惨的,感觉门框周边都浸透了,五楼的也是态度比较差的让我一定要把水弄好了,但是前面也说了谁是从对门那户的水表阀那出来的,理论上应该让对面的处理,结果我敲门敲了半天对面都没反应,想着我放着不管也不太好,就去找了物业保安,保安上来看了只能先把总阀关了,我也打电话给维修自来水管的,自来水公司的人过了会也是真的来修了,我那会是挺怕不来修,自来水公司的师傅到了以后拿开一看是对面那户的有个阀门估计是自己换上去的,跟我们这的完全不一样,看上去就比较劣质,师傅也挺气的,大晚上被叫过来,我又尝试着去敲门也还是没人应,也没办法,对面老人家我敲太响到时候出来说我吓到他们啥的,第二天去说也没现场了。
前面的这件事是个重要铺垫,前几天 LD 下班后把厨余垃圾套好袋子放在门口,打算等我下班了因为要去做核酸(hz 48 小时核酸)顺便带下去,结果到了七点多,说对面的老太太在那疯狂砸门了,LD 被吓到了不敢开门,老太太在外面一边砸门一边骂,“你们年轻人怎么素质这么差”(他们家也经常在门口放垃圾,我们刚来住的时候在楼梯转角他们就放这个废弃的洗衣机,每次走楼梯带点东西都要小心翼翼地走,不然都过不去,然后我赶紧赶回去,结果她听到我回家了,还特意开门继续骂,“你们年轻人怎么素质这么差,垃圾放在这里”,我说我们刚才放在这,打算待会做核酸的时候去扔掉,结果他们家老头,都已经没了牙齿,在那瞪大眼睛说,“你们早上就放在这了的,”我说是LD 刚才下班了放的,争论了一会,我说这个事情我们门口放了垃圾,这会我就去扔掉了,但是你们家老太太这么砸门总不太好,像之前门口水管爆掉了,我敲了门没人应,我也没要砸门一定把你们叫醒,结果老头老太说我们的水管从来没换过,不可能破的(其实到这,再往后说就没意思了,跟这么不要脸的人说多了也只是瞎扯),一会又回到这个垃圾的问题,那个老头说“你们昨天就放在这里了的”,睁着眼说瞎话可真是 666,感觉不是老太太拦着点他马上就要冲上来揍我了一样,事后我想想,这种情况我大概只能躺地上装死了,当这个事情发生之前我真的快把前面说的事情(水管阀坏了)给忘了,虽然这是理论上不该我来处理,除非是老头老太太请求我帮忙,这事后面我也从没说起过,本来完全没交集,对他们的是怎么样的人也没概念,总觉得年纪大了可能还比较心宽和蔼点,结果没想到就是一典型的坏人变老了,我说你们这么砸门,我老婆都被吓得不敢开门,结果对面老头老太太的儿子也出来了说,“我们就是敲下门,我母亲是机关单位退休的,所以肯定不会敲门很大声的,你老婆觉得吓到了是你们人生观价值观有问题”,听到这话我差点笑出来,连着两个可笑至极的脑残逻辑,无语他妈给无语开门,无语到家了。对门家我们之前有个印象就是因为我们都是顶楼,这边老小区以前都是把前后阳台包进来的,然后社区就来咨询大家的意见是不是统一把包进来的违建拆掉,还特地上来六楼跟他们说,结果对面的老头就说,“我要去住建局投诉你们”,本来这个事情是违法的,但是社区的意思也是征求各位业主的意见,结果感觉是社区上门强拆了一样,为老不尊,坏人变老了的典范了。
]]>那位大哥,骑电瓶车一前一后带着两个娃,在非机动车道靠右边行驶,肉眼估计是在我右前方大概十几米的距离,不知道是小孩不舒服了还是啥,想下来还是就在跟他爹玩耍,我算是比较谨慎骑车的,看到这种情况已经准备好捏刹车了,但是也没想到这个娃这么神,差不多能并排四五辆电瓶车的非机动车道,直接从他爸的车下来跑到了非机动车道的最左边,前面我铺垫了电瓶车 25 码,换算一下大概 1 秒能前进 7 米,我是直接把刹车捏死了,才勉强避免撞上这个小孩,并且当时的情况本来我左后方有另一个大哥是想从我左边超过去,因为我刹车了他也赶紧刹车。
现在我们做个假设,假如我刹车不够及时,撞上了这个小孩,会是啥后果呢,小孩人没事还好,即使没事也免不了大吵一架,说我骑车不看前面,然后去医院做检查,负责医药费,如果是有点啥伤了,这事估计是没完了,我是心里一阵后怕。
说实话是张口快骂人了,“怎么带小孩的”,结果那大哥竟然还是那套话术,“你们骑车不会慢点的啊,说一下就好了啊,用得着这么说吗”,我是真的被这位的逻辑给打败了,还好是想超我车那大哥刹住车了,他要是刹不住呢,把我撞了我怪谁?这不是追尾事件,是 zhizhang 大哥的小孩鬼探头,下个电瓶车就下车,下来就往另一边跑,我们尽力刹车没撞到这小孩,说他没管好小孩这大哥还觉得自己委屈了?结果我倒是想骂脏话了,结果我左后方的的大哥就跟他说“你这么教小孩教得真好,你真厉害”,果然在中国还是不能好好说话,阴阳怪气才是王道,我前面也说了真的是后怕,为什么我从头到尾都没有说这个小孩不对,我是觉得这个年纪的小孩(估摸着也就五六岁或者再大个一两岁)这种安全意识应该是要父母和学校老师一起教育培养的,在路上不能这么随便乱跑,即使别人撞了他,别人有责任,那小孩的生理伤痛和心理伤害,父母也肯定要心疼的吧,另外对我们来说前面也说了,真的撞到了我们也是很难受的,这个社会里真的是自私自利的人太多了,平时让外卖小哥送爬下楼梯送上来外卖都觉得挺抱歉的,每次的接过来都说谢谢,人家也不容易,换在有些人身上大概会觉得自己花了钱就是大爷,给我送上来是必须的。
]]>java.lang.Object#equals
public boolean equals(Object obj) {
return (this == obj);
}
对于所有对象的父类,equals 方法其实对比的就是对象的地址,也就是是否是同一个对象,试想如果像 Integer 或者 String 这种,我们没有重写 equals,那其实就等于是在用==,可能就没法达到我们的目的,所以像 String 这种常用的 jdk 类都是默认重写了java.lang.String#equals
public boolean equals(Object anObject) {
if (this == anObject) {
return true;
}
if (anObject instanceof String) {
String anotherString = (String)anObject;
int n = value.length;
if (n == anotherString.value.length) {
char v1[] = value;
char v2[] = anotherString.value;
int i = 0;
while (n-- != 0) {
if (v1[i] != v2[i])
return false;
i++;
}
return true;
}
}
return false;
}
然后呢就是为啥一些书或者 effective java 中写了 equals 跟 hashCode 要一起重写,这里涉及到当对象作为 HashMap 的 key 的时候
首先 HashMap 会使用 hashCode 去判断是否在同一个槽里,然后在通过 equals 去判断是否是同一个 key,是的话就替换,不是的话就链表接下去,如果不重写 hashCode 的话,默认的 object 的hashCode 是 native 方法,根据对象的地址生成的,这样其实对象的值相同的话,因为地址不同,HashMap 也会出现异常,所以需要重写,同时也需要重写 equals 方法,才能确认是同一个 key,而不是落在同一个槽的不同 key.
synchronized 的一些学习记录
jdk1.6 以后对 synchronized 进行了一些优化,包括偏向锁,轻量级锁,重量级锁等
这些锁的加锁方式大多跟对象头有关,我们可以查看 jdk 代码
首先对象头的位置注释
// Bit-format of an object header (most significant first, big endian layout below):
//
// 32 bits:
// --------
// hash:25 ------------>| age:4 biased_lock:1 lock:2 (normal object)
// JavaThread*:23 epoch:2 age:4 biased_lock:1 lock:2 (biased object)
// size:32 ------------------------------------------>| (CMS free block)
// PromotedObject*:29 ---------->| promo_bits:3 ----->| (CMS promoted object)
//
// 64 bits:
// --------
// unused:25 hash:31 -->| unused:1 age:4 biased_lock:1 lock:2 (normal object)
// JavaThread*:54 epoch:2 unused:1 age:4 biased_lock:1 lock:2 (biased object)
// PromotedObject*:61 --------------------->| promo_bits:3 ----->| (CMS promoted object)
// size:64 ----------------------------------------------------->| (CMS free block)
//
// unused:25 hash:31 -->| cms_free:1 age:4 biased_lock:1 lock:2 (COOPs && normal object)
// JavaThread*:54 epoch:2 cms_free:1 age:4 biased_lock:1 lock:2 (COOPs && biased object)
// narrowOop:32 unused:24 cms_free:1 unused:4 promo_bits:3 ----->| (COOPs && CMS promoted object)
// unused:21 size:35 -->| cms_free:1 unused:7 ------------------>| (COOPs && CMS free block)
enum { locked_value = 0,
unlocked_value = 1,
monitor_value = 2,
marked_value = 3,
biased_lock_pattern = 5
};
我们可以用 java jol库来查看对象头,通过一段简单的代码来看下
public class ObjectHeaderDemo {
public static void main(String[] args) throws InterruptedException {
L l = new L();
System.out.println(ClassLayout.parseInstance(l).toPrintable());
}
}

然后可以看到打印输出,当然这里因为对齐方式,我们看到的其实顺序是反过来的,按最后三位去看,我们这是 001,好像偏向锁都没开,这里使用的是 jdk1.8,默认开始偏向锁的,其实这里有涉及到了一个配置,jdk1.8 中偏向锁会延迟 4 秒开启,可以通过添加启动参数 -XX:+PrintFlagsFinal,看到

因为在初始化的时候防止线程竞争有大量的偏向锁撤销升级,所以会延迟 4s 开启
我们再来延迟 5s 看看
public class ObjectHeaderDemo {
public static void main(String[] args) throws InterruptedException {
TimeUnit.SECONDS.sleep(5);
L l = new L();
System.out.println(ClassLayout.parseInstance(l).toPrintable());
}
}

可以看到偏向锁设置已经开启了,我们来是一下加个偏向锁
public class ObjectHeaderDemo {
public static void main(String[] args) throws InterruptedException {
TimeUnit.SECONDS.sleep(5);
L l = new L();
System.out.println(ClassLayout.parseInstance(l).toPrintable());
synchronized (l) {
System.out.println("1\n" + ClassLayout.parseInstance(l).toPrintable());
}
synchronized (l) {
System.out.println("2\n" + ClassLayout.parseInstance(l).toPrintable());
}
}
}
看下运行结果

可以看到是加上了 101 = 5 也就是偏向锁,后面是线程 id
当我再使用一个线程来竞争这个锁的时候
public class ObjectHeaderDemo {
public static void main(String[] args) throws InterruptedException {
TimeUnit.SECONDS.sleep(5);
L l = new L();
System.out.println(ClassLayout.parseInstance(l).toPrintable());
synchronized (l) {
System.out.println("1\n" + ClassLayout.parseInstance(l).toPrintable());
}
Thread thread1 = new Thread() {
@Override
public void run() {
try {
TimeUnit.SECONDS.sleep(5L);
} catch (InterruptedException e) {
e.printStackTrace();
}
synchronized (l) {
System.out.println("thread1 获取锁成功");
System.out.println(ClassLayout.parseInstance(l).toPrintable());
try {
TimeUnit.SECONDS.sleep(5L);
} catch (InterruptedException e) {
e.printStackTrace();
}
}
}
};
thread1.start();
}
}

可以看到变成了轻量级锁,在线程没有争抢,只是进行了切换,就会使用轻量级锁,当两个线程在竞争了,就又会升级成重量级锁
public class ObjectHeaderDemo {
public static void main(String[] args) throws InterruptedException {
TimeUnit.SECONDS.sleep(5);
L l = new L();
System.out.println(ClassLayout.parseInstance(l).toPrintable());
synchronized (l) {
System.out.println("1\n" + ClassLayout.parseInstance(l).toPrintable());
}
Thread thread1 = new Thread() {
@Override
public void run() {
try {
TimeUnit.SECONDS.sleep(5L);
} catch (InterruptedException e) {
e.printStackTrace();
}
synchronized (l) {
System.out.println("thread1 获取锁成功");
System.out.println(ClassLayout.parseInstance(l).toPrintable());
try {
TimeUnit.SECONDS.sleep(5L);
} catch (InterruptedException e) {
e.printStackTrace();
}
}
}
};
Thread thread2 = new Thread() {
@Override
public void run() {
try {
TimeUnit.SECONDS.sleep(5L);
} catch (InterruptedException e) {
e.printStackTrace();
}
synchronized (l) {
System.out.println("thread2 获取锁成功");
System.out.println(ClassLayout.parseInstance(l).toPrintable());
}
}
};
thread1.start();
thread2.start();
}
}
class L {
private boolean myboolean = true;
}

可以看到变成了重量级锁。
]]>select * from table1 where id = 1这种查询语句其实是不会加传说中的锁的,当然这里是指在 RR 或者 RC 隔离级别下,
SELECT ... FROMis a consistent read, reading a snapshot of the database and setting no locks unless the transaction isolation level is set to SERIALIZABLE. For SERIALIZABLE level, the search sets shared next-key locks on the index records it encounters. However, only an index record lock is required for statements that lock rows using a unique index to search for a unique row.
纯粹的这种一致性读,实际读取的是快照,也就是基于 read view 的读取方式,除非当前隔离级别是SERIALIZABLE
但是对于以下几类
select * from table where ? lock in share mode;select * from table where ? for update;insert into table values (...);update table set ? where ?;delete from table where ?;除了第一条是 S 锁之外,其他都是 X 排他锁,这边在顺带下,S 锁表示共享锁, X 表示独占锁,同为 S 锁之间不冲突,S 与 X,X 与 S,X 与 X 之间都冲突,也就是加了前者,后者就加不上了
我们知道对于 RC 级别会出现幻读现象,对于 RR 级别不会出现,主要的区别是 RR 级别下对于以上的加锁读取都根据情况加上了 gap 锁,那么是不是 RR 级别下以上所有的都是要加 gap 锁呢,当然不是
举个例子,RR 事务隔离级别下,table1 有个主键id 字段select * from table1 where id = 10 for update
这条语句要加 gap 锁吗?
答案是不需要,这里其实算是我看了这么久的一点自己的理解,啥时候要加 gap 锁,判断的条件是根据我查询的数据是否会因为不加 gap 锁而出现数量的不一致,我上面这条查询语句,在什么情况下会出现查询结果数量不一致呢,只要在这条记录被更新或者删除的时候,有没有可能我第一次查出来一条,第二次变成两条了呢,不可能,因为是主键索引。
再变更下这个题的条件,当 id 不是主键,但是是唯一索引,这样需要怎么加锁,注意问题是怎么加锁,不是需不需要加 gap 锁,这里呢就是稍微延伸一下,把聚簇索引(主键索引)和二级索引带一下,当 id 不是主键,说明是个二级索引,但是它是唯一索引,体会下,首先对于 id = 10这个二级索引肯定要加锁,要不要锁 gap 呢,不用,因为是唯一索引,id = 10 只可能有这一条记录,然后呢,这样是不是就好了,还不行,因为啥,因为它是二级索引,对应的主键索引的记录才是真正的数据,万一被更新掉了咋办,所以在 id = 10 对应的主键索引上也需要加上锁(默认都是 record lock行锁),那主键索引上要不要加 gap 呢,也不用,也是精确定位到这一条记录
最后呢,当 id 不是主键,也不是唯一索引,只是个普通的索引,这里就需要大名鼎鼎的 gap 锁了,
是时候画个图了
其实核心的目的还是不让这个 id=10 的记录不会出现幻读,那么就需要在 id 这个索引上加上三个 gap 锁,主键索引上就不用了,在 id 索引上已经控制住了id = 10 不会出现幻读,主键索引上这两条对应的记录已经锁了,所以就这样 OK 了


