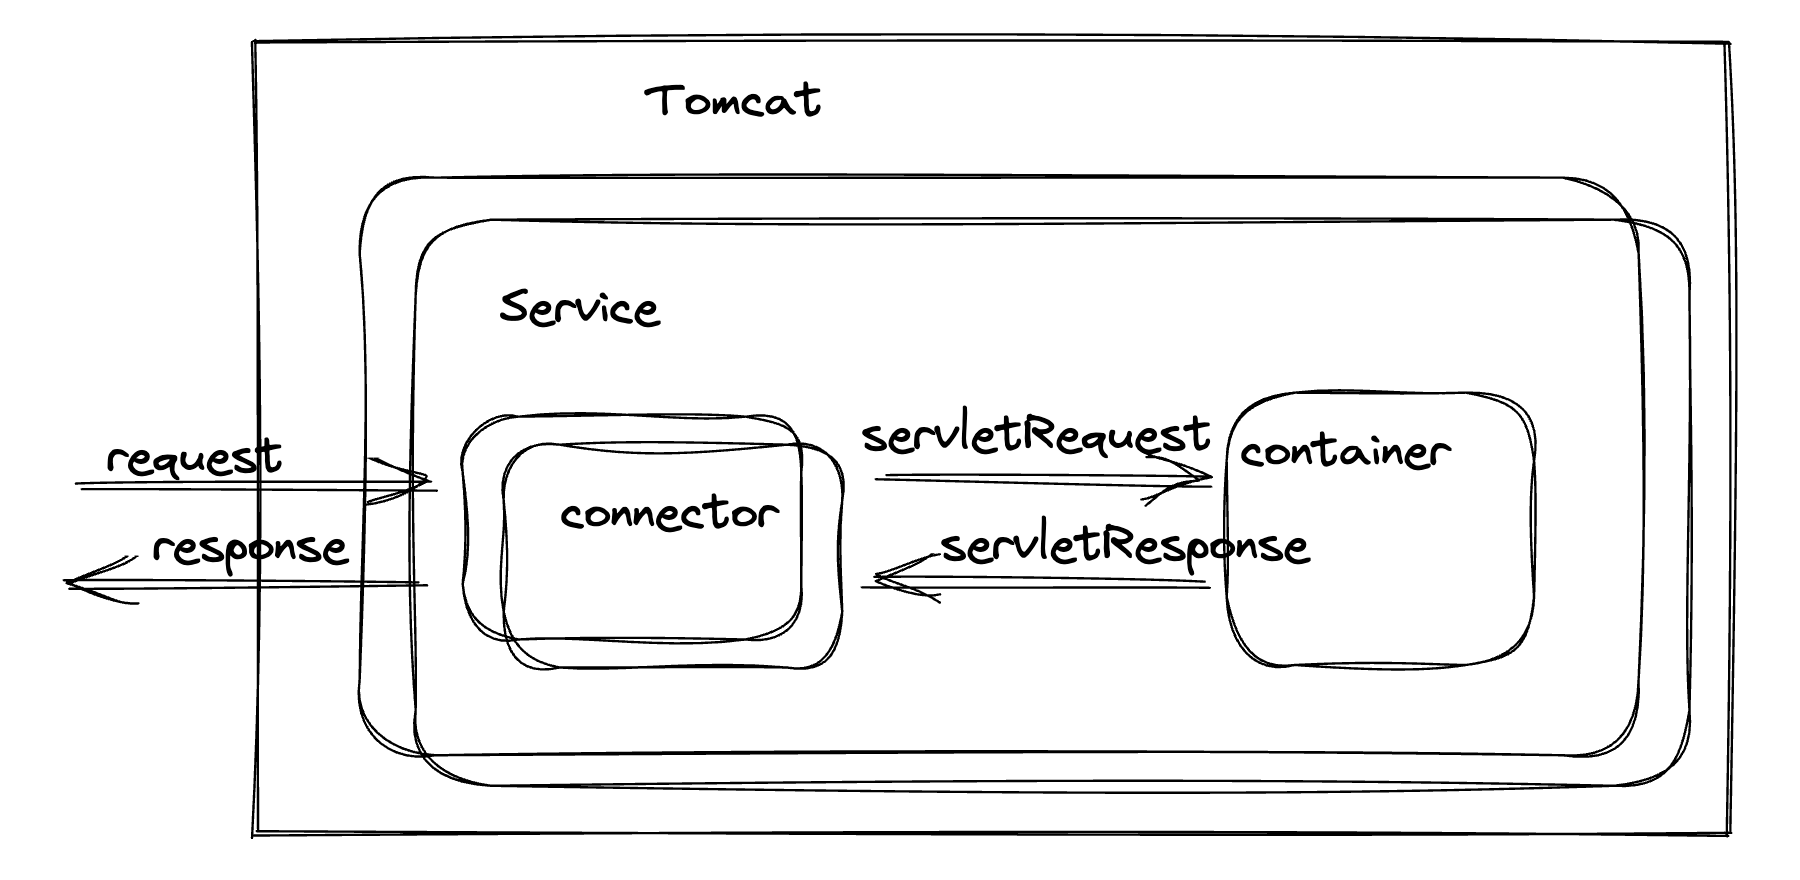
tomcat的主体架构里,connector 作为核心的连接器
![]()
这也是个架构的优化,将连接跟请求处理分开,可以适配各种连接协议
连接器的初始化逻辑,是在初始化 WebServer 的时候调用
org.springframework.boot.web.embedded.tomcat.TomcatServletWebServerFactory#getWebServer
public WebServer getWebServer(ServletContextInitializer... initializers) {
if (this.disableMBeanRegistry) {
Registry.disableRegistry();
}
Tomcat tomcat = new Tomcat();
File baseDir = this.baseDirectory != null ? this.baseDirectory : this.createTempDir("tomcat");
tomcat.setBaseDir(baseDir.getAbsolutePath());
Connector connector = new Connector(this.protocol);
connector.setThrowOnFailure(true);
tomcat.getService().addConnector(connector);
this.customizeConnector(connector);
tomcat.setConnector(connector);
而 connector 中最重要的就是 ProtocolHandler ,初始化代码中
org.apache.catalina.connector.Connector#Connector(java.lang.String)
public Connector(String protocol) {
boolean apr = AprStatus.getUseAprConnector() && AprStatus.isInstanceCreated()
&& AprLifecycleListener.isAprAvailable();
ProtocolHandler p = null;
try {
p = ProtocolHandler.create(protocol, apr);
} catch (Exception e) {
log.error(sm.getString(
"coyoteConnector.protocolHandlerInstantiationFailed"), e);
}
if (p != null) {
protocolHandler = p;
protocolHandlerClassName = protocolHandler.getClass().getName();
} else {
protocolHandler = null;
protocolHandlerClassName = protocol;
}
setThrowOnFailure(Boolean.getBoolean("org.apache.catalina.startup.EXIT_ON_INIT_FAILURE"));
}
这里就调用了
org.apache.coyote.ProtocolHandler#create
根据协议来生成对应的,我们这里默认就是
org.apache.coyote.http11.Http11NioProtocol
public static ProtocolHandler create(String protocol, boolean apr)
throws ClassNotFoundException, InstantiationException, IllegalAccessException,
IllegalArgumentException, InvocationTargetException, NoSuchMethodException, SecurityException {
if (protocol == null || "HTTP/1.1".equals(protocol)
|| (!apr && org.apache.coyote.http11.Http11NioProtocol.class.getName().equals(protocol))
|| (apr && org.apache.coyote.http11.Http11AprProtocol.class.getName().equals(protocol))) {
if (apr) {
return new org.apache.coyote.http11.Http11AprProtocol();
} else {
return new org.apache.coyote.http11.Http11NioProtocol();
}
} else if ("AJP/1.3".equals(protocol)
|| (!apr && org.apache.coyote.ajp.AjpNioProtocol.class.getName().equals(protocol))
|| (apr && org.apache.coyote.ajp.AjpAprProtocol.class.getName().equals(protocol))) {
if (apr) {
return new org.apache.coyote.ajp.AjpAprProtocol();
} else {
return new org.apache.coyote.ajp.AjpNioProtocol();
}
} else {
Class<?> clazz = Class.forName(protocol);
return (ProtocolHandler) clazz.getConstructor().newInstance();
}
}
而这个初始化就主要做的是初始化 EndPoint
public Http11NioProtocol() {
super(new NioEndpoint());
}
这个调用父类的方法是调用的
org.apache.coyote.http11.AbstractHttp11Protocol#AbstractHttp11Protocol
public AbstractHttp11Protocol(AbstractEndpoint<S,?> endpoint) {
    super(endpoint);
    setConnectionTimeout(Constants.DEFAULT_CONNECTION_TIMEOUT);
    ConnectionHandler<S> cHandler = new ConnectionHandler<>(this);
    setHandler(cHandler);
    getEndpoint().setHandler(cHandler);
}
而后在 Tomcat 启动后,在启动 connector 的时候
是在StandardService 添加 connector 时,启动了 connector
org.apache.catalina.core.StandardService#addConnector
@Override
public void addConnector(Connector connector) {
synchronized (connectorsLock) {
connector.setService(this);
Connector results[] = new Connector[connectors.length + 1];
System.arraycopy(connectors, 0, results, 0, connectors.length);
results[connectors.length] = connector;
connectors = results;
}
try {
if (getState().isAvailable()) {
connector.start();
}
} catch (LifecycleException e) {
throw new IllegalArgumentException(
sm.getString("standardService.connector.startFailed", connector), e);
}
support.firePropertyChange("connector", null, connector);
}
而后就会调用到 Connector 的 initInternal 方法
org.apache.catalina.connector.Connector#initInternal
@Override
protected void initInternal() throws LifecycleException {
super.initInternal();
if (protocolHandler == null) {
throw new LifecycleException(
sm.getString("coyoteConnector.protocolHandlerInstantiationFailed"));
}
adapter = new CoyoteAdapter(this);
protocolHandler.setAdapter(adapter);
if (service != null) {
protocolHandler.setUtilityExecutor(service.getServer().getUtilityExecutor());
}
if (null == parseBodyMethodsSet) {
setParseBodyMethods(getParseBodyMethods());
}
if (protocolHandler.isAprRequired() && !AprStatus.isInstanceCreated()) {
throw new LifecycleException(sm.getString("coyoteConnector.protocolHandlerNoAprListener",
getProtocolHandlerClassName()));
}
if (protocolHandler.isAprRequired() && !AprStatus.isAprAvailable()) {
throw new LifecycleException(sm.getString("coyoteConnector.protocolHandlerNoAprLibrary",
getProtocolHandlerClassName()));
}
if (AprStatus.isAprAvailable() && AprStatus.getUseOpenSSL() &&
protocolHandler instanceof AbstractHttp11JsseProtocol) {
AbstractHttp11JsseProtocol<?> jsseProtocolHandler =
(AbstractHttp11JsseProtocol<?>) protocolHandler;
if (jsseProtocolHandler.isSSLEnabled() &&
jsseProtocolHandler.getSslImplementationName() == null) {
jsseProtocolHandler.setSslImplementationName(OpenSSLImplementation.class.getName());
}
}
try {
protocolHandler.init();
} catch (Exception e) {
throw new LifecycleException(
sm.getString("coyoteConnector.protocolHandlerInitializationFailed"), e);
}
}
这里继续往下走就是 protocolHandler 的 init 方法
@Override
public void init() throws Exception {
if (getLog().isInfoEnabled()) {
getLog().info(sm.getString("abstractProtocolHandler.init", getName()));
logPortOffset();
}
if (oname == null) {
oname = createObjectName();
if (oname != null) {
Registry.getRegistry(null, null).registerComponent(this, oname, null);
}
}
if (this.domain != null) {
ObjectName rgOname = new ObjectName(domain + ":type=GlobalRequestProcessor,name=" + getName());
this.rgOname = rgOname;
Registry.getRegistry(null, null).registerComponent(
getHandler().getGlobal(), rgOname, null);
}
String endpointName = getName();
endpoint.setName(endpointName.substring(1, endpointName.length()-1));
endpoint.setDomain(domain);
endpoint.init();
}
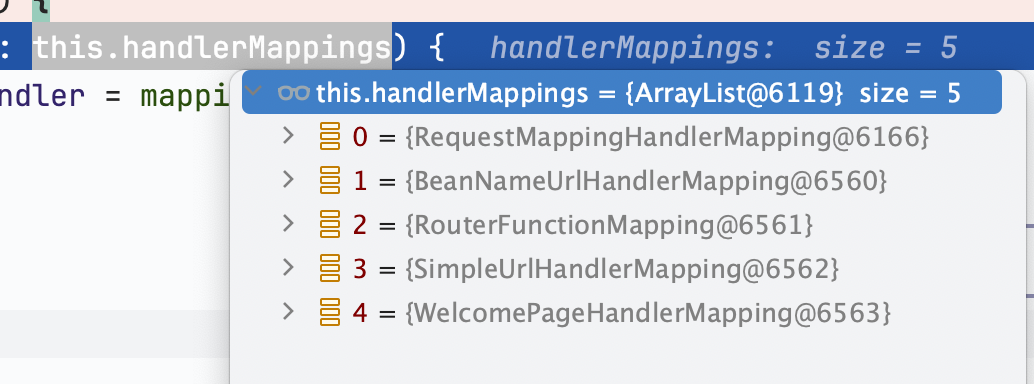
看一下继承关系
![]()
然后就看到这里调用了 endpoint.init() ,走的也是父类的初始化方法,
org.apache.tomcat.util.net.AbstractEndpoint#init
public final void init() throws Exception {
if (bindOnInit) {
bindWithCleanup();
bindState = BindState.BOUND_ON_INIT;
}
if (this.domain != null) {
oname = new ObjectName(domain + ":type=ThreadPool,name=\"" + getName() + "\"");
Registry.getRegistry(null, null).registerComponent(this, oname, null);
ObjectName socketPropertiesOname = new ObjectName(domain +
":type=SocketProperties,name=\"" + getName() + "\"");
socketProperties.setObjectName(socketPropertiesOname);
Registry.getRegistry(null, null).registerComponent(socketProperties, socketPropertiesOname, null);
for (SSLHostConfig sslHostConfig : findSslHostConfigs()) {
registerJmx(sslHostConfig);
}
}
}
然后接着调用了
org.apache.tomcat.util.net.AbstractEndpoint#bindWithCleanup
private void bindWithCleanup() throws Exception {
try {
bind();
} catch (Throwable t) {
ExceptionUtils.handleThrowable(t);
unbind();
throw t;
}
}
这里的 bind 方法调用的是
org.apache.tomcat.util.net.NioEndpoint#bind
@Override
public void bind() throws Exception {
initServerSocket();
setStopLatch(new CountDownLatch(1));
initialiseSsl();
}
这里的 initServerSocket是后面抽出来的,方便扩展,主要就是开启 ServerSocketChannel,绑定端口
protected void initServerSocket() throws Exception {
if (getUseInheritedChannel()) {
Channel ic = System.inheritedChannel();
if (ic instanceof ServerSocketChannel) {
serverSock = (ServerSocketChannel) ic;
}
if (serverSock == null) {
throw new IllegalArgumentException(sm.getString("endpoint.init.bind.inherited"));
}
} else if (getUnixDomainSocketPath() != null) {
SocketAddress sa = JreCompat.getInstance().getUnixDomainSocketAddress(getUnixDomainSocketPath());
serverSock = JreCompat.getInstance().openUnixDomainServerSocketChannel();
serverSock.bind(sa, getAcceptCount());
if (getUnixDomainSocketPathPermissions() != null) {
Path path = Paths.get(getUnixDomainSocketPath());
Set<PosixFilePermission> permissions =
PosixFilePermissions.fromString(getUnixDomainSocketPathPermissions());
if (path.getFileSystem().supportedFileAttributeViews().contains("posix")) {
FileAttribute<Set<PosixFilePermission>> attrs = PosixFilePermissions.asFileAttribute(permissions);
Files.setAttribute(path, attrs.name(), attrs.value());
} else {
java.io.File file = path.toFile();
if (permissions.contains(PosixFilePermission.OTHERS_READ) && !file.setReadable(true, false)) {
log.warn(sm.getString("endpoint.nio.perms.readFail", file.getPath()));
}
if (permissions.contains(PosixFilePermission.OTHERS_WRITE) && !file.setWritable(true, false)) {
log.warn(sm.getString("endpoint.nio.perms.writeFail", file.getPath()));
}
}
}
} else {
serverSock = ServerSocketChannel.open();
socketProperties.setProperties(serverSock.socket());
InetSocketAddress addr = new InetSocketAddress(getAddress(), getPortWithOffset());
serverSock.bind(addr, getAcceptCount());
}
serverSock.configureBlocking(true);
}
接着我们来看下 start 方法,这里多数是复用的 父类的方法
org.apache.tomcat.util.net.AbstractEndpoint#start
public final void start() throws Exception {
        if (bindState == BindState.UNBOUND) {
            bindWithCleanup();
            bindState = BindState.BOUND_ON_START;
        }
        startInternal();
    }
startInternal 才是 NioEndPoint 中的处理
@Override
public void startInternal() throws Exception {
if (!running) {
running = true;
paused = false;
if (socketProperties.getProcessorCache() != 0) {
processorCache = new SynchronizedStack<>(SynchronizedStack.DEFAULT_SIZE,
socketProperties.getProcessorCache());
}
if (socketProperties.getEventCache() != 0) {
eventCache = new SynchronizedStack<>(SynchronizedStack.DEFAULT_SIZE,
socketProperties.getEventCache());
}
if (socketProperties.getBufferPool() != 0) {
nioChannels = new SynchronizedStack<>(SynchronizedStack.DEFAULT_SIZE,
socketProperties.getBufferPool());
}
if (getExecutor() == null) {
createExecutor();
}
initializeConnectionLatch();
poller = new Poller();
Thread pollerThread = new Thread(poller, getName() + "-Poller");
pollerThread.setPriority(threadPriority);
pollerThread.setDaemon(true);
pollerThread.start();
startAcceptorThread();
}
}
上面是启动了一个 Poller 线程,在startAcceptorThread 里是启动了 acceptor
protected void startAcceptorThread() {
        acceptor = new Acceptor<>(this);
        String threadName = getName() + "-Acceptor";
        acceptor.setThreadName(threadName);
        Thread t = new Thread(acceptor, threadName);
        t.setPriority(getAcceptorThreadPriority());
        t.setDaemon(getDaemon());
        t.start();
    }
启动后运行的代码
@Override
public void run() {
int errorDelay = 0;
try {
while (!stopCalled) {
while (endpoint.isPaused() && !stopCalled) {
state = AcceptorState.PAUSED;
try {
Thread.sleep(50);
} catch (InterruptedException e) {
}
}
if (stopCalled) {
break;
}
state = AcceptorState.RUNNING;
try {
endpoint.countUpOrAwaitConnection();
if (endpoint.isPaused()) {
continue;
}
U socket = null;
try {
socket = endpoint.serverSocketAccept();
} catch (Exception ioe) {
endpoint.countDownConnection();
if (endpoint.isRunning()) {
errorDelay = handleExceptionWithDelay(errorDelay);
throw ioe;
} else {
break;
}
}
errorDelay = 0;
if (!stopCalled && !endpoint.isPaused()) {
if (!endpoint.setSocketOptions(socket)) {
endpoint.closeSocket(socket);
}
} else {
endpoint.destroySocket(socket);
}
} catch (Throwable t) {
ExceptionUtils.handleThrowable(t);
String msg = sm.getString("endpoint.accept.fail");
if (t instanceof Error) {
Error e = (Error) t;
if (e.getError() == 233) {
log.warn(msg, t);
} else {
log.error(msg, t);
}
} else {
log.error(msg, t);
}
}
}
} finally {
stopLatch.countDown();
}
state = AcceptorState.ENDED;
}
这行socket = endpoint.serverSocketAccept();是 accept 等待线程进来,进来以后调用
@Override
protected boolean setSocketOptions(SocketChannel socket) {
NioSocketWrapper socketWrapper = null;
try {
NioChannel channel = null;
if (nioChannels != null) {
channel = nioChannels.pop();
}
if (channel == null) {
SocketBufferHandler bufhandler = new SocketBufferHandler(
socketProperties.getAppReadBufSize(),
socketProperties.getAppWriteBufSize(),
socketProperties.getDirectBuffer());
if (isSSLEnabled()) {
channel = new SecureNioChannel(bufhandler, this);
} else {
channel = new NioChannel(bufhandler);
}
}
NioSocketWrapper newWrapper = new NioSocketWrapper(channel, this);
channel.reset(socket, newWrapper);
connections.put(socket, newWrapper);
socketWrapper = newWrapper;
socket.configureBlocking(false);
if (getUnixDomainSocketPath() == null) {
socketProperties.setProperties(socket.socket());
}
socketWrapper.setReadTimeout(getConnectionTimeout());
socketWrapper.setWriteTimeout(getConnectionTimeout());
socketWrapper.setKeepAliveLeft(NioEndpoint.this.getMaxKeepAliveRequests());
poller.register(socketWrapper);
return true;
} catch (Throwable t) {
ExceptionUtils.handleThrowable(t);
try {
log.error(sm.getString("endpoint.socketOptionsError"), t);
} catch (Throwable tt) {
ExceptionUtils.handleThrowable(tt);
}
if (socketWrapper == null) {
destroySocket(socket);
}
}
return false;
}
这里就是最重要的封装了 NioSocketWrapper, 然后注册到 Poller,
我们再来看 Poller 代码,注册其实是添加事件 event
public void register(final NioSocketWrapper socketWrapper) {
socketWrapper.interestOps(SelectionKey.OP_READ);
PollerEvent event = null;
if (eventCache != null) {
event = eventCache.pop();
}
if (event == null) {
event = new PollerEvent(socketWrapper, OP_REGISTER);
} else {
event.reset(socketWrapper, OP_REGISTER);
}
addEvent(event);
}
然后Poller 的运行方法会处理这些 event
@Override
public void run() {
while (true) {
boolean hasEvents = false;
try {
if (!close) {
hasEvents = events();
if (wakeupCounter.getAndSet(-1) > 0) {
keyCount = selector.selectNow();
} else {
keyCount = selector.select(selectorTimeout);
}
wakeupCounter.set(0);
}
if (close) {
events();
timeout(0, false);
try {
selector.close();
} catch (IOException ioe) {
log.error(sm.getString("endpoint.nio.selectorCloseFail"), ioe);
}
break;
}
if (keyCount == 0) {
hasEvents = (hasEvents | events());
}
} catch (Throwable x) {
ExceptionUtils.handleThrowable(x);
log.error(sm.getString("endpoint.nio.selectorLoopError"), x);
continue;
}
Iterator<SelectionKey> iterator =
keyCount > 0 ? selector.selectedKeys().iterator() : null;
while (iterator != null && iterator.hasNext()) {
SelectionKey sk = iterator.next();
iterator.remove();
NioSocketWrapper socketWrapper = (NioSocketWrapper) sk.attachment();
if (socketWrapper != null) {
processKey(sk, socketWrapper);
}
}
timeout(keyCount,hasEvents);
}
getStopLatch().countDown();
}
如果 events 方法返回了 true 代表有事件,就会跑到processKey(sk, socketWrapper); 来处理这个事件
而这里的 processKey 也比较复杂,
protected void processKey(SelectionKey sk, NioSocketWrapper socketWrapper) {
try {
if (close) {
cancelledKey(sk, socketWrapper);
} else if (sk.isValid()) {
if (sk.isReadable() || sk.isWritable()) {
if (socketWrapper.getSendfileData() != null) {
processSendfile(sk, socketWrapper, false);
} else {
unreg(sk, socketWrapper, sk.readyOps());
boolean closeSocket = false;
if (sk.isReadable()) {
if (socketWrapper.readOperation != null) {
if (!socketWrapper.readOperation.process()) {
closeSocket = true;
}
} else if (socketWrapper.readBlocking) {
synchronized (socketWrapper.readLock) {
socketWrapper.readBlocking = false;
socketWrapper.readLock.notify();
}
} else if (!processSocket(socketWrapper, SocketEvent.OPEN_READ, true)) {
closeSocket = true;
}
}
if (!closeSocket && sk.isWritable()) {
if (socketWrapper.writeOperation != null) {
if (!socketWrapper.writeOperation.process()) {
closeSocket = true;
}
} else if (socketWrapper.writeBlocking) {
synchronized (socketWrapper.writeLock) {
socketWrapper.writeBlocking = false;
socketWrapper.writeLock.notify();
}
} else if (!processSocket(socketWrapper, SocketEvent.OPEN_WRITE, true)) {
closeSocket = true;
}
}
if (closeSocket) {
cancelledKey(sk, socketWrapper);
}
}
}
} else {
cancelledKey(sk, socketWrapper);
}
} catch (CancelledKeyException ckx) {
cancelledKey(sk, socketWrapper);
} catch (Throwable t) {
ExceptionUtils.handleThrowable(t);
log.error(sm.getString("endpoint.nio.keyProcessingError"), t);
}
}
正常请求回到这
else if (!processSocket(socketWrapper, SocketEvent.OPEN_READ, true))
然后调用processSocket 进行处理,
public boolean processSocket(SocketWrapperBase<S> socketWrapper,
SocketEvent event, boolean dispatch) {
try {
if (socketWrapper == null) {
return false;
}
SocketProcessorBase<S> sc = null;
if (processorCache != null) {
sc = processorCache.pop();
}
if (sc == null) {
sc = createSocketProcessor(socketWrapper, event);
} else {
sc.reset(socketWrapper, event);
}
Executor executor = getExecutor();
if (dispatch && executor != null) {
executor.execute(sc);
} else {
sc.run();
}
} catch (RejectedExecutionException ree) {
getLog().warn(sm.getString("endpoint.executor.fail", socketWrapper) , ree);
return false;
} catch (Throwable t) {
ExceptionUtils.handleThrowable(t);
getLog().error(sm.getString("endpoint.process.fail"), t);
return false;
}
return true;
}
这里就会调用 createSocketProcessor 进行处理了,不过这是下一篇的内容了。